I already posted a bit in the General Discussion forum, so I'll just summarize here.
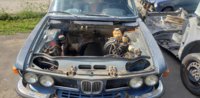
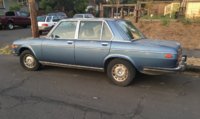
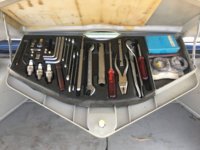
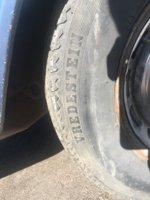
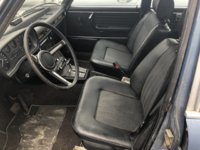
I bought this 1973 Bavaria on Aug 4th with a seized engine and allegedly bad automatic trans (ZF, I think?). Was told by the seller that it last ran in 1981 and the owner got tired of putting money into it. Discovered the battery was from 1979, the tires were from 1977 (receipts for both found in the rat nest glovebox). Interior is in very good condition (no cracks in the dash or seats), body is almost rust free, surface rust being most of the rust found (... so far). Tool kit was complete and original, and it even came with a two volume factory Blue Book FSM.
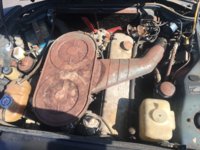
Have since tried removing the spark plugs in hopes of filling the cylinders with Marvel, etc, to free up the pistons. None budged, so I sprayed copious amounts of PB Blaster on them. A day later I tried again and was able to get them to budge a LITTLE, but I'm afraid to try harder- don't wanna strip the head. Not a big deal, I'm not in a rush. Moved onto the airbox, which was totally rusted out and bent almost in half when I lifted it out. Dead and crispy. Carb linkage won't move either. Sprayed penetrant on every visible fastener I could under the hood for future efforts.
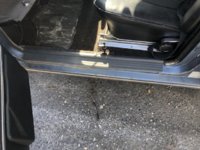
Next, I pulled the front wheels off to inspect the front brakes. Receipts show the rotors and pads were installed within months of it's last gasp, and they do look within spec, but only thickness-wise. I might luck out and have them turned just enough to remove the scale. Found a box of new, OEM front pads in the rear tool box but I won't be using them. Again, sprayed more penerant on every fastener I could see. Oh- I found all the bleeder screw covered by their rubber caps. Underneath, the all look good, but I haven't tried turning anything yet. I bought a set of 15x7 mesh wheels, but not sure if they'll fit (offset, stud length).
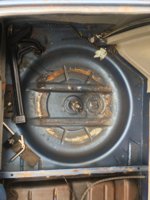
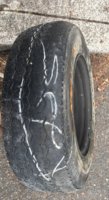
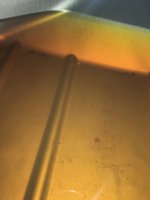
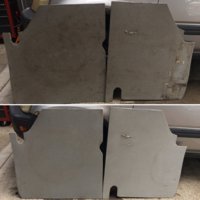
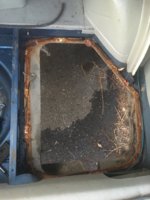
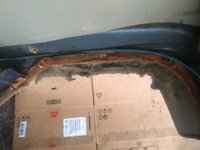
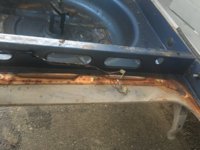
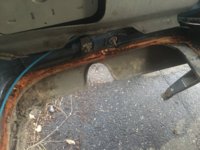
Moving on to the rear, I removed the trunk floor panels and cleaned them up pretty well, although one has a 5-6in tear. Underneath, the gas tank has only minor rust scale where visible. The spare tire appears to have been switched out, as the one in the well is badly worn and had a good bulge in it. Factory jack is complete and perfect- no rust. Only the foam has turned into a Cheeto-like material. Removed the fuel line (came off easily) and the fuel level sender also came out and looked good. Found maybe 6-8 gallons of 38 year old gas inside and no visible rust(!).
About me- I'm not a mechanic and am spotty with knowledge of older BMW's, even though I've owned two Bavarias, two 2002's, two e21's (one sold to Al Taylor with a stroker 2.7 with Scheel seats- ouch), and now own this Bavaria and an '86 325e, which will be getting a Honda K24A2 engine. I volunteered at a shop in Greensboro, NC back in the early 90's and regret not picking the brains of the mechanics more. I don't have a big enough garage to fit any cars inside, so much of the work will be done curbside (yay), or at my mechanic's shop. Pretty much all feedback is welcome. I'll have many questions and will rely on forums, facebook groups, etc for info and tips. I'll try to do my research as much as possible before asking common asked/answered questions. Thanks, everyone!
I bought this 1973 Bavaria on Aug 4th with a seized engine and allegedly bad automatic trans (ZF, I think?). Was told by the seller that it last ran in 1981 and the owner got tired of putting money into it. Discovered the battery was from 1979, the tires were from 1977 (receipts for both found in the rat nest glovebox). Interior is in very good condition (no cracks in the dash or seats), body is almost rust free, surface rust being most of the rust found (... so far). Tool kit was complete and original, and it even came with a two volume factory Blue Book FSM.
Have since tried removing the spark plugs in hopes of filling the cylinders with Marvel, etc, to free up the pistons. None budged, so I sprayed copious amounts of PB Blaster on them. A day later I tried again and was able to get them to budge a LITTLE, but I'm afraid to try harder- don't wanna strip the head. Not a big deal, I'm not in a rush. Moved onto the airbox, which was totally rusted out and bent almost in half when I lifted it out. Dead and crispy. Carb linkage won't move either. Sprayed penetrant on every visible fastener I could under the hood for future efforts.
Next, I pulled the front wheels off to inspect the front brakes. Receipts show the rotors and pads were installed within months of it's last gasp, and they do look within spec, but only thickness-wise. I might luck out and have them turned just enough to remove the scale. Found a box of new, OEM front pads in the rear tool box but I won't be using them. Again, sprayed more penerant on every fastener I could see. Oh- I found all the bleeder screw covered by their rubber caps. Underneath, the all look good, but I haven't tried turning anything yet. I bought a set of 15x7 mesh wheels, but not sure if they'll fit (offset, stud length).
Moving on to the rear, I removed the trunk floor panels and cleaned them up pretty well, although one has a 5-6in tear. Underneath, the gas tank has only minor rust scale where visible. The spare tire appears to have been switched out, as the one in the well is badly worn and had a good bulge in it. Factory jack is complete and perfect- no rust. Only the foam has turned into a Cheeto-like material. Removed the fuel line (came off easily) and the fuel level sender also came out and looked good. Found maybe 6-8 gallons of 38 year old gas inside and no visible rust(!).
About me- I'm not a mechanic and am spotty with knowledge of older BMW's, even though I've owned two Bavarias, two 2002's, two e21's (one sold to Al Taylor with a stroker 2.7 with Scheel seats- ouch), and now own this Bavaria and an '86 325e, which will be getting a Honda K24A2 engine. I volunteered at a shop in Greensboro, NC back in the early 90's and regret not picking the brains of the mechanics more. I don't have a big enough garage to fit any cars inside, so much of the work will be done curbside (yay), or at my mechanic's shop. Pretty much all feedback is welcome. I'll have many questions and will rely on forums, facebook groups, etc for info and tips. I'll try to do my research as much as possible before asking common asked/answered questions. Thanks, everyone!
Attachments
-
 IMG_9190.JPG443.2 KB · Views: 506
 -
 fullsizeoutput_1c85.jpeg278 KB · Views: 525
 -
 IMG_9141.JPG280.8 KB · Views: 472
 -
 IMG_9229.JPG298.8 KB · Views: 474
 -
 IMG_9174.JPG284.5 KB · Views: 501
 -
 fullsizeoutput_1c81.jpeg378.8 KB · Views: 521
 -
 IMG_9378.JPG327.6 KB · Views: 470
 -
 IMG_9387.JPG325.5 KB · Views: 472
 -
 fullsizeoutput_1d2e.jpeg371.9 KB · Views: 463
 -
 IMG_9397.JPG200.3 KB · Views: 501
 -
 IMG_9402.JPG123 KB · Views: 506
 -
 66DE2307-88CE-46A5-AE15-AC2C1B5F9A51.jpg345.6 KB · Views: 466
 -
 58719373171__9B0335FE-CD9B-49C3-B5AB-B76270E2FAB6.JPG277.6 KB · Views: 485
 -
 IMG_1133.jpg93.2 KB · Views: 462
 -
 fullsizeoutput_1c5a.jpeg136.6 KB · Views: 481
 -
 IMG_9148.JPG392.4 KB · Views: 447
Last edited:
")


")