BMW E9 Auto to 5SPD manual Conversion

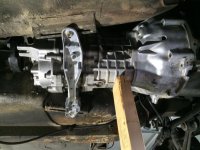
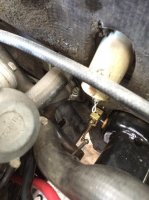
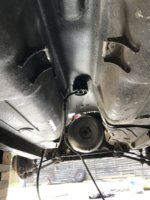
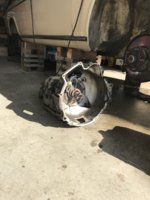
35) Install transmission, make sure you have it filled with oil, it will take a little less than two liters. I used Redline MTL GL-4, order a head of time.

35.1) Now is a great time to install guibo, pay attention to arrows along of perimeter of guibo. They should point to the yokes.

35.1a) Grease the splines and bearing shaft.

35.2) With an assistant, lift the trans and install into bell housing.

Wiggle and push from the guibo side. It will eventually go in, if not use the four nuts to bring it in.

35.2) Torque the nuts, remove the clutch master cylinder to access the top left nut. Its a real PITA. I think an S-drive wrench would work. I just got it as tight as I could.

35.3) Replace slave cylinder (with hose) and torque nuts.
 

Attachments

  • thumb_IMG_3144_1024.jpg
    thumb_IMG_3144_1024.jpg
    92.1 KB · Views: 357
Last edited:
36) Install the transmission mounts to the transmission bracket.

The transmission mounts are specific to the bracket, so use the parts numbers I provided. The have angles studs than work with bracket.

37) I had enough room with transmission in place to install the shifter, you could wait till after the shifter is installed to put the trans bracket in.

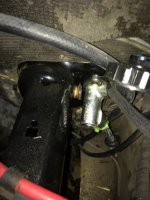
38 ) Reinstall drag link connection.

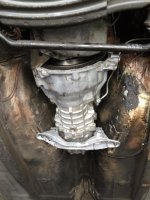
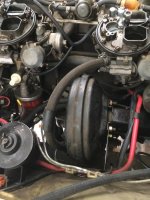
39) Remove auto transmission lines, there is a bracket that is fastened by the right engine mount.
 

Attachments

  • thumb_IMG_3166_1024.jpg
    thumb_IMG_3166_1024.jpg
    92.1 KB · Views: 355
Last edited:
40) Shifter install and fabrication.

I used a short shift lever from Ireland Engineering designed for the 2002. Install the shift carrier into place using the shift tower mounts.

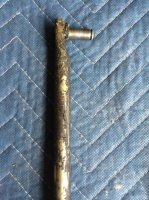
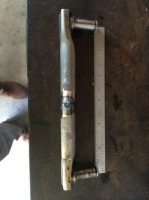
I then installed the shift selector rod from an E30 318is. I placed it level and marked the center that is projected down from the center of the shift carrier.

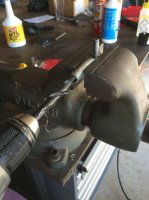
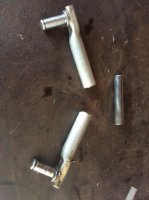
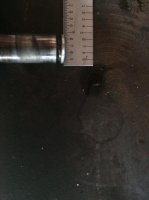
The center to center distance came out to be 5.8 inches. I then cut the shift rod at each end, make sure the pieces add up to 5.8" center to center. I then drilled the inner diameter to allow for a piece of steel rod to fit, this served two purposes, alignment and weight.

I then welded them up.

Be forewarned, there will be a lot of install and remove while test fitting, there is not enough space to allow the selector rod to be installed with the shift carrier installed. So it has to come off each time. Since I am providing the dimensions, it should be much easier for you.

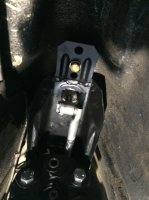
I used a 2002 transmission mount to support the rear of the shift carrier, I drilled a hole just about in between the two factory holes. The AFM mounts I had were to short.

Test shift, as long as you can get into gear fairly easy you should be fine, it will feel notchy when dry shifting.
 

Attachments

  • thumb_IMG_3169_1024.jpg
    thumb_IMG_3169_1024.jpg
    98 KB · Views: 329
  • thumb_IMG_3171_1024.jpg
    thumb_IMG_3171_1024.jpg
    80.5 KB · Views: 301
  • thumb_IMG_3172_1024.jpg
    thumb_IMG_3172_1024.jpg
    86 KB · Views: 298
  • thumb_IMG_3173_1024.jpg
    thumb_IMG_3173_1024.jpg
    70 KB · Views: 313
  • thumb_IMG_3174_1024.jpg
    thumb_IMG_3174_1024.jpg
    60.8 KB · Views: 315
  • thumb_IMG_3175_1024.jpg
    thumb_IMG_3175_1024.jpg
    74.8 KB · Views: 343
Last edited:
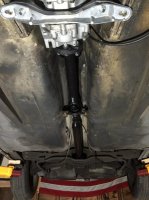
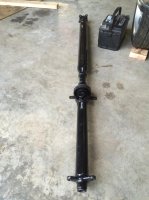
41) Install the driveshaft.
 

Attachments

  • thumb_IMG_3178_1024.jpg
    thumb_IMG_3178_1024.jpg
    89.1 KB · Views: 327
  • thumb_IMG_3143_1024.jpg
    thumb_IMG_3143_1024.jpg
    87.7 KB · Views: 317
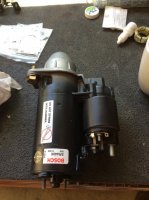
42) Install the starter, if you have a stock starter then you will remember the pain of removing it. I used this opportunity to install a 1991 E30 M3 starter, it is a direct fit and about half to the size and weight.

It will slide right in. Make sure the cranking wire goes to terminal 50, the other terminal will only power the motor and not the bendix.
 

Attachments

  • thumb_IMG_3160_1024.jpg
    thumb_IMG_3160_1024.jpg
    91.4 KB · Views: 315
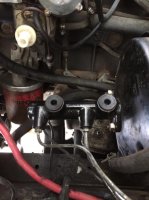
43 ) Install the clutch master cylinder. I had Ben from La Jolla also throw in the nipple and clutch line. Remember if you have an auto car, you will need a reservoir with a clutch line port.

Attach the nipple and clutch line to the master before installing in the car.

43.1) Install the line from slave to the bottom port.

43.2) From the inside of the car, bolt the eyebolt to the clutch
pedal. Attach the spring.

43.4) Install the throttle arm and throttle linkage, then from inside the car install the throttle return spring. Go in this order, or else the throttle pedal will bind.
 

Attachments

  • thumb_IMG_3148_1024.jpg
    thumb_IMG_3148_1024.jpg
    88.7 KB · Views: 305
  • thumb_IMG_3162_1024.jpg
    thumb_IMG_3162_1024.jpg
    85.9 KB · Views: 305
Last edited:
44) Install brake booster, install clevis and pin to brake pedal. Install return spring.

45) Install master cylinder and all lines.

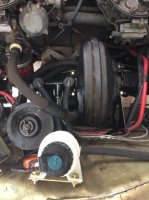
46) Replace and fasten power steering reservoir.
 

Attachments

  • thumb_IMG_3163_1024.jpg
    thumb_IMG_3163_1024.jpg
    91.2 KB · Views: 295
  • thumb_IMG_3164_1024.jpg
    thumb_IMG_3164_1024.jpg
    83.7 KB · Views: 297
  • thumb_IMG_3165_1024.jpg
    thumb_IMG_3165_1024.jpg
    88.3 KB · Views: 293
47) Reconnect all the loose hoses, you may of removed the coolant tank. If you did put it back on. Make sure all vacuum ports are in and reinstall the air cleaner assembly.
 
48) Bleed the brakes.

49) Bleed the clutch. Fill the reservoir and open the nipple. Allow it to gravity bleed first.

Have the assistant pump the heck out of the clutch after you have some fluid flowing through it. After they pump about 20 times, have them hold the pedal down, then open the nipple. A burst of fluid and air should flow through. Do this several times, it was the only way I got the clutch to work.

50) Bleed the coolant system, this is done by opening the screw on the thermostat housing.
 
51) Replace your interior panels. I was able to acquire a manual shift surround from Ben at 2002AD. The automatic one can be modded to work.

52) Your car should be ready to rock! Take it easy on the test drive, the car had several important parts out of it!

I will be going back in the next few days/weeks adding and editing. If I missed anything major shoot me a message and I will edit.

Thanks and enjoy!
 
Thanks for taking the time to do this excellent write up, it will certainly help me to put mine back together.

John.
 
Thank you! I will be doing this to a '73 Bavaria sooner than later. One question, if you don't mind...why install bell housing then the gear box; why not install the complete transmission (bell housing and gear box)? Obviously both paths are acceptable; wondering about the benefit/s.

Regards,
Bill
 
A hot mess of mis-information and no information.....

BMW Parts:
Transmission: Getrag 265 5SPD
Transmission Mounting Bracket: 23711175731
Transmission Mounts: HELLO?
Transmission Tower Shift Mounts: HELLO?
Shifter Mounting Plate: HELLO?
E28 M5 Guibo: 30mm thick: 26117511454 WRONG
Driveshaft: E9 2800CS Auto Transmission Driveshaft lengthened 1.6 inches (could possibly be a 1978 530i driveshaft, they may be the same) WRONG
Pedal Box: Pedals from any manual, use what ever pedal box you have in your car.
Clutch Line: La Jolla Independent
Clutch Slave: HELLO?
Clutch Master: HELLO?
Clutch Kit: E28 533i/535i
Rear Main Seal: HELLO?
Rear Main Seal Housing Gasket: HELLO?
Starter: (good idea to replace with the E30 M3 if you have a stock unit, the E30 M3 is much more compact and easy to install)
Exhaust Manifold Gaskets: HELLO?

Fasteners:
Flywheel bolts: HELLO?
Pressure Plate Bolts: HELLO?
 
HI
I do like the idea of installing engine alone, installing the bell housing, then the gearbox. Seems very logical and certainly the gear box on its own is a easier and balanced shape to manage.

Regards
Bill P.
 
A hot mess of mis-information and no information.....

BMW Parts:
Transmission: Getrag 265 5SPD
Transmission Mounting Bracket: 23711175731
Transmission Mounts: HELLO?
Transmission Tower Shift Mounts: HELLO?
Shifter Mounting Plate: HELLO?
E28 M5 Guibo: 30mm thick: 26117511454 WRONG
Driveshaft: E9 2800CS Auto Transmission Driveshaft lengthened 1.6 inches (could possibly be a 1978 530i driveshaft, they may be the same) WRONG
Pedal Box: Pedals from any manual, use what ever pedal box you have in your car.
Clutch Line: La Jolla Independent
Clutch Slave: HELLO?
Clutch Master: HELLO?
Clutch Kit: E28 533i/535i
Rear Main Seal: HELLO?
Rear Main Seal Housing Gasket: HELLO?
Starter: (good idea to replace with the E30 M3 if you have a stock unit, the E30 M3 is much more compact and easy to install)
Exhaust Manifold Gaskets: HELLO?

Fasteners:
Flywheel bolts: HELLO?
Pressure Plate Bolts: HELLO?

Which Guibo then!? Part#?

BTW when I am being critical of someone's info, I like to provide what I think is correct information. I find it more useful.

Regards,
Bill
 
Y'all know that Carl Nelson wrote this up decades ago, although it pertained to the AT-MT swap in a Bavaria. I used his writings as guide for my first and second trans changes. Pedals from a junkyard Bavaria; trans, flywheel and clutch from an E12, clutch lines and reservoir from 2002. Elbow grease by yours truly. No extra charge for pondering the electrical diagram to figure out how to disable the neutral safety switch and relay, and removing those wires. Good clean fun, NOT. The trans was filthy.
 
Hi Honolulu

Yup...removing the AT was the filthiest job I have completed...other than removing the AT from the '74 3.0s I did in the late 80s ;). Like you said, 'filthy'. Out of interest, does Carl's write up exist somewhere!?

19WZ6iY8T%62XqDyhjiK%Q.jpgvOqN2yyURw+no%LwcOKsEg.jpg

Bill
 
Back
Top