Driver's window has stopped working, suggestions sought.

decampos

Well-Known Member
Messages
252
Reaction score
3
Location
Los Angeles and North London UK
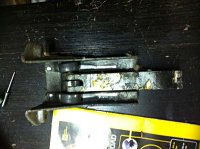
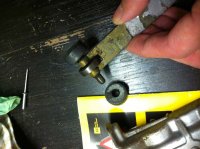
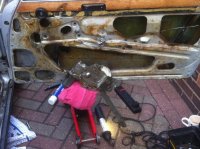
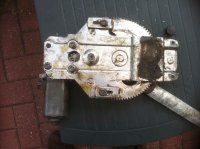
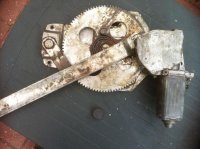
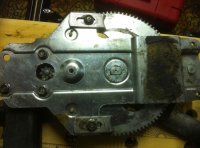
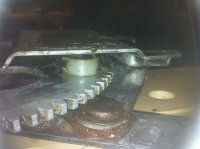
Thanks for the photographs and further suggestions. The motor and whole lift mechanism is entirely different on my car than in the photograph. As recommended by Arde I connected the battery directly to the motor (is the two connection type) and to my joy the motor wound the window down fine (and fast). Wahey.

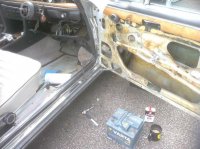
So it's not the motor and it's not the switch. How should I proceed to find the fault? Am I too pull out all the wires? Looks like an elaborate circuit (the wires that run to the driver's motor appear to disappear under the carpet in the direction of the rear window). Any suggestions very much appreciated.

Also, (I'm such a dumbass when it comes to electrics,) do I transpose the two wires I connected to the posts of the battery in order to reverse the direction of the window? Surely not.

Any help very much appreciated.
 

Attachments

  • window_battery.jpg
    window_battery.jpg
    81.2 KB · Views: 199

decampos

Well-Known Member
Messages
252
Reaction score
3
Location
Los Angeles and North London UK
Right. Please ignore my last post. I think I have worked out the problem and it is weird: It appears as though the window 'wants' to naturally stop about an inch before the window is completely closed. If I gently persuade the glass to close completely, I take it past what it thinks is its natural stop point and it's not able to come down again.

Is there adjustment somewhere where I can 'set' where the two rest positions should be (as in all the way up and all the way down)?

Does any of this make sense?

Any help very much appreciated.
 

Attachments

  • window1.jpg
    window1.jpg
    86.4 KB · Views: 230
  • window2.jpg
    window2.jpg
    90.4 KB · Views: 404

sfdon

Well-Known Member
Site Donor
Site Donor $$
Messages
8,268
Reaction score
4,624
Location
sfbay area
You are looking for the bump stops...
You should inspect and replace and adjust if needed the bump stops when you are in there- they are studs with rubber ends that determine how far the window opens and closes. Just thread them in and set the nut. Prime reason for slow windows as the rubber mushrooms and rubs hard against the gear as it moves.

two types available- I like the rubber ones from the rear better than the spring ones from the front.

Front- # 8 in the pic

http://parts.bmwofsouthatlanta.com/...imLevel=11870&ukey_modelRange=0&searchString=

Rear- #3 in the pic

http://www.realoem.com/bmw/showparts.do?model=7013&mospid=47811&btnr=51_3454&hg=51&fg=05
 

decampos

Well-Known Member
Messages
252
Reaction score
3
Location
Los Angeles and North London UK
Thanks for the replies.

You are looking for the bump stops...
You should inspect and replace and adjust if needed the bump stops when you are in there- they are studs with rubber ends that determine how far the window opens and closes. Just thread them in and set the nut. Prime reason for slow windows as the rubber mushrooms and rubs hard against the gear as it moves.

Here's a picture of a 72 front regulator with the bump stops highlighted as another reference
https://sites.google.com/site/kdelimon/_/rsrc/1259789430408/IMG_0045-large.jpg

That's all really helpful. There were a two rubber 'stops' amongst other detritus in the bottom of the door. I shall investigate and post any useful findings.
 

decampos

Well-Known Member
Messages
252
Reaction score
3
Location
Los Angeles and North London UK
Appeal for more information

I've managed to get the motor and regulator out of the door but I can't find where the 'bump stop' is meant to go.

My car's a '74 car and appears to have a motor/mechanism different to all of the illustrations/photographs I've seen.

Is the bump stop supposed to be attached to a runner within the door?
Any help very much appreciated

(the bump is visible in two of the photographs next to the mechanism)
 

Attachments

  • window1.jpg
    window1.jpg
    82.2 KB · Views: 215
  • window2.jpg
    window2.jpg
    94 KB · Views: 444
  • window3.jpg
    window3.jpg
    65.1 KB · Views: 206

MMercury

Well-Known Member
Messages
481
Reaction score
5
I've managed to get the motor and regulator out of the door but I can't find where the 'bump stop' is meant to go. My car's a '74 car and appears to have a motor/mechanism different to all of the illustrations/photographs I've seen. Is the bump stop supposed to be attached to a runner within the door?
Any help very much appreciated

(the bump is visible in two of the photographs next to the mechanism)

I am unfamiliar with your newer style mechanism and am not 100% certain that the bump stops are affixed to the lift mechanism you removed. If they resemble the earlier style stops, I suspect the rubber parts are only a portion of each "stop" and they have become detached. As noted by Don, many stops, including those used in the earlier style, have rubber or urethane permanently affixed to a threaded metal stud. This threaded stud is what makes the entire stop "adjustable." (No. 12 below) Just as there are many styles of motor mounts, that perform the same function, there are many styles of "stops," e.g., no "13." Although I am not suggesting re-invention of the stops, I wouldn't be surprised if you couldn't fabricate or locate a suitable substitute.

6.png


Per your pictures, and you previous posts, there appear to be two adjustment bolts with sliding "tangs"- at roughly 12 and 6 o'clock (10 and 4 in the second photo). They show evidence of having been adjusted. I would wager your stops need to go there, or adjacent to these locations. The pictures do not make clear exactly how the rubber(found amongst the debris) is attached. Looking at the other side of the rubber might yield a few clues?

For a better frame of reference (maybe) as to other exemplars of threaded bump stops, refer to the other previously posted pics below. Again, look closely and you will notice stops that are rubber cylinders affixed to threaded studs. This may be misleading IF the bump stops employed in your newer style assembly are merely glued to the sliding bits in your picture.


hth.

attachment.php
attachment.php


IMG_0045-large.jpg
IMG_0043.JPG


32.png


33005019_z.jpg
 

decampos

Well-Known Member
Messages
252
Reaction score
3
Location
Los Angeles and North London UK
Thanks for your reply MMercury, has been very useful. I have concluded that he bump stop(s) found in the sump of the door are in fact red herrings. You correctly identified two adjustment bolts with sliding 'tangs'. There is a circular plastic obstruction of sorts (pictured) which 'docks' at each tang at either the fully up or the fully down position of the glass. All the adjustment could have been done without having removed anything. Those stops threw me off. Bugger knows what they are.

So, good news (sort of).

So is this motor and mechanism stock for a '75 E9 or is this from some other car? A bit of googling showed that the motor looks like it may be from an E28 but not the mechanism. Any ideas?
 

Attachments

  • machanism_1.jpg
    machanism_1.jpg
    71 KB · Views: 222
  • machanism_2.jpg
    machanism_2.jpg
    64.6 KB · Views: 188
  • machanism_3.jpg
    machanism_3.jpg
    75.5 KB · Views: 196

decampos

Well-Known Member
Messages
252
Reaction score
3
Location
Los Angeles and North London UK
Just to put this thread to bed, adjustment to my later E9 (or possibly unique/custom) window assembly was easily done via the two bolts and could have been done without having removed anything though having it out afforded me the opportunity the thoroughly lubricate everything extensively. I now have acceptably 'fast' slow windows. Here's a short but fascinating youtube clip: http://www.youtube.com/watch?v=0AXVqKYCzo4

window_motor.jpg
 
Last edited:

decampos

Well-Known Member
Messages
252
Reaction score
3
Location
Los Angeles and North London UK
Upon removing the broken door brake from the other door, I discovered what those little red herrings are. They're part of the brake mechanism. (That information might save someone some grief).
 

Attachments

  • herrings_1.jpg
    herrings_1.jpg
    42 KB · Views: 241
  • herrings_2.jpg
    herrings_2.jpg
    38.8 KB · Views: 198

kurtd

Well-Known Member
Site Donor
Messages
180
Reaction score
6
Location
San Jose, CA
Thanks for the update. The original style door "breaks" aren't very durable, I replaced a broken with some new OEM parts and they lasted about 6 months. I updated to the ones that Carl sells and haven't had a problem since.
 
Top