Finishing School for a Fjord 3.0 CS / 100 projects to improve a Coupe / Countdown

paul cain

Well-Known Member
Site Donor $$
Messages
679
Reaction score
1,332
Location
Orange County
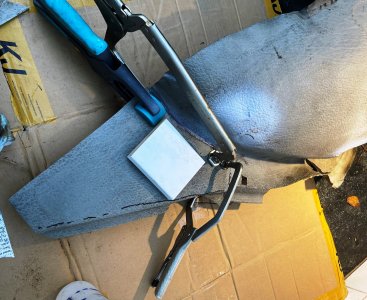
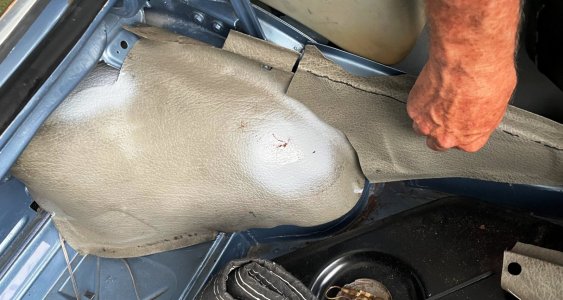
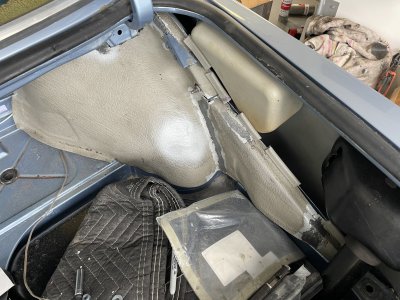
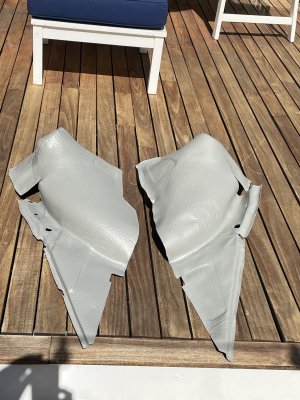
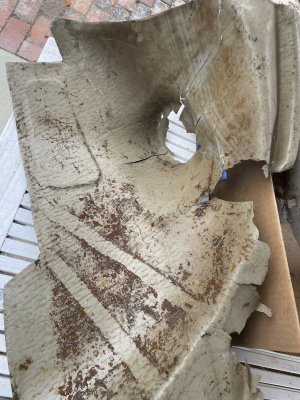
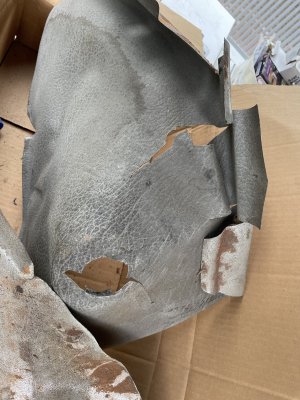
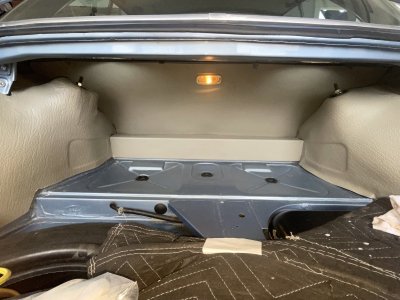
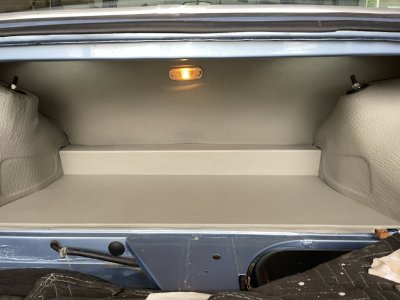
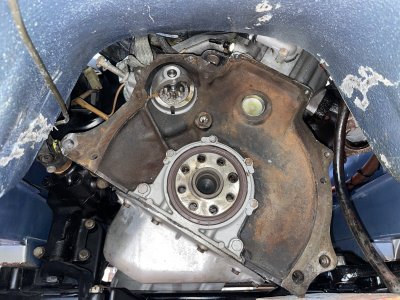
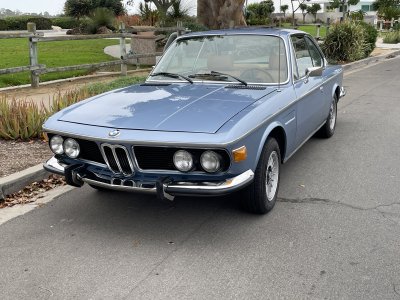
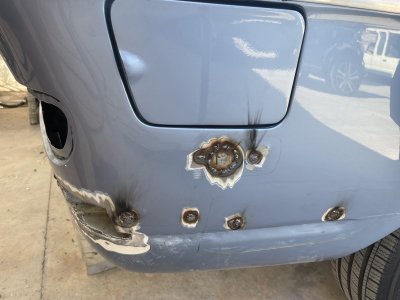
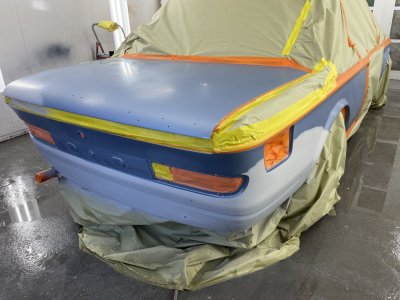
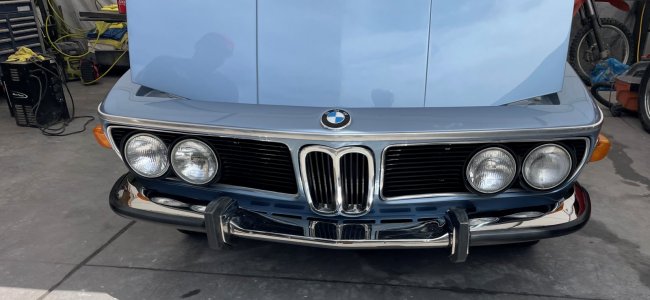
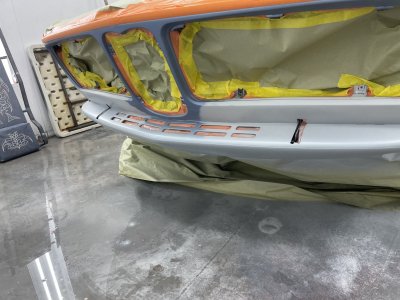
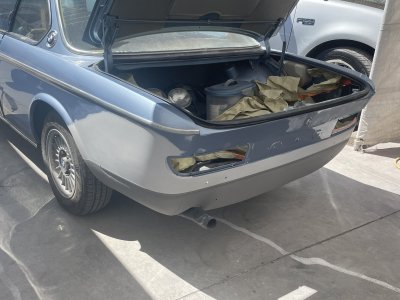
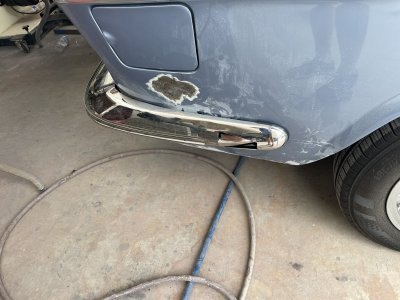
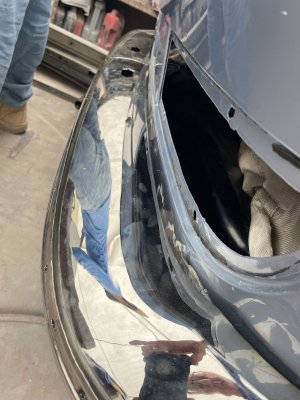
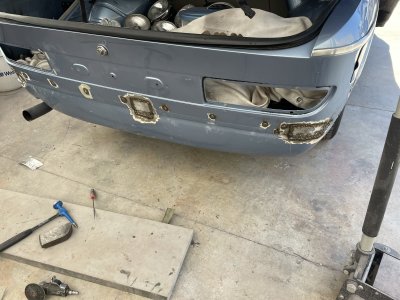
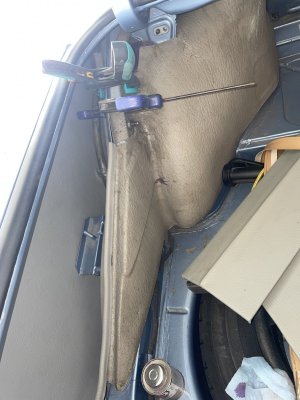
In July, in a moment of Bring-a-Trailer weakness I high bid another 1974 Fjord 3.0 CS coupe. This time the car had been restored by Clem Pappas who lives in Florida and was a sometime poster on this forum. Clem and his subcontractors had 'gone deep' in a significant body work and painting project on this U.S. Market 3.0 CS. You can find it here at: https://bringatrailer.com/listing/1974-bmw-3-0cs-62/. The car arrived in California and the first inspection was a relief. The body and paint work were slightly better than expected and there was a lot of new parts on the car not mentioned in the auction. Unlike the Patricia Mayer project this one will be mostly finishing work. I thought it would be fun to document 100 different things that are needed to bring the car to a serious level of finishing. So, I will be posting occasionally with lots of small projects that are required on this example. Project No. 1 was getting rid of the the U.S. Federal bumpers. See attached pics and the review on the Vietnamese supplier of bumpers. Project 2 is welding in all of the U.S. reflector holes, turning into a much larger painting project. Project 3 is to rebuild a set of trunk inner fender liners that are unique to the 1974-75 model. This involves getting a third liner as sacrificial material that is grafted into the original liner. Then lots of repairing of cracks.
 

Attachments

  • IMG_7588.jpg
    IMG_7588.jpg
    509.4 KB · Views: 368
  • IMG_7088.jpg
    IMG_7088.jpg
    201.7 KB · Views: 417
  • IMG_7158 (1).jpg
    IMG_7158 (1).jpg
    312.7 KB · Views: 341
  • IMG_7150 (2).jpg
    IMG_7150 (2).jpg
    280.6 KB · Views: 317
  • IMG_7587.jpg
    IMG_7587.jpg
    470.3 KB · Views: 311
  • IMG_7545.jpg
    IMG_7545.jpg
    184.1 KB · Views: 313
  • IMG_7153.jpg
    IMG_7153.jpg
    296.1 KB · Views: 291
  • IMG_7484.jpg
    IMG_7484.jpg
    265.3 KB · Views: 298
  • IMG_7119.jpg
    IMG_7119.jpg
    320.1 KB · Views: 307
  • IMG_7118.jpg
    IMG_7118.jpg
    271.7 KB · Views: 308
  • IMG_7091.jpg
    IMG_7091.jpg
    354.4 KB · Views: 372
  • IMG_7678.jpg
    IMG_7678.jpg
    312.4 KB · Views: 344
Last edited by a moderator:

Arde

Well-Known Member
Site Donor $
Site Donor $$
Messages
4,729
Reaction score
1,934
Location
Cupertino, CA
Great start Paul, I assume 100 projects while showing 3 is a bit hyperbolic... I recall counting 22 small projects in my first year or so of ownership...
 

Bmachine

Well-Known Member
Site Donor $
Site Donor $$
Messages
3,534
Reaction score
1,792
Location
Northern California coast

mulberryworks

Mr. Fixity
Site Donor
Messages
1,244
Reaction score
614
Location
Jacksonville FL

For anyone with low blood pressure problems, I highly recommend doing some welding right next to the gas tank, especially filler neck opening. Works a treat
When I was oh so young, I had a 1968 VW Beetle gas tank with a pinhole in the very bottom I needed to weld, so I emptied it and let it air out in the sun for a while. I didn't know about the trick of filling it with water to displace the vapors, but I figured there were certainly some left so I foolishly draped a paper towel over the inlet and lit the corner before retreating behind a nearby car to wait. It took a while, but eventually, there was a loud woosh as the fumes ignited and rushed out of the inlet tube. The tank was now empty at the cost of bulging the top a bit. I was able to weld up the pinhole and push the top back down without much trouble.
I consider myself very lucky. A tank full of air and gas vapors is more likely to react quickly, i.e. 'explode' than a tank full of gas as there is less room for oxygen in a full tank. Hence the reason there isn't an explosive danger when you light the rag in a Molotov Cocktail, not that there's anything safe about doing that.
 
Last edited:

paul cain

Well-Known Member
Site Donor $$
Messages
679
Reaction score
1,332
Location
Orange County
Passenger side inner fender liner. converting the Euro style to the US Federal style in 18 easy steps.
 

Attachments

  • IMG_7696.jpg
    IMG_7696.jpg
    454.6 KB · Views: 297
  • IMG_7695.jpg
    IMG_7695.jpg
    283.3 KB · Views: 320

Arde

Well-Known Member
Site Donor $
Site Donor $$
Messages
4,729
Reaction score
1,934
Location
Cupertino, CA
Did you really think I was going to download all 100 projects at once? ;) This'll be the slow drip. I've edited the title to lower the hype.
Very Machiavellian your plan:

“Injuries, therefore, should be inflicted all at once, that their ill savour being less lasting may the less offend; whereas, benefits should be conferred little by little, that so they may be more fully relished.”​

― Niccolò Machiavelli, The Prince
 

paul cain

Well-Known Member
Site Donor $$
Messages
679
Reaction score
1,332
Location
Orange County
Still on Project 3. Now at 3.6 in terms of completion. Lots of grinding and cutting, JB Weld applications, head gun, PVC cement, and high build priming. The one on the right is a spliced in version of the triangle section. The one on the left is an original 1974 U.S. Federal version in need of a lot of patching.
 

Attachments

  • IMG_7713.jpg
    IMG_7713.jpg
    339.8 KB · Views: 310

paul cain

Well-Known Member
Site Donor $$
Messages
679
Reaction score
1,332
Location
Orange County
Project No. 4 Rebuild the shift linkage for the upcoming 5 speed transmission and add new shift tower support arm.
 

Attachments

  • IMG_7749.jpg
    IMG_7749.jpg
    318.9 KB · Views: 284
  • IMG_7750.jpg
    IMG_7750.jpg
    281 KB · Views: 266
  • IMG_7751.jpg
    IMG_7751.jpg
    271.3 KB · Views: 259
  • IMG_7752.jpg
    IMG_7752.jpg
    316.3 KB · Views: 277

Arde

Well-Known Member
Site Donor $
Site Donor $$
Messages
4,729
Reaction score
1,934
Location
Cupertino, CA
Project 101, fix the 5-speed Getrag input shaft bearing (NLA) noise...
 

paul cain

Well-Known Member
Site Donor $$
Messages
679
Reaction score
1,332
Location
Orange County
Project 3. Well, technically Project 3.6.5.2. This is the first full test fit of the inner fender liners back in the car. Lots of trimming on back side. The heat gun was very effective in getting the edges to lay down. This resulted in a number of new cracks and more JB weld applications. Getting close. Not a project I would recommend undertaking. Much more time intensive than anticipated.
 

Attachments

  • IMG_7760.jpg
    IMG_7760.jpg
    408.7 KB · Views: 250
  • IMG_7761.jpg
    IMG_7761.jpg
    333.9 KB · Views: 261

paul cain

Well-Known Member
Site Donor $$
Messages
679
Reaction score
1,332
Location
Orange County
Project 3.9.9.9 Finally after a coat of high build primer and final prep, we have some finished coloring. Ready to reinstall. Certainly not perfect in the repaired areas, but a big improvement from the starting point (last two images).
 

Attachments

  • IMG_7802.jpg
    IMG_7802.jpg
    396.6 KB · Views: 212
  • IMG_7589.jpg
    IMG_7589.jpg
    521.4 KB · Views: 210
  • IMG_7590.jpg
    IMG_7590.jpg
    418.5 KB · Views: 227

paul cain

Well-Known Member
Site Donor $$
Messages
679
Reaction score
1,332
Location
Orange County
Happy to put this project in the rear view mirror. Yes, its a tool caddy from an E3. The correct E9 caddy with the side pocket will not fit in a '74 trunk as the bumper support beams are in the way. So, I'll adapt this one in the same location.
 

Attachments

  • IMG_7819.jpg
    IMG_7819.jpg
    293.5 KB · Views: 216
  • IMG_7820.jpg
    IMG_7820.jpg
    242.5 KB · Views: 209
  • IMG_7802 (1).jpg
    IMG_7802 (1).jpg
    396.6 KB · Views: 200
  • IMG_7803 (1).jpg
    IMG_7803 (1).jpg
    412.6 KB · Views: 243

Erik

Well-Known Member
Site Donor
Messages
418
Reaction score
163
Location
NorCal, CA
Covers look good. Maybe I missed it, but which JB Weld product did you use on them?

The e3 caddy is certainly more spacious, but did you consider altering an earlier coupe caddy by making a slotted cutout in the side pocket or just eliminating the pocket? If the cutout works (-haven't gotten to this project yet), it might be able to secure the caddy when installed. The contours of the coupe caddy body minus the pocket seem like they should fit well even with the support beams. Still smaller though.
 

paul cain

Well-Known Member
Site Donor $$
Messages
679
Reaction score
1,332
Location
Orange County
Covers look good. Maybe I missed it, but which JB Weld product did you use on them?

The e3 caddy is certainly more spacious, but did you consider altering an earlier coupe caddy by making a slotted cutout in the side pocket or just eliminating the pocket? If the cutout works (-haven't gotten to this project yet), it might be able to secure the caddy when installed. The contours of the coupe caddy body minus the pocket seem like they should fit well even with the support beams. Still smaller though.
Erik,
I am not sure this E3 caddy is going to fit. I am going try in in a few locations before anchoring it down. I'll keep you posted. Thanks.
 

paul cain

Well-Known Member
Site Donor $$
Messages
679
Reaction score
1,332
Location
Orange County
Project 6 - Replace the Automatic Transmission with a 5 spd Overdrive
I drove the car up to Orange, Calif. today. First trip on the freeway. The motor is truly racing at 4,000 rpm at my preferred 78 mph. It was the last drive with automatic transmission power. Good riddance.

A big thanks to @Mike Pelly and Todd for showing up at the key moment to drop the carcass out of the drive tunnel. It was going very smoothly until I discovered that there were 4 bolts holding the torque converter in place (not 3). A very productive 8 hours. I am elated with the work performed by the prior owner. More close ups to follow.
 

Attachments

  • IMG_7827.jpg
    IMG_7827.jpg
    291.8 KB · Views: 220
  • IMG_7828.jpg
    IMG_7828.jpg
    315.4 KB · Views: 218
  • IMG_7825.jpg
    IMG_7825.jpg
    285 KB · Views: 221
  • IMG_7826.jpg
    IMG_7826.jpg
    452.3 KB · Views: 242

Pittraider18

Active Member
Messages
49
Reaction score
37
Location
Seattle, Wa
Project 6 - Replace the Automatic Transmission with a 5 spd Overdrive
I drove the car up to Orange, Calif. today. First trip on the freeway. The motor is truly racing at 4,000 rpm at my preferred 78 mph. It was the last drive with automatic transmission power. Good riddance.

A big thanks to @Mike Pelly and Todd for showing up at the key moment to drop the carcass out of the drive tunnel. It was going very smoothly until I discovered that there were 4 bolts holding the torque converter in place (not 3). A very productive 8 hours. I am elated with the work performed by the prior owner. More close ups to follow.
I assume you'll be using an OEM Clutch pedal for the swap. There wouldn't happen to be a few more of those in a stash somewhere would there? I'm loving the attention to detail and finish work.
 
Top