I finally took time to get going on better rear bumpers. The ones I got were used and needed a fair bit of reshaping and cleaning.
The neighbors were unimpressed. But the results were surprisingly good.

On to installing new WN rails.
There are two tricky parts to this. First, bending the rail to the proper arc and, second, drilling the rivet holes in the right spots to match the bumper ones.
It is nearly impossible to bend the rails on the bumper itself. The convex shape of the rail has to fold against the convex shape of the bumper which is nearly impossible. So first I made a little tool to help trace the shape of the bumper onto some plywood.


Next I cut two shapes on the plywood. An outer one which follows the exact shape of the bumper and then an inner piece that had a more exaggerated curve to force the metal a little past what it was supposed to end up.


To drill the rivet holes in the correct spots I first drill the first one on the long straight section of the bumper. Then I use a small M3 (or similar) bolt to secure that temporarily to the bumper. Next I tape the rail as tightly as possible onto the bumper. From the inside of the bumper I mark where the rivet holes are with a marker until the beginning of the curve.
Note: It really helps to build 2 jigs for this job: One to hold one half bumper on top of a workbench and a second one to hold the fully assembled bumper together. The shape of these things make them really difficult to work on without that.


.jpg")
After marking the holes locations, I remove the rail and transfer those marking from the convex side to the concave side which will make it much easier to drill.
As always with metal, center punch where those holes will be drilled first.

Holes need to be 4 mm diameter or 5/64 of an inch. Using M3 bolts and some blank rivets, secure the rail onto the bumper to make sure they all line up. The last hole before the curve is very important. You need to have that rail as tight on the bumper on that curve as possible. Use clamps to press the curved rail onto the bumper. This section is critical because it is very easy for the rail to lift off the bumper in that area and that will result in the rubber belt sticking out in that area.
Again mark the holes from the inside of the bumper, transfer the marking to the other side, drill those holes, and reattach the rail temporarily with small bolts or blank rivets. Now you can either clamp or tape the rest of the rail and mark the remaining holes.


The rivers I used were aluminum 5/64” or 4mm.

I thoroughly cleaned the rubber belt, first with soap and water. Be sure to go deep inside the recessed areas because lots of nasty bits can hide in there.
Then I applied Eastwood rubber rejuvenator and let it soak for a day.


Boxes and various supports help install the whole thing when working solo.

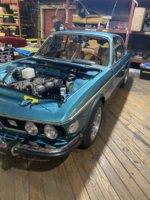
Final result:
.jpg")
The neighbors were unimpressed. But the results were surprisingly good.
On to installing new WN rails.
There are two tricky parts to this. First, bending the rail to the proper arc and, second, drilling the rivet holes in the right spots to match the bumper ones.
It is nearly impossible to bend the rails on the bumper itself. The convex shape of the rail has to fold against the convex shape of the bumper which is nearly impossible. So first I made a little tool to help trace the shape of the bumper onto some plywood.
Next I cut two shapes on the plywood. An outer one which follows the exact shape of the bumper and then an inner piece that had a more exaggerated curve to force the metal a little past what it was supposed to end up.
To drill the rivet holes in the correct spots I first drill the first one on the long straight section of the bumper. Then I use a small M3 (or similar) bolt to secure that temporarily to the bumper. Next I tape the rail as tightly as possible onto the bumper. From the inside of the bumper I mark where the rivet holes are with a marker until the beginning of the curve.
Note: It really helps to build 2 jigs for this job: One to hold one half bumper on top of a workbench and a second one to hold the fully assembled bumper together. The shape of these things make them really difficult to work on without that.
After marking the holes locations, I remove the rail and transfer those marking from the convex side to the concave side which will make it much easier to drill.
As always with metal, center punch where those holes will be drilled first.
Holes need to be 4 mm diameter or 5/64 of an inch. Using M3 bolts and some blank rivets, secure the rail onto the bumper to make sure they all line up. The last hole before the curve is very important. You need to have that rail as tight on the bumper on that curve as possible. Use clamps to press the curved rail onto the bumper. This section is critical because it is very easy for the rail to lift off the bumper in that area and that will result in the rubber belt sticking out in that area.
Again mark the holes from the inside of the bumper, transfer the marking to the other side, drill those holes, and reattach the rail temporarily with small bolts or blank rivets. Now you can either clamp or tape the rest of the rail and mark the remaining holes.
The rivers I used were aluminum 5/64” or 4mm.
I thoroughly cleaned the rubber belt, first with soap and water. Be sure to go deep inside the recessed areas because lots of nasty bits can hide in there.
Then I applied Eastwood rubber rejuvenator and let it soak for a day.
Boxes and various supports help install the whole thing when working solo.
Final result:
Last edited: