Fixing rear bumpers and Installing metal rails to hold the rubber belts

Bmachine

Well-Known Member
Site Donor $
Site Donor $$
Messages
3,525
Reaction score
1,779
Location
Northern California coast
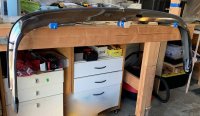
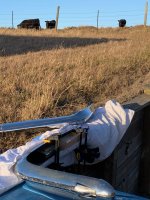
I finally took time to get going on better rear bumpers. The ones I got were used and needed a fair bit of reshaping and cleaning.
The neighbors were unimpressed. But the results were surprisingly good.
IMG_0089.jpg

On to installing new WN rails.
There are two tricky parts to this. First, bending the rail to the proper arc and, second, drilling the rivet holes in the right spots to match the bumper ones.
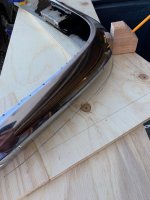
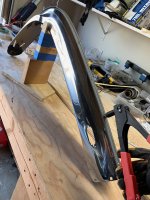
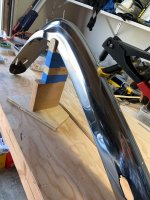
It is nearly impossible to bend the rails on the bumper itself. The convex shape of the rail has to fold against the convex shape of the bumper which is nearly impossible. So first I made a little tool to help trace the shape of the bumper onto some plywood.
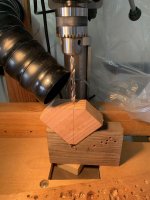
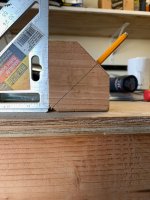
IMG_0096.jpg IMG_0098.jpg IMG_0101.jpg

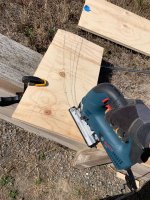
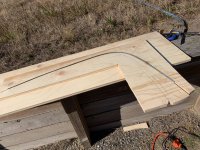
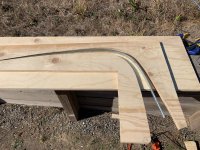
Next I cut two shapes on the plywood. An outer one which follows the exact shape of the bumper and then an inner piece that had a more exaggerated curve to force the metal a little past what it was supposed to end up.

IMG_0103.jpg IMG_0104.jpg IMG_0105.jpg


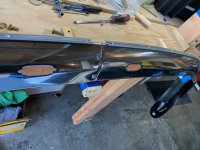
To drill the rivet holes in the correct spots I first drill the first one on the long straight section of the bumper. Then I use a small M3 (or similar) bolt to secure that temporarily to the bumper. Next I tape the rail as tightly as possible onto the bumper. From the inside of the bumper I mark where the rivet holes are with a marker until the beginning of the curve.
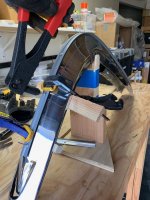
Note: It really helps to build 2 jigs for this job: One to hold one half bumper on top of a workbench and a second one to hold the fully assembled bumper together. The shape of these things make them really difficult to work on without that.

IMG_0130.jpg IMG_0128.jpg IMG_0134 (1).jpg


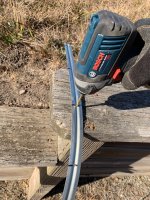
After marking the holes locations, I remove the rail and transfer those marking from the convex side to the concave side which will make it much easier to drill.
As always with metal, center punch where those holes will be drilled first.

IMG_0110.jpg

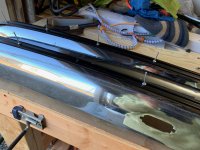
Holes need to be 4 mm diameter or 5/64 of an inch. Using M3 bolts and some blank rivets, secure the rail onto the bumper to make sure they all line up. The last hole before the curve is very important. You need to have that rail as tight on the bumper on that curve as possible. Use clamps to press the curved rail onto the bumper. This section is critical because it is very easy for the rail to lift off the bumper in that area and that will result in the rubber belt sticking out in that area.

Again mark the holes from the inside of the bumper, transfer the marking to the other side, drill those holes, and reattach the rail temporarily with small bolts or blank rivets. Now you can either clamp or tape the rest of the rail and mark the remaining holes.

IMG_0129.jpg IMG_0122.jpg IMG_0135.jpg

The rivers I used were aluminum 5/64” or 4mm.

IMG_0112.jpg

I thoroughly cleaned the rubber belt, first with soap and water. Be sure to go deep inside the recessed areas because lots of nasty bits can hide in there.
Then I applied Eastwood rubber rejuvenator and let it soak for a day.


IMG_0132.jpg IMG_0133.jpg


Boxes and various supports help install the whole thing when working solo.

IMG_0138.jpg

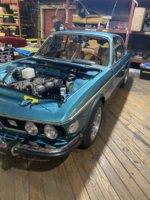
Final result:

IMG_0144 (1).jpg
 
Last edited:

eriknetherlands

Moderator
Site Donor
Messages
2,698
Reaction score
1,929
Location
Netherlands, Eindhoven area
HI Bo, just to ask, is the steel profile too stiff to simply bend it by hand over the outside of the bumper? You are going at it like a professional, but i'd like to understand why.
Does it have to do with the accuracy? Do I understand correctly that the steel profile needs to follow the bumper without gaps, as otherwise the rubber will show gaps as well?
 

Bmachine

Well-Known Member
Site Donor $
Site Donor $$
Messages
3,525
Reaction score
1,779
Location
Northern California coast
HI Bo, just to ask, is the steel profile too stiff to simply bend it by hand over the outside of the bumper? You are going at it like a professional, but i'd like to understand why.
No, it is not too stiff to bend. But the steel rail is not flat. It has a convex "river" pressed along its center. This makes it difficult to bend against the bulge of the bumper which is bulging the opposite way. It's as if you were trying to bend a U shaped piece of metal on top of an upside down U shaped piece of metal. Almost like trying to force two magnets against each other. It is much easier to bend it against something like the flat cross section of a piece of wood. On top of that, you really want that end to follow the contour of the bumper as close as possible because:
Does it have to do with the accuracy? Do I understand correctly that the steel profile needs to follow the bumper without gaps, as otherwise the rubber will show gaps as well?
Yes that is exactly right.
 
Last edited:

Drew Gregg

Well-Known Member
Site Donor
Messages
1,565
Reaction score
1,201
Location
Ft. Lauderdale
I finally took time to get going on better rear bumpers. The ones I got were used and needed a fair bit of reshaping and cleaning.
The neighbors were unimpressed. But the results were surprisingly good.

View attachment 80172

On to installing new WN rails.
There are two tricky parts to this. First, bending the rail to the proper arc and, second, drilling the rivet holes in the right spots to match the bumper ones.
It is nearly impossible to bend the rails on the bumper itself. The convex shape of the rail has to fold against the convex shape of the bumper which is nearly impossible. So first I made a little tool to help trace the shape of the bumper onto some plywood.
View attachment 80173 View attachment 80174 View attachment 80175

Next I cut two shapes on the plywood. An outer one which follows the exact shape of the bumper and then an inner piece that had a more exaggerated curve to force the metal a little past what it was supposed to end up.
View attachment 80176 View attachment 80252 View attachment 80177


To drill the rivet holes in the correct spots I first drill the first one on the long straight section of the bumper. Then I use a small M3 (or similar) bolt to secure that temporarily to the bumper. Next I tape the rail as tightly as possible onto the bumper. From the inside of the bumper I mark where the rivet holes are with a marker until the beginning of the curve.
Note: It really helps to build 2 jigs for this job: One to hold one half bumper on top of a workbench and a second one to hold the fully assembled bumper together. The shape of these things make them really difficult to work on without that.

View attachment 80182 View attachment 80253 View attachment 80254


After marking the holes locations, I remove the rail and transfer those marking from the convex side to the concave side which will make it much easier to drill.
As always with metal, center punch where those holes will be drilled first.

View attachment 80178

Holes need to be 4 mm diameter or 5/64 of an inch. Using M3 bolts and some blank rivets, secure the rail onto the bumper to make sure they all line up. The last hole before the curve is very important. You need to have that rail as tight on the bumper on that curve as possible. Use clamps to press the curved rail onto the bumper. This section is critical because it is very easy for the rail to lift off the bumper in that area and that will result in the rubber belt sticking out in that area.

Again mark the holes from the inside of the bumper, transfer the marking to the other side, drill those holes, and reattach the rail temporarily with small bolts or blank rivets. Now you can either clamp or tape the rest of the rail and mark the remaining holes.

View attachment 80181 View attachment 80180 View attachment 80185

The rivers I used were aluminum 5/64” or 4mm.

View attachment 80179

I thoroughly cleaned the rubber belt, first with soap and water. Be sure to go deep inside the recessed areas because lots of nasty bits can hide in there.
Then I applied Eastwood rubber rejuvenator and let it soak for a day.


View attachment 80183 View attachment 80184


Boxes and various supports help install the whole thing when working solo.

View attachment 80187

Final result:

View attachment 80193
Bo--I attached the metal strip the hard way--Rivet in the first hole and then rivets in every other hole around the curves. The 4mm rivets around the curve are not flush with the bumper with slight gaps as you said will happen. I cleaned the rubber strip. How did you get it over the metal strip? thanks, Drew
 

Bmachine

Well-Known Member
Site Donor $
Site Donor $$
Messages
3,525
Reaction score
1,779
Location
Northern California coast
That is the easy part. Just bend the rubber belt backwards on itself at a tight angle until the two outside “lips” are forced to open wide. Then press and slowly “walk” the belt over the steel rail.
 

deQuincey

Quousque tandem...?
Site Donor
Messages
8,371
Reaction score
2,389
Location
BIO - 43°15'46.5"N 2°56'03.7"W
No, it is not too stiff to bend. But the steel rail is not flat. It has a convex "river" pressed along its center. This makes it difficult to bend against the bulge of the bumper which is bulging the opposite way. It's as if you were trying to bend a U shaped piece of metal on top of an upside down U shaped piece of metal. Almost like trying to force two magnets against each other. It is much easier to bend it against something like the flat cross section of a piece of wood. On top of that, you really want that end to follow the contour of the bumper as close as possible because:

Yes that is exactly right.


i appreciate your fabrication mods, excellent,
but i did this six years ago and there was no need to do other thing than moving on placing a rivet and bending until next one, new hole and new rivet, bend again and so on, each rivet makes the final force to ensure the two metals together
 

Bmachine

Well-Known Member
Site Donor $
Site Donor $$
Messages
3,525
Reaction score
1,779
Location
Northern California coast
i appreciate your fabrication mods, excellent,
but i did this six years ago and there was no need to do other thing than moving on placing a rivet and bending until next one, new hole and new rivet, bend again and so on, each rivet makes the final force to ensure the two metals together
Wouldn’t be the first time I’m overthinking something... ;-)
 

rsporsche

Moderator
Site Donor $$
Messages
10,634
Reaction score
3,671
Location
Atlanta, GA
I finally took time to get going on better rear bumpers. The ones I got were used and needed a fair bit of reshaping and cleaning.
The neighbors were unimpressed. But the results were surprisingly good.

View attachment 80172

On to installing new WN rails.
There are two tricky parts to this. First, bending the rail to the proper arc and, second, drilling the rivet holes in the right spots to match the bumper ones.
It is nearly impossible to bend the rails on the bumper itself. The convex shape of the rail has to fold against the convex shape of the bumper which is nearly impossible. So first I made a little tool to help trace the shape of the bumper onto some plywood.

View attachment 80173 View attachment 80174 View attachment 80175

Next I cut two shapes on the plywood. An outer one which follows the exact shape of the bumper and then an inner piece that had a more exaggerated curve to force the metal a little past what it was supposed to end up.
View attachment 80176 View attachment 80252 View attachment 80177


To drill the rivet holes in the correct spots I first drill the first one on the long straight section of the bumper. Then I use a small M3 (or similar) bolt to secure that temporarily to the bumper. Next I tape the rail as tightly as possible onto the bumper. From the inside of the bumper I mark where the rivet holes are with a marker until the beginning of the curve.
Note: It really helps to build 2 jigs for this job: One to hold one half bumper on top of a workbench and a second one to hold the fully assembled bumper together. The shape of these things make them really difficult to work on without that.
View attachment 80182 View attachment 80253 View attachment 80254


After marking the holes locations, I remove the rail and transfer those marking from the convex side to the concave side which will make it much easier to drill.
As always with metal, center punch where those holes will be drilled first.
View attachment 80178

Holes need to be 4 mm diameter or 5/64 of an inch. Using M3 bolts and some blank rivets, secure the rail onto the bumper to make sure they all line up. The last hole before the curve is very important. You need to have that rail as tight on the bumper on that curve as possible. Use clamps to press the curved rail onto the bumper. This section is critical because it is very easy for the rail to lift off the bumper in that area and that will result in the rubber belt sticking out in that area.

Again mark the holes from the inside of the bumper, transfer the marking to the other side, drill those holes, and reattach the rail temporarily with small bolts or blank rivets. Now you can either clamp or tape the rest of the rail and mark the remaining holes.
View attachment 80181 View attachment 80180 View attachment 80185

The rivers I used were aluminum 5/64” or 4mm.
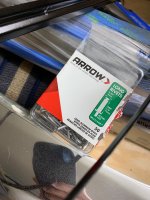
View attachment 80179

I thoroughly cleaned the rubber belt, first with soap and water. Be sure to go deep inside the recessed areas because lots of nasty bits can hide in there.
Then I applied Eastwood rubber rejuvenator and let it soak for a day.
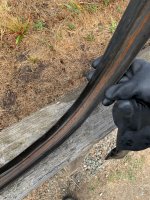
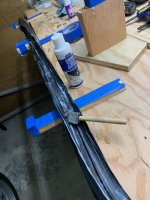

View attachment 80183 View attachment 80184


Boxes and various supports help install the whole thing when working solo.
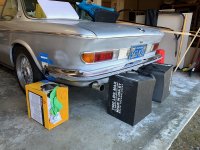
View attachment 80187

Final result:

View attachment 80193
Bo, great work, i see a cottage industry in your future now that you have the nice mold.
 

Bmachine

Well-Known Member
Site Donor $
Site Donor $$
Messages
3,525
Reaction score
1,779
Location
Northern California coast
Bo: That is nice work. And is your coupe freshly painted?
Thanks very much, Jay.
Funny you mention that about the paint. I believe I have finally found a shop that could paint the car at a reasonable price. (Although the term “reasonable“ has somehow managed to inflate quite a bit over time...).
I will know more by the end of this week.
 

Drew Gregg

Well-Known Member
Site Donor
Messages
1,565
Reaction score
1,201
Location
Ft. Lauderdale
Bo--First,I also want to compliment your jig making technique. You were right about drilling holes in the curved spine of those metal strips. I gave the bumper parts to the restoration shop today and told them to hit the gaps with a hammer if they aren't tight to the chrome bumper...well, you know what I mean. It seems you didn't have the spacer that covers the center gap and the carriage bolts. I had that piece chrome plated also. It must be slid onto the bumper and the bottom tangs bent into place before the rubber is clipped onto the metal strips. And then the under-rider horns are bolted to the bumper and body to complete the job.
As you know, I changed my color from a custom blue metallic to #065 Turkis. When you do have your car painted,I suggest you spend the extra $$ for the Glasurit paint system. The results will be much better especially if your selection is a metallic color. The Glasurit paint covered the panels in 2-3 passes. The BASF paint took 7 passes to cover an area.
 

Attachments

  • IMG_1743(1).jpg
    IMG_1743(1).jpg
    439 KB · Views: 105
  • IMG_1746(1).jpg
    IMG_1746(1).jpg
    259.4 KB · Views: 108

Bmachine

Well-Known Member
Site Donor $
Site Donor $$
Messages
3,525
Reaction score
1,779
Location
Northern California coast
Thanks Drew. I added the center strap afterwards. And I do not use the under riders in the back or the overriders in the front. To me, they distract from the clean lines of the car.
As for paint, the shop I am focusing on uses Spies Hecker. My research indicates that it is decent stuff. Not Glasurit but not Maaco Thursday Special either.
 
Last edited:

Drew Gregg

Well-Known Member
Site Donor
Messages
1,565
Reaction score
1,201
Location
Ft. Lauderdale
Bo--I missed the center strap in your photo. I also should have said it was PPG paint that the shop first tried to get the Turkis color correct, not BASF. I'm sure you have done your research on paint brands. What color have you chosen?
 

JayWltrs

Well-Known Member
Site Donor $
Messages
954
Reaction score
534
Location
Oklahoma City
Wouldn’t be the first time I’m overthinking something... ;-)

Your woodworking skills always impress the heck out of me. It isn't additional steps if it allows you to work in your comfort zone. I lack many skills and specialty tools, so I add a lot of crutch steps (or half-steps) to make me comfortable and allow me to see how I'm getting from A to C without doing any harm, including minor steps where I can have bailout points. E.G., I built some crude blocks just to remove the big bumpers, so I would be sure not to harm anything if they let go quicker than I wanted. Probably unnecessary, but gave me comfort.
 

Bmachine

Well-Known Member
Site Donor $
Site Donor $$
Messages
3,525
Reaction score
1,779
Location
Northern California coast
It isn't additional steps if it allows you to work in your comfort zone. I lack many skills and specialty tools, so I add a lot of crutch steps (or half-steps) to make me comfortable and allow me to see how I'm getting from A to C without doing any harm, including minor steps where I can have bailout points. E.G., I built some crude blocks just to remove the big bumpers, so I would be sure not to harm anything if they let go quicker than I wanted. Probably unnecessary, but gave me comfort.
I agree wholeheartedly. One pearl of wisdom I always remember from my research when we were building my Tii race car is: “The cheapest performance improvement you can make in a car is driver comfort“. I find this applicable in many facets of this hobby or even in other parts of life.
 
Top