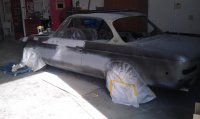
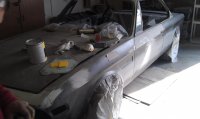
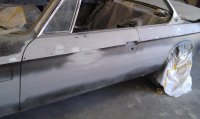
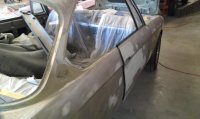
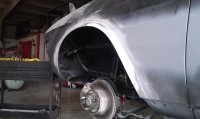
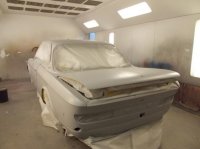
I wanted to post some pictures of the bodywork in progress, I hope some find this of interest. In the absence of a restoration only $$$$ facility here in Austin, TX the choices are limited and it is typically the owner of the shop that does allot of the work on the cars so along with running their business they have to sneak in hours, thus the 3-4 month time estimate (I guess). Anyhow, one of our forum Members, John I think, mentioned the door crease that is often overlooked by body shops, so armed with 30-40 photos, I think we got it right... so far. It's hard to see, but the crease is there and this was the side with lots of damage.
You are using an out of date browser. It may not display this or other websites correctly.
You should upgrade or use an alternative browser.
You should upgrade or use an alternative browser.
Keeping the project alive
- Thread starter Peter Coomaraswamy
- Start date

Are you going to plug the side DOT lights/reflector holes or keep them?
Side DOT
Hi Steve,
I filled in the front markers but I'm leaving the rears, I'm afraid the car won't be too visible from the rear side without them. While I'm at it, though I have a question; do you know what goes over the 3 carriage bolts on the rear bumper (center). I'm converting to the pre 74 bumpers and the set I bought came without any trim for that area- would you have a picture?
Thanks
I regret not filling in my rear side markers during the last respray. They are not original to our cars, look like cheap add-ons, which they are. By the time the drunk, high, texting, phoning teen/adult(BAL .19) sees the markers, you will hear the sound of metal on metal.
On mine the center only has a thin strip of metal trip bolted top and bottom:
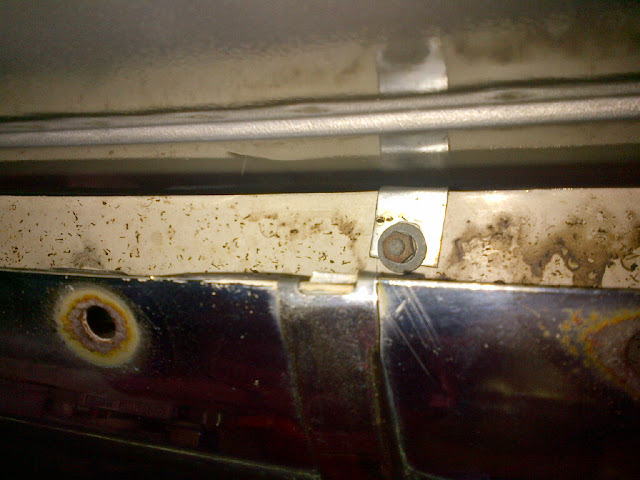
Seen here from the outside:

Seen here from the outside:
do you know what goes over the 3 carriage bolts on the rear bumper (center). I'm converting to the pre 74 bumpers and the set I bought came without any trim for that area- would you have a picture?
Thanks
Delete the side markers.
See example at night
http://i260.photobucket.com/albums/ii6/ClassicCoupe/cebaa032.jpg
See example at night
http://i260.photobucket.com/albums/ii6/ClassicCoupe/cebaa032.jpg
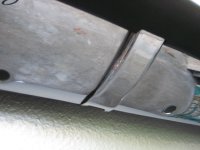
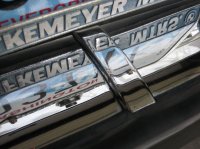
Peter - Here are a couple of photos of the center rear bumper cover. The piece has flat ends that wrap to the inside of the bumper. The exposed sections are more channel shaped with short curved legs. You don't want to bend this too much as it cracks the chrome.
Attachments
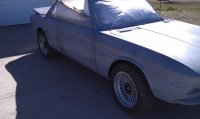
Those door gaps look very nice - i would also get rid of the rear marker lights. If concerned about being visible - add brighter tail lights.
NL2800CS
Member
Hai Peter,
Looks good, the doors I mean.
Good luck
Looks good, the doors I mean.
Good luck
Last edited:
Again- thanks
The pictures and comments are really helpful, thanks!! The owner of the shop is very accommodating to my visits and pointers (all of which I get from the forum). I will be absolutely sure he has the "drying" information and one thing about Austin, TX is that it sure is dry -most of the time! As you all know, these cars are getting more and more "uncommon" and I love that there is a genuine interest from everyone who has done even the smallest amount of work on it. I am due for another visit later this week and I'll post some more shots, hope I'm not boring everyone but who knows- it might be helpful. For now, I'm relegated to cleaning the shop since there is very little for me to do since the car is gone for a while. I have cleaned and polished every part... I feel like I've lost my therapist!
Cheers
Peter,
are you really sure you have come this far and want to keep those rear lights on the side?
This car will be a knock out and look great, and I think this is the time to make it right after the DOT did their "thing".
Anyway, its your money to spend, and I am excited to see how it comes out ,
Well done
OK, I guess I don't need a poll to guess what everyone prefers. I'll go down this week and work with the shop before they get too far along... not too worried about that ")
Cheers!
Cheers!
more...
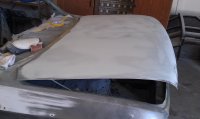
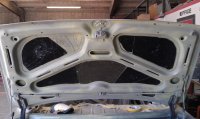
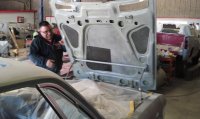
Again, I hope I'm not abusing the picture feature on the forum but many of the before and after shots, which are awesome, show the cars when they are ready for paint (primed) and then after, so I thought I would send the day by day stuff so all the little nastiness would be visible... and then I'll of course show the primed and then painted product. Some of the metal on the hood and trunk was thin because the foam rubber pads that came on the car would trap moisture and erode the metal, that coupled with the fact that I think the blasters put a little too much pressure on those weak areas caused some , well, "nastiness". The body shop is applying some fiberglass mats to those areas to strengthen them and I thought I would pass along the progress.
Cheers,
Attachments
Some of the metal on the hood and trunk was thin because the foam rubber pads that came on the car would trap moisture and erode the metal
I honestly don't believe that, but you're right, there are those weak spots on the bigger surface areas of the trunk and hood. Originally this problem is solved by gluing the outer skin on the inner supporting structure. Over the years sometimes this connection is getting lose for some reason (one could be sand blasting).
These mentioned fiber mats are not necessary imho, but be aware, that the outer skin is properly fixed to the inner supporting structure. This is more than important - otherwise the skin will begin to vibrate on higher speeds.
Probably not a problem for you, because you have that nasty speed limit but here in Germany it would be disturbing :lol:.
So, first of all you should make sure, that the skin is still fixed in these areas.
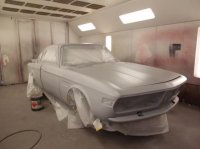
Keep on posting pics from the paint preparation. For sure this is interesting. I did this filling and sanding job over the last 4 weaks and missed to take some intermediate snap shots.
Mine will get the paint next weak - I'm really looking forward to have this step done.
cheers
Ingo
Agree
Hi Arnie,
The shop did mention that they were going to use a high strength bond to "attach" the skin to the hood and trunk frame but I will be sure to reinforce the importance of that step. I do feel the pain of the lower speed limits here in the US. Maybe someday someone can explain why the roads in Texas are built to handle speeds much greater than the speed limit, but I think it's possibly a nationwide conspiracy to extract funds from drivers. They recently opened up a highway between Austin and San Antonio with an 85 MPH limit, which means you can do a little over 90 without fear (of the police) but it costs 12.00 US to drive 40 miles on the road- not much of a bargain. I'm hoping they open up the new F1 track to car club members so that should give us Central Texans some consolation. Please post some pics of your car, always love to look!
Thanks,
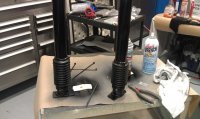
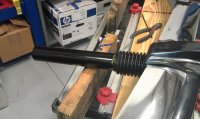
Bumper tubes
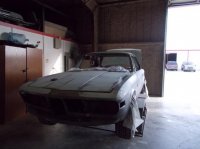
Thought I would post a couple pics of the tubes I made, I had some guidance from other forum members and it looks like I'm only about 4-5 weeks away from having the paint done and getting the old gal back in my cave, so I posted some of today’s pictures.
Thought I would post a couple pics of the tubes I made, I had some guidance from other forum members and it looks like I'm only about 4-5 weeks away from having the paint done and getting the old gal back in my cave, so I posted some of today’s pictures.
Attachments
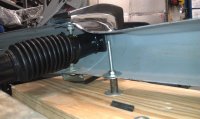
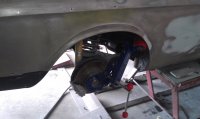

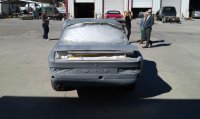
rear bumper holes
i assume the tubes you made are for the front (they look nice btw), and that rear bumpers will attach as usual to rear sheet metal? if so, be SURE and fill/weld the three holes in back now while its easy. i had this done after paint and it was $3k.
i assume the tubes you made are for the front (they look nice btw), and that rear bumpers will attach as usual to rear sheet metal? if so, be SURE and fill/weld the three holes in back now while its easy. i had this done after paint and it was $3k.
pamp
Well-Known Member
Hmmm....more than one way to skin a cat. The tubes look good. Good eye Alan...I thought Peter would have done the rear holes by now, I believe I mentioned it to him before.