

You are using an out of date browser. It may not display this or other websites correctly.
You should upgrade or use an alternative browser.
You should upgrade or use an alternative browser.
My BMW journey has begun
- Thread starter D Calkins
- Start date
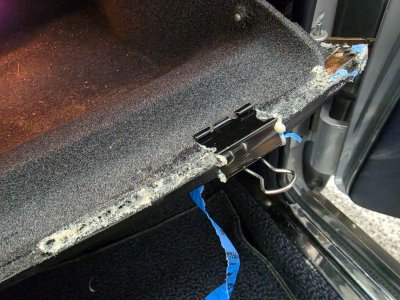

This can be a bit challenging. I completely disassembled my underdash segments / glovebox and fusebox and stripped them, glued the Foam back to the metal holding it together with clamps and then reflocked it all. Lot of work and it still doesn’t look perfect. Probably worth trying but CS-Werk has new ones I think. Not cheap but a backup option. The foam pulls away from the metal over time and is fairly dense so it’s hard to get it to sit back down even with epoxy and clamping. On the underside where it isn’t visible I actually put one or two rivets across the foam/metal interface to help hold it long/term
Looks like you used Gorilla Glue. I have had the same problem where it is an expanding glue so it extrudes out like this as it dries. Holds well but yes, this problem then arises. You’re in a bit of a bind here, I guess pun intended. Get that binder clip off however you can, but it will probably have marred the exterior visible part of the vinyl. May be able to just repaint the area with some SEM trim black or landau black after sanding down the glue chunks. Welcome to our life - one step up and two steps back. I know about this problem because I did exactly the same thing.Unfortunately I chose the wrong glue and made a mess. I have glued on this binder clip. Not exactly the look I wanted.
Yes, gorilla glue. I did get the clip off so hopefully some touch up paint will make it less conspicuous.
And if you decide to go the reflocking route there are pretty good instructions on here. I'd only do it if yours looks really ratty. It's not hard but a bit tedious.

I sent mine to CoupeKing, and they did a nice job on them. They glued them, and then used some sort of filler to clean up dents and such, and finally covered them in German vinyl. Did that will all of the black parts, dash, side trim, glove box, bolster, etc.
Sounds like CoupeKing has really done right by you / those beautiful seats and everything! I got the sense when I talked to DCalkins last week that he is trying to stick to a budget which may be hard when outsourcing, but good to know of options when the job gets beyond your capabilities (or what you believed your capabilities were when you started the job).
Erik certainly did an awesome job with your interior.I sent mine to CoupeKing, and they did a nice job on them. They glued them, and then used some sort of filler to clean up dents and such, and finally covered them in German vinyl. Did that will all of the black parts, dash, side trim, glove box, bolster, etc.
I'm trying really hard to do as much as possible. It seems like there is a big hole in my pocket paying for the new booster, master cylinder, brake lines and calipers for a pending brake job.
I would tell you that it’s worth it to do the mechanical parts now and get them as good as you can, the interior can always be done at a later point. So your plan is a good one.

With de-lamination of the padded areas I have had very good luck with Wurth contact cement. The trick is to get your area clean and all of your clamping ready then apply following the directions (I think it is about 15 minutes wait to put the areas in contact with one another). I have tried to do the work when it is warm out and put the glove box or other parts in a plastic bag in the sunlight. If that is not an option then careful use of a heat gun to evenly warm the padded parts to get them pliable.
I try to use wood pieces, with other padding as necessary to protect the pieces, test fit and know your clamping plan before you start.
With rust remediation I have used KBS coatings Rust Blast. There are many similar products on the market. My preference is to clean up the area as much as possible, then neutralize the rust and then prime and paint the area as appropriate.
I cleaned up the engine compartment and underside of my coupe and used the rust as a treatment to keep flash rust from forming in areas that I stripped of paint and undercoat. It is a good metal prep product. If there are areas that you can't reach to treat with Rust Blast and then neutralize that is a good place to use a rust converter such as this.
I am not promoting KBS products, those are just what I have used
I try to use wood pieces, with other padding as necessary to protect the pieces, test fit and know your clamping plan before you start.
With rust remediation I have used KBS coatings Rust Blast. There are many similar products on the market. My preference is to clean up the area as much as possible, then neutralize the rust and then prime and paint the area as appropriate.
I cleaned up the engine compartment and underside of my coupe and used the rust as a treatment to keep flash rust from forming in areas that I stripped of paint and undercoat. It is a good metal prep product. If there are areas that you can't reach to treat with Rust Blast and then neutralize that is a good place to use a rust converter such as this.
I am not promoting KBS products, those are just what I have used

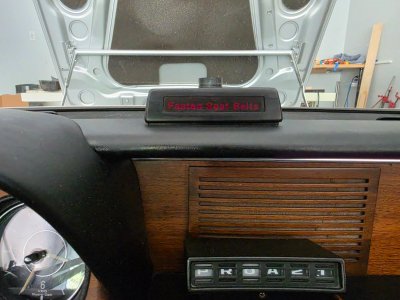
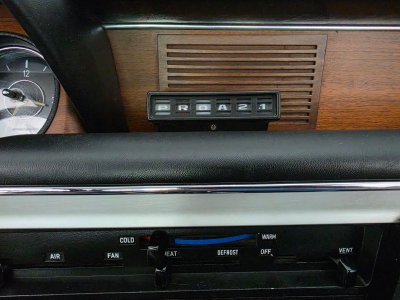
its worth removing the fasten seat belt light. what you will find, once you take it off, is there will be an indentation on the top dash rail. it doesn't really come out easily. luckily my car didn't have that light. the A/T position sensor ... that will come off easily enough, but replacing that thick piece of vinyl means the dash comes out and therefore the windshield. both of these projects will be easier with the dash removed.I'm considering removing these warts
so now for the question, how are you going to do do gear position for the A/T? perhaps you can take the approach that Porsche has done in modern cars and done it with lighting on one of the gauges. for instance, if you replace the clock with a multi gauge, you could do it on one of those gauges.
I will design and 3d print a plug for the hole where the seatbelt light was. Pulling the glass to pull the dash is for another day. Why do I need the gear position light? The shifter shows where the trans it at.its worth removing the fasten seat belt light. what you will find, once you take it off, is there will be an indentation on the top dash rail. it doesn't really come out easily. luckily my car didn't have that light. the A/T position sensor ... that will come off easily enough, but replacing that thick piece of vinyl means the dash comes out and therefore the windshield. both of these projects will be easier with the dash removed.
so now for the question, how are you going to do do gear position for the A/T? perhaps you can take the approach that Porsche has done in modern cars and done it with lighting on one of the gauges. for instance, if you replace the clock with a multi gauge, you could do it on one of those gauges.
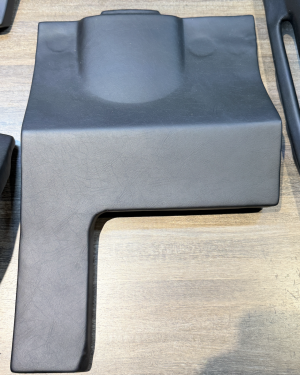
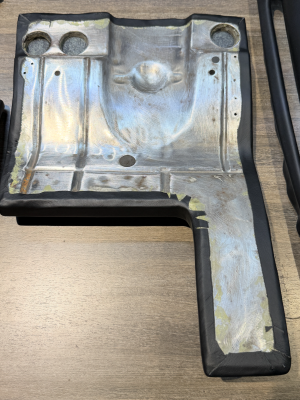
Based on the photos CK sent me, they did much as you, in terms of gluing and clamping the foam back in place. However they then filled any cracks and simply re-covered the pieces with black vinyl, so they ended up looking new. If you have cracks and such in those foam pieces, you will never be able to repair them and have them look right, but you can repair them and then re-cover them.Erik certainly did an awesome job with your interior.
I'm trying really hard to do as much as possible. It seems like there is a big hole in my pocket paying for the new booster, master cylinder, brake lines and calipers for a pending brake job.
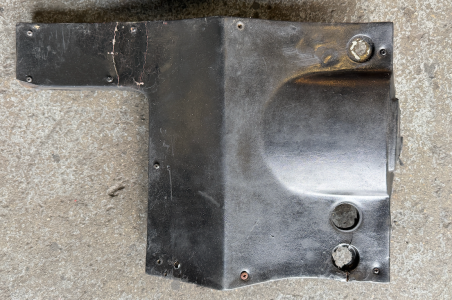
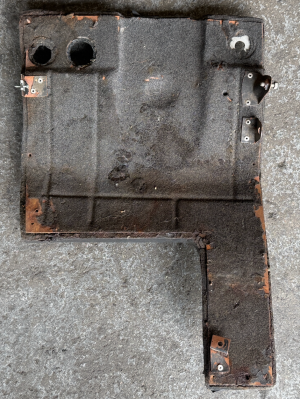
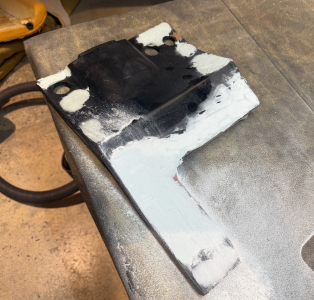
Here are some pics of the process. My originals were is truly terrible shape!
Attachments
-
 Screenshot 2026-07-21 at 2.05.06 PM.png1.7 MB · Views: 88
 -
 Screenshot 2026-07-21 at 2.05.23 PM.png2.6 MB · Views: 80
 -
 Screenshot 2026-07-21 at 2.06.22 PM.png1.4 MB · Views: 81
 -
 Screenshot 2026-07-21 at 2.07.00 PM.png3.8 MB · Views: 81
 -
 Screenshot 2026-07-21 at 2.07.12 PM.png3.7 MB · Views: 71
 -
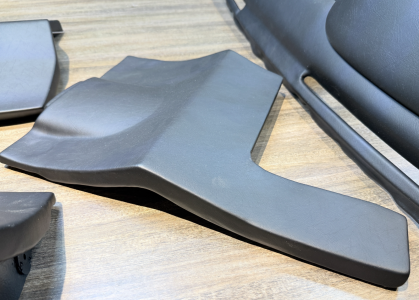 Screenshot 2026-07-21 at 2.07.21 PM.png3.2 MB · Views: 91
good point ... haven't driven an A/T in a long time ... forgot there was something there.I will design and 3d print a plug for the hole where the seatbelt light was. Pulling the glass to pull the dash is for another day. Why do I need the gear position light? The shifter shows where the trans it at.
That's a super cool idea. You could use the warning lights and just mark them PRND, and then wire up the lights to the same signals that run the dash mounted indicator..its worth removing the fasten seat belt light. what you will find, once you take it off, is there will be an indentation on the top dash rail. it doesn't really come out easily. luckily my car didn't have that light. the A/T position sensor ... that will come off easily enough, but replacing that thick piece of vinyl means the dash comes out and therefore the windshield. both of these projects will be easier with the dash removed.
so now for the question, how are you going to do do gear position for the A/T? perhaps you can take the approach that Porsche has done in modern cars and done it with lighting on one of the gauges. for instance, if you replace the clock with a multi gauge, you could do it on one of those gauges.
The shrouds for the warning lights are just simple plastic with colored lenses glued in. Easy to take out the lenses and put in custom ones. Could probably just use frosted plastic and lettering transfers to make the indicator lenses.
not sure i completely agree with you about being able to fix things without recovering. i had cracks in my upper dash that i carved out, filled it with vinyl welding, sanded it smooth, painted it with color coat and while the paint was wet, i textured it. might not be quite as good as a recover, but it only cost about 40 bucks and some time. the lower dash panel is rarely seen up close. i had a little bit of damage on mine, filled + sanded it and painted. also looked quite good.Based on the photos CK sent me, they did much as you, in terms of gluing and clamping the foam back in place. However they then filled any cracks and simply re-covered the pieces with black vinyl, so they ended up looking new. If you have cracks and such in those foam pieces, you will never be able to repair them and have them look right, but you can repair them and then re-cover them.
Here are some pics of the process. My originals were is truly terrible shape!
it occurs to me that the coupe has a 3 speed a/t whereas my porsches and audi have a 7 speed and an 8 speed with paddle shifters, so it became more important to know where you were. the PRND was in small lights, but i rarely look at them. with paddles and manual shifting an a/t, i really like knowing what gear i'm in.That's a super cool idea. You could use the warning lights and just mark them PRND, and then wire up the lights to the same signals that run the dash mounted indicator..
The shrouds for the warning lights are just simple plastic with colored lenses glued in. Easy to take out the lenses and put in custom ones. Could probably just use frosted plastic and lettering transfers to make the indicator lenses.
That re-covering looks great. Did they paint the metal or reflock it?Based on the photos CK sent me, they did much as you, in terms of gluing and clamping the foam back in place. However they then filled any cracks and simply re-covered the pieces with black vinyl, so they ended up looking new. If you have cracks and such in those foam pieces, you will never be able to repair them and have them look right, but you can repair them and then re-cover them.
Here are some pics of the process. My originals were is truly terrible shape!
Not sure. I suspect they re-flocked it since they tend toward the concours end of things.That re-covering looks great. Did they paint the metal or reflock it?