You are using an out of date browser. It may not display this or other websites correctly.
You should upgrade or use an alternative browser.
You should upgrade or use an alternative browser.
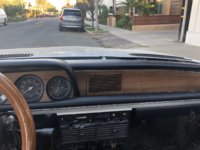
Wood veneer replacement
- Thread starter Rex Kapriellian
- Start date
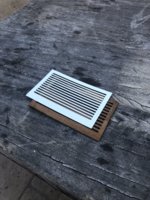
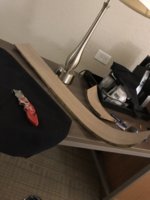
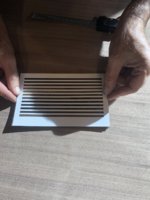
It is hard to tell from the pic - bit is the veneer folding/kinking around the tight radiused edge? Steaming the veneer and working it around a mold (or possibly the actual part) will help to prevent damage to the wood fibers. I love the straight grain of your veneer.Wrought cut
")
Rex Kapriellian
Well-Known Member
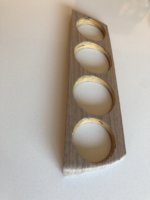
This was the second take, the first one buckled around the corner, and the fibers did give in other areas. Light sanding will make the curve smooth.It is hard to tell from the pic - bit is the veneer folding/kinking around the tight radiused edge? Steaming the veneer and working it around a mold (or possibly the actual part) will help to prevent damage to the wood fibers. I love the straight grain of your veneer.
My espresso machine was working overtime with steam to get this turn.
Attachments
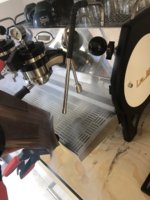
Ha ha - sounds delicious!!!My espresso machine was working overtime with steam to get this turn.
Must be Italian, not French walnut...Very clever, Rex!
Rex Kapriellian
Well-Known Member
Rex Kapriellian
Well-Known Member
#McGiverMust be Italian, not French walnut...Very clever, Rex!
Honolulu
Well-Known Member
Rex, Dave V, others:
Speak to the clueless masses! (please)
How did you got your veneer to conform to 3-D curves such as the upper edge/corners of the instrument cluster? I can imagine cutting the veneer to overlap, then sticking it on and sanding the result, am I on the right track?
Did you used backed veneer or unbacked? Any preference? I see BFeng prefers unbacked but does not say why.
How did you stick the veneer to the substrate, using glue or another mystical process? Hide glue, contact cement, polyurethane, epoxy, other?
I suppose going online to learn about veneer application would answer these questions, but I want to know from someone apparently successful in real time.
Thanks
Rex Kapriellian
Well-Known Member
Honolulu, I ran into the same problem. Simple things like the species of wood to where to source them.Rex, Dave V, others:
Speak to the clueless masses! (please)
How did you got your veneer to conform to 3-D curves such as the upper edge/corners of the instrument cluster? I can imagine cutting the veneer to overlap, then sticking it on and sanding the result, am I on the right track?
Did you used backed veneer or unbacked? Any preference? I see BFeng prefers unbacked but does not say why.
How did you stick the veneer to the substrate, using glue or another mystical process? Hide glue, contact cement, polyurethane, epoxy, other?
I suppose going online to learn about veneer application would answer these questions, but I want to know from someone apparently successful in real time.
Thanks
I can only speak to my method, the “Getrrrdone”
1) source out paper backed walnut veneer locally 2 by 8 feet will run you 50 US dollars
2)pick up a few 1 inch disposable brushes from Home Depot, contact cement 6 ratcheting plastic clamps, 2 of with c clamp type. 2 inch tape. A utility knife with bunch of new blades, and drywall knifes 2 and 4 inch dremel tool helps.
3) if your veneer is crusty like mine, you maybe able to peel the old veneer. If not, grind away.
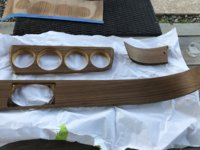
4) cut out sheet to overlap about an inch on each edge.
5)apply contact cement on both surfaces, let it dry. Re activate the glue by applying another coat on the sub surface. Press, clamp together.
6)let dry
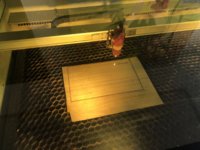
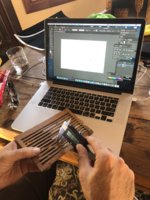
7)trim away with utility knife, free hand works fine using the sub as a guide, take your time, SLICE away. Dremel to precut the guage cutouts, and finish with a sharp blade, sand away smooth.
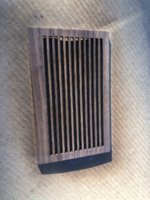
2)scotchbrite the surface and apply finish, I opted for the spray on type, satin finish
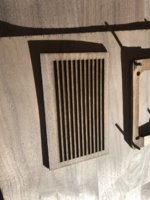
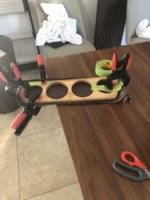
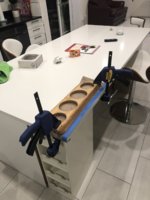
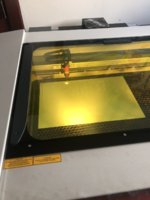
Ohh the complex contoor.....I used steam, lots of steam. But make sure to steam/wet the complete piece so it dries up (water stains)evenly.
Use the guage sub as contour guide, clamp the veneer, work the curve slowely till it conforms, clamp it together and let it dry overnight.
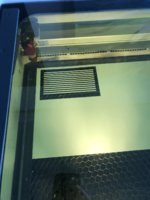
P.S. the upper corners veneer is trimmed out from the factory, you just don’t see them with the dash on.
Attachments
Rex Kapriellian
Well-Known Member

Honolulu
Well-Known Member
Thanks Rex. I'm also a big fan of getrrrdone, or whateverworks, if you will. A BFH is handy too when the opportunity presents.
I have a good deal of koa (Hawaiian hardwood with a nice flame grain in the better pieces). Looks like the instrument cluster wood could be made from a straight section, from solid rather than plywood. Hmmmm, that would obviate having to glue veneer on complex surfaces. I also think about vacuum bagging sometimes, that method is used in composite construction a good deal (surfboards, FRP boats, kayaks, and the like). Hmmm a business opportunity perhaps. I reach my SocSec full retirement age in nine days...
I have a good deal of koa (Hawaiian hardwood with a nice flame grain in the better pieces). Looks like the instrument cluster wood could be made from a straight section, from solid rather than plywood. Hmmmm, that would obviate having to glue veneer on complex surfaces. I also think about vacuum bagging sometimes, that method is used in composite construction a good deal (surfboards, FRP boats, kayaks, and the like). Hmmm a business opportunity perhaps. I reach my SocSec full retirement age in nine days...
Hi Charlie. I have been getting ready to reproduce the complete wood needed in a 2000cs and E9 in solid walnut. I have decided on this since my son used solid walnut on his wood pieces and they came out fantastic.
I should have a set ready before the end of the year as long as my health holds out.
I should have a set ready before the end of the year as long as my health holds out.
You can find many different veneers on Ebay. I just looked for french or english walnut and did not find any right now. This veneer is leftovers from the veneer mills in Indiana and other areas.
You can frequently find 9-10 11" wide pieces 8 and 10 ft long.
This is where I got the Etimoe I used for my dash. The prices are very reasonable.
You can frequently find 9-10 11" wide pieces 8 and 10 ft long.
This is where I got the Etimoe I used for my dash. The prices are very reasonable.
Rex Kapriellian
Well-Known Member
Rex Kapriellian
Well-Known Member
Rex Kapriellian
Well-Known Member

Rex Kapriellian
Well-Known Member
Close enough