73 POLARIS E3 BUILD...Slowly..

the wheel wells are a great question. i didn't paint mine, but the fronts are going to have lokari liners ... and i've been thinking of having them painted ceylon ... just not cut / buffed. then sooner or later, i will have to do something with the rears - they will probably be gray undercoat as you can't see too much inside anyway.
 
I say go for the red. You can always paint them black later even with spray paint, since you’d be doing matte black. Red will be hard to do in the future so do it now. Or do a test one and mount a tire to see how it goes. My car is Polaris and painted them silver, I prefer how it looks rather than the black
 
I say go for the red. You can always paint them black later even with spray paint, since you’d be doing matte black. Red will be hard to do in the future so do it now. Or do a test one and mount a tire to see how it goes. My car is Polaris and painted them silver, I prefer how it looks rather than the black
Yeah, I think the plan will be to do the whole underside in a light gray chip guard and then shoot the wells red. Touch up gun should make it quick and easy. I picked up another quart of paint to redo the hood and trunk, so I might be good for material.
 
There’s the Wurth stone guard and the SEM dark gray high solids spray is actually a very medium gray and matches almost exactly to the stone guard. The stone guard shoots out a thick textured paint so you don’t want to do multiple coats of it, it just gets gloopy. I laid down a layer of that and then used the SEM dark gray as touch up and to try to create an even coloring. I know that the very original was khaki and on my car I could see some areas of khaki but those were mainly in places that hadn’t gotten any stoneguard layer.
 
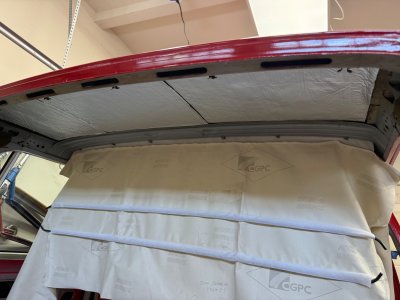
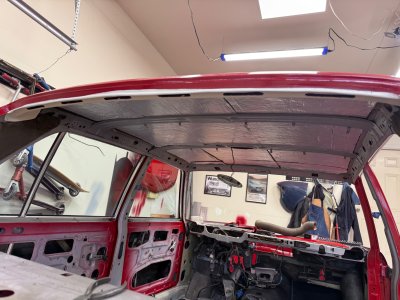
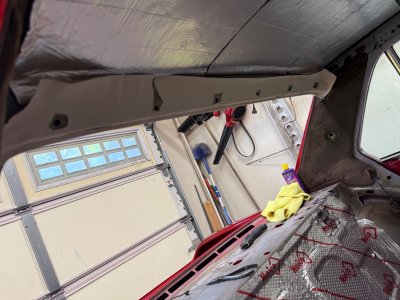
Prepping for headliner..e3 has a board that mounts at the back that clips into the roof above the rear windshield and has the headliner wrap around it to secure it. My board is in pretty decent shape, but the clip holes are worn and a few cracks left me concerned. I had enough glass fiber cloth and resin to put a layer down for strengthening the overall shape…one more job on the massive list! Should be good until after I'm gone..
IMG_2177.jpeg
IMG_2178.jpeg
IMG_2179.jpeg
IMG_2180.jpeg
 
Not sure why I started tackling this tonight. While I wait for parts, I just jump from one task to another..a tiny bit ADHD here..
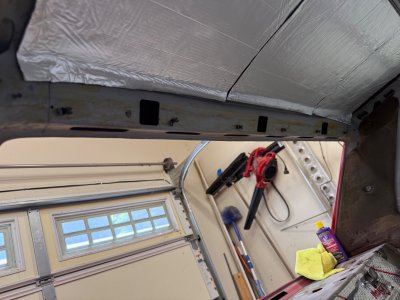
I still need to replace the foam at the ‘kink’ panels and put the separate headliner piece in at the rear roof edge vents before the newly strengthened panel gets installed. The panel sits with a gap for the air vents, so it needs a little swath of fabric there to look pretty. I’ll try to show pics of that process if anyone else is doing their headliner. It’s definitely a more complicated install than the handful I’ve done on other old euro cars, but not too bad. I’ll need some heat and stretching to hopefully remove all wrinkles.
IMG_2181.jpeg
 
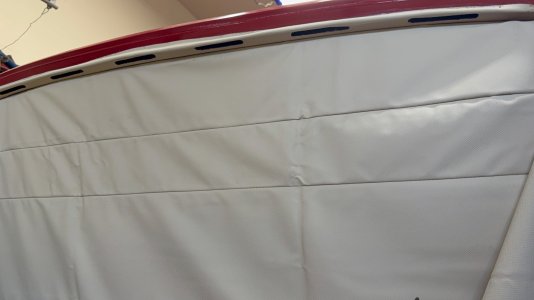
Had to pull it back down to glue in the separate piece and glue the headliner to the floating panel in the back. Different process than an 02 and a triumph herald..but similar enough. You can see in these pics that there’s a series of vents along the rear ceiling area. These are covered by a separate piece of fabric and the holes cut out. Next pics show the inside of that area and that’s where the floating panel attaches. Real PITA with ‘Van Halen’ clips…(you’ll see why later..lol).
Loose piece installed and lightly cleaned up the holes.
 

Attachments

  • IMG_2183.jpeg
    IMG_2183.jpeg
    391.3 KB · Views: 21
  • IMG_2184.jpeg
    IMG_2184.jpeg
    413.3 KB · Views: 18
  • IMG_2188.jpeg
    IMG_2188.jpeg
    496.1 KB · Views: 18
  • IMG_2189.jpeg
    IMG_2189.jpeg
    501.8 KB · Views: 20
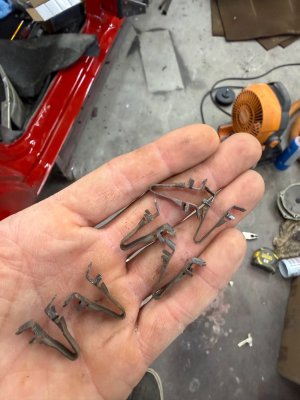
They look like little Van Halen symbols, right? Don’t lose those..they are a pain to get into the holes of the board.
Next pic shows that board that I wrapped with the lead edge of the headliner and popped into place. There are also two tiny screws, one in each corner, that help hold the panel. You can see that the vents will be barely visible once everything is put back together, but it’s there!

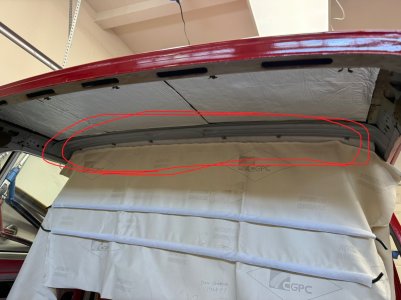
In the pic with the red circle, you see that in addition to the standard bows that insert into the sides, you also have to bars that are secured with metal tabs. One aft of the middle and the other just forward of it. These effectively allow you to tension the headliner and secure it at that point to be able to move forward without trying to tension the whole distance..(like in an 02).

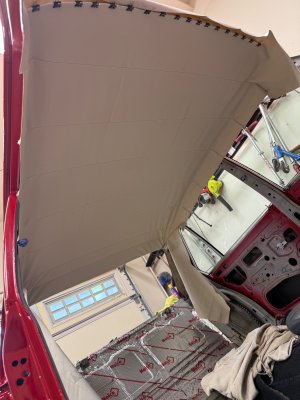
I now have it lightly pulled to the front in preparation for starting the pull and clip of the sides. After I get all the clips on (filling in all the gaps with clips) and the fabric is nice and tight, I’ll start pulling of a handful of clips to brush in contact cement and reclip it. You don’t let the cement set up, instead letting it take a few days to cure on its own. This allows you to pull and adjust as you work your way from the front to the sides.
 

Attachments

  • IMG_2190.jpeg
    IMG_2190.jpeg
    438.7 KB · Views: 19
  • IMG_2191.jpeg
    IMG_2191.jpeg
    359.5 KB · Views: 18
  • IMG_2192.jpeg
    IMG_2192.jpeg
    435 KB · Views: 18
  • IMG_2183.jpeg
    IMG_2183.jpeg
    420.8 KB · Views: 20
Do we have source for these words? A rub off something? I’d love to repaint this but I really don’t want to lose the original font/look for something cheesy..
1786565363836.jpeg
 
Do we have source for these words? A rub off something? I’d love to repaint this but I really don’t want to lose the original font/look for something cheesy..View attachment 224359
@m73 (Mo Faraz) offers those:

 
@m73 (Mo Faraz) offers those:

Thanks! I looked at his website earlier but didn’t find these. I’ll reach out. Thanks for that link.
 
  • Like
Reactions: Dlc
Back
Top