I did take lots of photos of the dash removal and the window removal and door disassembly. I am pretty familiar with the M30 family of engines, so I just labeled the various wires and bagged and labeled the parts. Every part will either be renovated or replaced, so the cataloging is really just for reference.I so hope you are taking many, many photos of every step here. Of each connection, angle, orientation. Makes replacing everything seem so much simpler, I mean, quicker. Enjoying your thread. Great work!
You are using an out of date browser. It may not display this or other websites correctly.
You should upgrade or use an alternative browser.
You should upgrade or use an alternative browser.
72 3.0 CS 2240344 Restoration
- Thread starter ScottAndrews
- Start date
-
- Tags
- restoration list
Anyone who looks through my camera roll would think I have an unhealthy obsession with mechanical parts. Nonetheless I still anticipate asking quite a few questions as I reassemble. Part of the issue is that any upgrades mean my photos don’t quite apply. I’ve spent the last week figuring out how to make my e28-style PS pump fit onto the engine, turns out I needed a new alternator support bracket and alternator mount. The e28-style alternator is supported from below with the adjustment tension bar above in contrast to the e9 style that is the opposite. Fun indeed but realoem saves the day.
“Once the engine is out, the rest is easy”
I certainly wish I could tell you that is true…yes, you have a lot of room, but the prep work takes some time! Sounds like you and I are in about the same boat. I have engine out and am almost done prepping to repaint the bay. Pulling wiring took a bit of time. Nothing overly challenging, just time-consuming.
Yeah, that's what I was expecting too, but SF Don convinced me to send the shell to his paint guy for floor board replacement, prep, subframe renovation and paint. I figure that will save me about 6+ months of time in exchange for X hours of paying work. So I am going to finish my rocker renovation, and deliver them an empty rolling shell that is basically cleaned. They will pull the subframes and strip the bottom, replace the front floors, attach the fender and quarter panel patch panels, block the body (there are only about 3-4 small dings in the body), do the prep and paint, and do undercoating. They will also powder coat the subframes and put them back in. So, when I get it back It will basically be a clean painted car that I can then reassemble.It took me weeks to clean the engine bay to the point of being ready for paint.
I have a full Carl Nelson suspension package on the shelf, so I'll probably pull off the newly coated subframes and re-install with all that new equipment (bushings, shocks, springs, camber plates, sway bars, etc.
Sending the interior and dash to LA for re-covering (My Scheel seats are already down there) later this week.
While it is at paint I plan to renovate the wire harness, and all the various trim bits, AC system heater, gauges, etc.
I KNEW there was a reason my E-12 based 635 alternator was easier to work with.. It has the pivot below and the adjustment on top...so it is not just the E28 that improved on that crazy approach!Anyone who looks through my camera roll would think I have an unhealthy obsession with mechanical parts. Nonetheless I still anticipate asking quite a few questions as I reassemble. Part of the issue is that any upgrades mean my photos don’t quite apply. I’ve spent the last week figuring out how to make my e28-style PS pump fit onto the engine, turns out I needed a new alternator support bracket and alternator mount. The e28-style alternator is supported from below with the adjustment tension bar above in contrast to the e9 style that is the opposite. Fun indeed but realoem saves the day.
So given my new plan wherein @sfdon has roped (ROPED!!!) me into having the bodywork and paint done in Berkeley, I can see that once I strip the car and trailer it to Berkeley, and send my interior bits off to join my Scheel seats for rework and leather in LA (road trip this week), I will have a more or less empty shop..
No! I am not going to buy another car restoration project (unless a Lotus Cortina or Alfa GTV pass my way! )
)
I am going to focus my attention on renovating all the other parts. Some will be replaced, and some simply rebuilt and re-finished. Pondering all that aluminum trim currently sitting on the trunk, and I know I have several window mechanisms to rebuild...The diff to rebuild/re-gear, the Getrag 265 swap, etc...
Top of my current list is the shift console. Mine is absolute toast. The main body is all de-laminated at the aft end (to the point where there is no wood between the back end and the shift boot), and the little curved back piece is not far behind. When I took this out, it basically fell apart in my hands, held together only by cracked old vinyl.
The part is deceptively complex, with a slightly curved top, bottom, and rear, and small rounded ridges that define the space where the aluminum window switch trim goes.
I am assuming the curve is part of the design. Seems intentional. Not so clear if the curve on the bottom is necessary... Anyone have any thoughts on this?
I have discussed this with a couple of forum members, but it seems the folks doing the restoration all need a core.
I suppose one way to reproduce this would be to mill it out of wood (which is what is looks like was done originally). Another would be to steam bent a piece of plywood (easier said than done), and apply the raised beads after the fact. However, it seems to easiest way to do this today would be to 3D print the core and then cover it with vinyl.
The curved top and bottom, and the overhanging sides make this somewhat complex. I think I may try modeling this in Fusion360 using two halves. A top piece with a flat bottom, and a bottom piece with a flat top (unless the bottom can be flat). I can then glue these together to create the overall core.
Anyone have any thoughts on this?
Here is a purely notional sketch of the build...

No! I am not going to buy another car restoration project (unless a Lotus Cortina or Alfa GTV pass my way!
)I am going to focus my attention on renovating all the other parts. Some will be replaced, and some simply rebuilt and re-finished. Pondering all that aluminum trim currently sitting on the trunk, and I know I have several window mechanisms to rebuild...The diff to rebuild/re-gear, the Getrag 265 swap, etc...
Top of my current list is the shift console. Mine is absolute toast. The main body is all de-laminated at the aft end (to the point where there is no wood between the back end and the shift boot), and the little curved back piece is not far behind. When I took this out, it basically fell apart in my hands, held together only by cracked old vinyl.
The part is deceptively complex, with a slightly curved top, bottom, and rear, and small rounded ridges that define the space where the aluminum window switch trim goes.
I am assuming the curve is part of the design. Seems intentional. Not so clear if the curve on the bottom is necessary... Anyone have any thoughts on this?
I have discussed this with a couple of forum members, but it seems the folks doing the restoration all need a core.
I suppose one way to reproduce this would be to mill it out of wood (which is what is looks like was done originally). Another would be to steam bent a piece of plywood (easier said than done), and apply the raised beads after the fact. However, it seems to easiest way to do this today would be to 3D print the core and then cover it with vinyl.
The curved top and bottom, and the overhanging sides make this somewhat complex. I think I may try modeling this in Fusion360 using two halves. A top piece with a flat bottom, and a bottom piece with a flat top (unless the bottom can be flat). I can then glue these together to create the overall core.
Anyone have any thoughts on this?
Here is a purely notional sketch of the build...
Last edited:
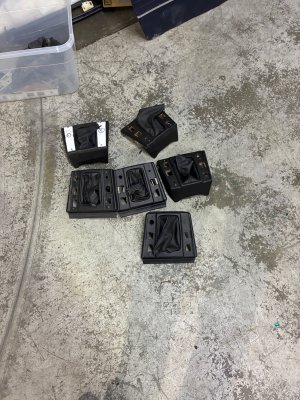
I have 5 restored cores at shop. Need a pic?
I had purchased some vinyl (for non-AC car) from another forum member in order to redo the vinyl on mine. It wasn’t as bad as yours, but the guy I brought it to asked instead if he could just refresh/renew the current vinyl rather than stripping it and trying to put the new vinyl on. His main concern was that front raised ridge, he wondered if that had been vacuum/heat applied originally and was worried that the vinyl sheet wouldn’t adhere with the same level of detail.
One option would be purchasing a new console from CS-werk. Not cheap but then you know it’s done and can spend time on other parts. If you want the vinyl sheets I still have them, they are sewn along the curve so that they get pulled onto the plywood core. I can send photos.
The aluminum strip along the console I refreshed using some silver vinyl tape that looks like aluminum. It lays down nicely and is indistinguishable from the original. Cheap enough from Amazon
i wrapped the console shift platform with black leather. it worked great - just applied it with a strong spray adhesive, stretched it to fit and clamped it down.
Yes please!I have 5 restored cores at shop. Need a pic?
CS Werk said they need a rebuildable core.I had purchased some vinyl (for non-AC car) from another forum member in order to redo the vinyl on mine. It wasn’t as bad as yours, but the guy I brought it to asked instead if he could just refresh/renew the current vinyl rather than stripping it and trying to put the new vinyl on. His main concern was that front raised ridge, he wondered if that had been vacuum/heat applied originally and was worried that the vinyl sheet wouldn’t adhere with the same level of detail.
One option would be purchasing a new console from CS-werk. Not cheap but then you know it’s done and can spend time on other parts. If you want the vinyl sheets I still have them, they are sewn along the curve so that they get pulled onto the plywood core. I can send photos.
The aluminum strip along the console I refreshed using some silver vinyl tape that looks like aluminum. It lays down nicely and is indistinguishable from the original. Cheap enough from Amazon
My aluminum strips are actually in good condition. I was able to remove them. The wood core is the issue.
The vinyl appears to have been stretched and glued very well to the wood. I suspect they used some sort of thermal press or something. I like @rsporsche idea of covering it in leather. Might better match the console sides then.
Am I correct that the console has a slightly convex top? Does it matter if the bottom is concave?

now if somebody is really ambitious, they would 3d print new ones and create a cottage industry
I'm working on it!!now if somebody is really ambitious, they would 3d print new ones and create a cottage industry
Had to work out how to get the bi-directional curve. Turned out I was able to make the console as a block with a flat top, and then "extrude" negative space along a curved path. So, sort of digital sculpting...
My next step will be to go back and change the profile of the extrusion to create the two troughs that the switch panels sit in, and get rid of that little flat artifact at the back end. And then do a second extrusion along a straight line to get the bottoms of those troughs flat.
I also have to work out how to get the sloped front and rear edges..
Punching the holes and recesses is easy.
Stay tuned...
Getting there!
Need to fix the outboard ridge, get the slope on the front, and the cutout for the curved piece in the back. The corner curves for the shift boot are not quite tight enough.


Need to fix the outboard ridge, get the slope on the front, and the cutout for the curved piece in the back. The corner curves for the shift boot are not quite tight enough.
Last edited:
OK. That's better! Need to figure out how to do the sloped front edge and the rabbet on the back end. Seems easy enough.

Looking awesome - impressed with your 3d skills
don't forget that there are some things that have to be shaped on the bottom as well - especially to mount the brackets.
Yeah, there is a recess in the second window switch holes for the brackets, the slope at the front, the cutout for the wiper switch and the rabbet for the rear panel, and holes for the aluminum trimsdon't forget that there are some things that have to be shaped on the bottom as well - especially to mount the brackets.