Window regulator speed

D Calkins

Well-Known Member
Site Donor
Messages
230
Reaction score
62
Location
Royal Oak, Mi & Montgomery TX
I installed the new motor but was very disappointed with the speed. Even if I cleaned all the old grease out of the tracks this will not be an improvement. Then I understand bolted the motor and retested and it is significantly faster. How do I lubricate this window regulator?
 

Attachments

  • 20260812_150346.jpg
    20260812_150346.jpg
    108.7 KB · Views: 49
Lubricating the track will not solve the slowness unless the steel wheels with ball bearings are cleaned first. With clamps to hold the glass up I removed the lifting arm, unbolted the bracket on the glass and then unbolted the rear track itself and pulled it up. Mark the lower mounting bolts first to help align later. Soaking in gasoline did wonders. I use a small amount of synthetic wheel bearing grease.

And when installing new e28 motors be sure one of the bolts isn’t too long or it will interfere.
 
This assembly is on my bench; something is binding in the regulator. The ball bearings have been cleaned and regreased.

I have removed the bolts except for the last thread and it is still very slow. Has anyone removed and successfully reinstalled the window regulator assist spring?
 
Last edited:
This is a long shot....
Does your new motor have the same number of teeth on the gear as your old one? There are at least 2 sizes out there.
 
See Thomas76'S note above. My motors (and all E9s??) have 8 teeth. Some very similar motors from Porsche and MB have 10 and on ebay they look like our motors so...
 
Last edited:
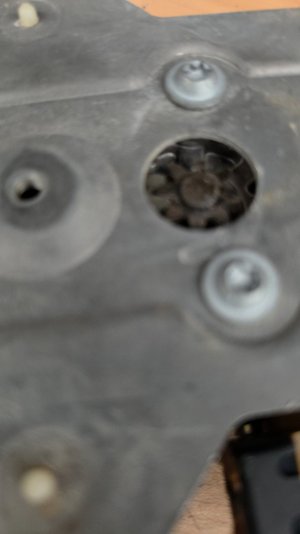
The picture in the original post appears to show an 8-tooth motor.
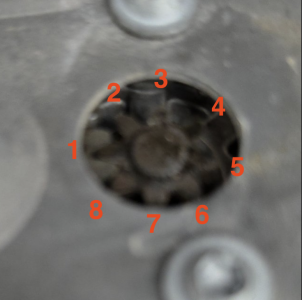
Screenshot 2026-08-13 at 5.00.22 PM.png

@D Calkins, Perhaps you can take a short video showing your test setup and demonstrate the slow movement. At the very least, define more explicitly exactly what steps you've taken, what parts you are using, etc.

There are a few questions to which we're left to infer the answers; clear answers will help us help you.

I installed the new motor
1. "The new motor" = factory E9 motor, or did you upgrade to a new E28 rear window motor? Is it brand new, or new to you? Your '74 will have visually similar motors to the E28, and they spin quickly unladen, but they are dog-slow once installed—even when the regulator & window carrier track/sled are pristine clean and greased. The biggest tell is that the E28 motors are riveted together, whereas the back case of the 74 E9 motor can be unscrewed to clean & grease the gears.

2. When you experience slow movement, is that when fully assembled with the glass, window tracks & sleds, etc, or are you bench testing with just the motor and regulator?

3. What power supply are you using to test the regulator assembly? Car power or suitable bench supply?

 
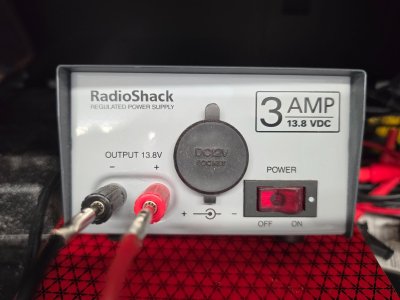
Sorry, these are the E28 rear motors. Yes, they have eight teeth. My bench power supply is a Radio shack 12v power supply. I tried to post a video but was unsuccessful. The loose motor is 4x faster that when the motor & window regulator are assembled.
 
Are the motors brand new, or used units?

What is the current rating of your power supply? It’s possible that it can’t provide enough current to turn the motor as quick as you’d expect under load on your bench. Worn brushes, corroded contacts, or insufficient test leads can also lead to a diminished torque potential of the motor.

You will probably have more luck uploading the video to YouTube first, then posting the link here.
 
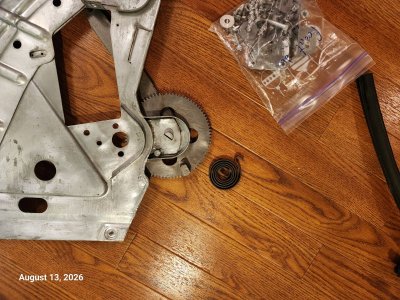
I now see, from your picture, that you’re working on a front window regulator. So you’ve got it on the test bench. Once removed, the regulator-arm with large gear and motor mounting plate is detached from the ball bearing bracket and tracks that bolt separately into the car door. So if in your bench test the “far end” of the regulator-arm is not pushing a window around the only drag on the arm is its pivot point and the spring (in one direction). I think you said that you can manually move the regulator arm when the spring and motor are removed – that is good and necessary. So why does the new motor only slowly move the unloaded regulator-arm on the bench? My guess - 1) your power supply may not have enough current – try a car battery with in-line fuse or 2) the slowness you perceive is in the downward direction, against the spring force, which normally has benefit of a heavy glass weight pushing down to help the motor.

I have not done your test but maybe you don’t have a problem and it’s only in your set up. Remove the spring and if your motor can swing the regulator arm up and down equally fast then there is no binding. Good luck.
 
Looking at my notes here... When I restored my window regulator, the stock motor installed on the regulator (no glass, no window track sled) drew between 4-5a throughout the range of motion during bench testing.

My results would suggest that a 3a power supply is not sufficient to evaluate actual motor speed under load. As @coupesport suggested, this can be confirmed by using a pair of fused and sufficiently-sized leads from the motor directly to a 12v car battery.
 
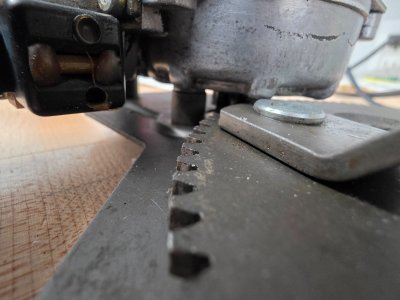
If you can physically observe the fouling between the motor and the regulator, why not fix that before troubleshooting further?

A few seconds with a file should take down the edge of that protruding boss.
 
So just to make sure we are understanding:
1. Motor spins on its own as we see when powered
2. You can move the arm freely with no motor attached, ie it’s not hanging up anywhere or stuck and needs lubrication? I found that it was possible to have the arm “overextended” after I took it apart, in which case the motor couldn’t actually have the arm swing through its usual arc.
3. If number 1 and 2 are correct above, when you attach motor it no longer works? I concur that one of the bolts may be blocking the movement. It’s hard to see what’s happening in the second video - is it moving partway and then stopping or just not moving at all?
4. For a lot of the testing you’re going to be doing, I found it easiest to build a little battery box - I had a 12V lantern battery that I put into an ammo box, mounted some battery terminals and then used a testing device which I could clamp to various parts/pieces/wires and would show continuity and would allow both positive and negative flow (so you could test up and down here)

 
Back
Top