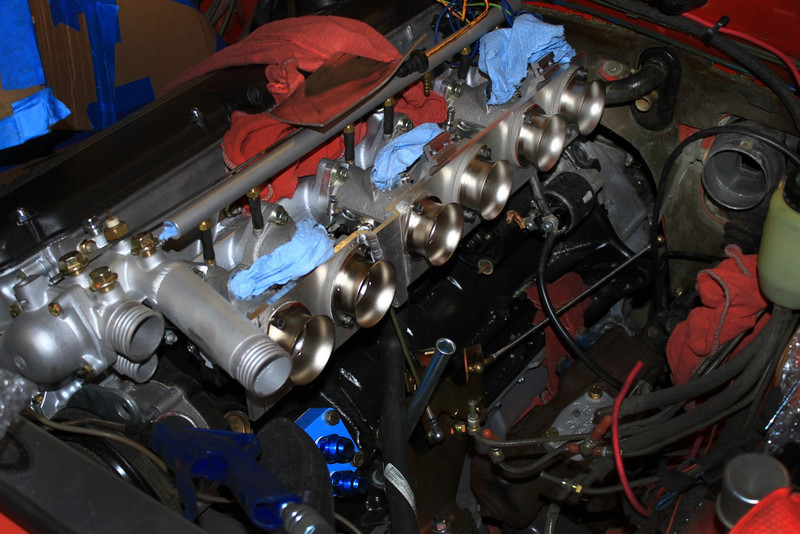
I had a phone conversation about the throttle issue with Ben T., as I pass by his Chicago shop often, and then took the car there a few days later. What we learned on close inspection was that two issues were present: 1. The movement of the throttle was too rapid for the throttle bodies and 2. The butterflies were wide open at only 80% of the accelerator travel. In order to shorten
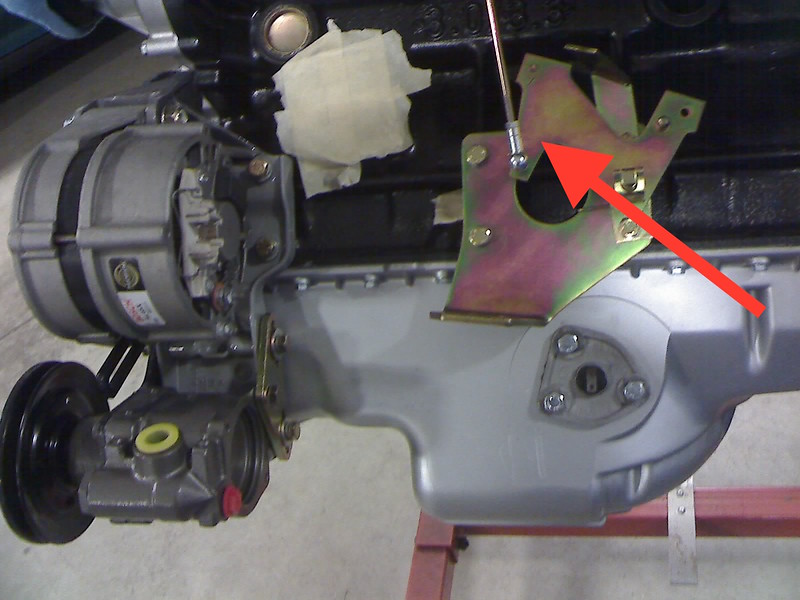
and slow the travel, Ben moved the upper throttle rod ball both upward, which reduced the maximum travel, and inward toward the fulcrum to slow the opening rate. the first try was a SWAG, but it worked beautifully for both issues. I can now accelerate out of a 90 degree corner after a downshift without jarring the driveline so I can actually relax while breaking it in.
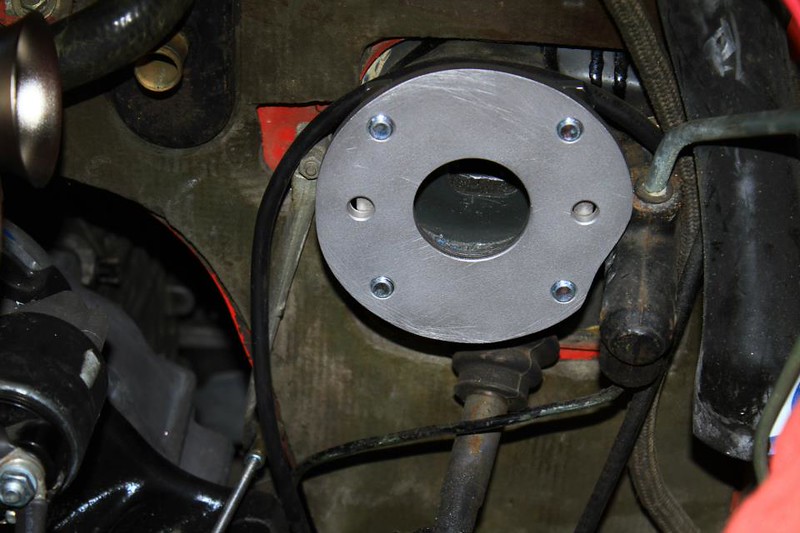
This is an approximation of the change. The horizontal rod from the pedal remain the same.
Within about three weeks it logs 500 miles so the break-in oil is drained and replaced with 20/50 Brad Penn. It had somehow escaped me that with the new ignition system I would not have an operational tach, but an order from Electromotive for an adapter and an hour or so of installation remedies the oversight. Other than that no issues have arisen. Other than adjusting the valves at the oil change and replaced the 75C thermostat with an 80 because it ran so cool with its new radiator, the only tasks I'm performing is to tidy up the under hood wiring. The engine is running great and, very unlike when it was carbureted, it starts almost instantly whether warm or cold and without any throttle input. Acceleration is very lineal and the sound has changed from mostly mechanical to a great combination of mechanical & intake. It's reminiscent to that of my departed e28 M5 and invites bursts of throttle just to enjoy the music.
The initial ECU set-up, which is still in place today, uses manifold absolute pressure (MAP) readings from a sensor mounted to the air box for fuel metering as well as adjustments to ignition advance/retard. Although this configuration works quite well in the flatlands of the midwest and even the modest altitudes of the Carolinas, it can become very confused with more extreme air density changes occurring above ~3500ft. For that reason, and because we wish to be able to drive the car on any and all continental adventures, I am going to change from MAP to a mass air sensor (MAF) which, in conjunction with an oxygen sensor (already installed) will alleviate the shortcomings of the MAP. I now have the MAF mounted on the air box but at this point it's simply acting as an intake tube as it isn't programmed.
NOTE: I am neither well versed nor technically savvy in the arena of electronic engine management. I'm on the learning curve but the incline is still sorta steep. I've been able to make some minor adjustments to the system with the laptop but they were based on specific instructions or my notes as opposed to having a comfortable understanding of what I was doing. I'm fortunate, however, in that I have had terrific assistance from the engine builder as well as the staff at Electromotive. To me, the beauty of the system is that once it's set up correctly, no changes or adjustments are required. I still think DCOEs are super cool and might actually miss the occasional points, condenser & timing routine but there's always the Farmall Super H if I have the urge to attack a distributor.
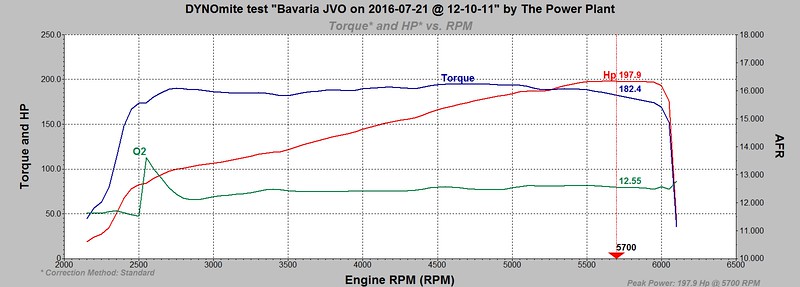
Here is the dyno result:
Figuring driveline loss the flywheel HP is about 240, a nice gain from stock, but I'm most pleased with the flat torque curve from about 2700 RPM all the way to 5500 and it's that which contributes most to the strong pull on acceleration or (especially) passing on a two lane which makes me smile every time. The numbers on the graph are all well and good but it's the real world feel of the car that's most important and I'm very happy with the end result.
The engine specs:
3.2 ltrs.
Forged 9.5:1 Wiseco pistons
Forged Crower rods
Dbilas 300 camshaft
Lightened and polished rocker arms
Dual valve springs
Cylinder head ported/polished & matched to manifold
TWM (now Borla) ITB
Bosch injectors
Crankfire ignition, Electromotive wasted spark coils
Stahl headers
Electromotive TEC gt ECU
Magnecor ignition wires
Lightened flywheel
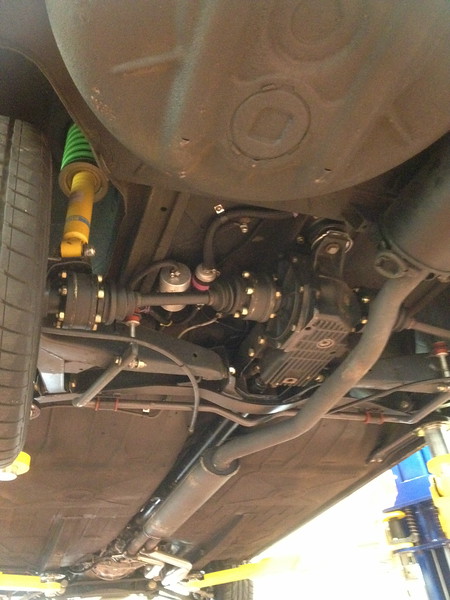
Chassis:
Powder coated front & rear subframes and associated components
New bushings throughout
New or rebuilt steering components
22mm front bar, 18mm adjustable rear
Bilstein HD shocks
Ireland Engineering springs
Five speed OD
Limited Slip Differential
So this will be the wrap-up (I hear sighs of relief) of my project recap. It began as a straight forward M30 engine rebuild and as often happens, morphed into far more than I had envisioned. As stated very early on and after dropping the engine out the bottom with its subframe, it made no sense to make a pretty engine and then bolt it back into that grungy subframe. And if doing the front one,...well, you get the idea. It was probably at that moment I realized this might take a bit longer than I had planned for but hey,...I'm retired and this is fun! In 46 years of BMW ownership I have seen and admired quite a number of what I considered to be well done performance enhanced street cars and here was my opportunity to (attempt to) do that for myself. I learned a fair amount by doing (or) observing, met some neat and very knowledgable people along the way and am enjoying the end product. My wife asked when it will be finished and my reply was "I hope never" which I guess describes my (likely yours as well) car affliction: I can't resist the CSI (constant state of improvement) mindset and I enjoy the process of
finding a solution. Since the engine project was completed I've changed front seats, added gauges to the console, modified the stock exhaust, re-routed wires, etc, all in the spirit of CSI and which can be covered in future postings to this forum. I'll attempt to do so in one sit down as opposed to this admittedly way too drawn out epistle.
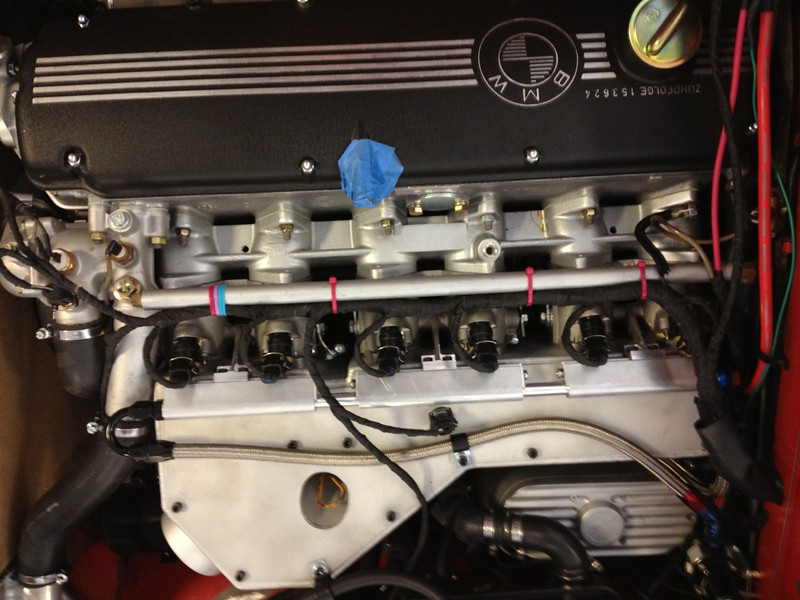
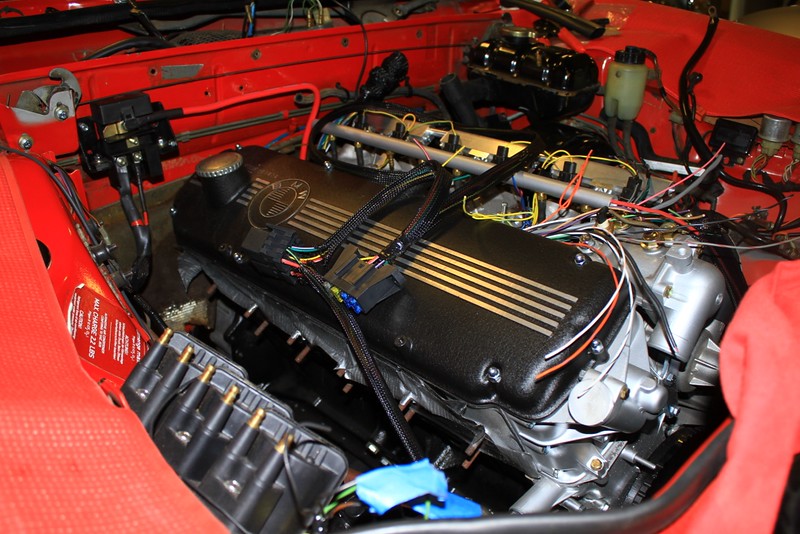
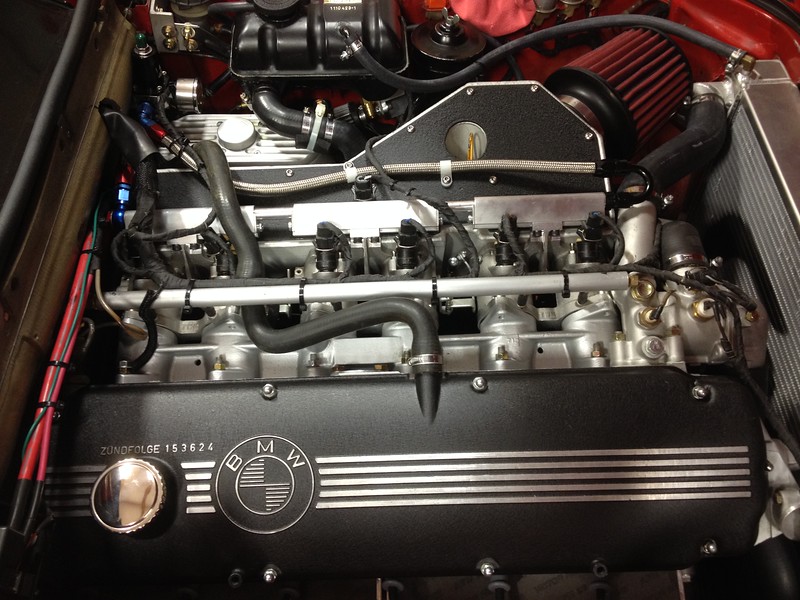
The (mostly) finished engine compartment.
I've since changed the circuitous breather tube to a positive catch system, re-routed the ignition wires through an E28 M5 loom, wrapped the red battery wires and shortened the overflow hose. Never done.
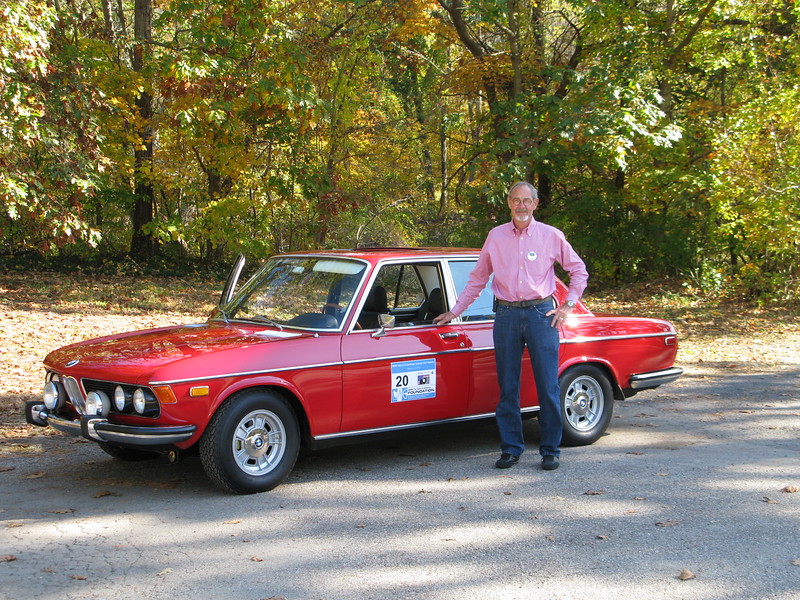
Upstate New Your Vintage tour
Cheers,
Jim
") Looks great!!
Looks great!!