Spectacular! Thanks for posting.
You are using an out of date browser. It may not display this or other websites correctly.
You should upgrade or use an alternative browser.
You should upgrade or use an alternative browser.
CSL Restoration
- Thread starter Marc-M
- Start date
-
- Tags
- restoration list
OK, now you've done it, I may have to quit working on cars since compared to your work my work is akin to putting lipstick on a pig.
Marc-M
Well-Known Member
After splitting the gearbox from the engine and taking the clutch plate off ready to attach the engine stand mounting plate, I was confronted with a badly mashed fly wheel and a cracked clutch pressure plate, but noting that can’t be sorted.
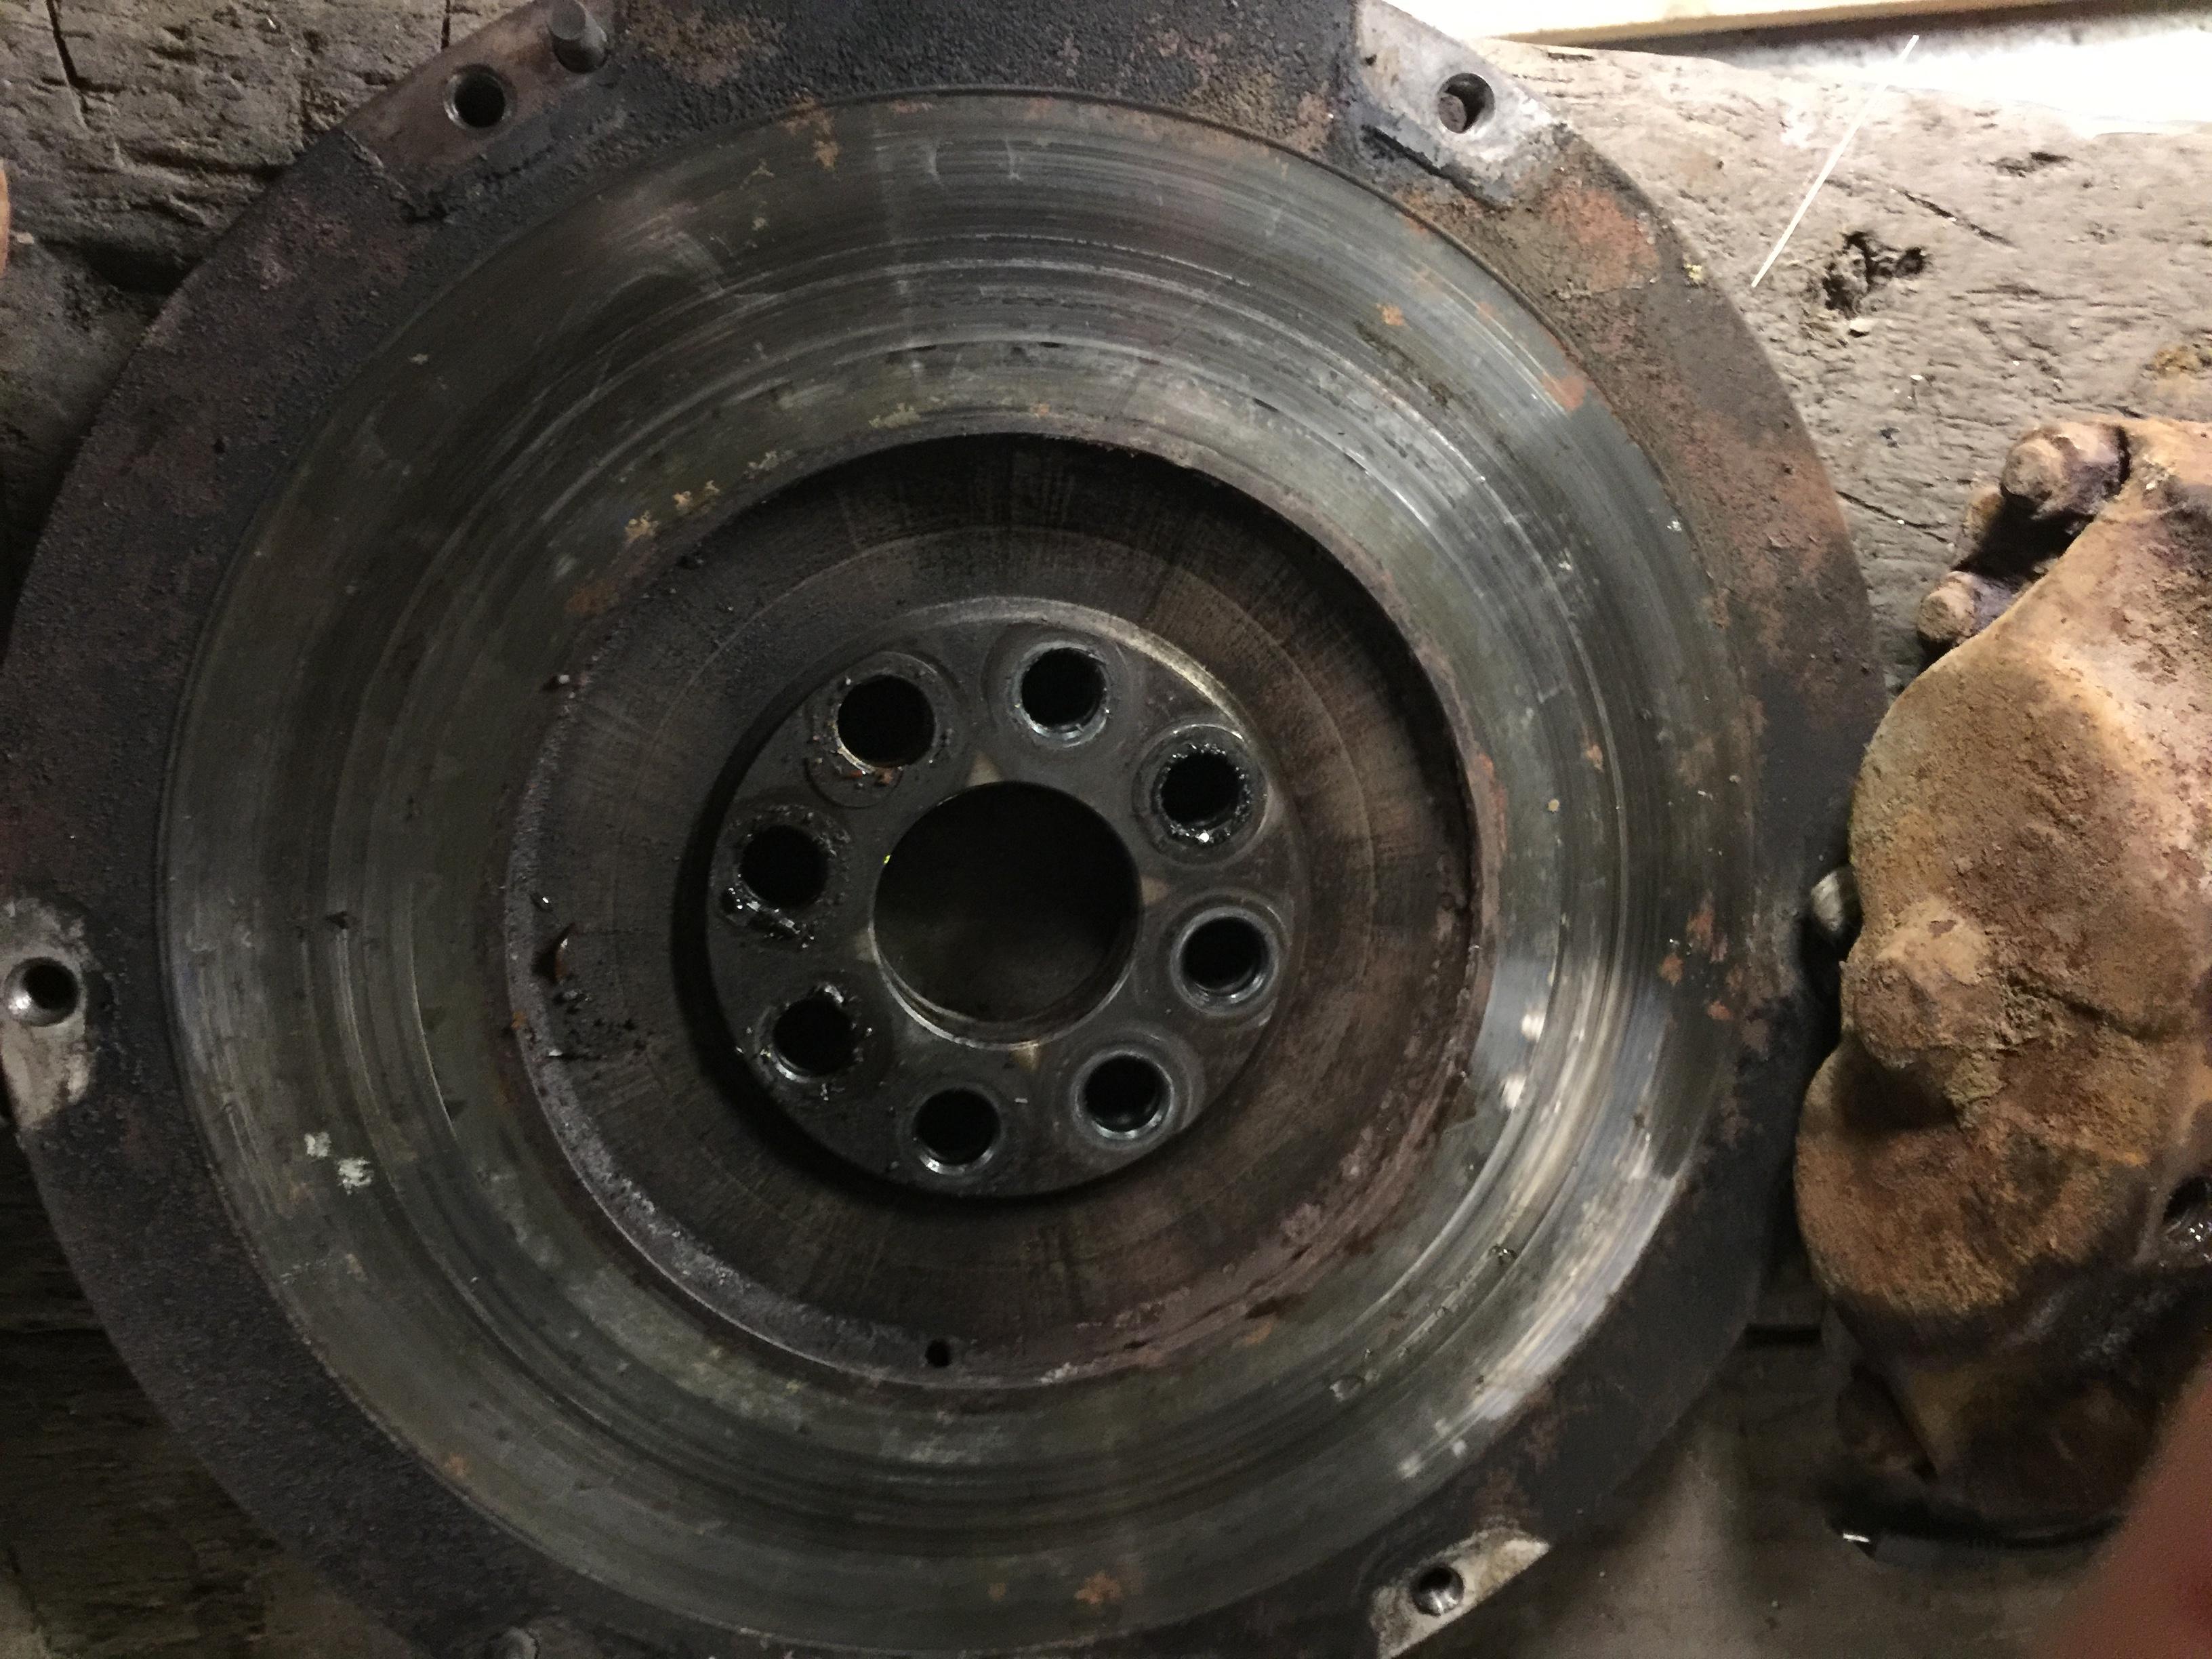
Mashed in fly - will need re facing - its quite light as it is...

Cracked clutch pressure plate
Lots to do here!
Mashed in fly - will need re facing - its quite light as it is...
Cracked clutch pressure plate
Lots to do here!
Marc-M
Well-Known Member
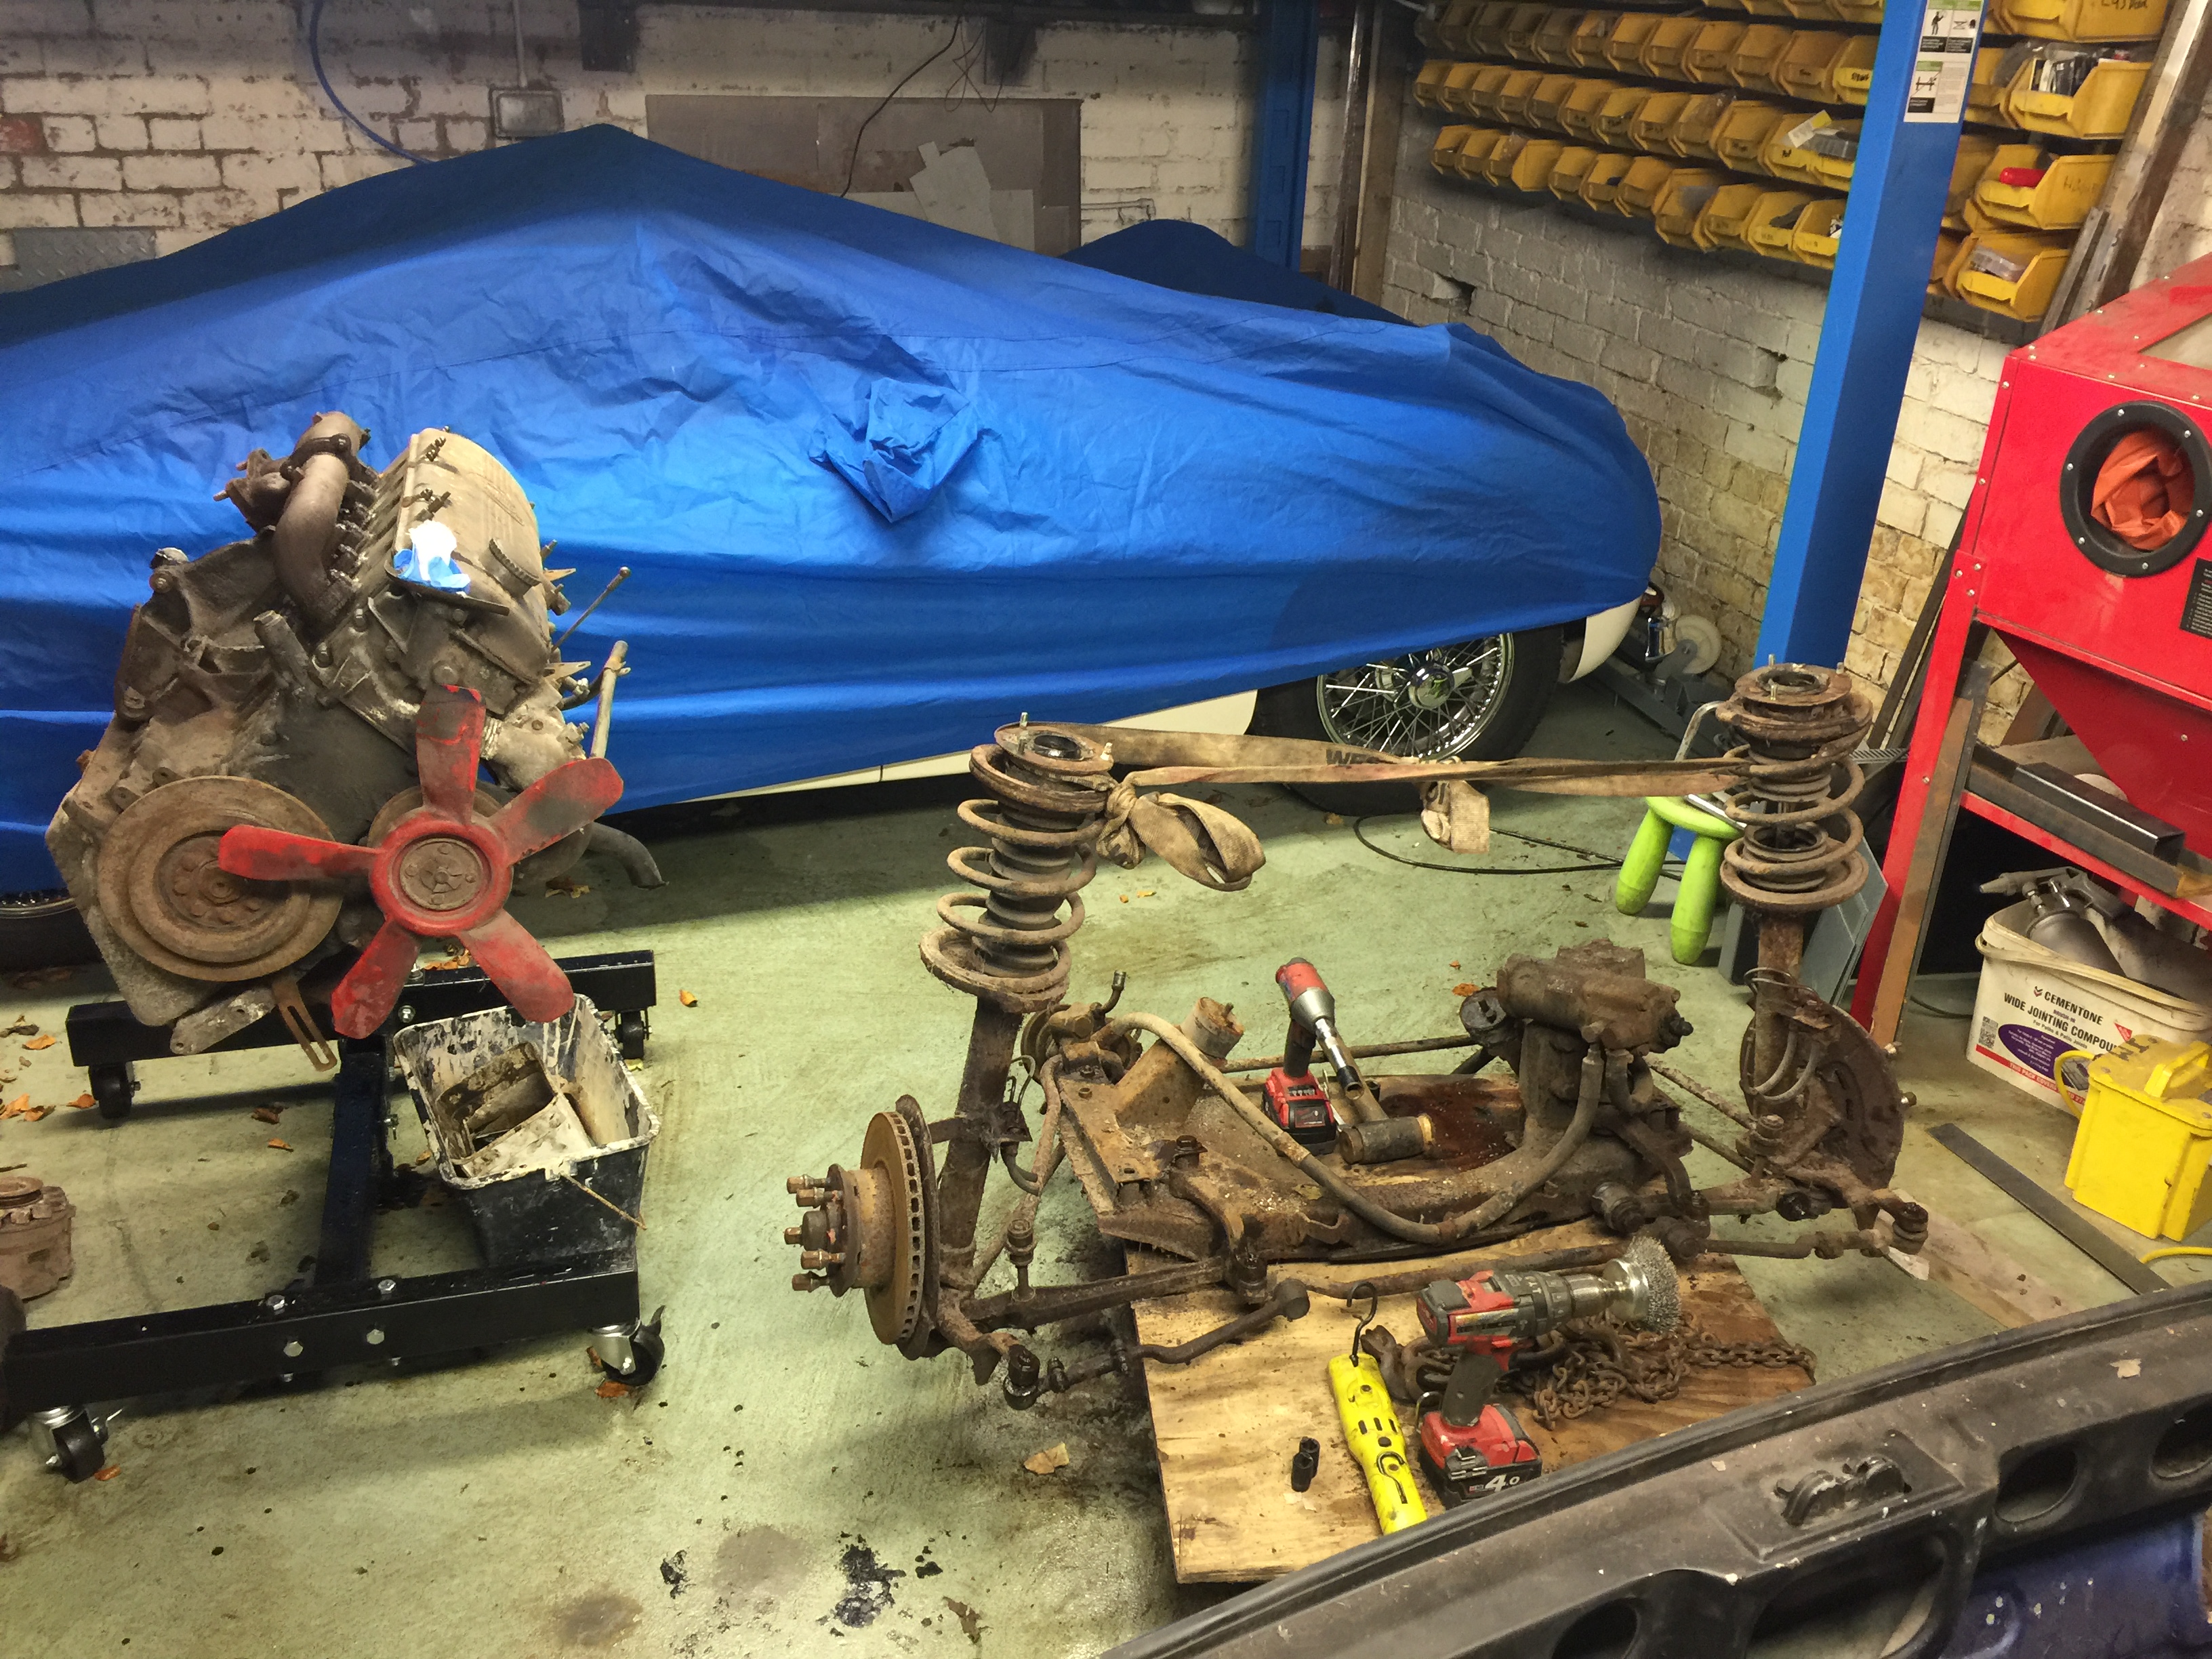
The last few nights I have been taking the front suspension to bits.
The first problem was the one of the 3 bolts that hold the bottom ball joints sheared off…
I was lucky that I still had sufficient stud to get my mole grips on, so it was heated up and became free, that does not normally happen to me and I usually have to resort to drilling out and tapping – or helicoiling because I have drilled out too much!
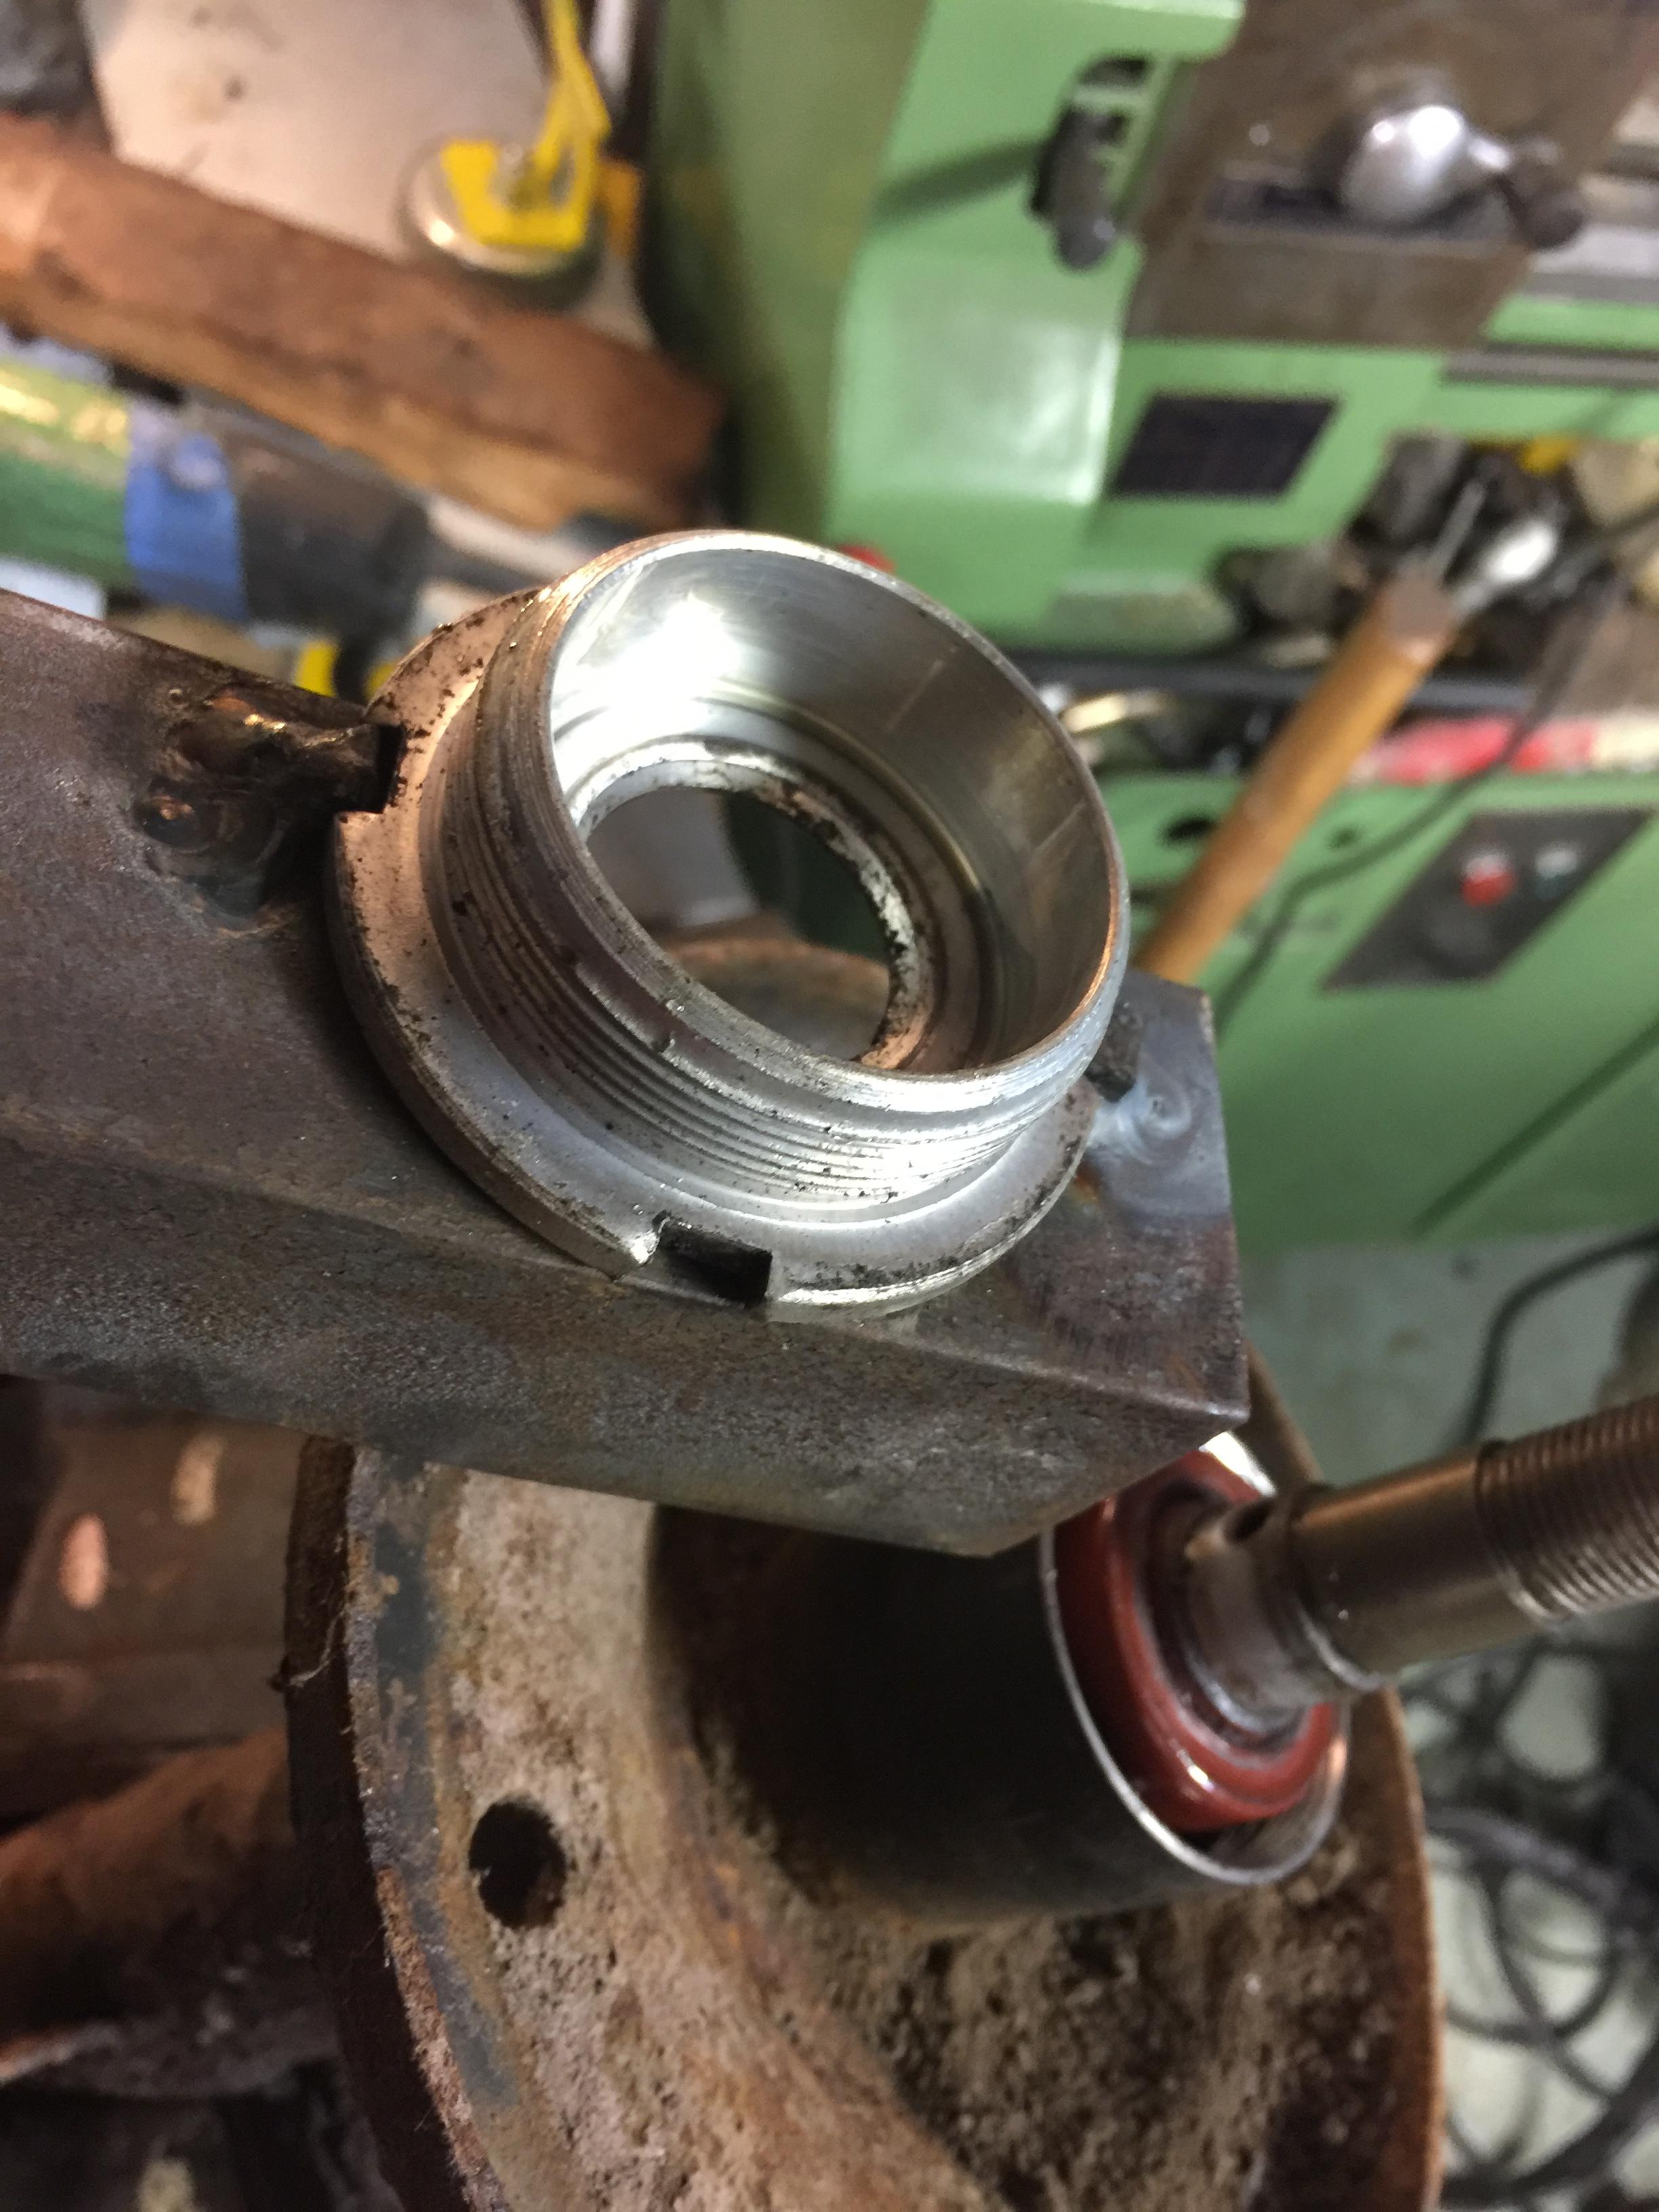
Next was getting the shock absorbers out – I had to make a tool to unscrew the tops as they would not move by the usual method, so a 10-min job to fab a ruff tool.
The shockers that came out were all covered with oil, and on inspection must have been the original ones – they are brown pained and have BMW stamped on them…
I would like some advice on what would be the best options for shocks. if there are…
All the front is now broken down and ready to go to powder coat

1 out of 10 for neatness for my home made tool - but strong - plus its only has to do the job 4 times
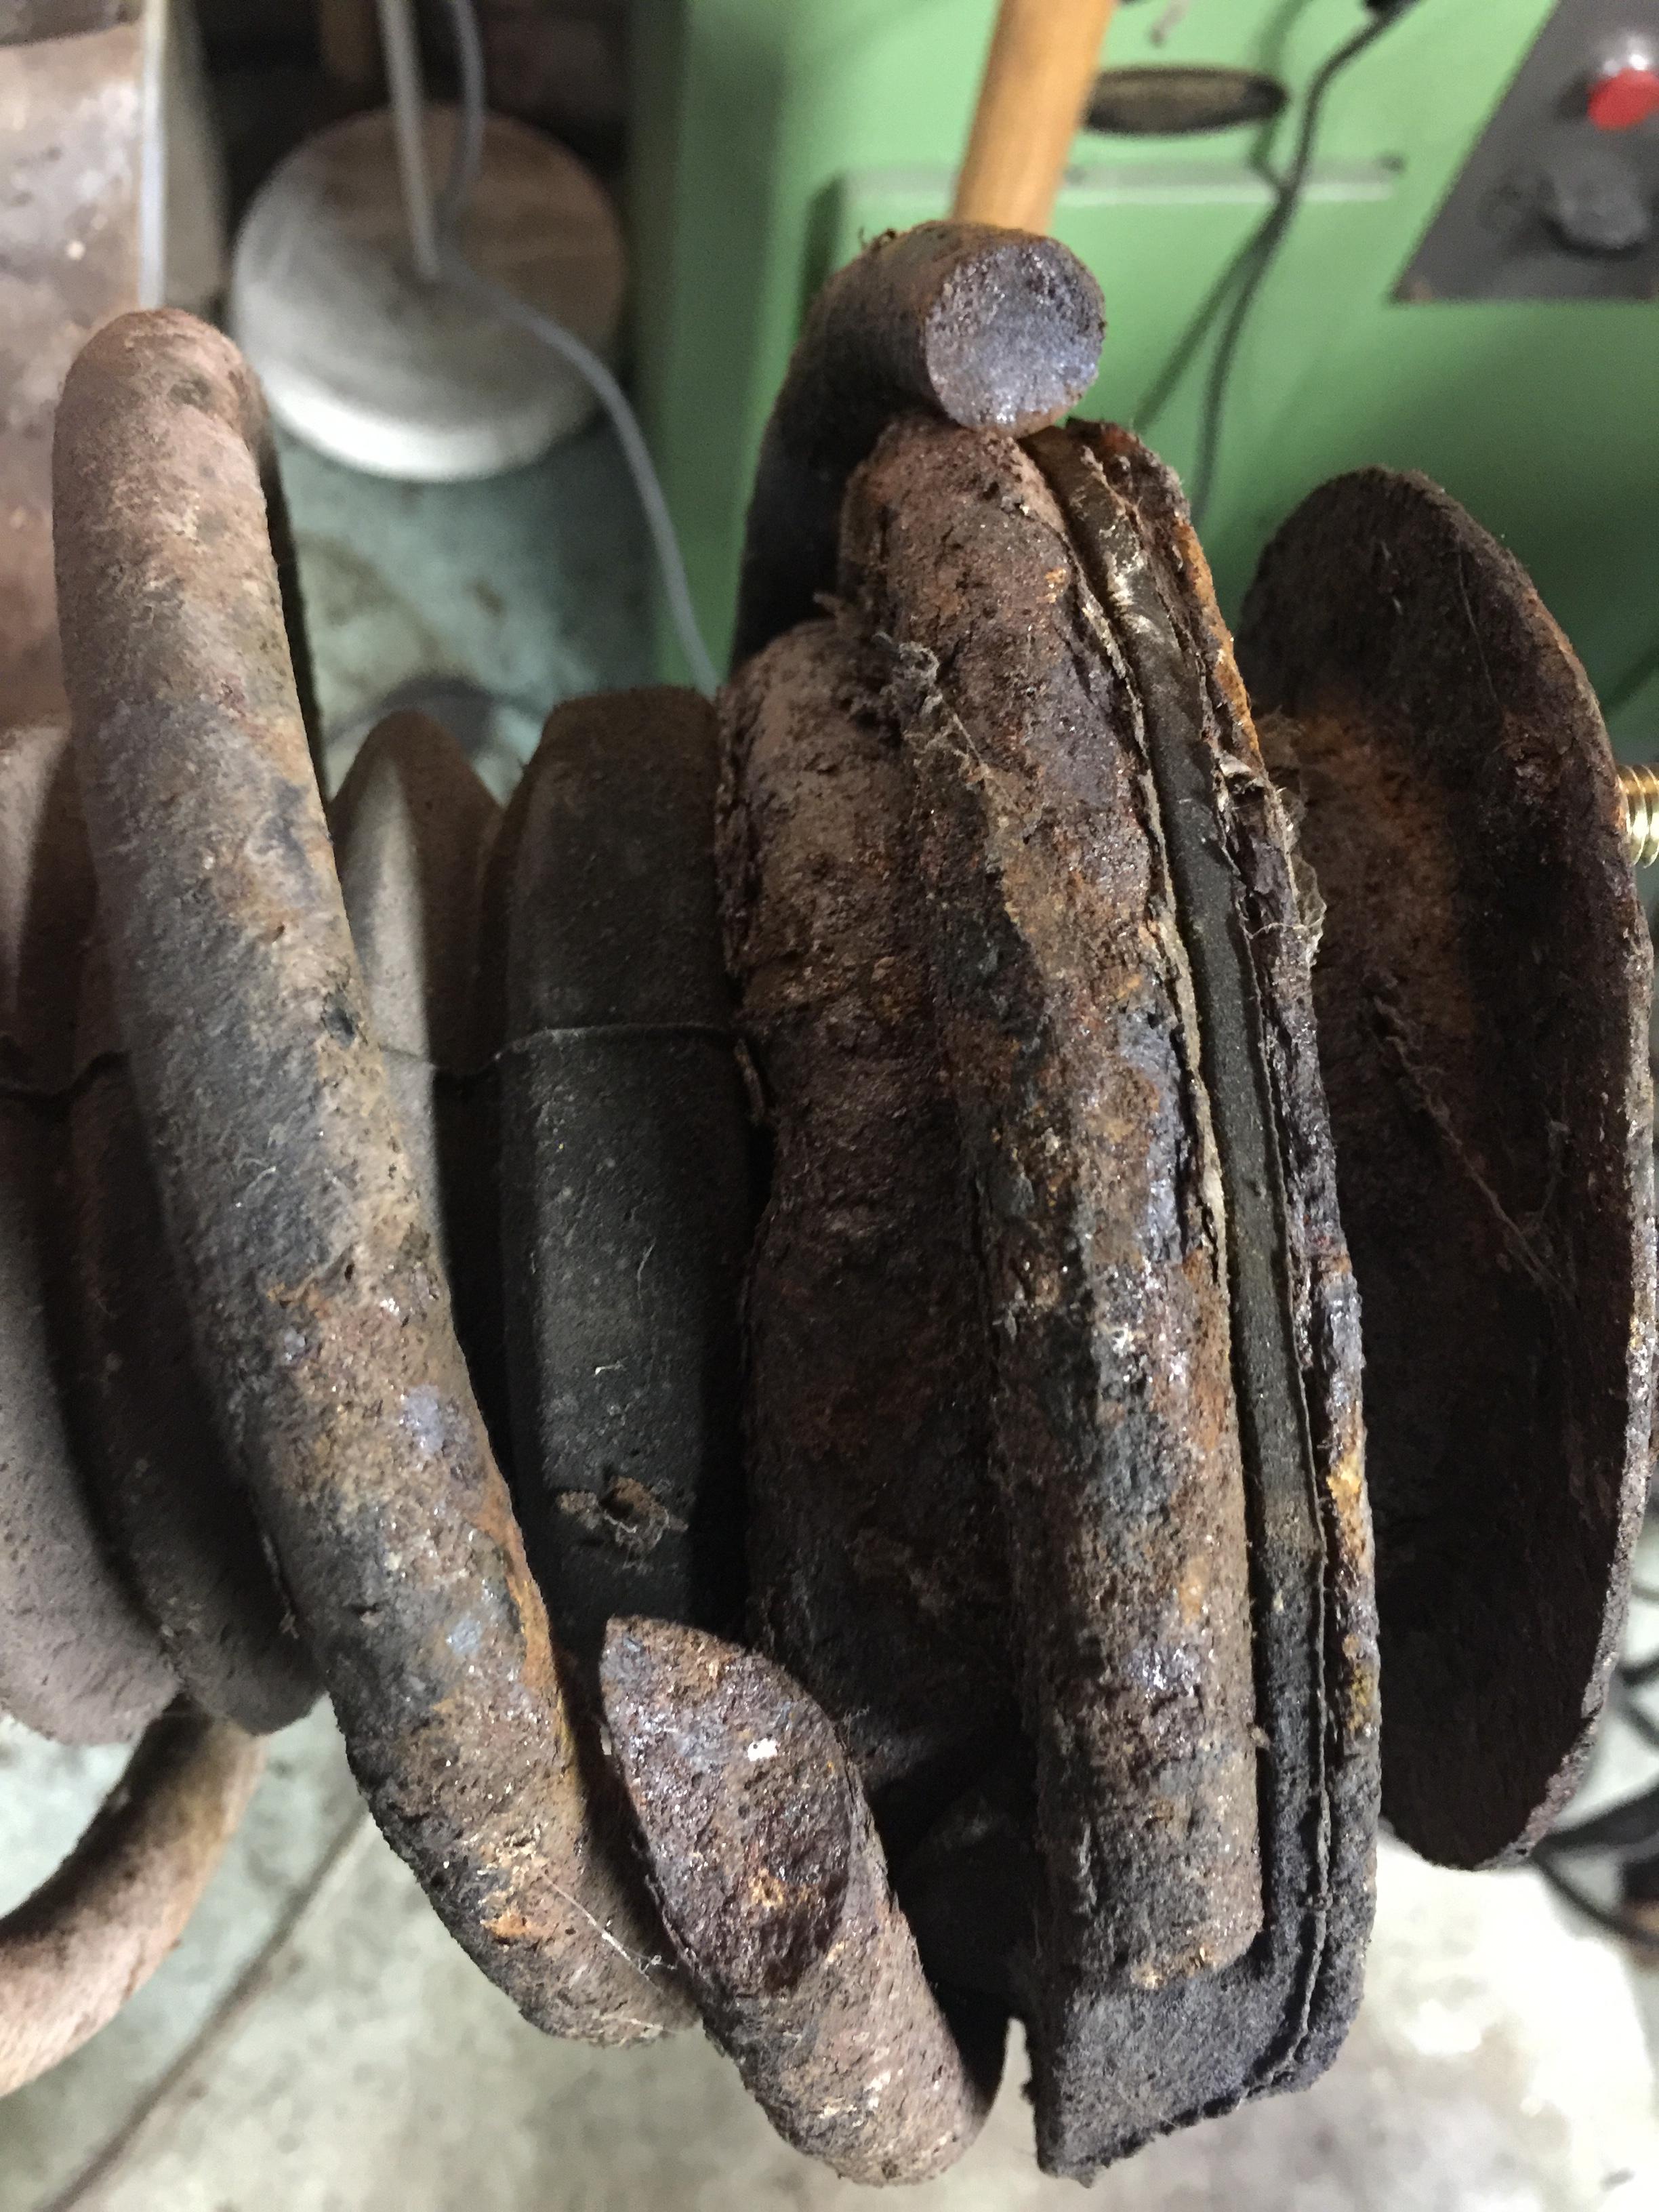
One of the springs was broken - looks like it has been for a long time..
The first problem was the one of the 3 bolts that hold the bottom ball joints sheared off…
I was lucky that I still had sufficient stud to get my mole grips on, so it was heated up and became free, that does not normally happen to me and I usually have to resort to drilling out and tapping – or helicoiling because I have drilled out too much!
Next was getting the shock absorbers out – I had to make a tool to unscrew the tops as they would not move by the usual method, so a 10-min job to fab a ruff tool.
The shockers that came out were all covered with oil, and on inspection must have been the original ones – they are brown pained and have BMW stamped on them…
I would like some advice on what would be the best options for shocks. if there are…
All the front is now broken down and ready to go to powder coat
1 out of 10 for neatness for my home made tool - but strong - plus its only has to do the job 4 times
One of the springs was broken - looks like it has been for a long time..
WOOOOOOOOWWWWWWWW
THOSE ARE AMAZING
i cant wait to see the coupe im really impressed with your work
on the flocking occoupe redid his
and ive send all my trim to the polisher and they come out bright as ever
THOSE ARE AMAZING
i cant wait to see the coupe im really impressed with your work
on the flocking occoupe redid his
and ive send all my trim to the polisher and they come out bright as ever
Marc-M
Well-Known Member
It’s been a bit cold to work in the garage, but I have managed to do a bit!
When I put the engine on its frame last week, I had the intention of not touching it until I had done the welding to the car.
But every time I walked passed the thing, the feeling of wanting to pop open the head to have a quick look got stronger and stronger.
Well, I cracked and decided to open it up.
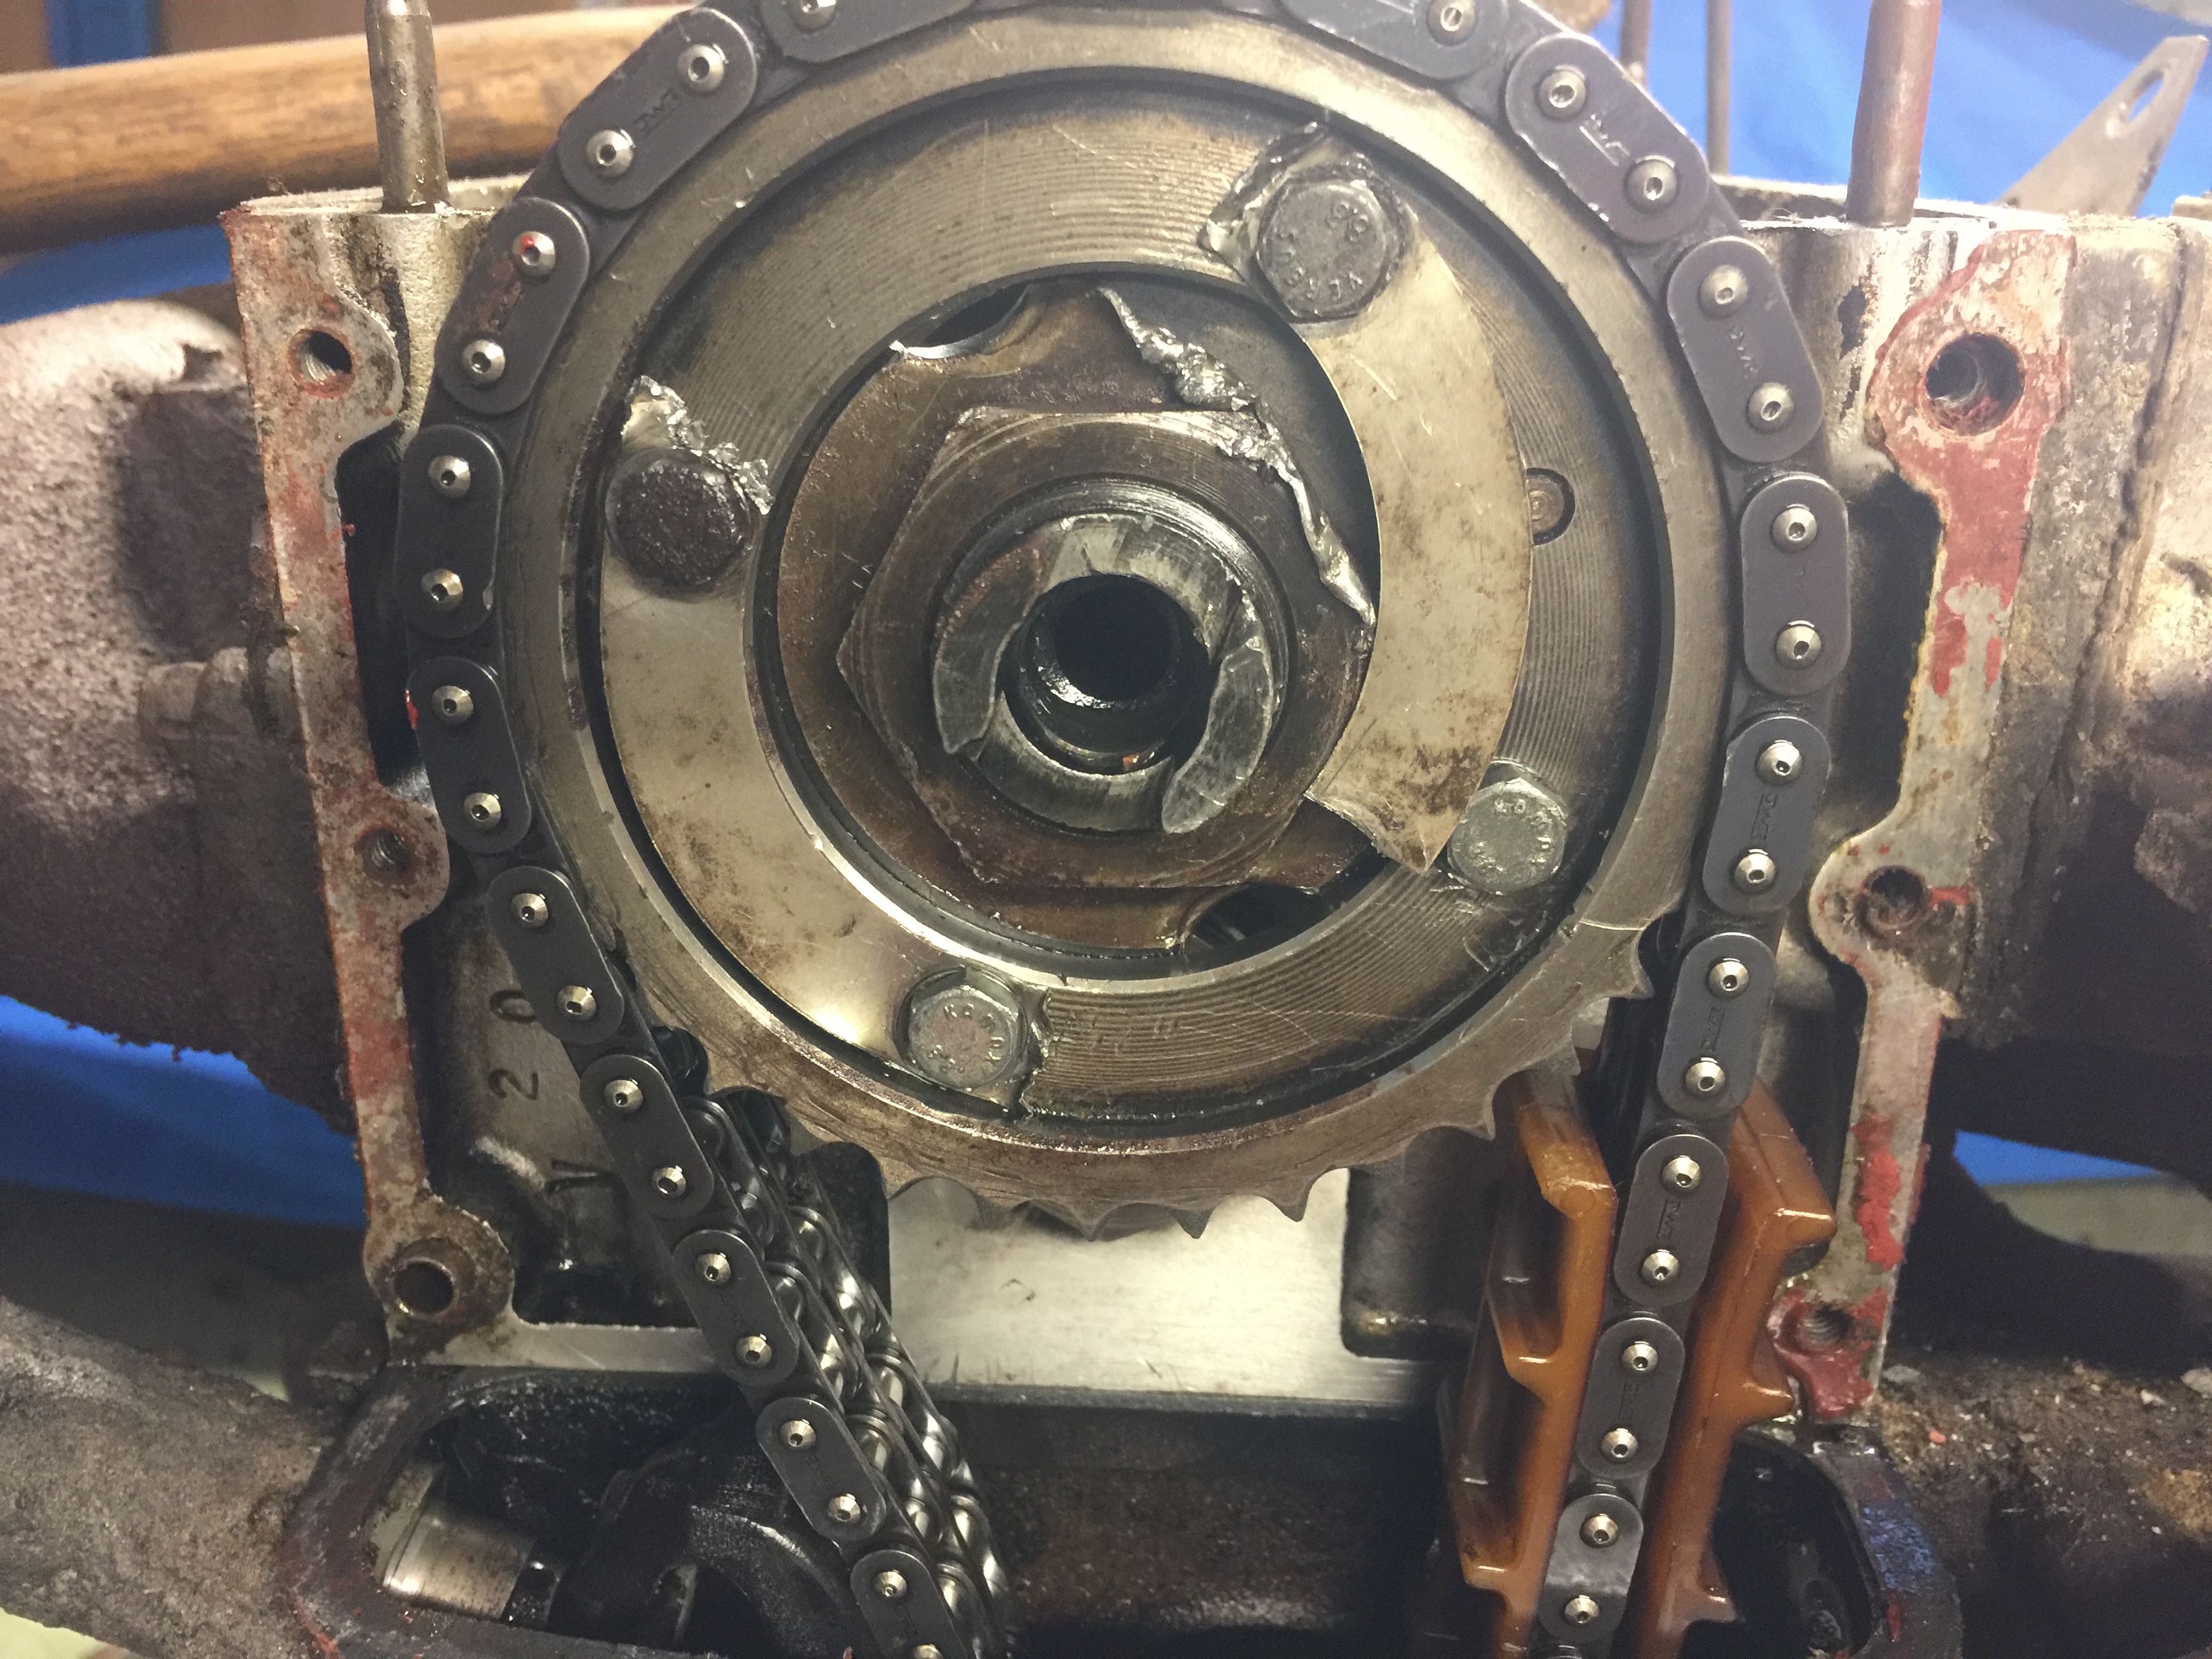
On first inspection, it has been open before as the valve rockers has numbered marks on them. Then as I took the front cam plate off, I discovered that whoever put it together was a total idiot.
The bolt retaining clips that the main cam gear is held on with was reused, but re used very badly, I must stress that they must have known it was too far gone to use, but still put it on.
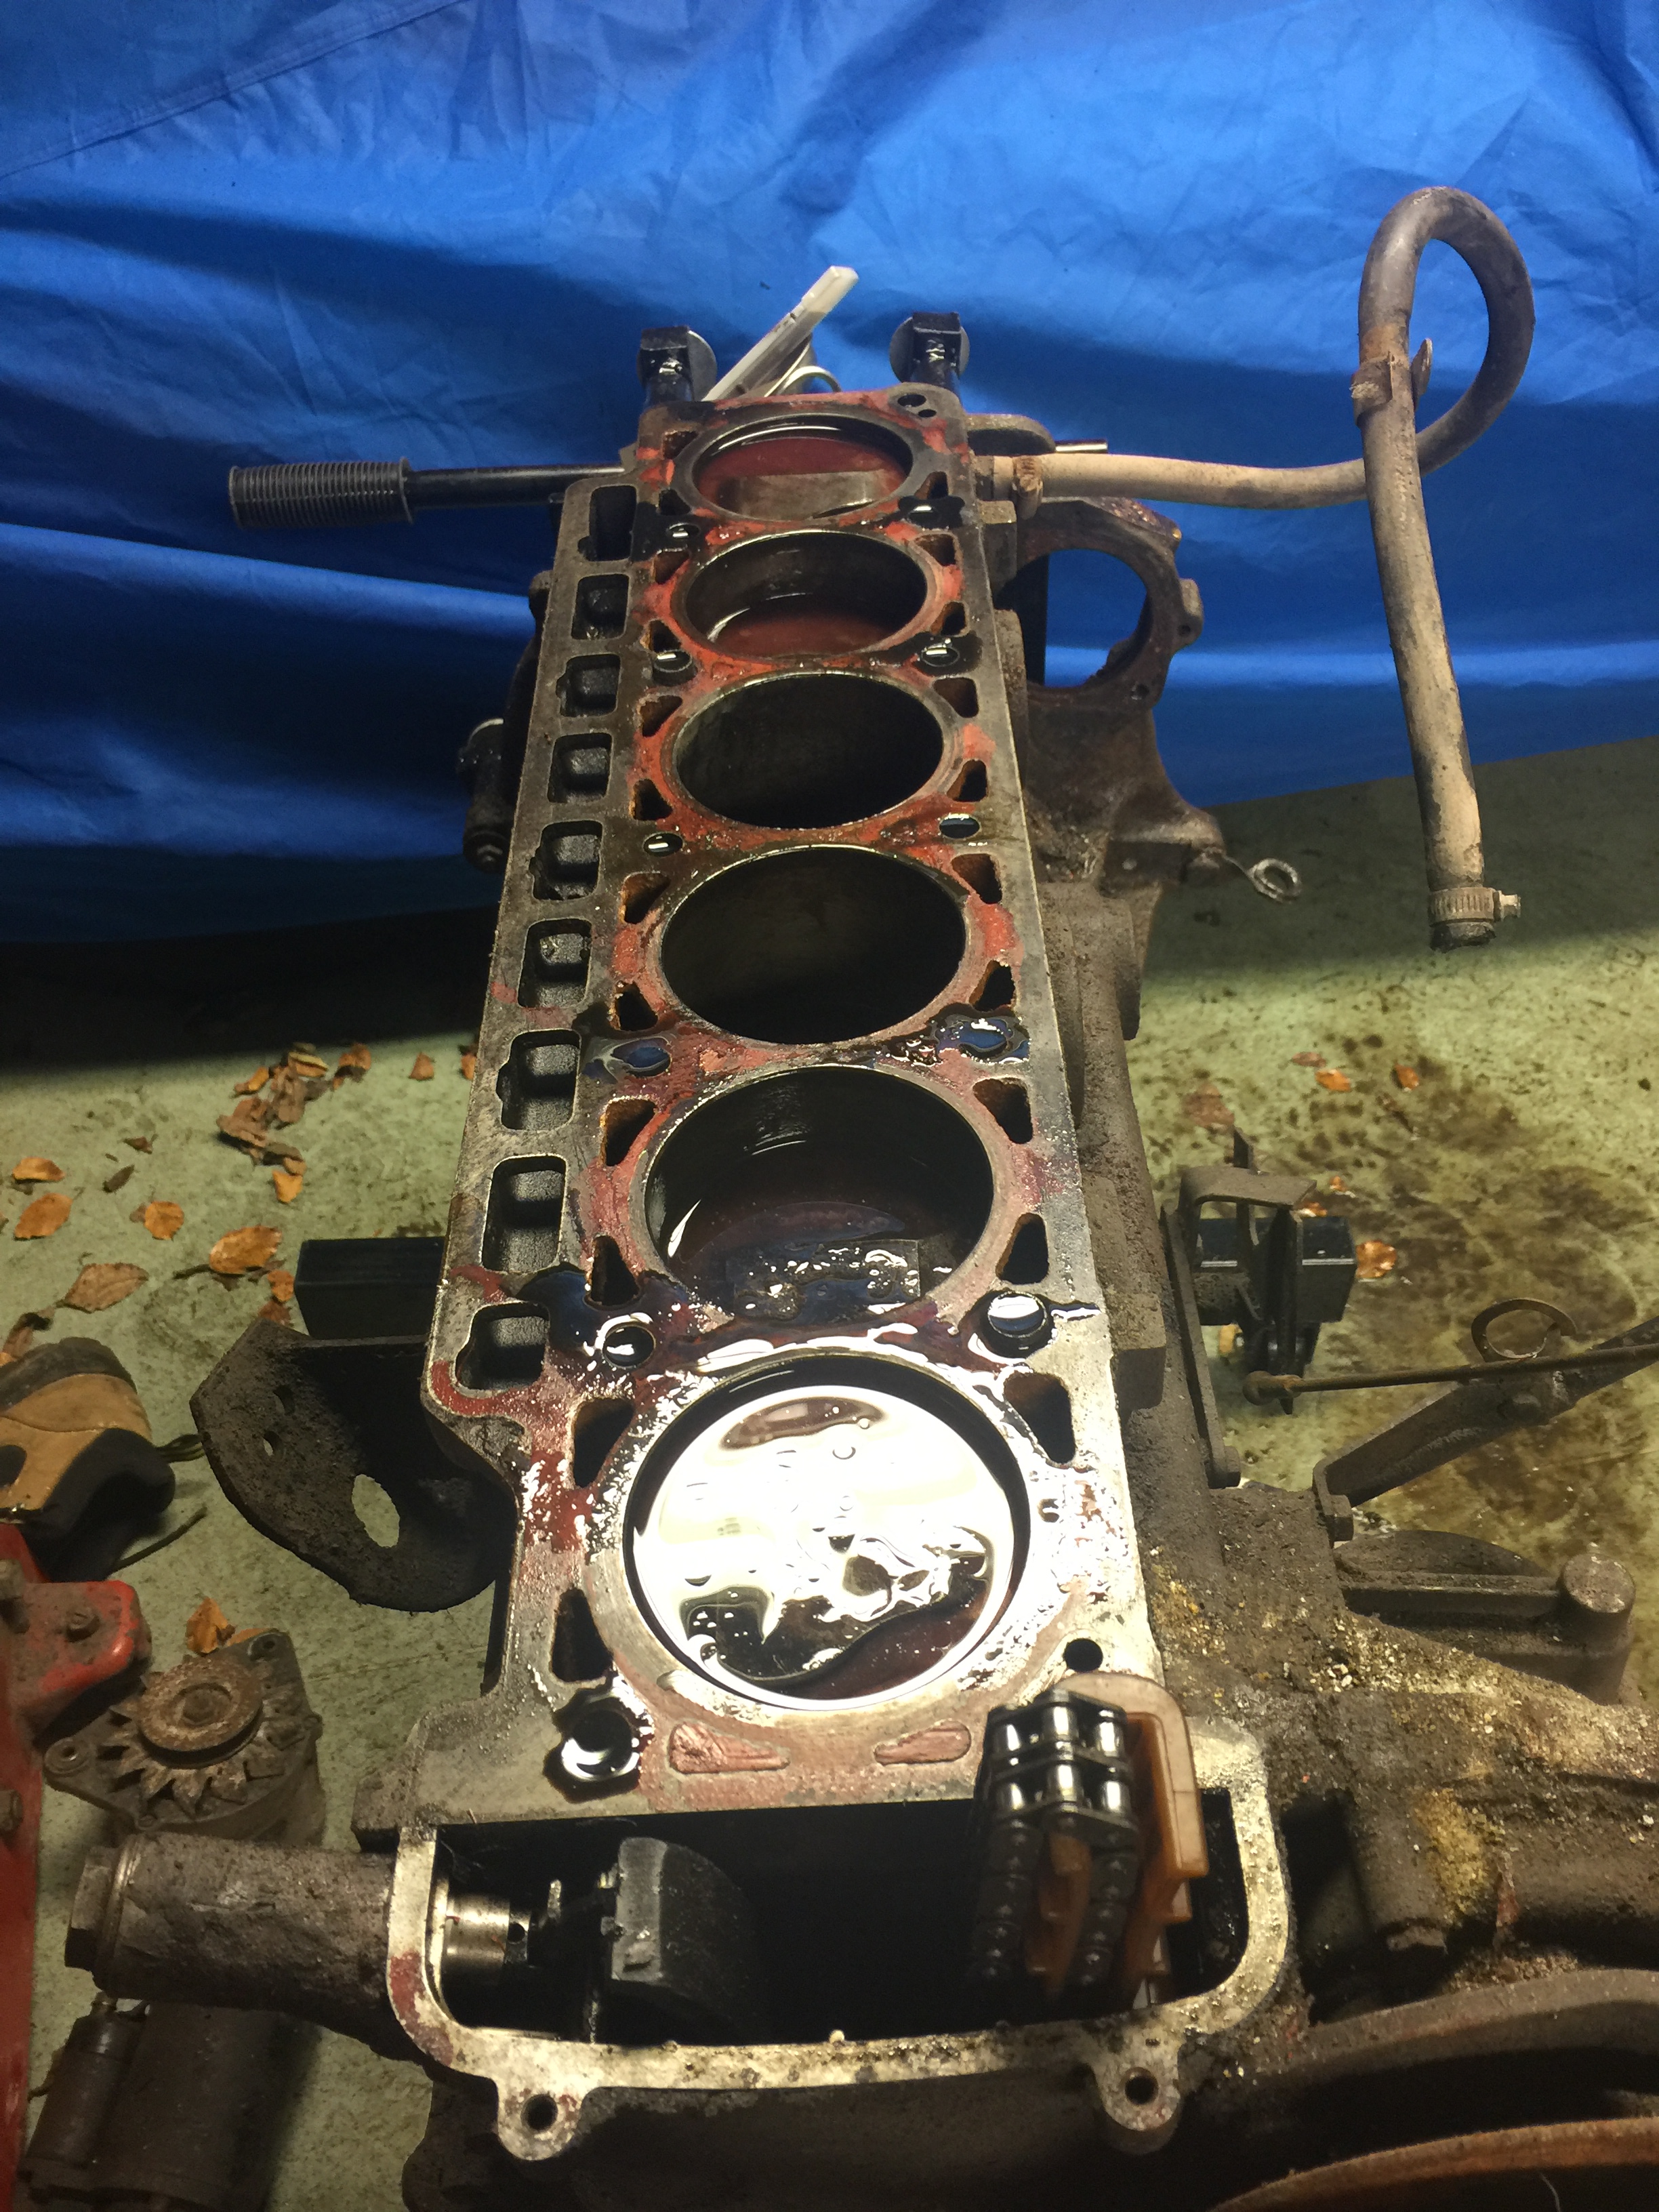
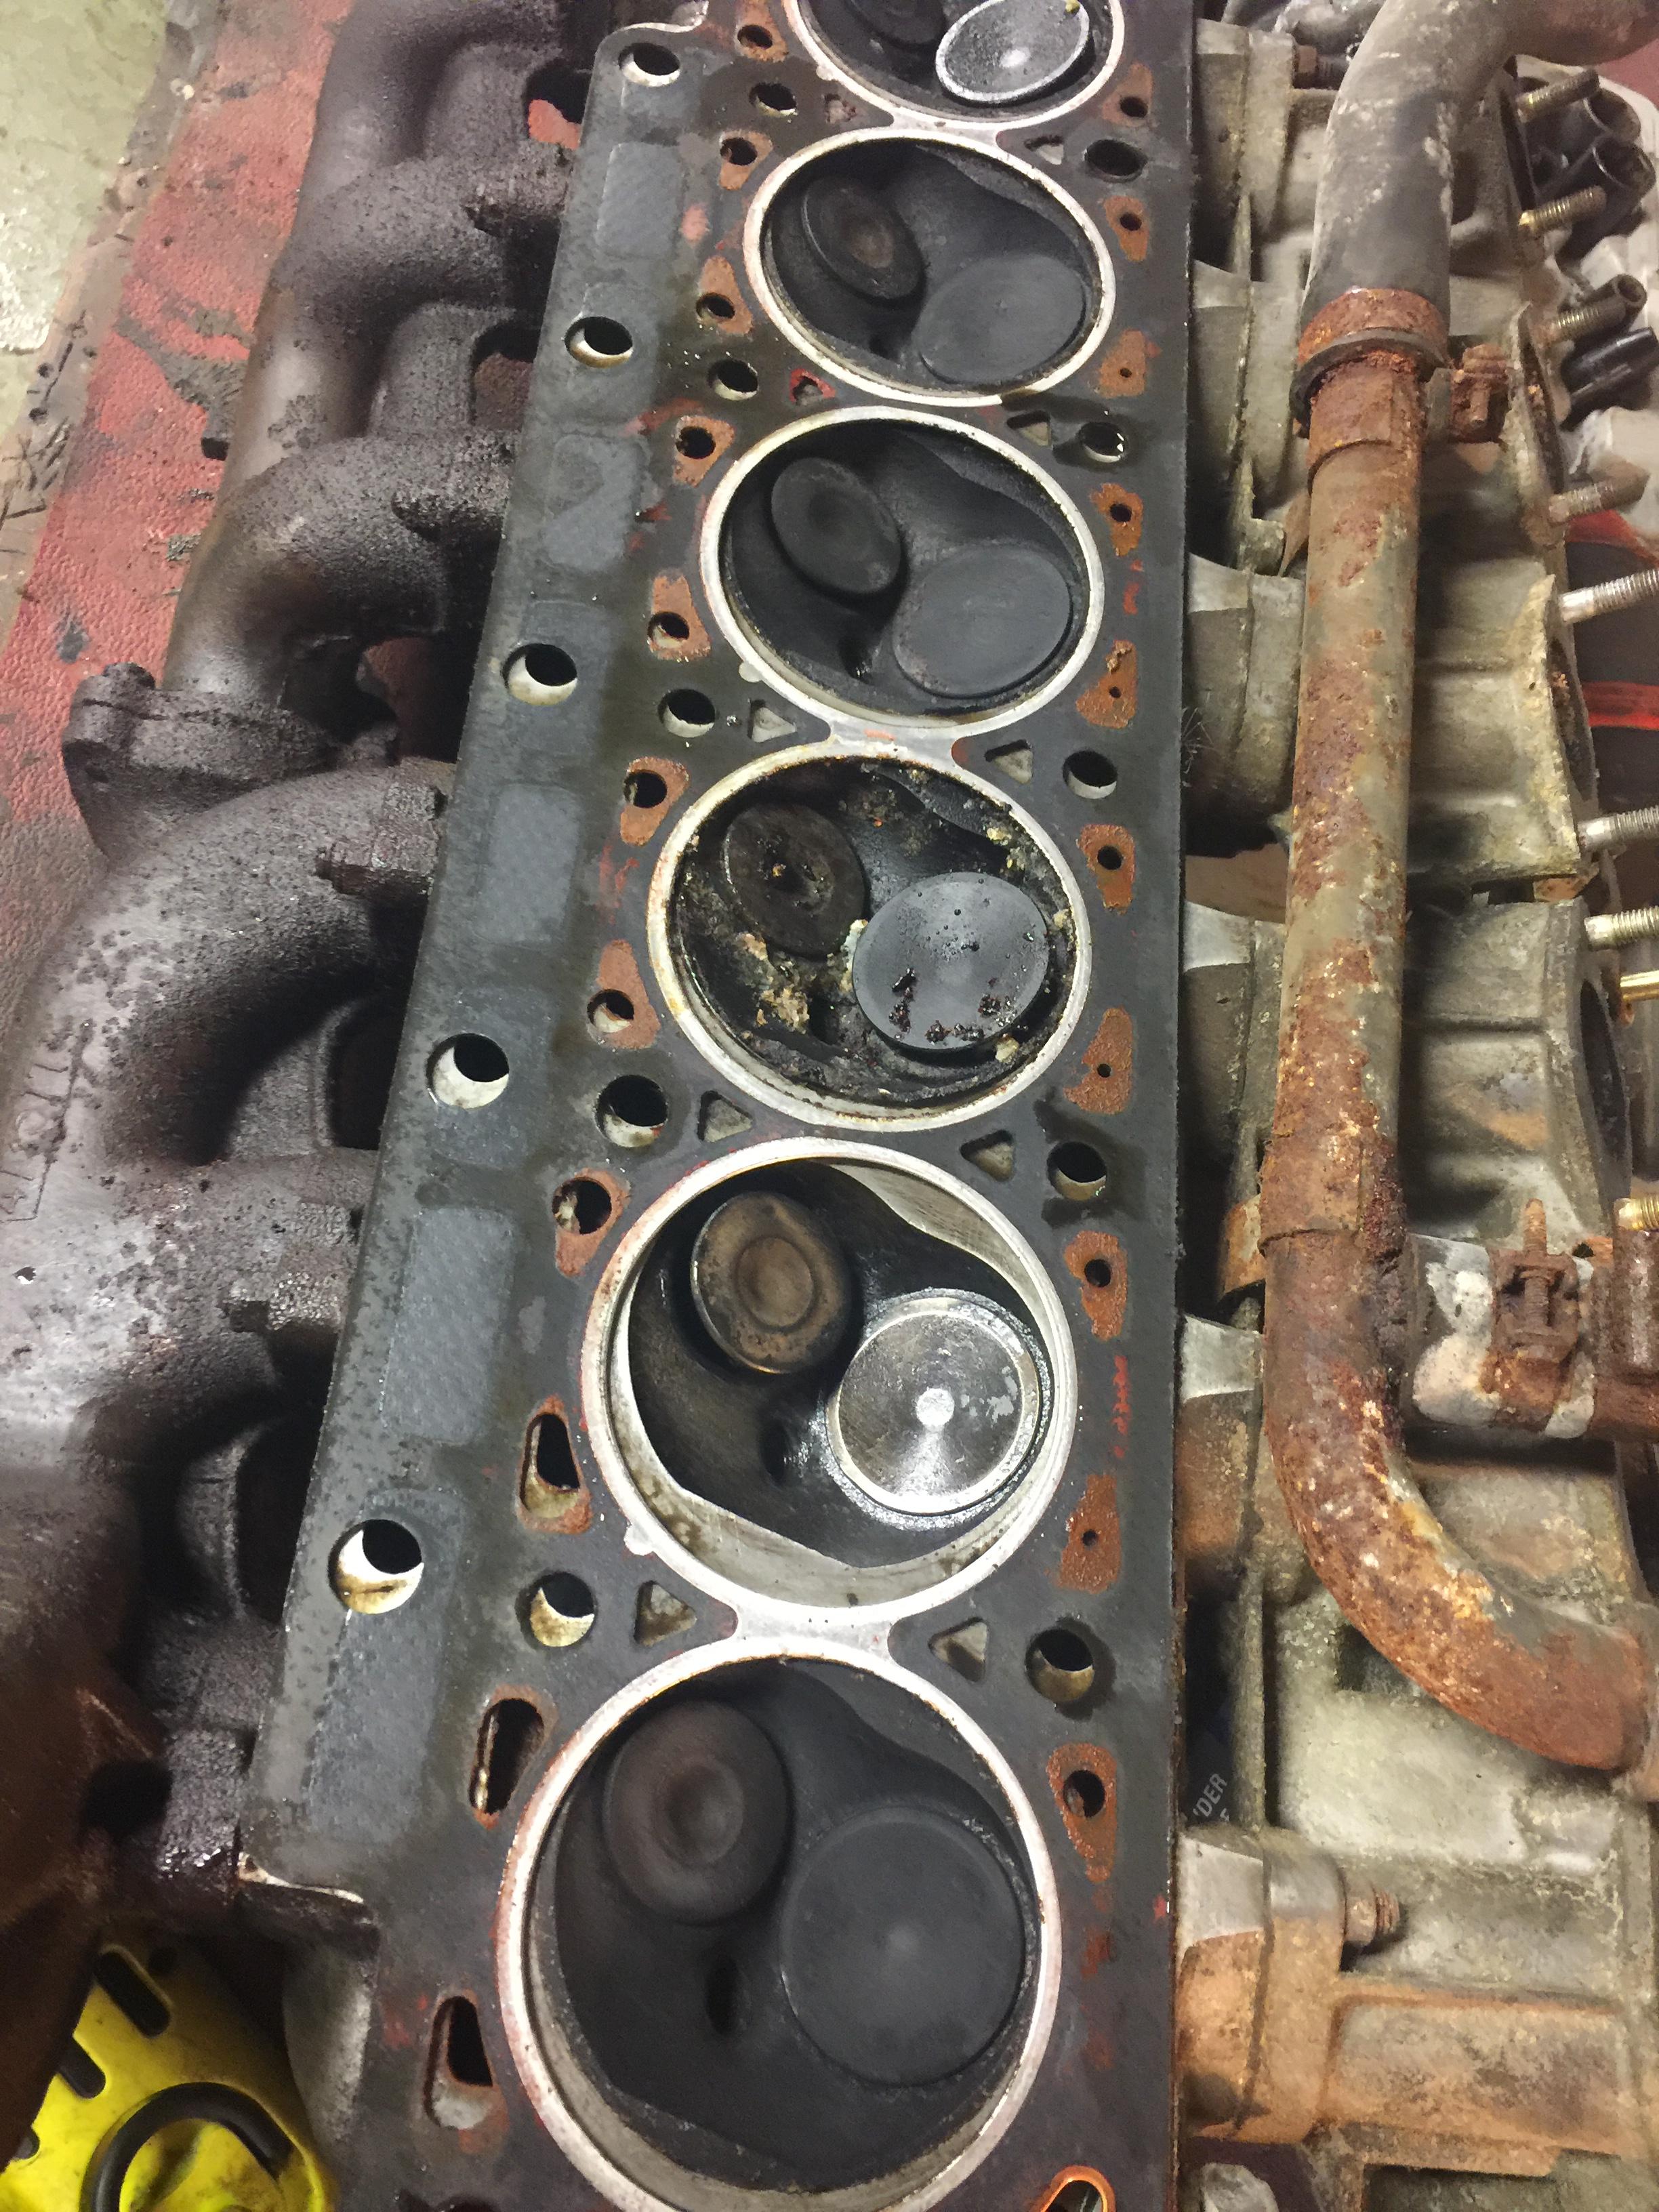
The head came off ok and on inspection only 1 cylinder has an issue, I ran my wire brush down the bore to clean it up and there are signs of pitting, so it will be a re bore.
The head itself looks good and although is still covered in crap, I could not see any visible cracks.
The water ways were clear and no signs of corrosion at all, again most odd on a head that is 40 years old.
So, it was left to steep in penetrating oil (its seized) and I will have a go at turning it over in a day or so…
Meanwhile with a little help form my friend, we have made the front roll over jig that attaches to the body… a home-made affair….
What can I say - who did this needs there tools taking off them.......
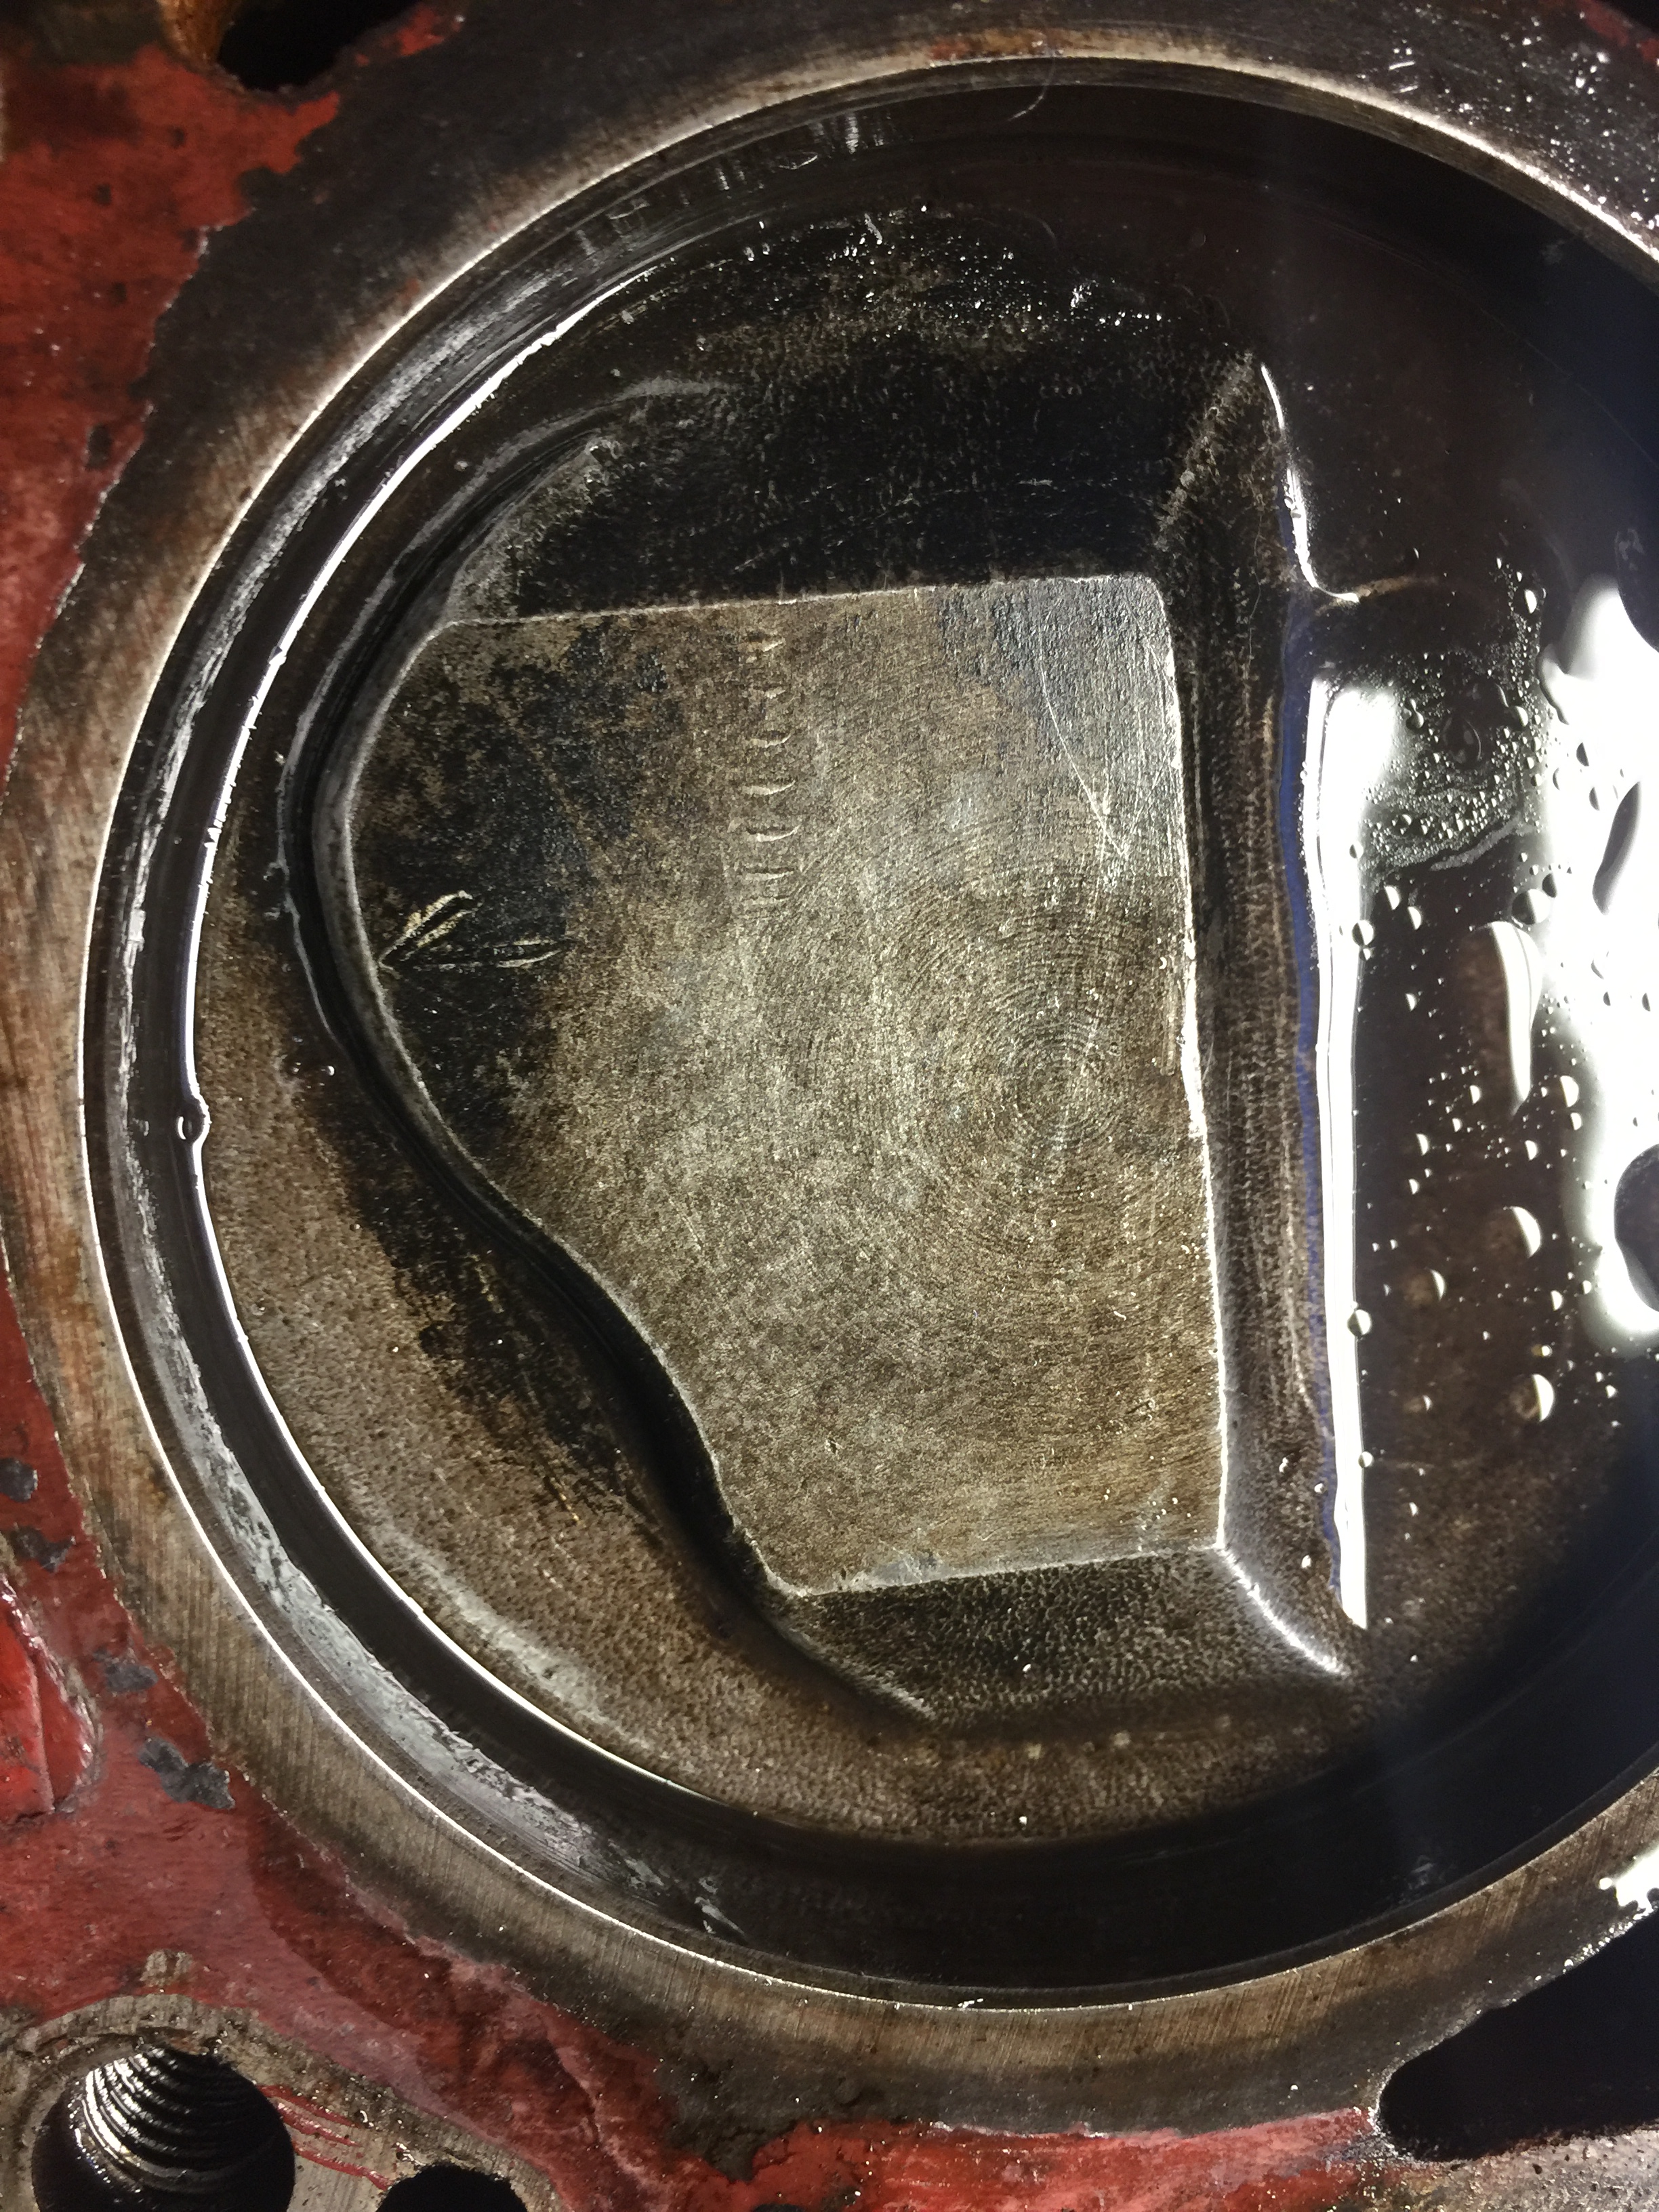
7 marks on the piston - am I missing a cyl?
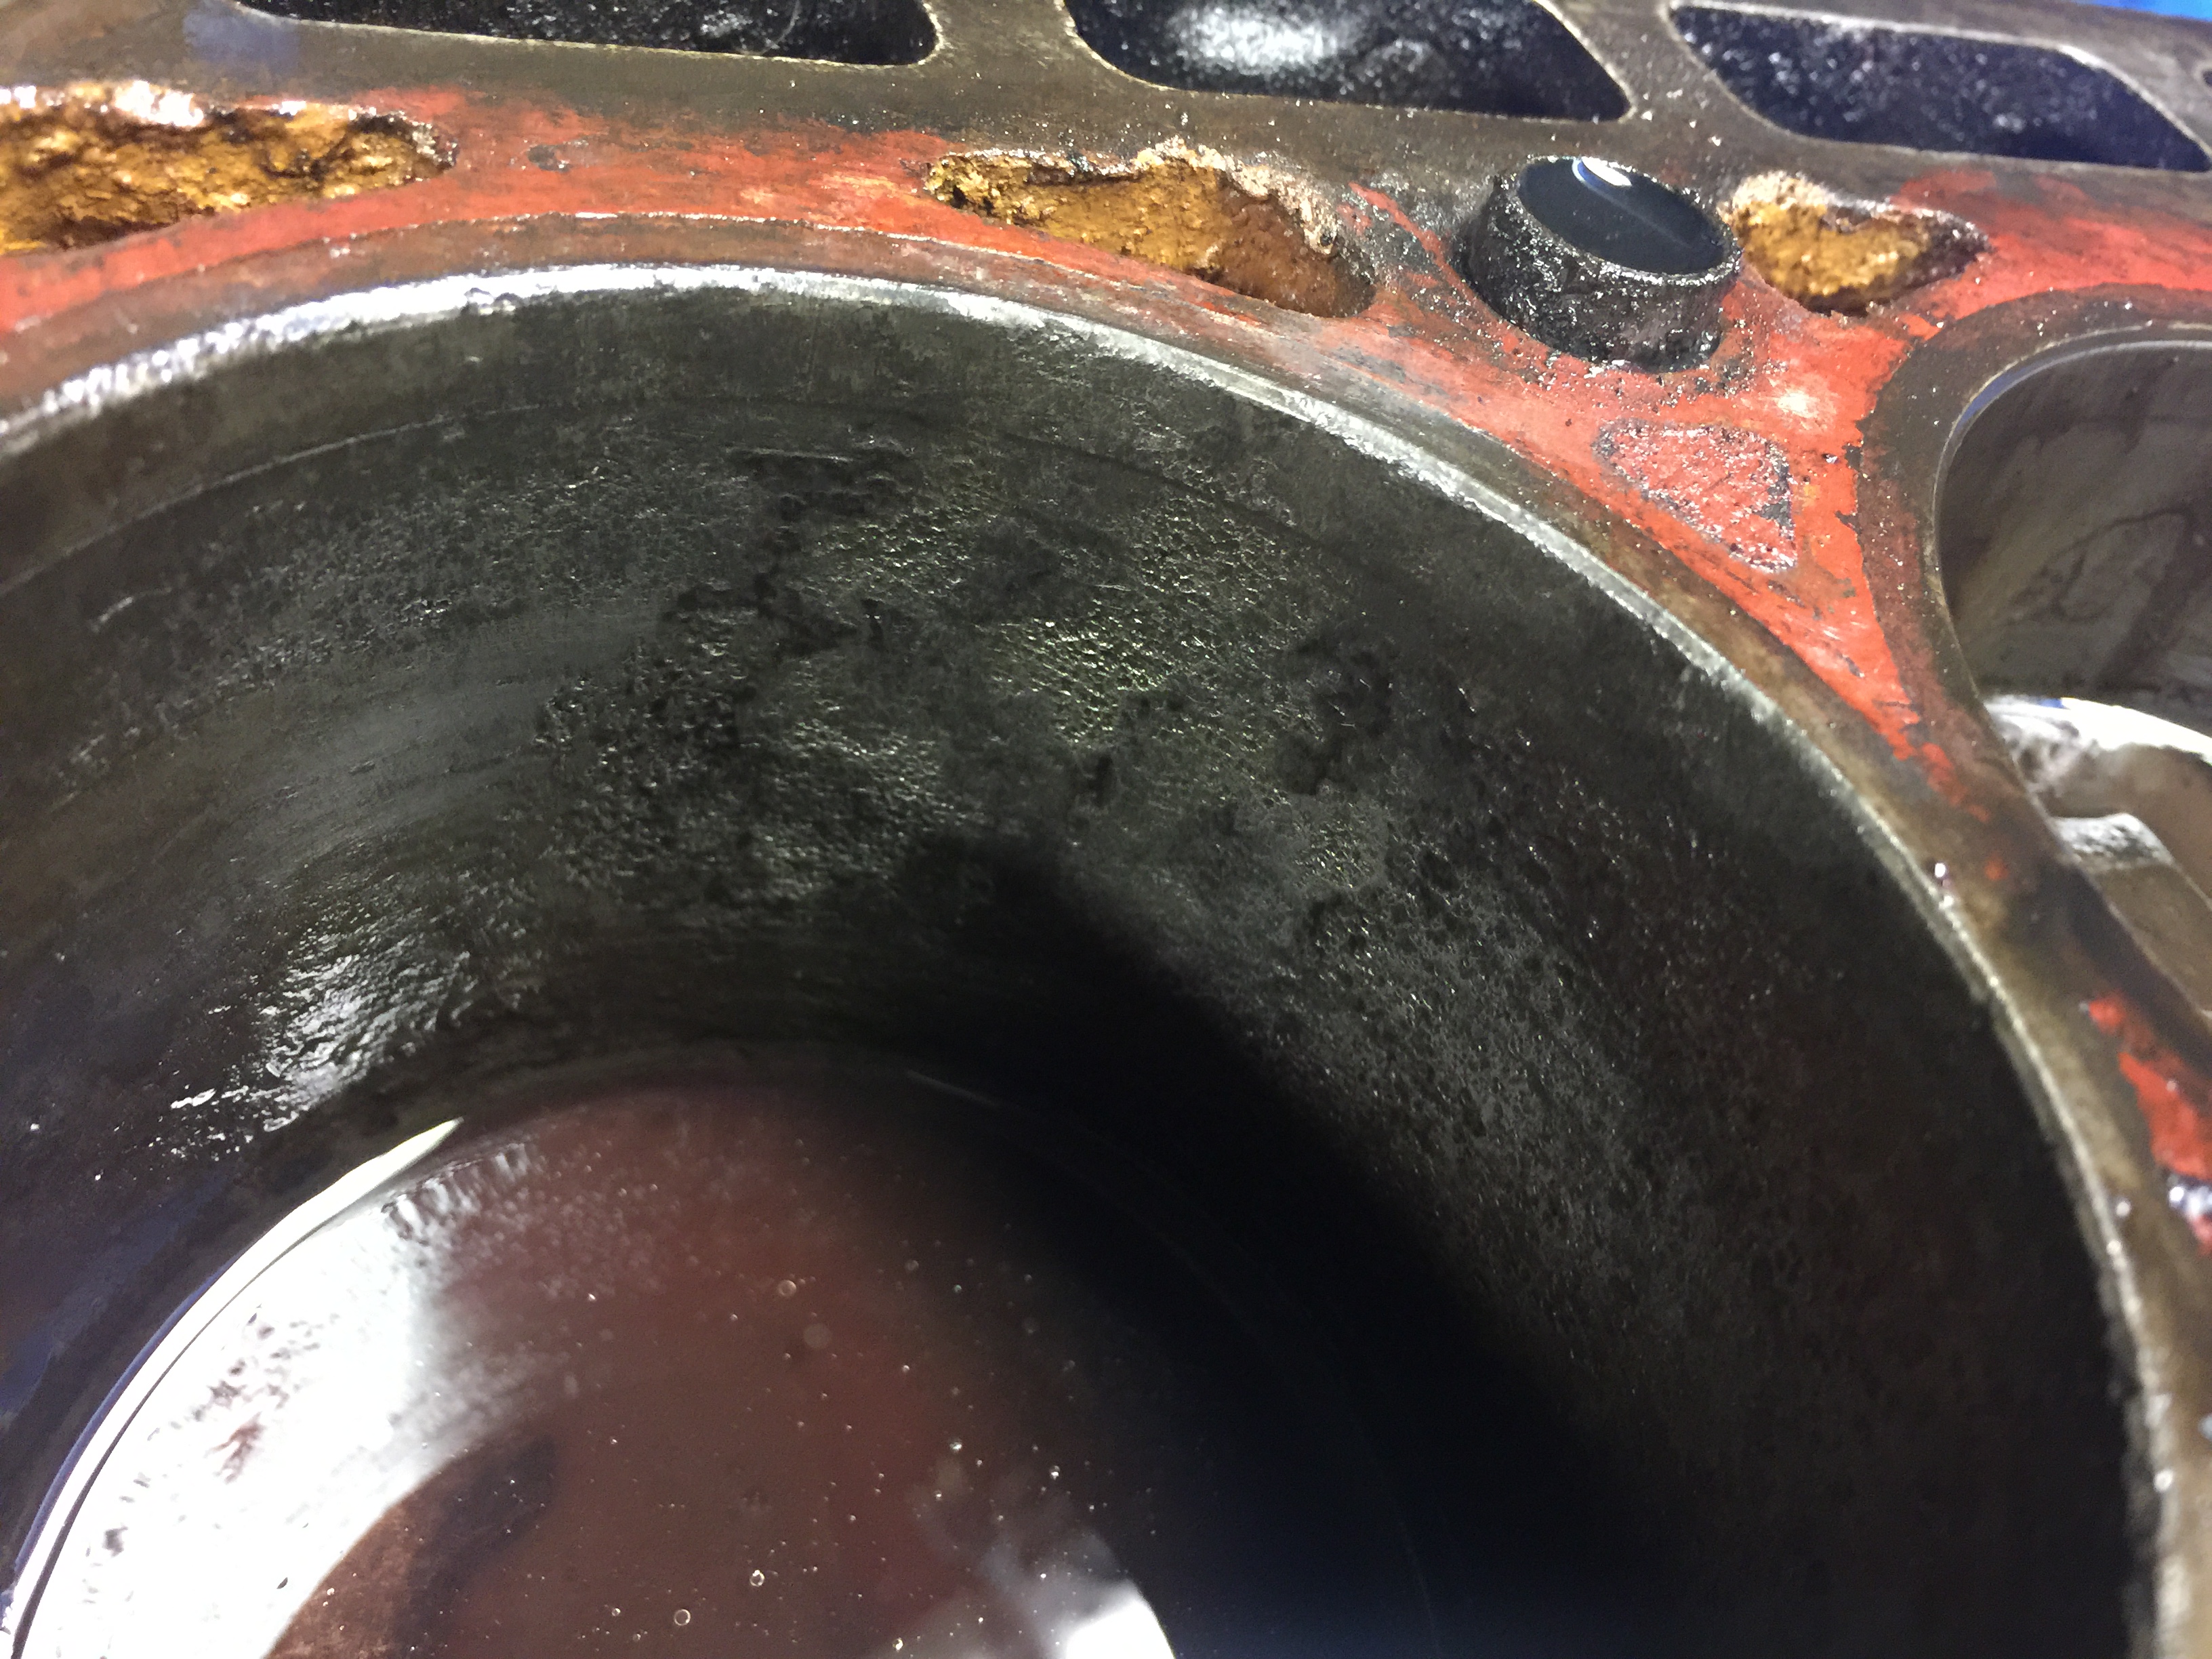
Pits in the bore -
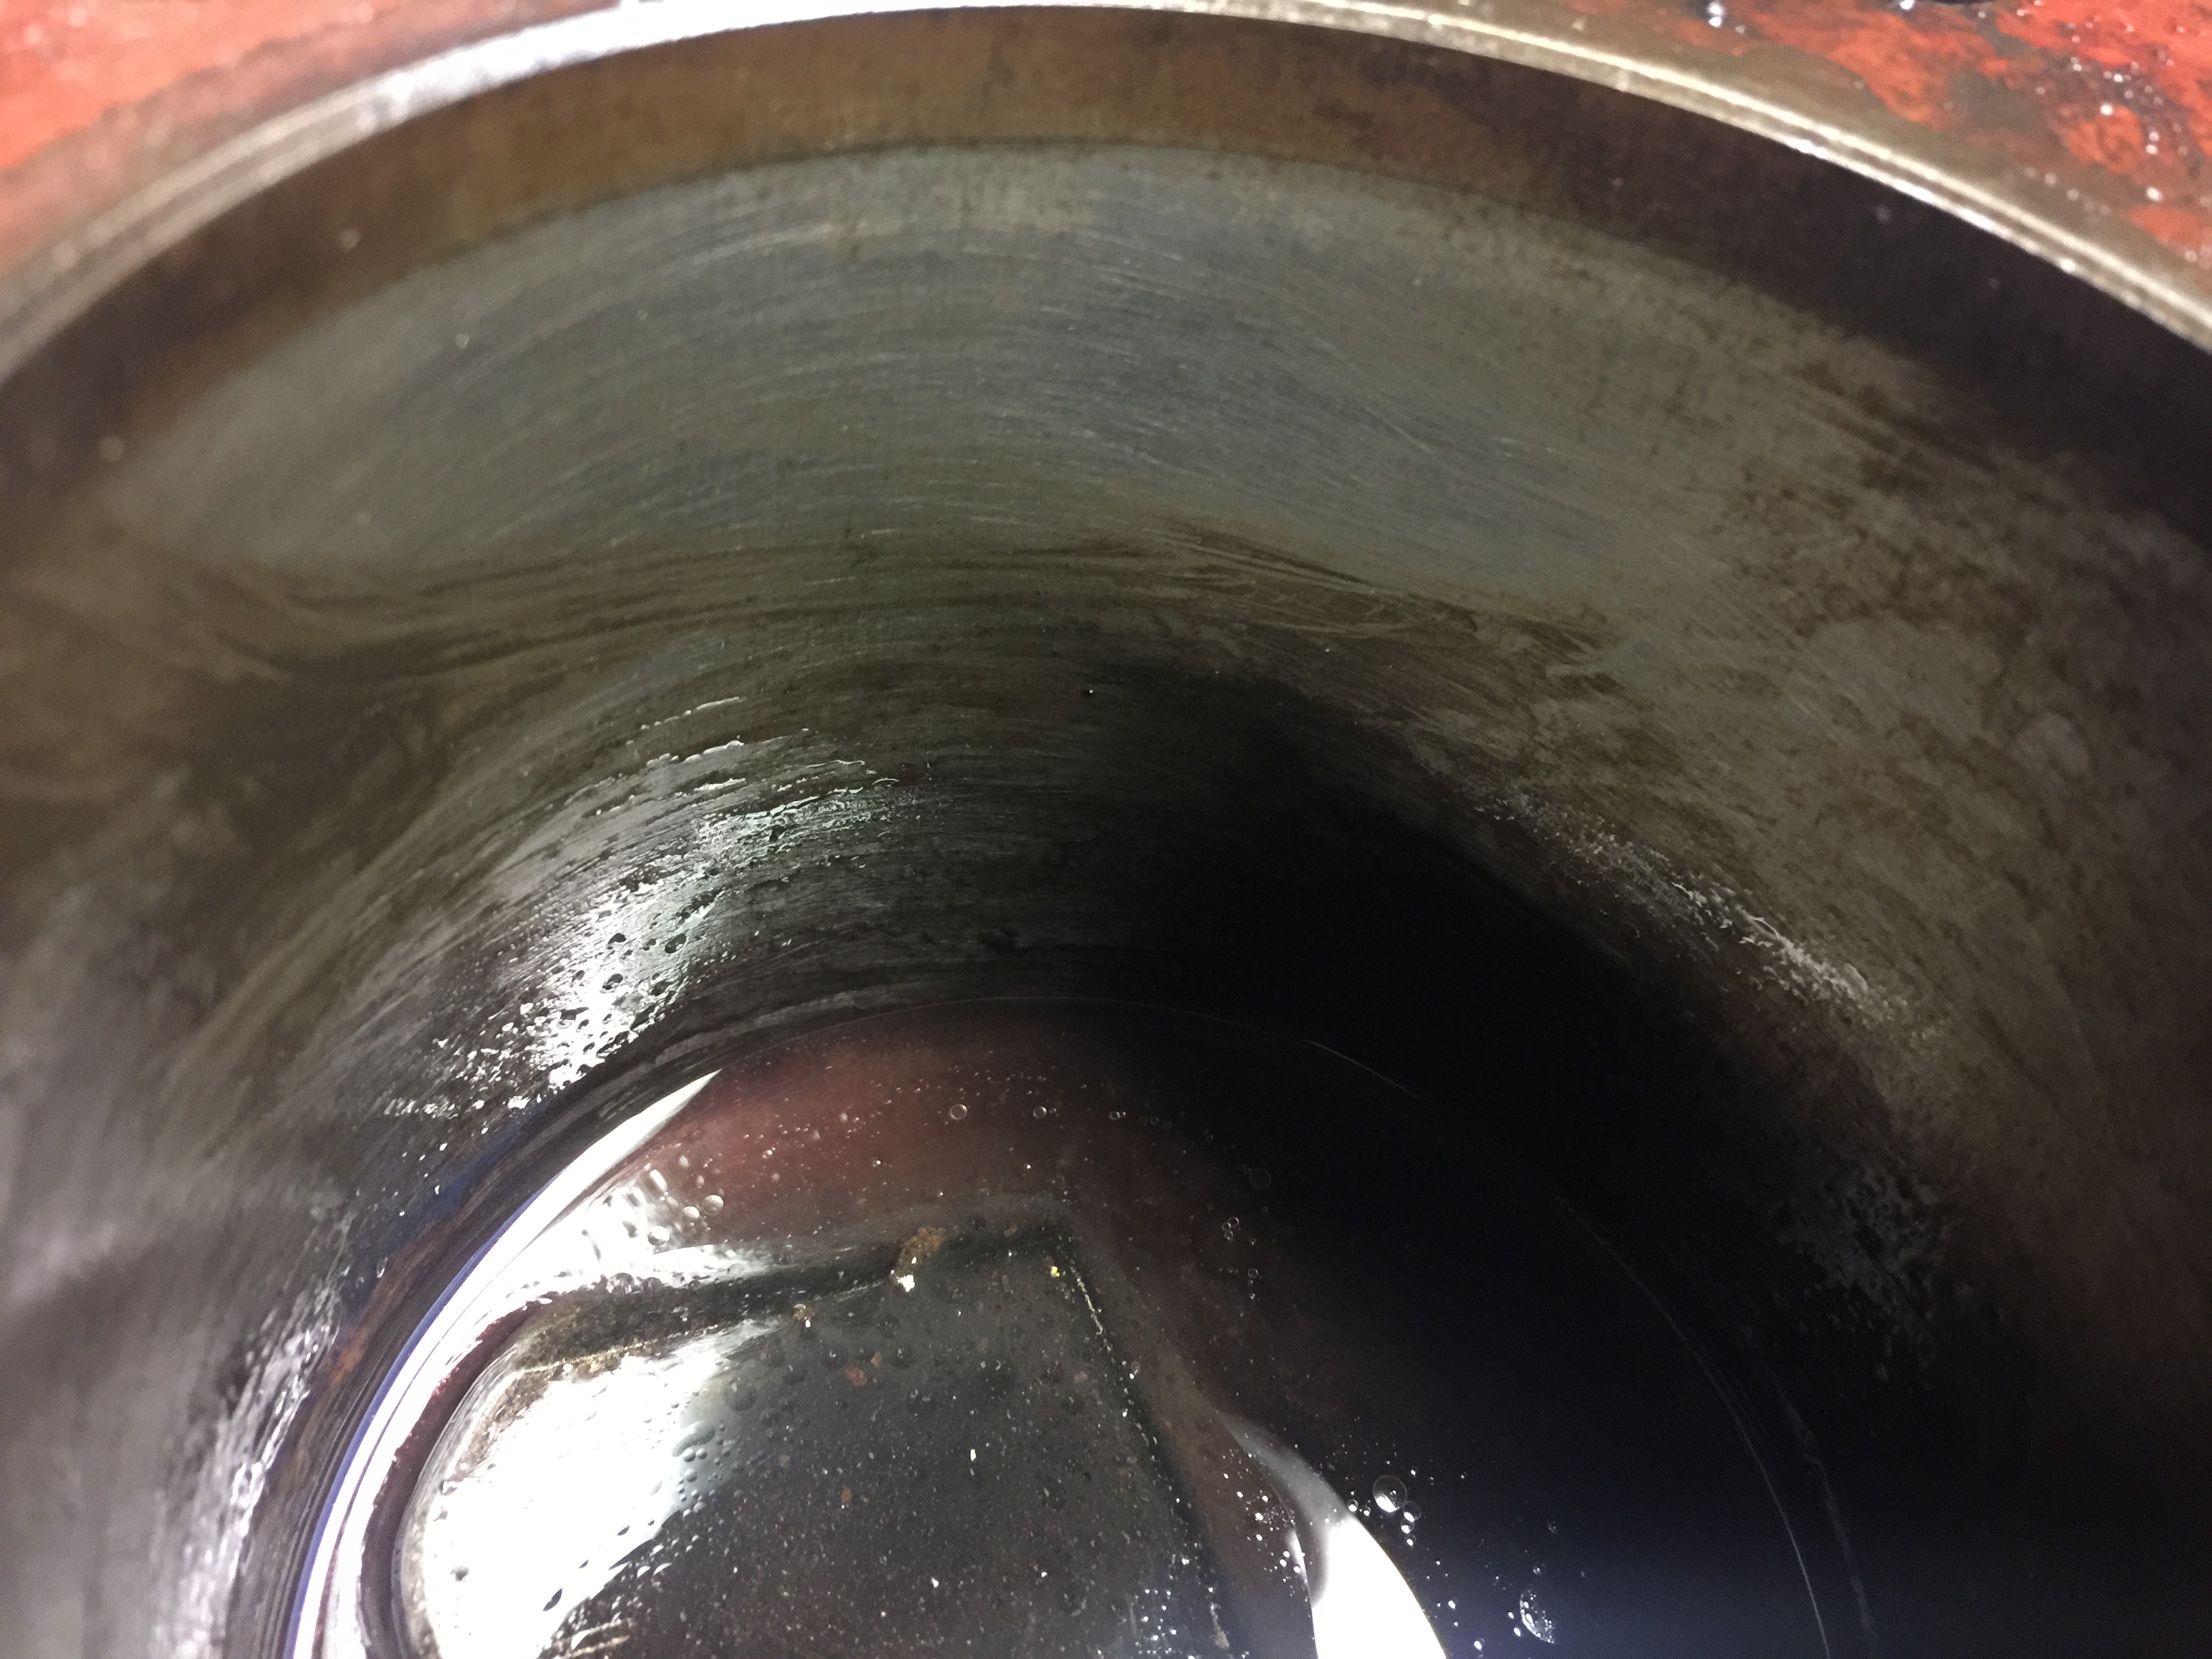
All the rest look like this will very little lip...
When I put the engine on its frame last week, I had the intention of not touching it until I had done the welding to the car.
But every time I walked passed the thing, the feeling of wanting to pop open the head to have a quick look got stronger and stronger.
Well, I cracked and decided to open it up.
On first inspection, it has been open before as the valve rockers has numbered marks on them. Then as I took the front cam plate off, I discovered that whoever put it together was a total idiot.
The bolt retaining clips that the main cam gear is held on with was reused, but re used very badly, I must stress that they must have known it was too far gone to use, but still put it on.
The head came off ok and on inspection only 1 cylinder has an issue, I ran my wire brush down the bore to clean it up and there are signs of pitting, so it will be a re bore.
The head itself looks good and although is still covered in crap, I could not see any visible cracks.
The water ways were clear and no signs of corrosion at all, again most odd on a head that is 40 years old.
So, it was left to steep in penetrating oil (its seized) and I will have a go at turning it over in a day or so…
Meanwhile with a little help form my friend, we have made the front roll over jig that attaches to the body… a home-made affair….
What can I say - who did this needs there tools taking off them.......
7 marks on the piston - am I missing a cyl?
Pits in the bore -
All the rest look like this will very little lip...
Marc-M
Well-Known Member
Took of the ancillary’s off the head and found some weird stuff – like a soft crumbly wax in the inlet port… most odd – has anyone got any ideas on what it could be?
The head has 72 stamped on it so it looks like it’s the original head that came with the car.

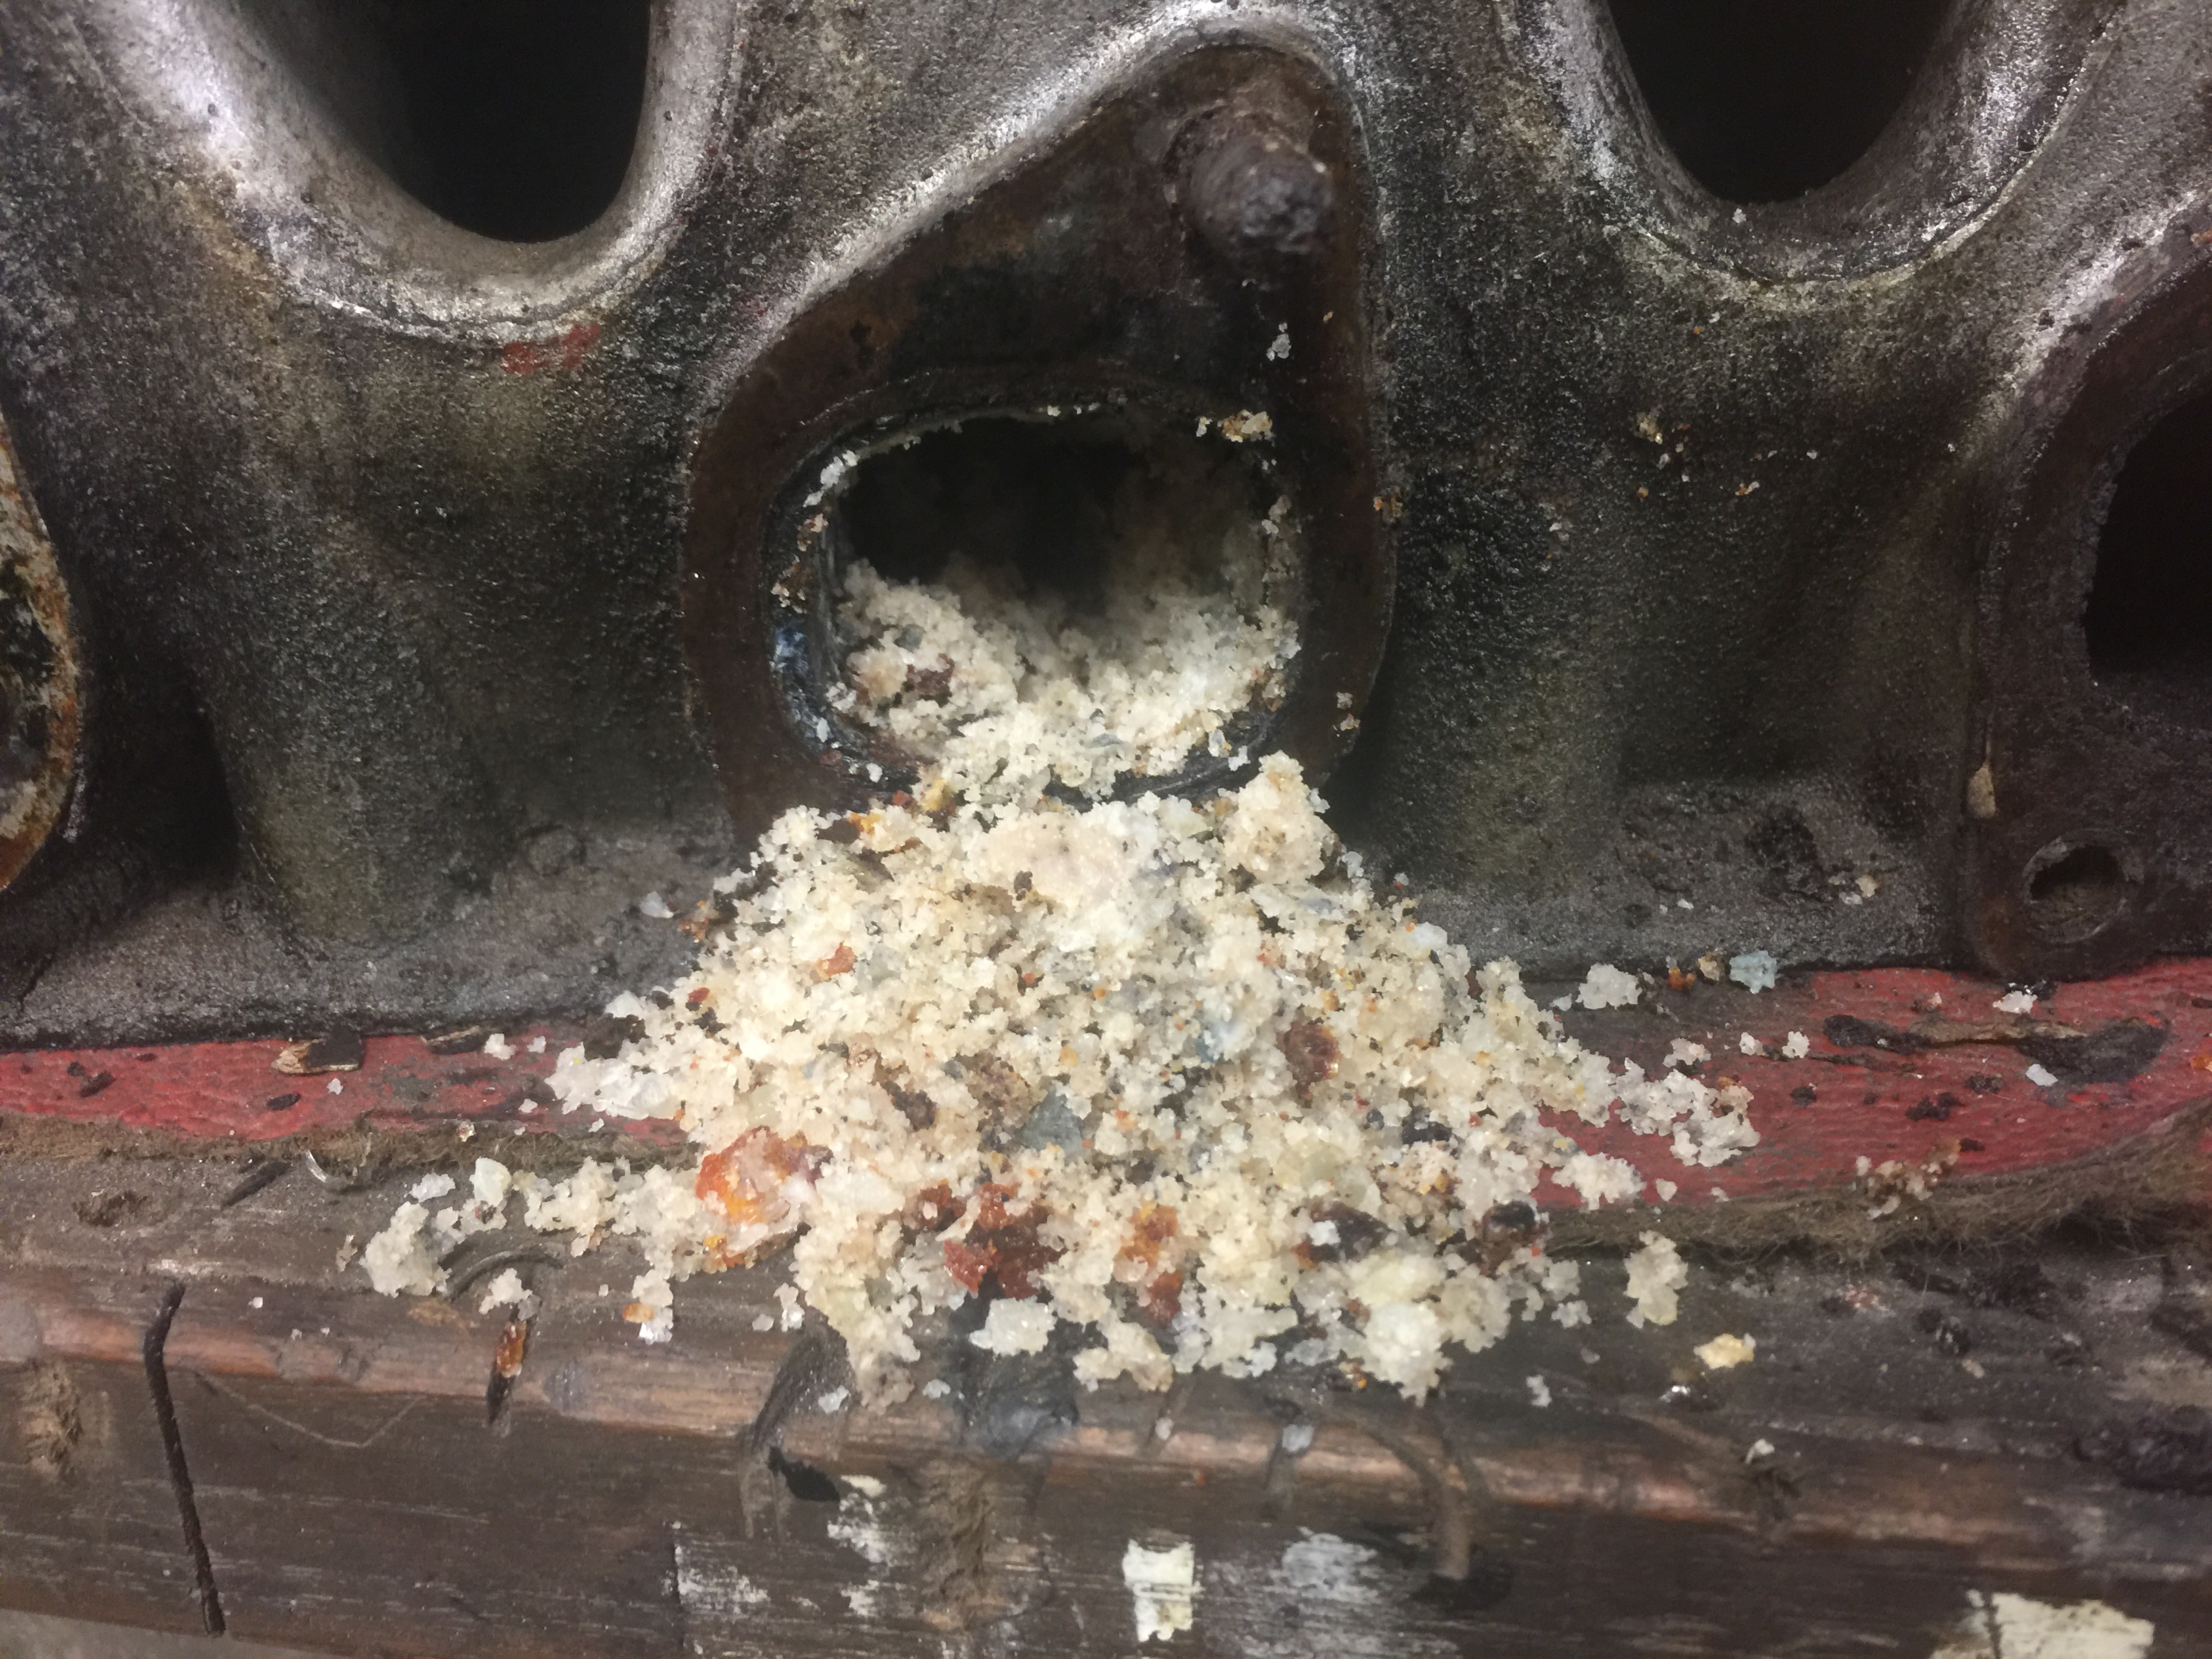
most odd!!!!
The head has 72 stamped on it so it looks like it’s the original head that came with the car.
most odd!!!!
Old coolant will turn a crumbly yellow/white, looks like powder or salt but very solid.
Marc-M
Well-Known Member
Over the last two weeks not much time has been spent in the garage and only a few things have been done.
The engine is now free after a good soaking of home-made penetrating oil – 50% Acetone and 50% ATF fluid – must be kept in a glass jar to stop it evaporating!
I had to go out and get a 36mm socket to go in the front pully, but after a little gentle toing and froing the pistons came free and it now turn’s over quite sweetly, so now the strip down should be easy.
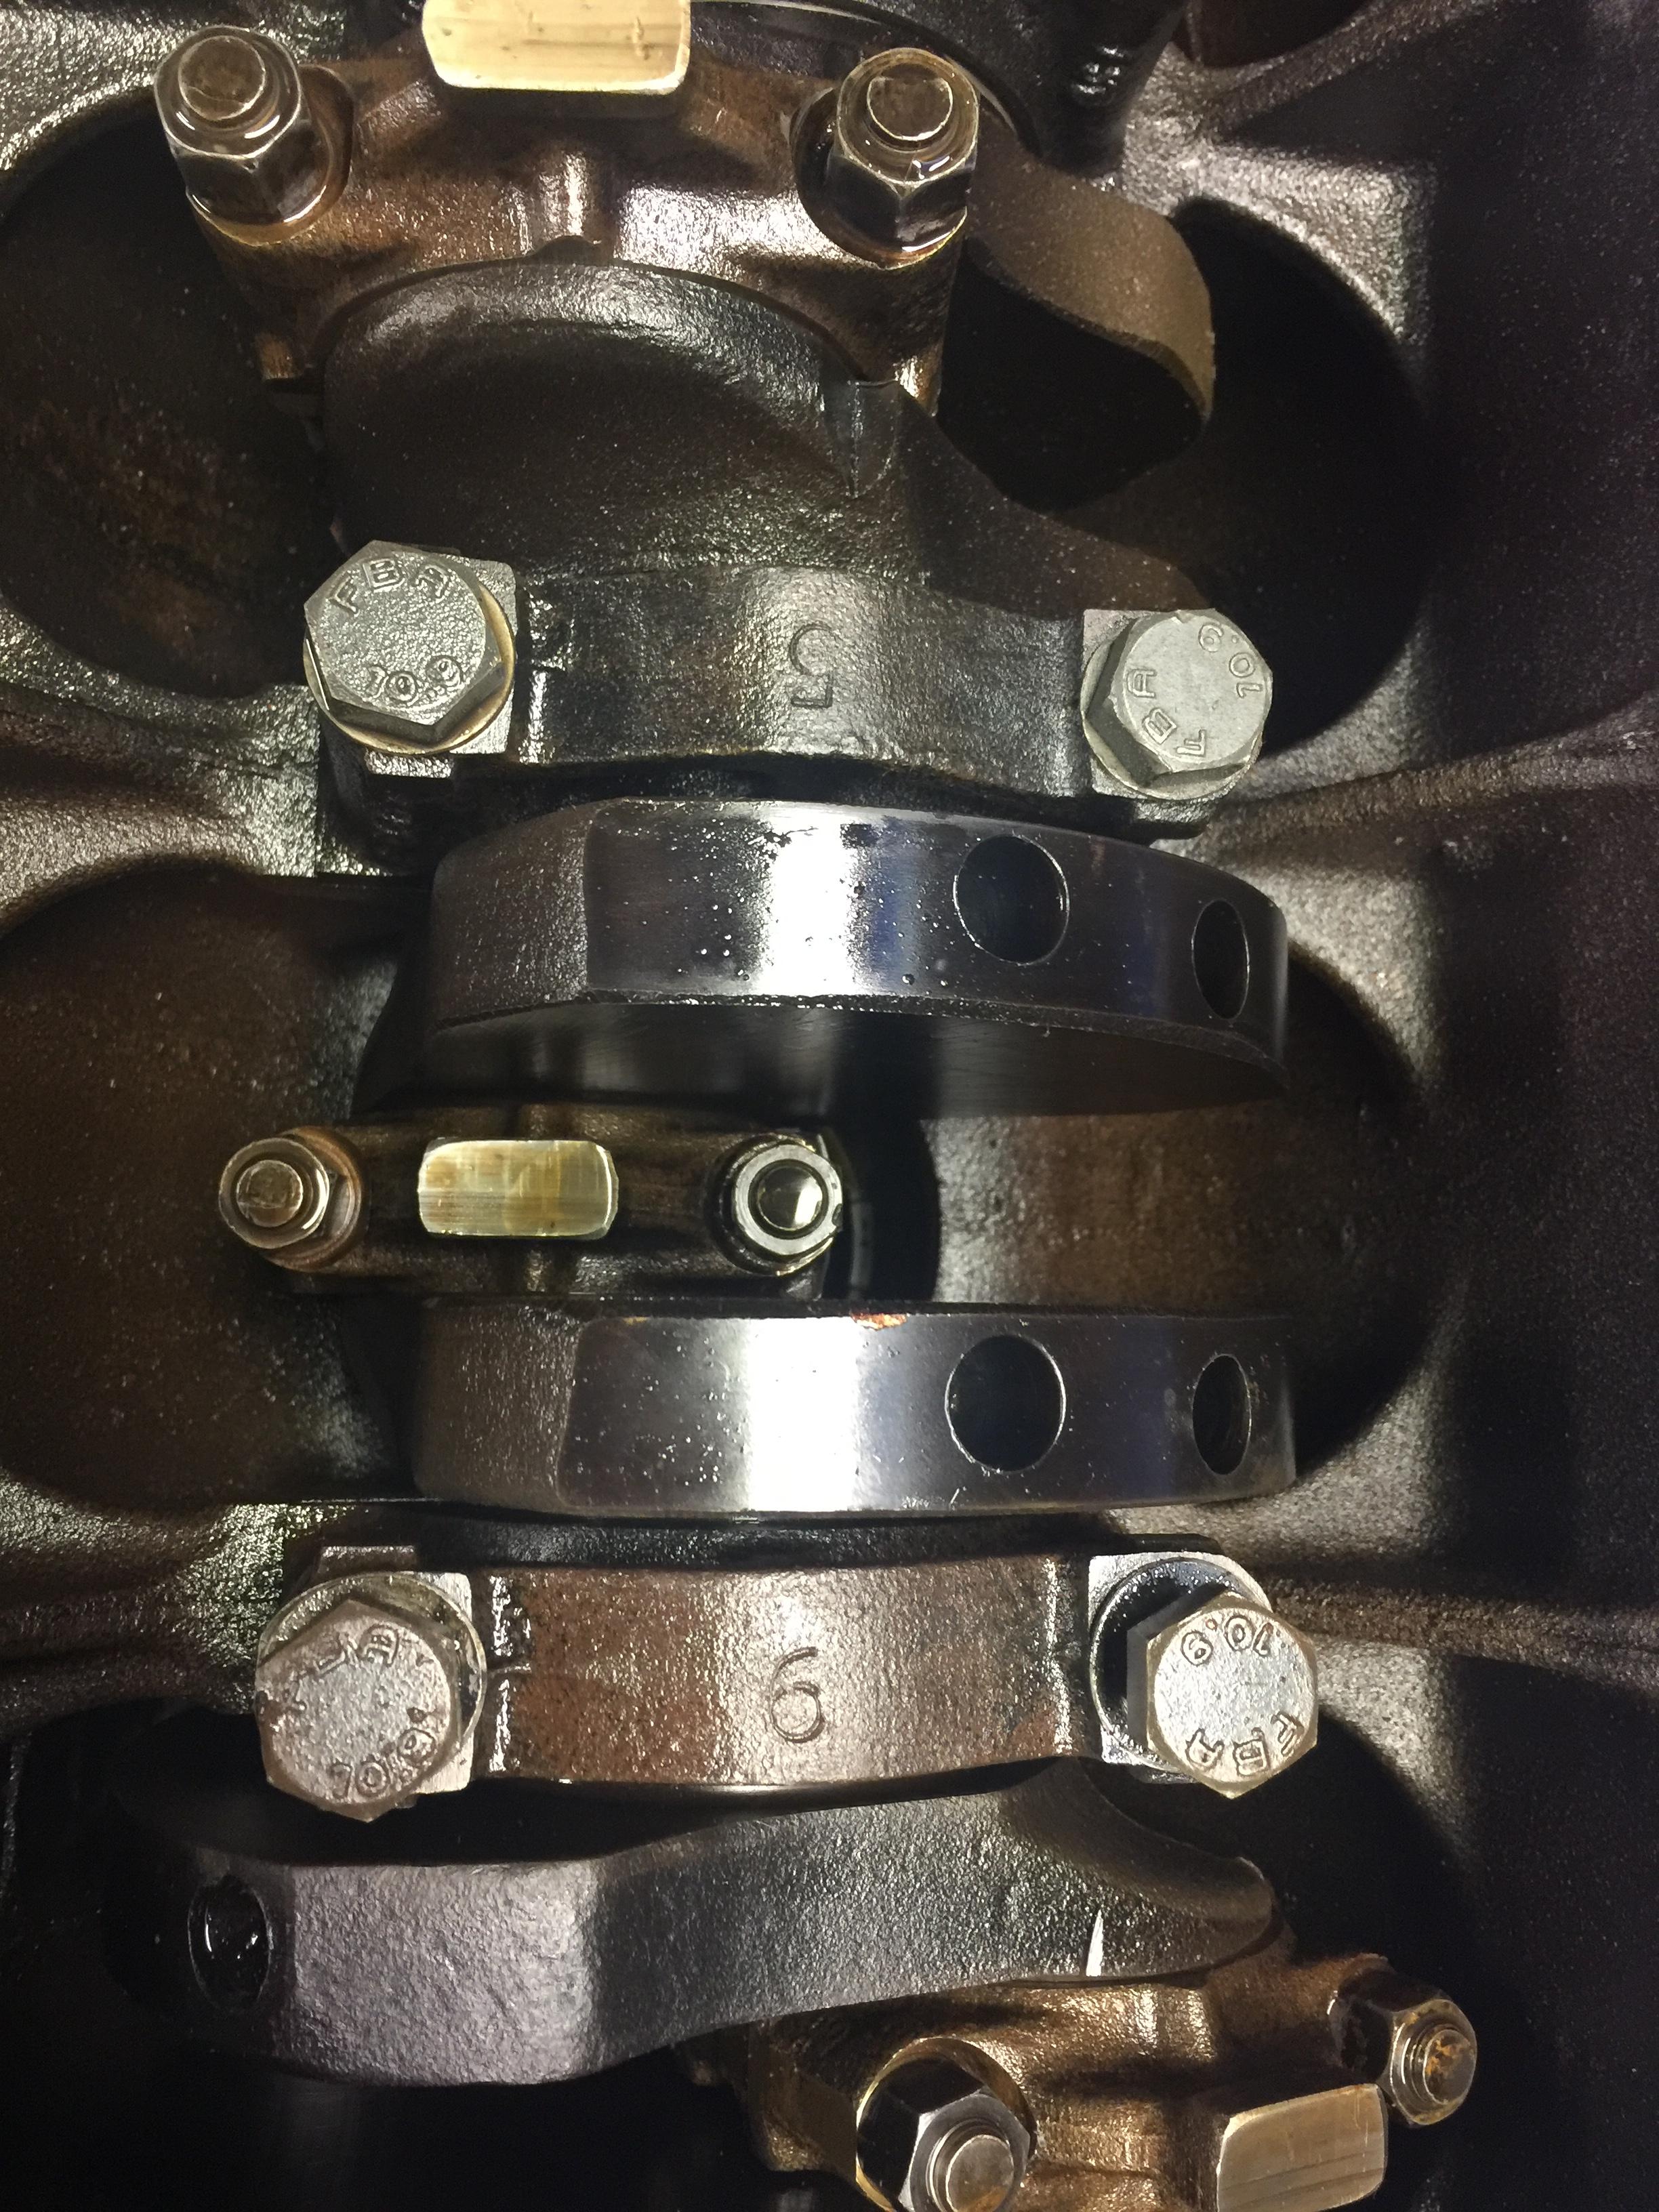
I decided to take the sump off to have a look, and then could not resist taking a main cap off to see the state of the bearings.
The first thing to show up as that one of the main caps “No6” is not stamped the same way around as the others – see picture.
But after taking it off, I can report that the crank (well on one anyhow) is in great condition and that the shells are std, so I think that it will only need a new set of std shells – but will get my engine machinist to check it to ensure I’m right.
Finished off the roll over for the car, and finished off taking off all the rest of the hardware so the car is now a shell.
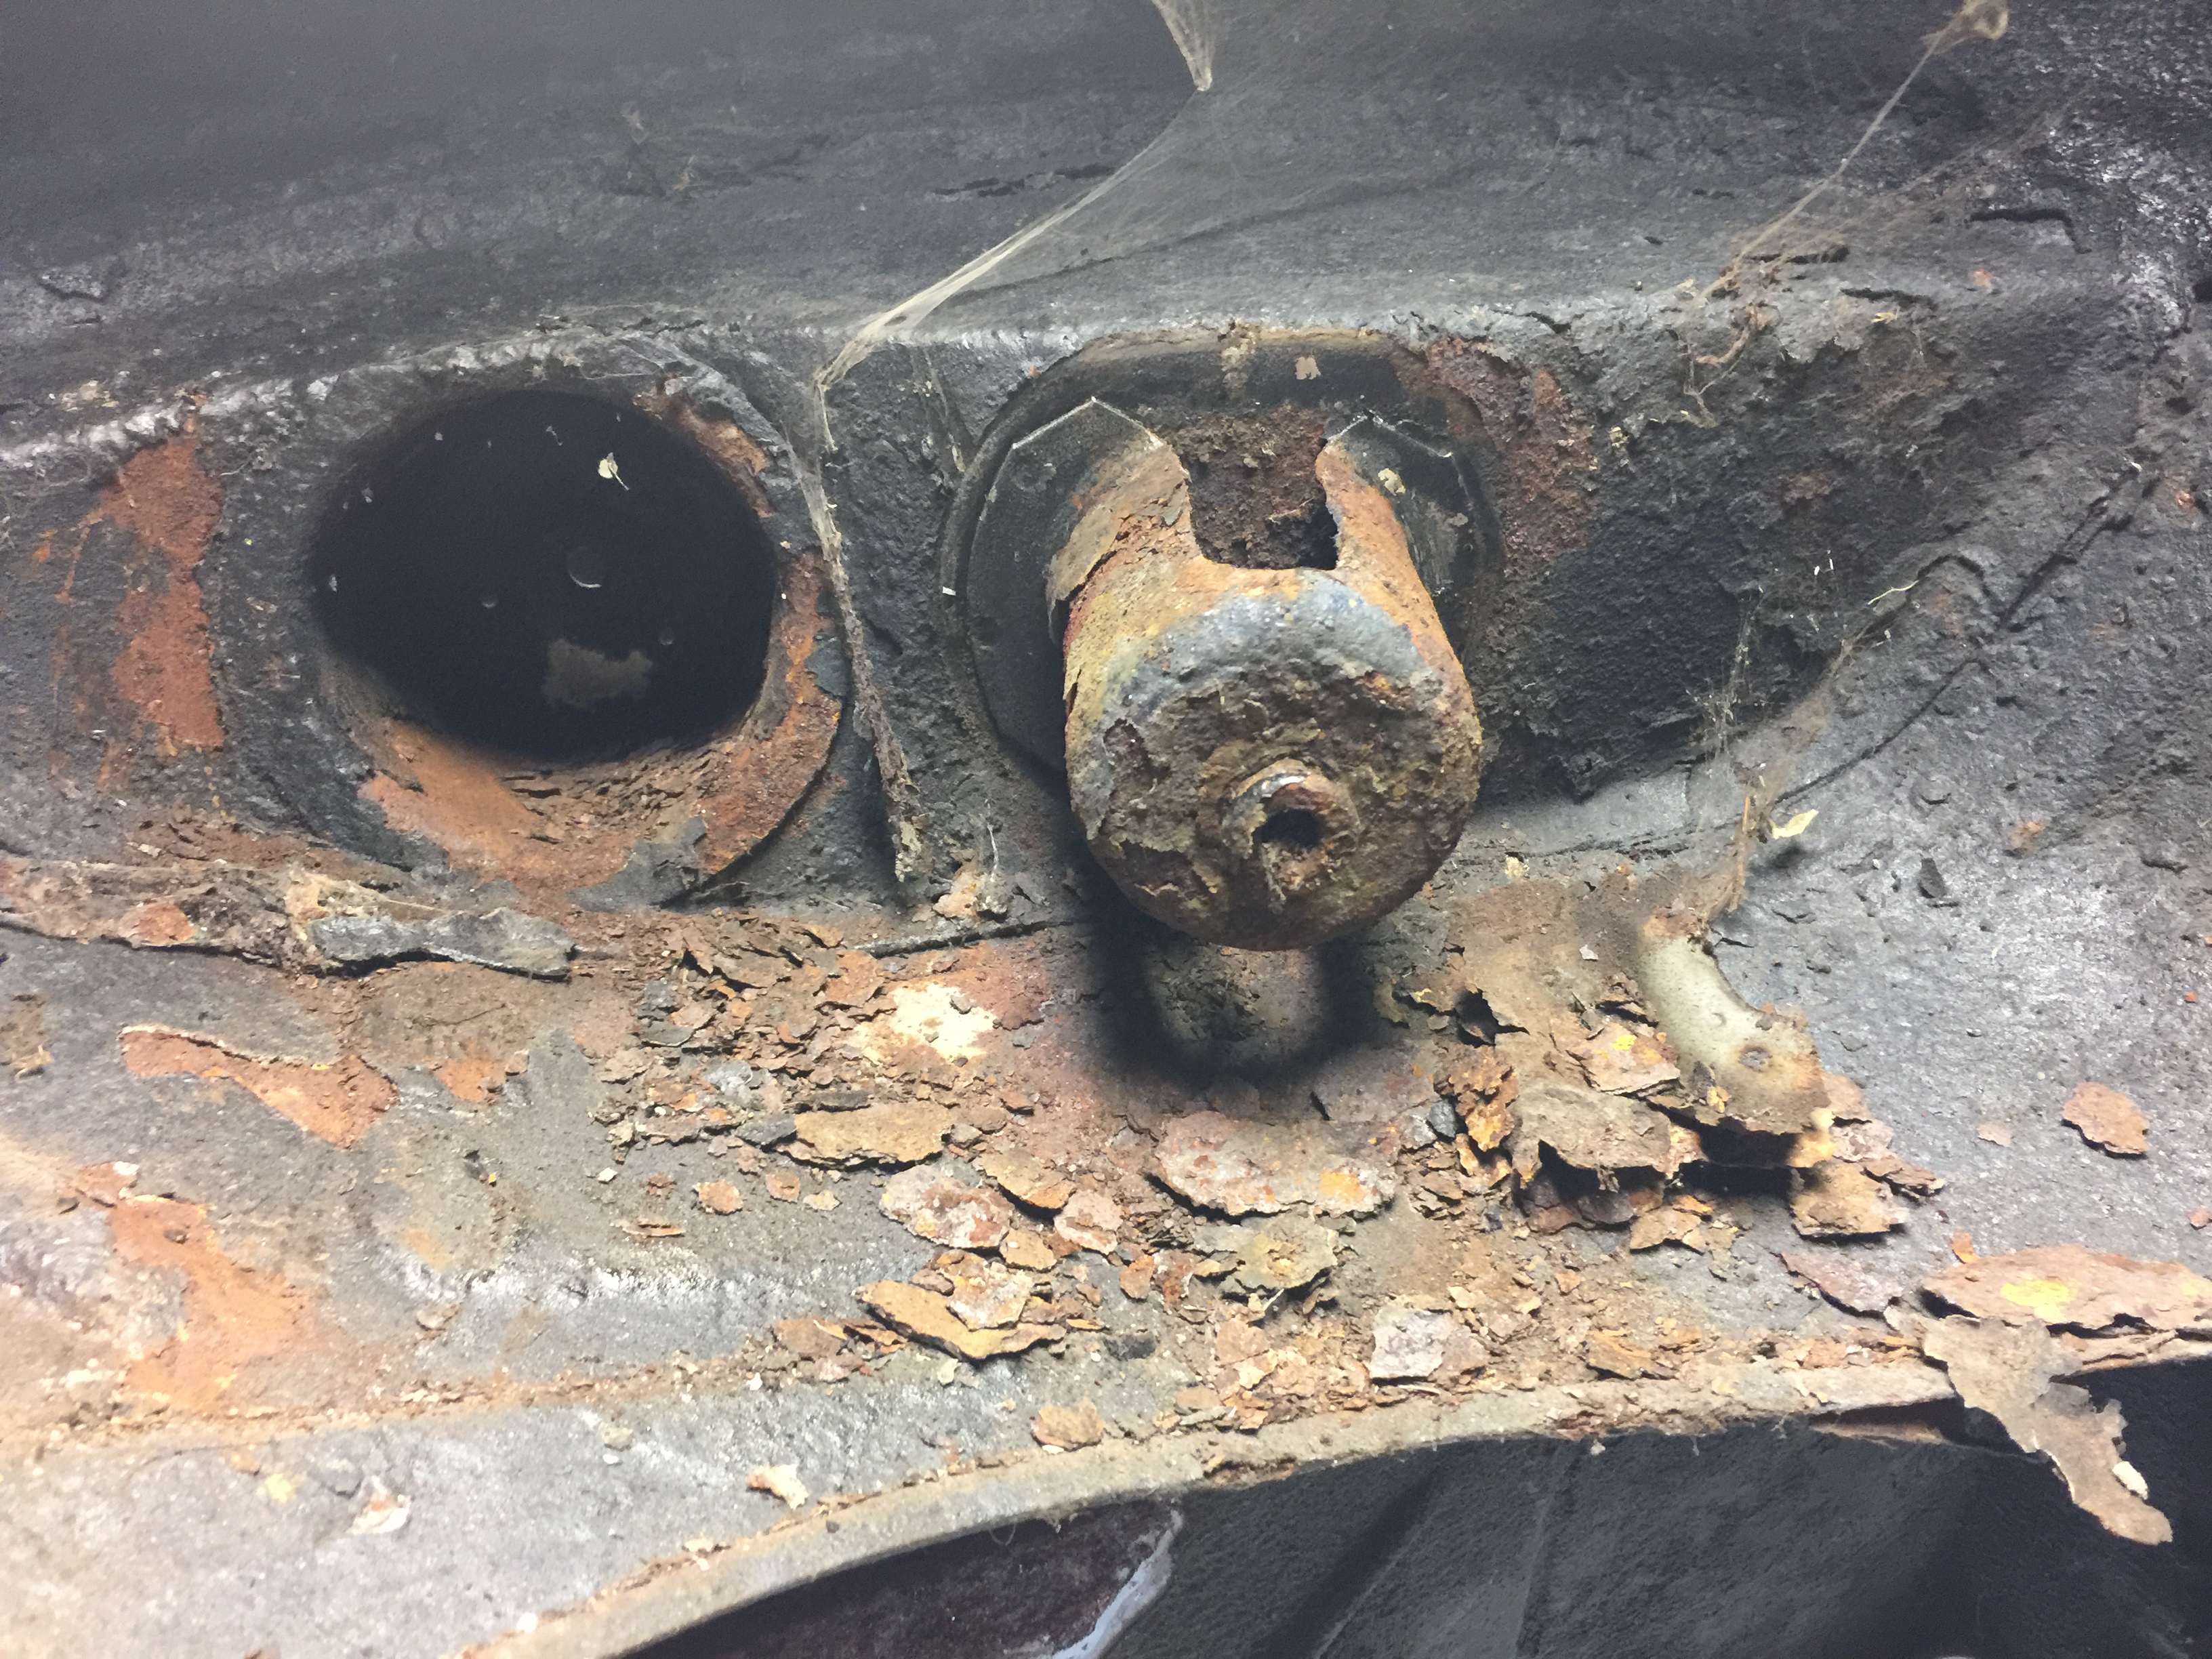
Again, could not resist having a poke around and the car has its rust spots and holes but not that bad.
The car has a type of rubber factory coating protection, and mainly this has done it job.
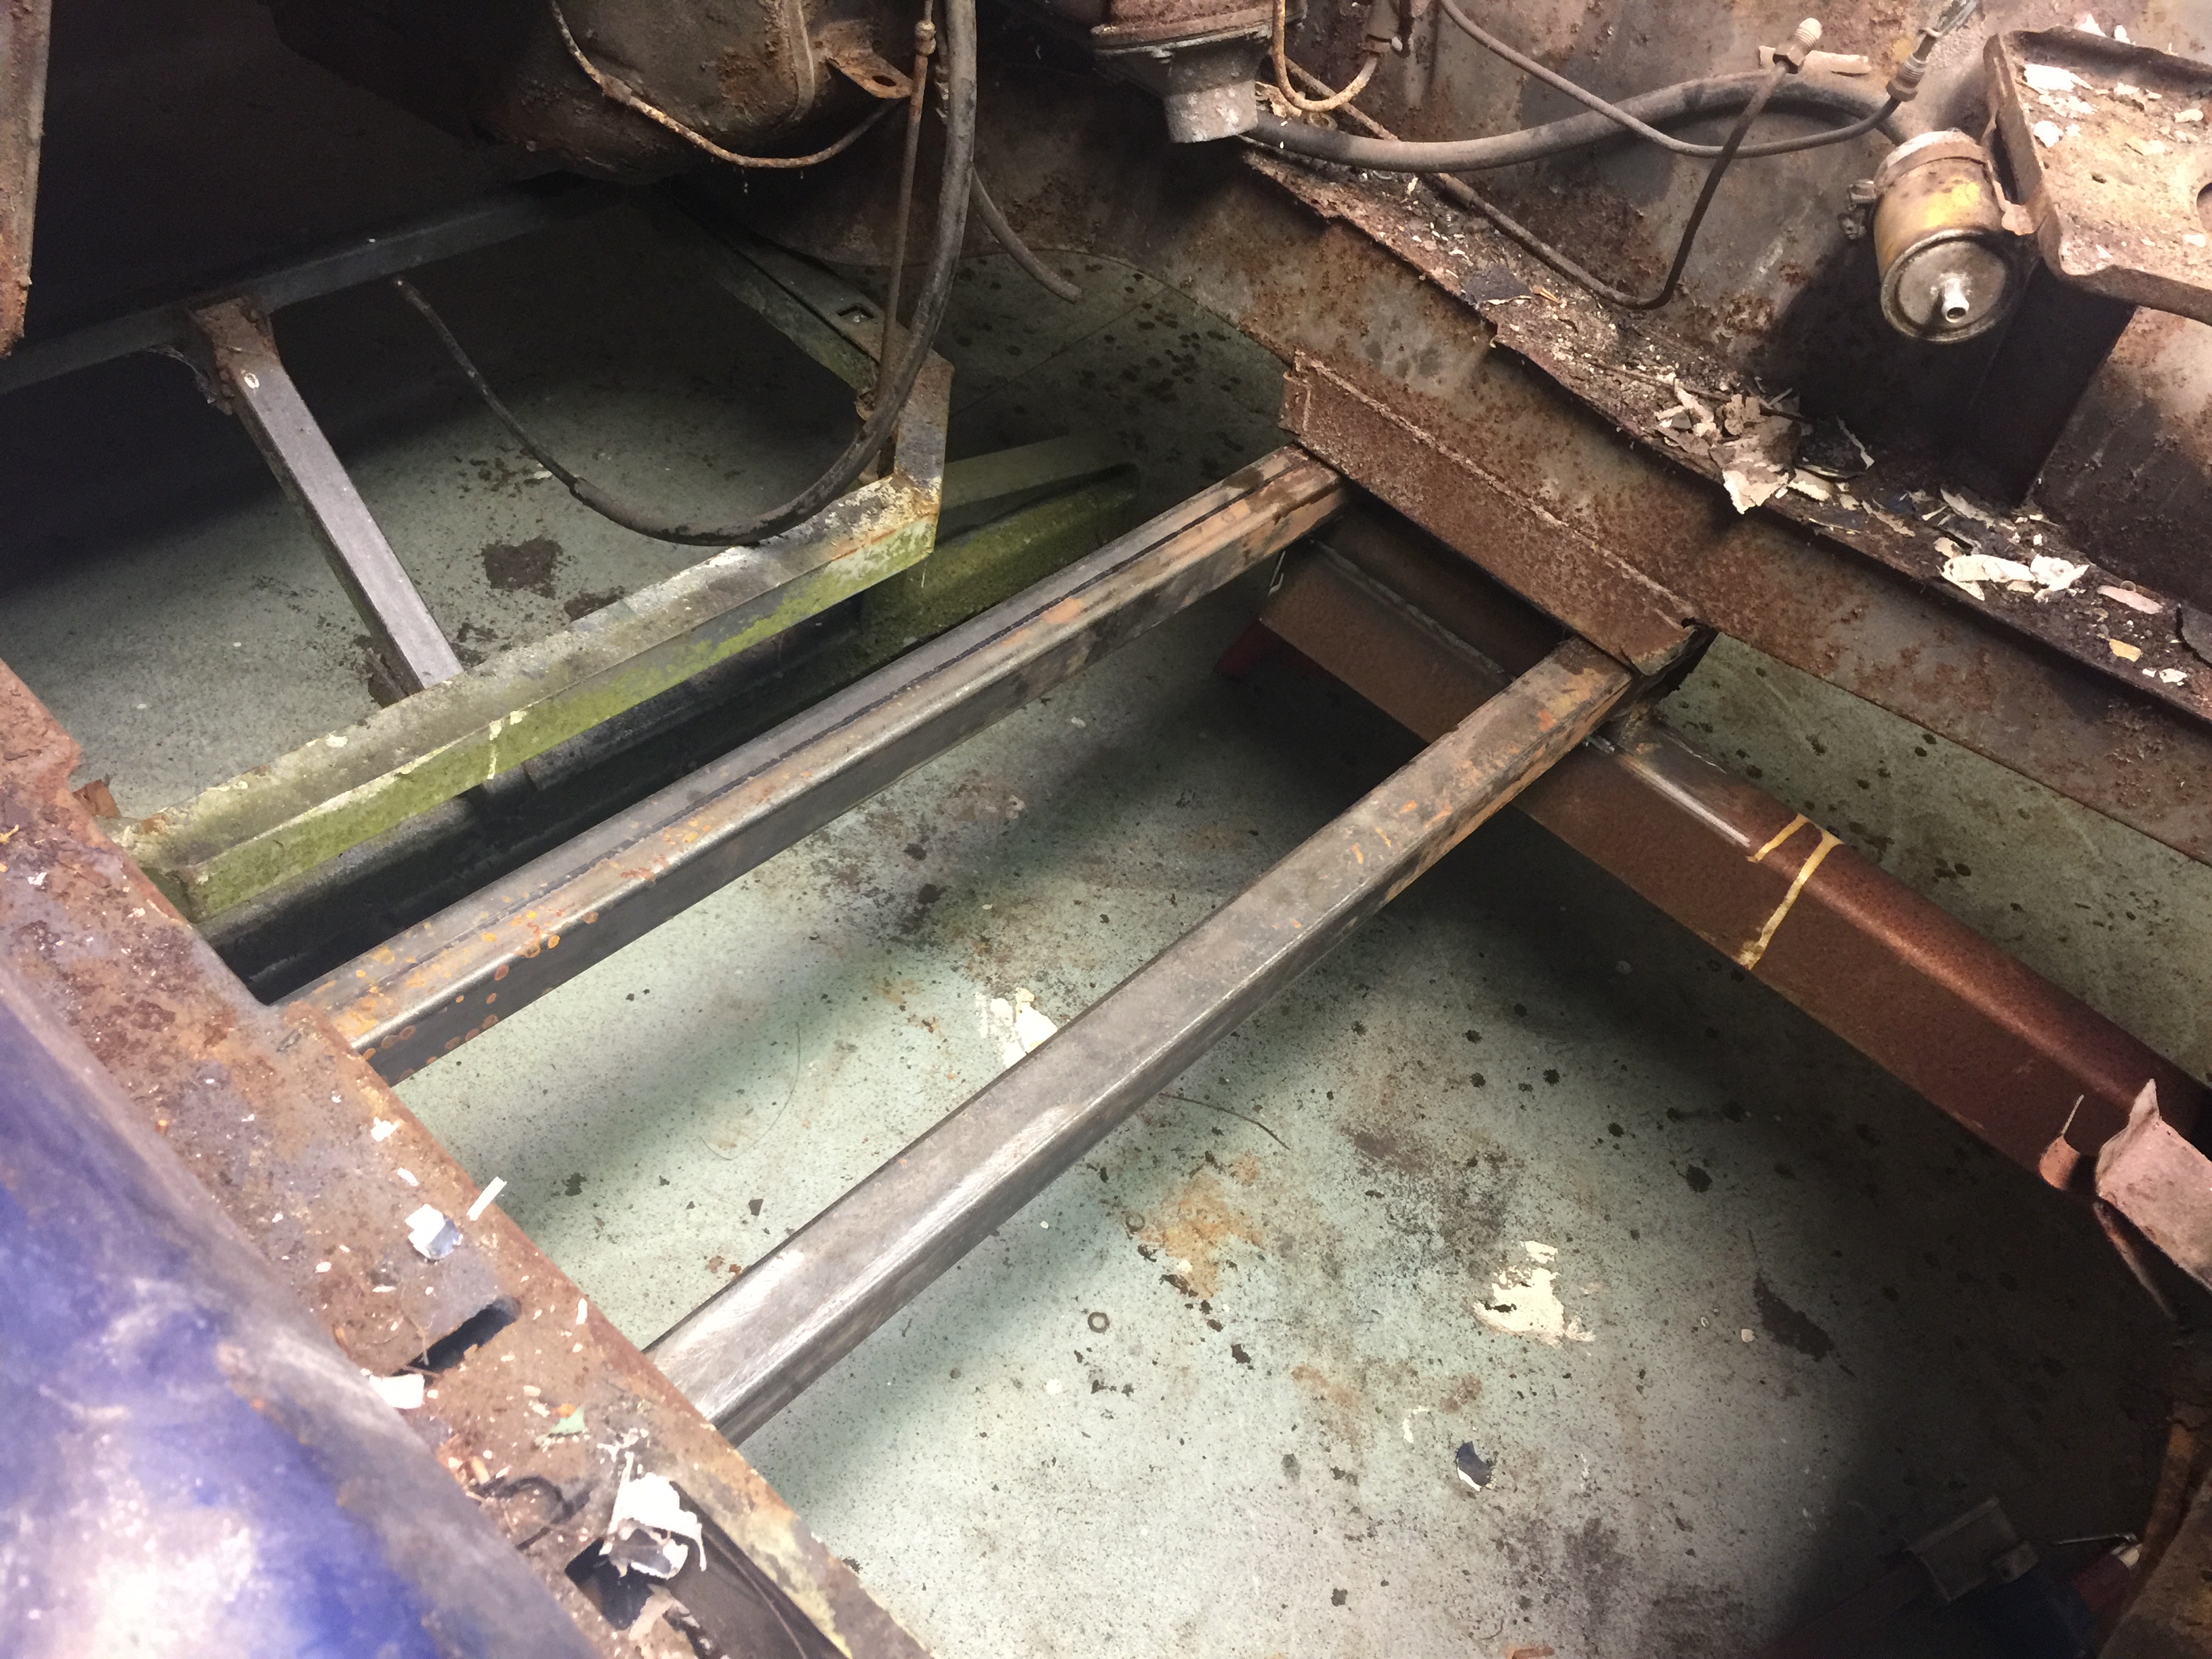
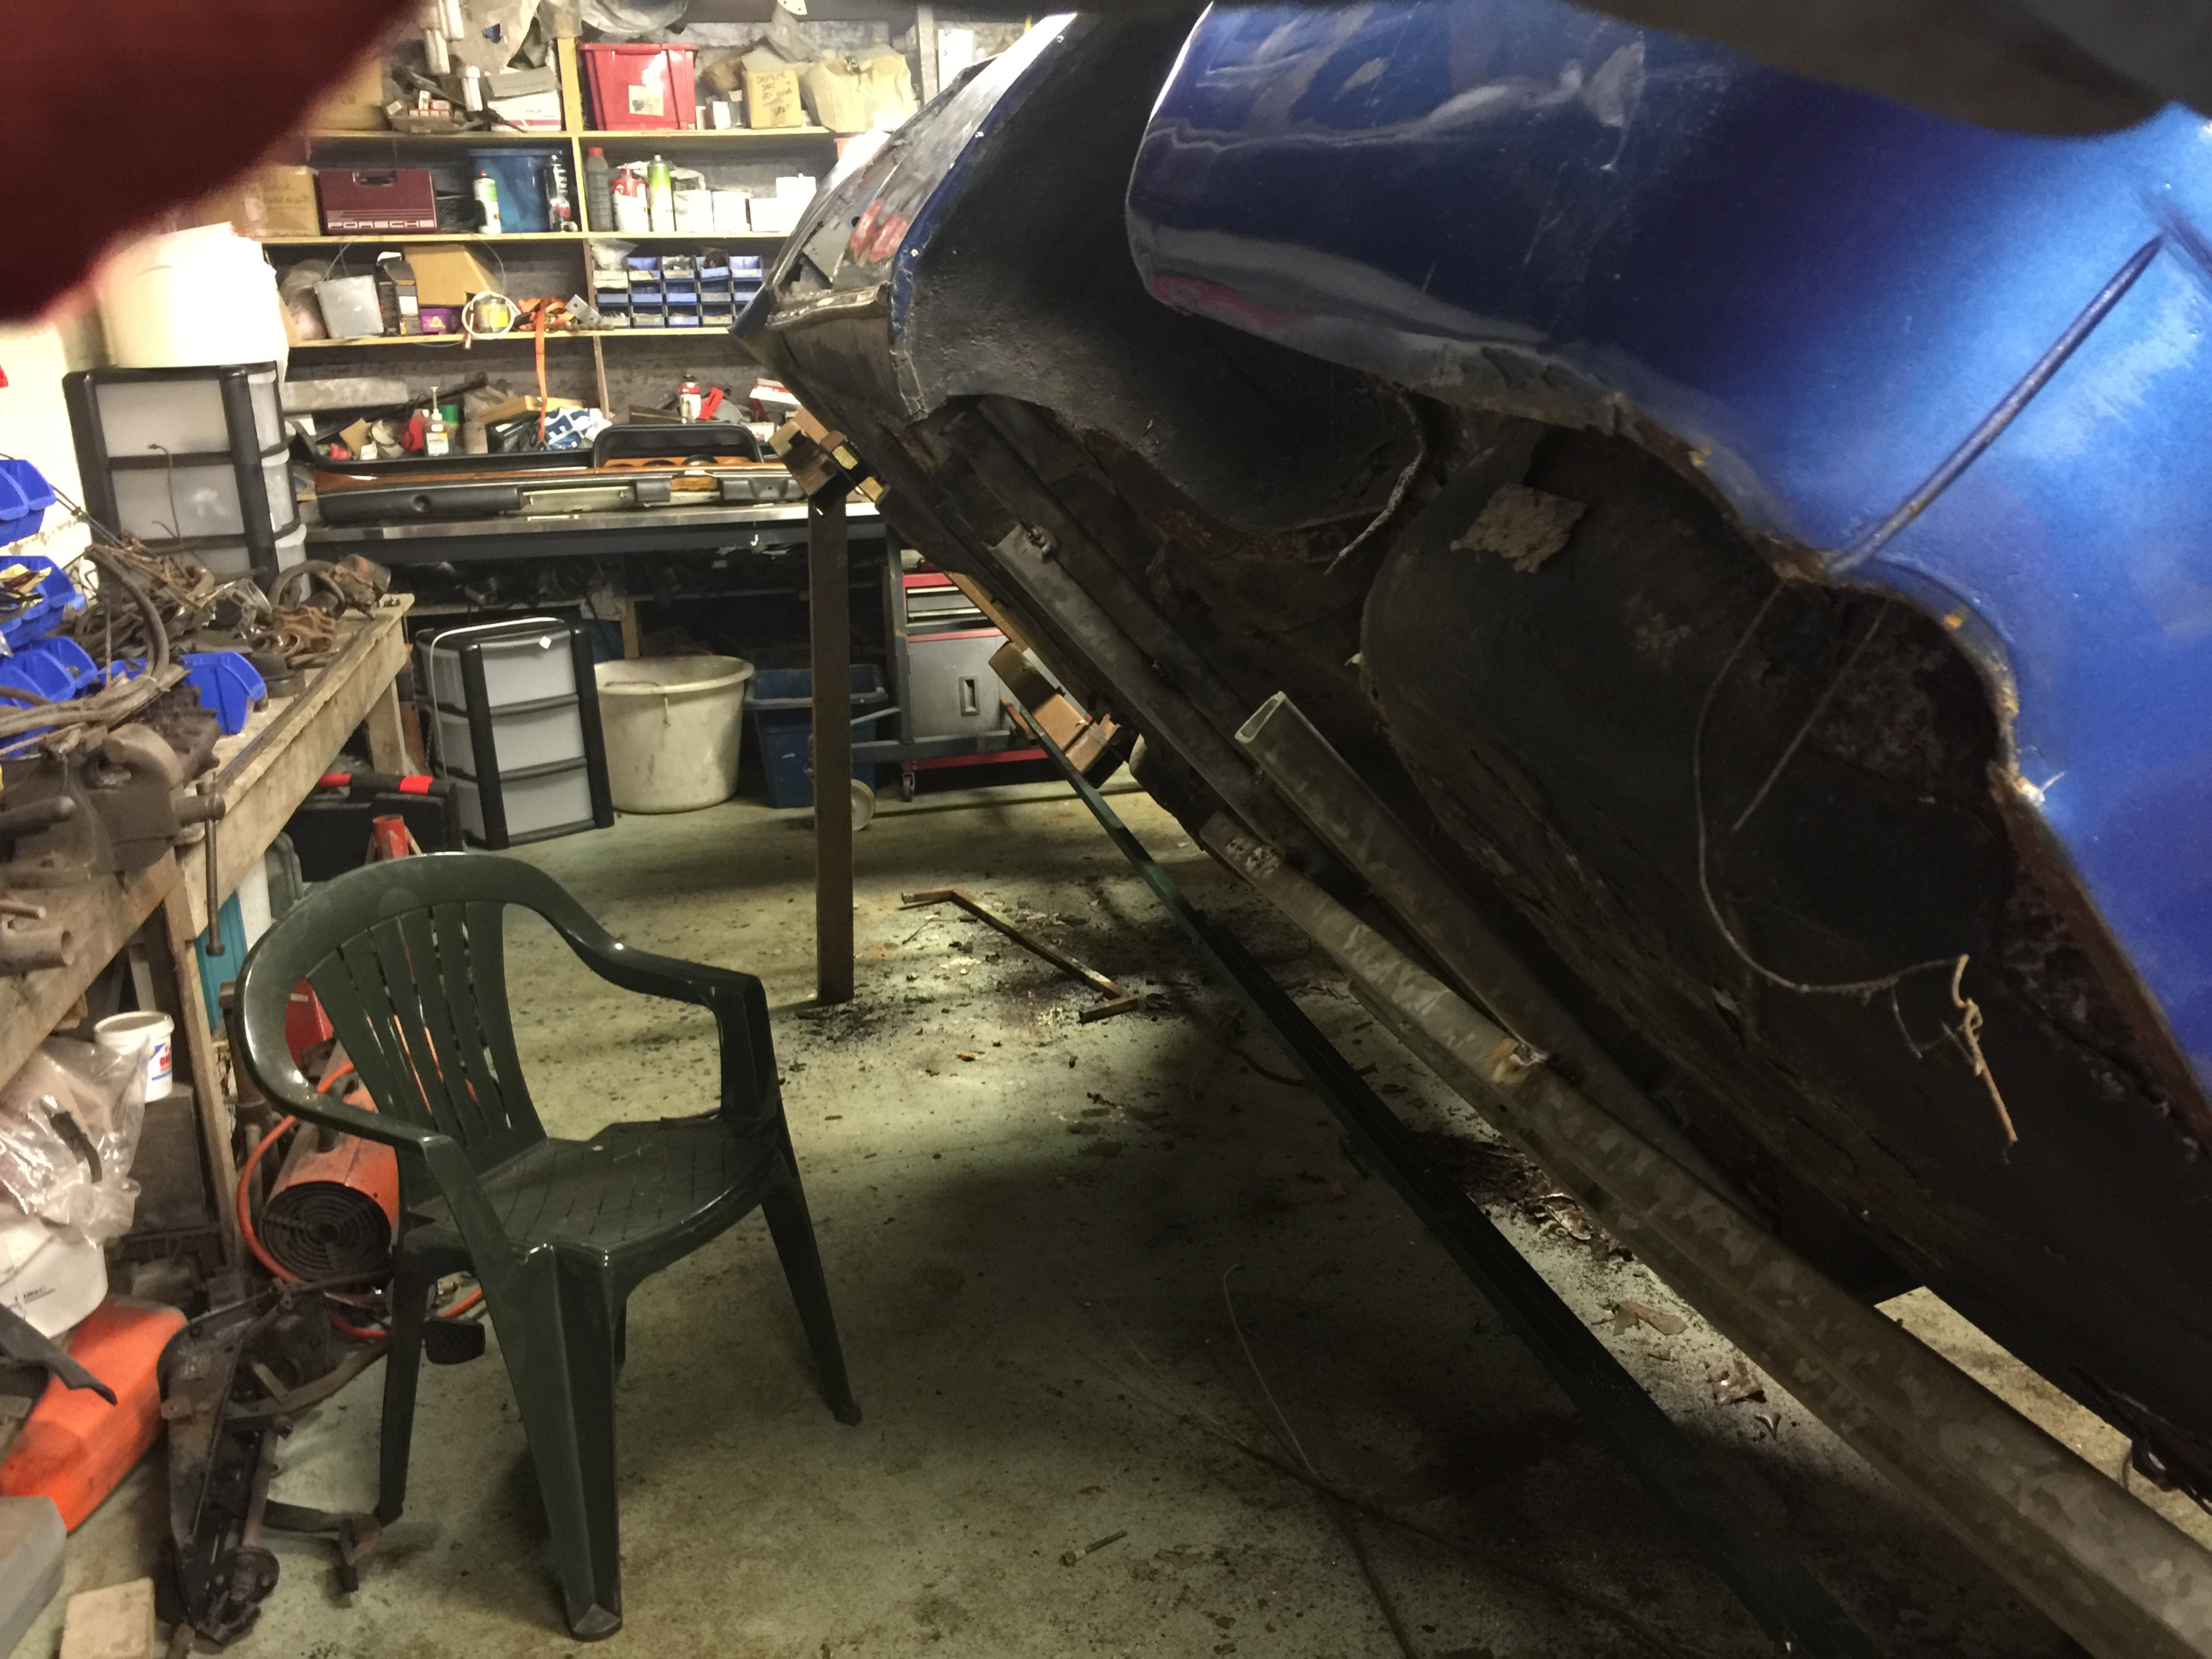
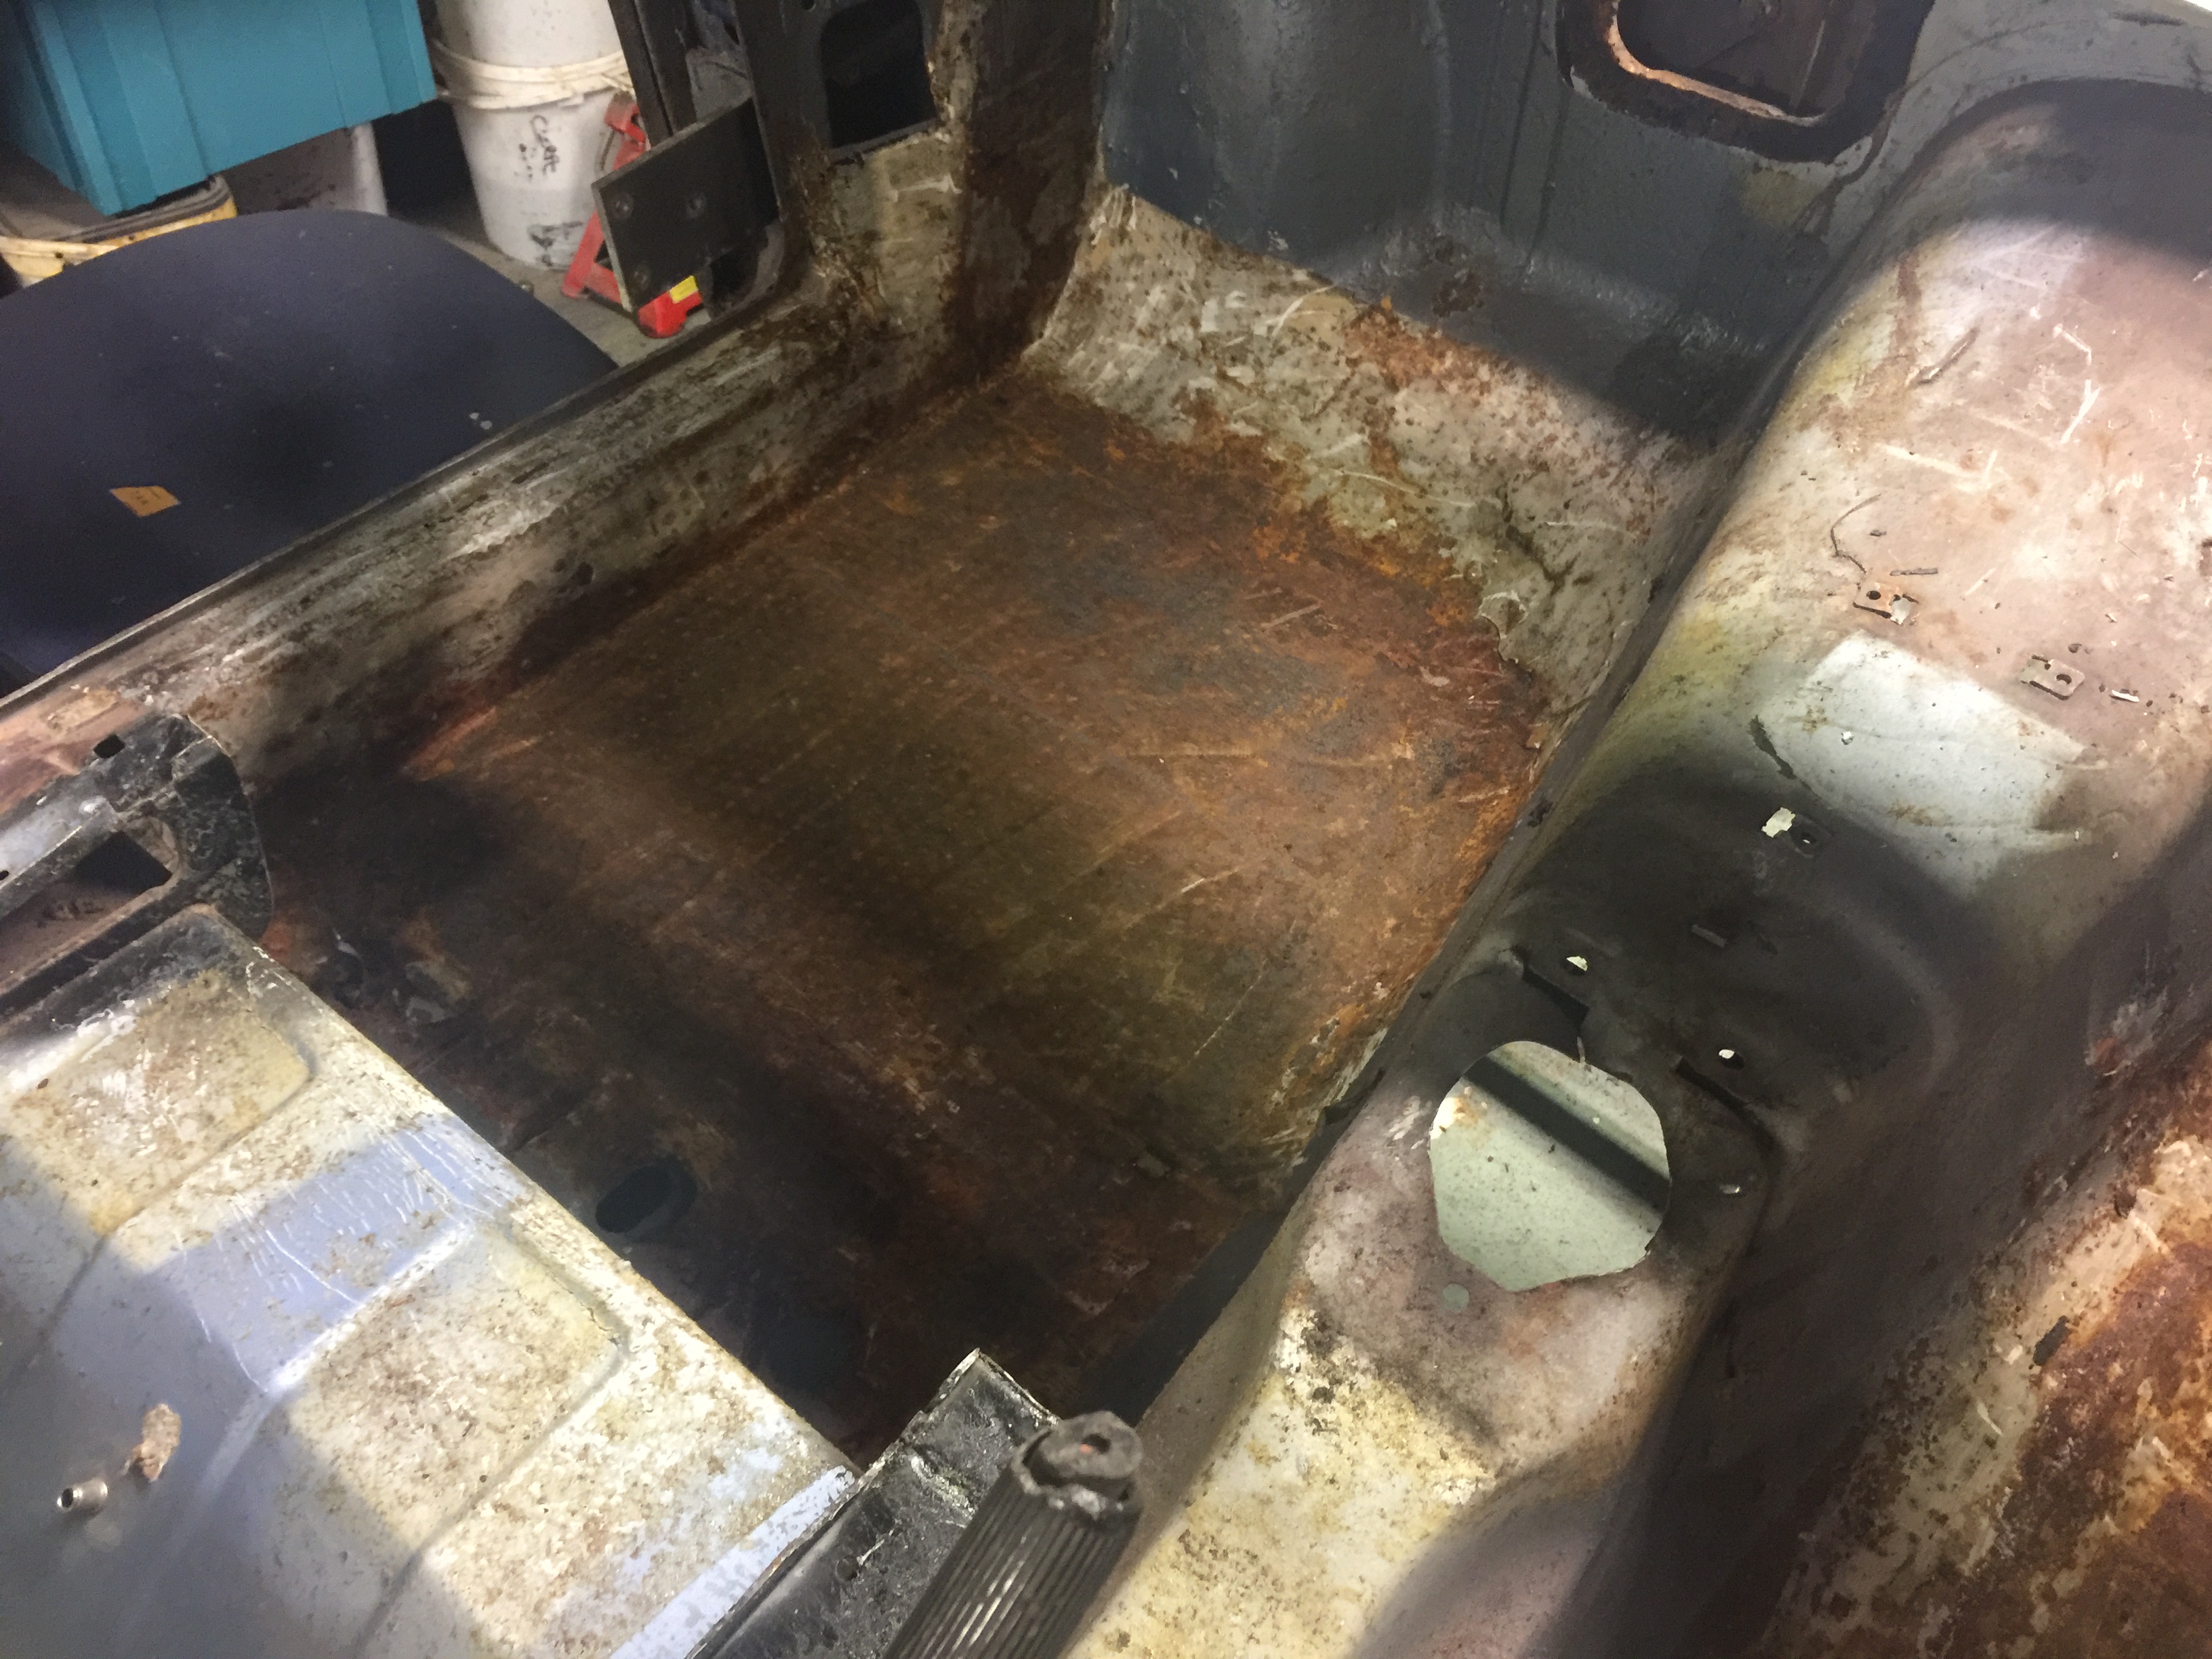
Some of you may remember the car having sound proofing pads stuck to the inside of the car, I have taken these off, and found some odd stuff going on…
In both of the front foot wells there should be a depression in the floor pan, but mine has had a flat plate spot welded over?? But looking from under the car the original floor pans are there – with no rot.
I think the company whom put sound proofing in decided to make the floors flat and just simply put a steel sheet over the existing floor, so that will need to be unpicked.
I have decided to have the car SPL dipped first, so its booked in Jan the 15th.
We will see how much of the car comes back!
I have found and purchased 2 new old stock front wings and a new rear wing, these may or may not be used, but they are getting so scare I have decided to pick them up on the way just in case I need them.
I have found a front Grill, unbelievably it was in the next town, it’s not 100% but better than mine.
The chrome plating and the bright anodizing has all been done and I now have it at home.
The chrome is spot on, the Bright Anodizing is good apart from the windscreen surrounds and 2 sections of the waist band trims
My tip to anyone whom is going down the restoring the anodizing would be not to get them bright anodizing, but try the satin finish and see how that goes.
I say this because I got the trims stripped, polished to a high shine and then bright anodized…but the Aluminium as small pitting in it where it has oxidized (like extremely small worm holes) and this seems to cause a duller finish, so in effect you get bright chrome type finish with a satin type finish splattered across the trim.
So, if it all was satin it would not look so uneven… well that my take on it.
So, I am now no the hunt for new windscreen trims and waste trims.
All the other aluminium has come out great and should give a good sparkle to the car.
My garage is a hell hole again and I need to do a big tidy up!
I now know what parts I need, and the long, long, long expensive task of getting them is under way.
The other problem I am having is what colour the car is going to be….
The original colour that car was made is metallic Blue, now it a great colour but I have seen the metallic green and I am really liking it…..
I am in a bit of a dilemma…. Should I keep the car the original colour, or do I go down an original colour, but not one that was on my car…….
main cap - stamp the wrong way round??
A bit of rot.....

A flat sheet of steel spot welded over the floor to make it smooth
The engine is now free after a good soaking of home-made penetrating oil – 50% Acetone and 50% ATF fluid – must be kept in a glass jar to stop it evaporating!
I had to go out and get a 36mm socket to go in the front pully, but after a little gentle toing and froing the pistons came free and it now turn’s over quite sweetly, so now the strip down should be easy.
I decided to take the sump off to have a look, and then could not resist taking a main cap off to see the state of the bearings.
The first thing to show up as that one of the main caps “No6” is not stamped the same way around as the others – see picture.
But after taking it off, I can report that the crank (well on one anyhow) is in great condition and that the shells are std, so I think that it will only need a new set of std shells – but will get my engine machinist to check it to ensure I’m right.
Finished off the roll over for the car, and finished off taking off all the rest of the hardware so the car is now a shell.
Again, could not resist having a poke around and the car has its rust spots and holes but not that bad.
The car has a type of rubber factory coating protection, and mainly this has done it job.
Some of you may remember the car having sound proofing pads stuck to the inside of the car, I have taken these off, and found some odd stuff going on…
In both of the front foot wells there should be a depression in the floor pan, but mine has had a flat plate spot welded over?? But looking from under the car the original floor pans are there – with no rot.
I think the company whom put sound proofing in decided to make the floors flat and just simply put a steel sheet over the existing floor, so that will need to be unpicked.
I have decided to have the car SPL dipped first, so its booked in Jan the 15th.
We will see how much of the car comes back!
I have found and purchased 2 new old stock front wings and a new rear wing, these may or may not be used, but they are getting so scare I have decided to pick them up on the way just in case I need them.
I have found a front Grill, unbelievably it was in the next town, it’s not 100% but better than mine.
The chrome plating and the bright anodizing has all been done and I now have it at home.
The chrome is spot on, the Bright Anodizing is good apart from the windscreen surrounds and 2 sections of the waist band trims
My tip to anyone whom is going down the restoring the anodizing would be not to get them bright anodizing, but try the satin finish and see how that goes.
I say this because I got the trims stripped, polished to a high shine and then bright anodized…but the Aluminium as small pitting in it where it has oxidized (like extremely small worm holes) and this seems to cause a duller finish, so in effect you get bright chrome type finish with a satin type finish splattered across the trim.
So, if it all was satin it would not look so uneven… well that my take on it.
So, I am now no the hunt for new windscreen trims and waste trims.
All the other aluminium has come out great and should give a good sparkle to the car.
My garage is a hell hole again and I need to do a big tidy up!
I now know what parts I need, and the long, long, long expensive task of getting them is under way.
The other problem I am having is what colour the car is going to be….
The original colour that car was made is metallic Blue, now it a great colour but I have seen the metallic green and I am really liking it…..
I am in a bit of a dilemma…. Should I keep the car the original colour, or do I go down an original colour, but not one that was on my car…….
main cap - stamp the wrong way round??
A bit of rot.....
A flat sheet of steel spot welded over the floor to make it smooth
Last edited:
Marc, Those crystals coming out of the head are actually the remnants of cocaine when that car was used to smuggle drugs into Europe- Have it tested and see if you can finance the rebuild with it") It's kind of like finding change behind the rear seat!
It's kind of like finding change behind the rear seat!
It's kind of like finding change behind the rear seat!Marc-M
Well-Known Member
Marc, Those crystals coming out of the head are actually the remnants of cocaine when that car was used to smuggle drugs into Europe- Have it tested and see if you can finance the rebuild with it
I will gather up and give it to my mates for Christmas.
They may be able to see Rudolf flying across the sky…..
Marc-M
Well-Known Member
Due to my garage being too cold and the Christmas season I have only done a few bits to show.
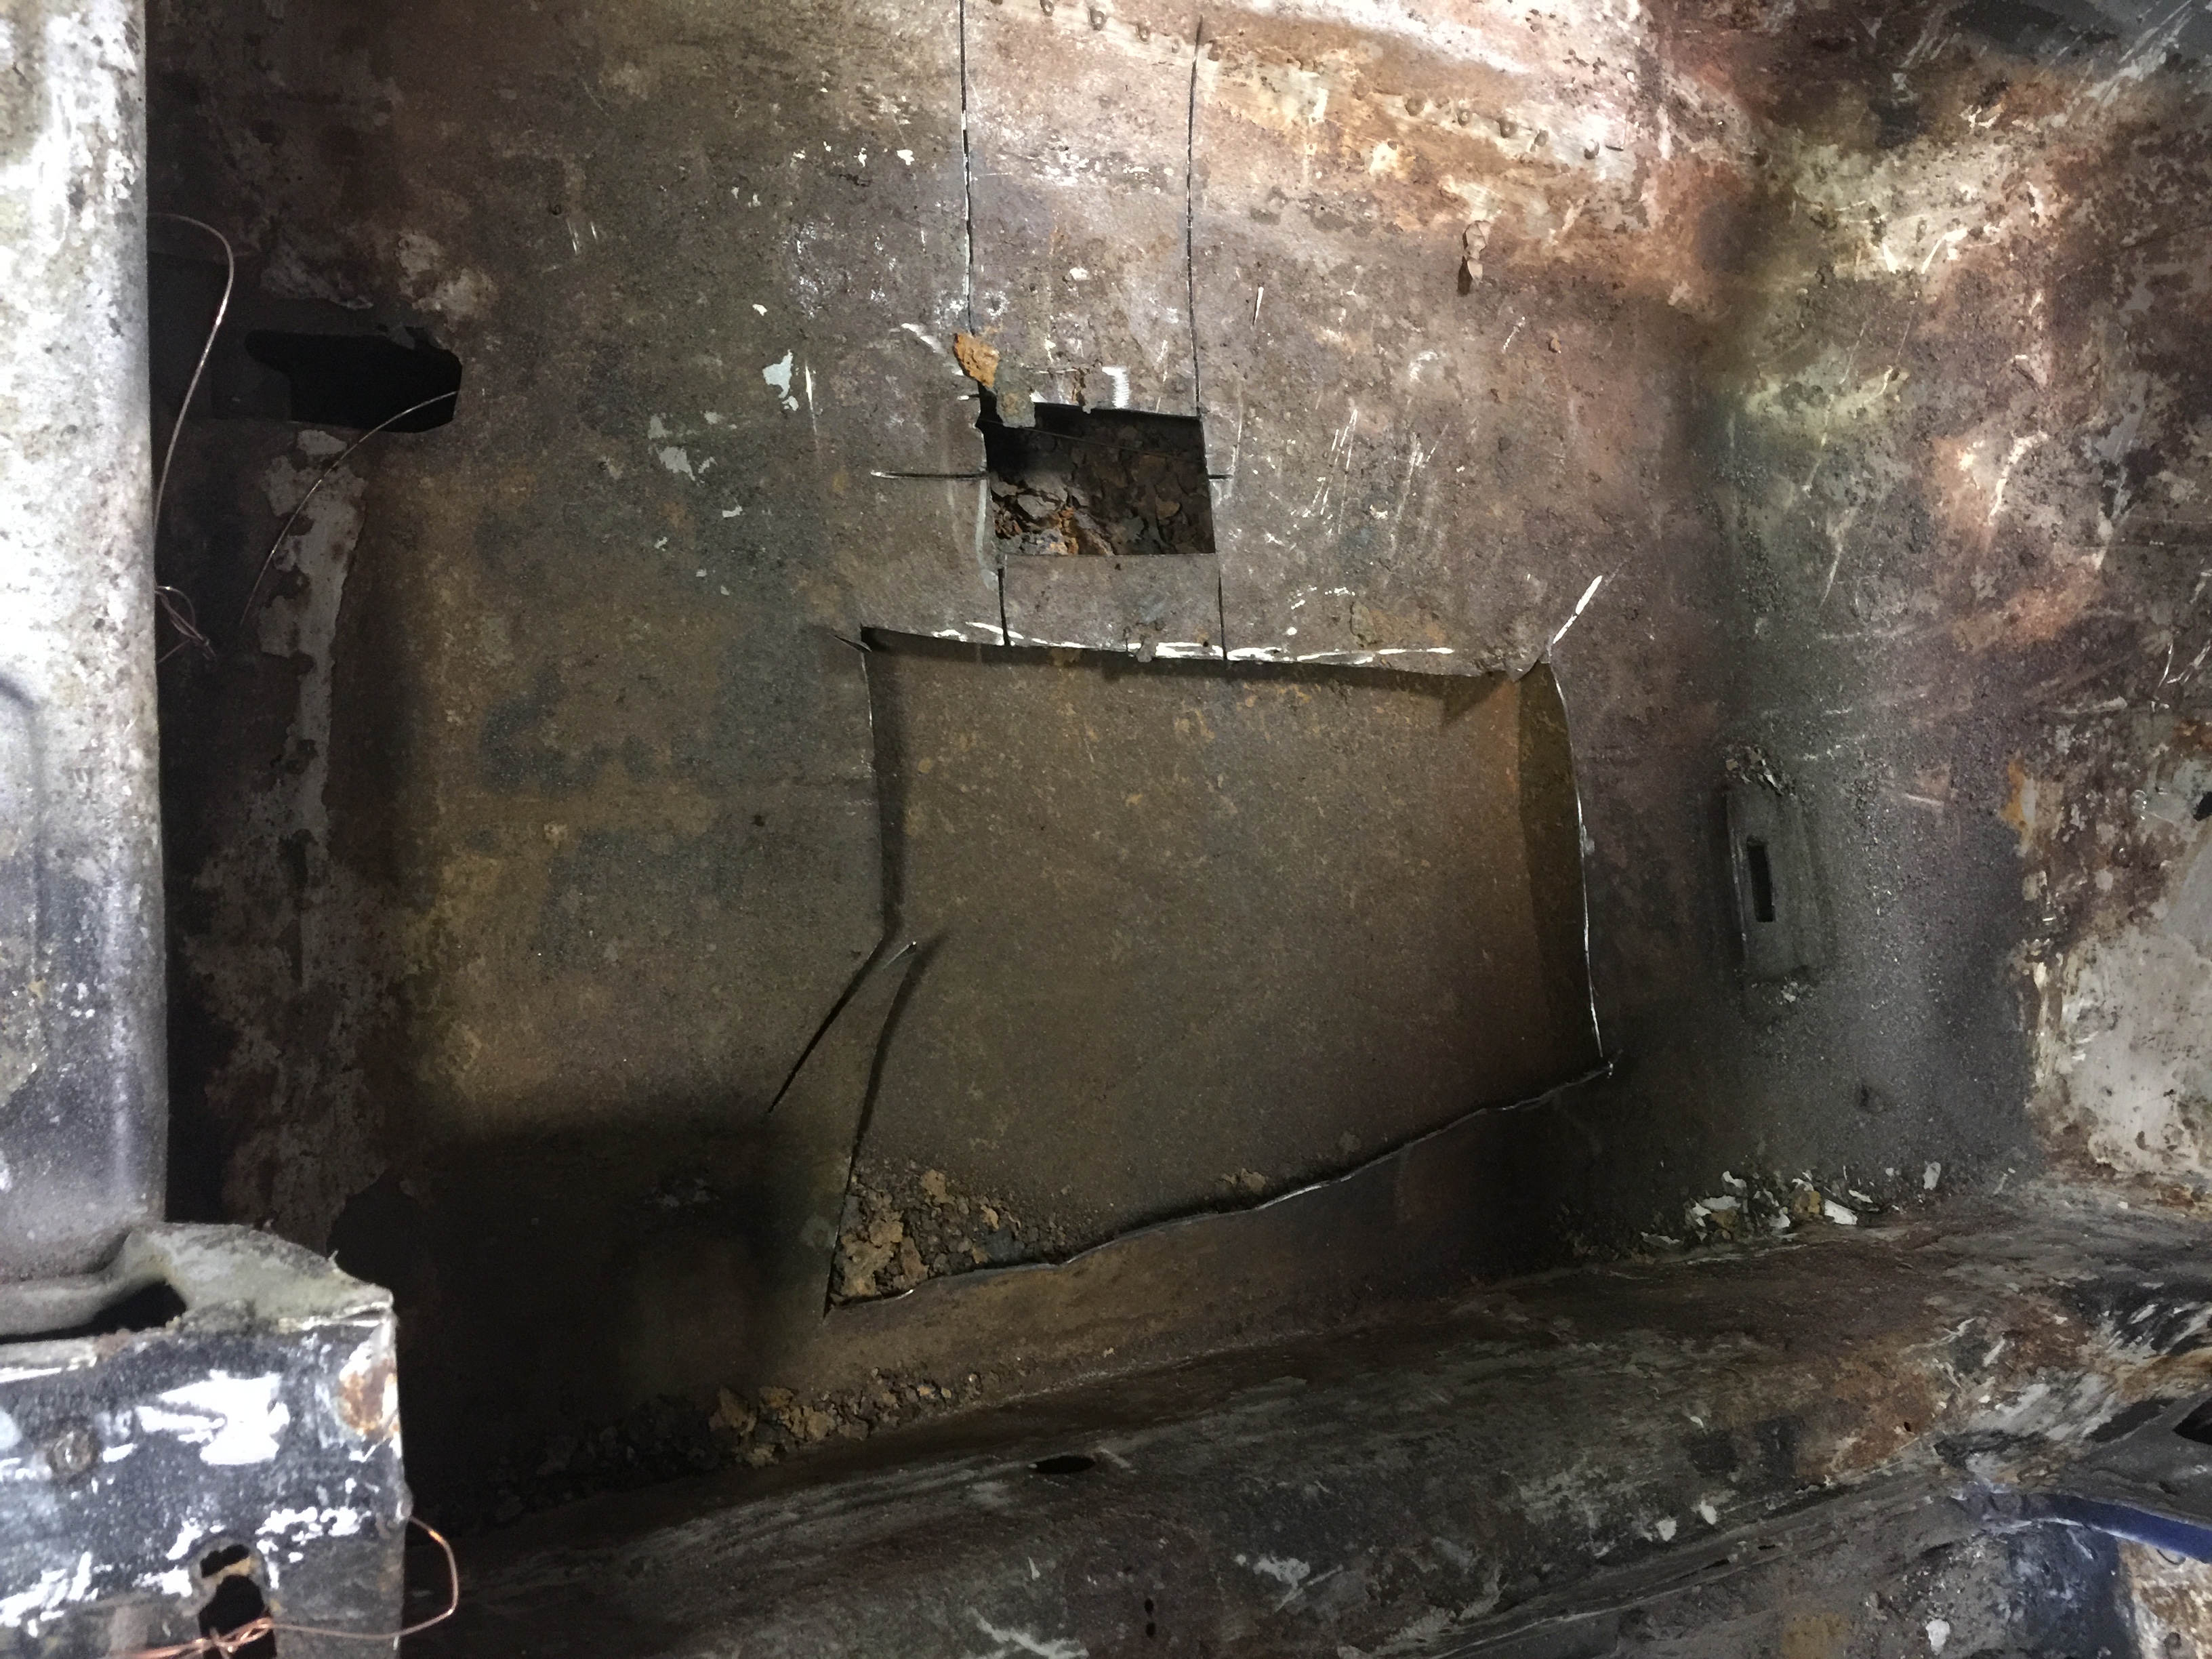
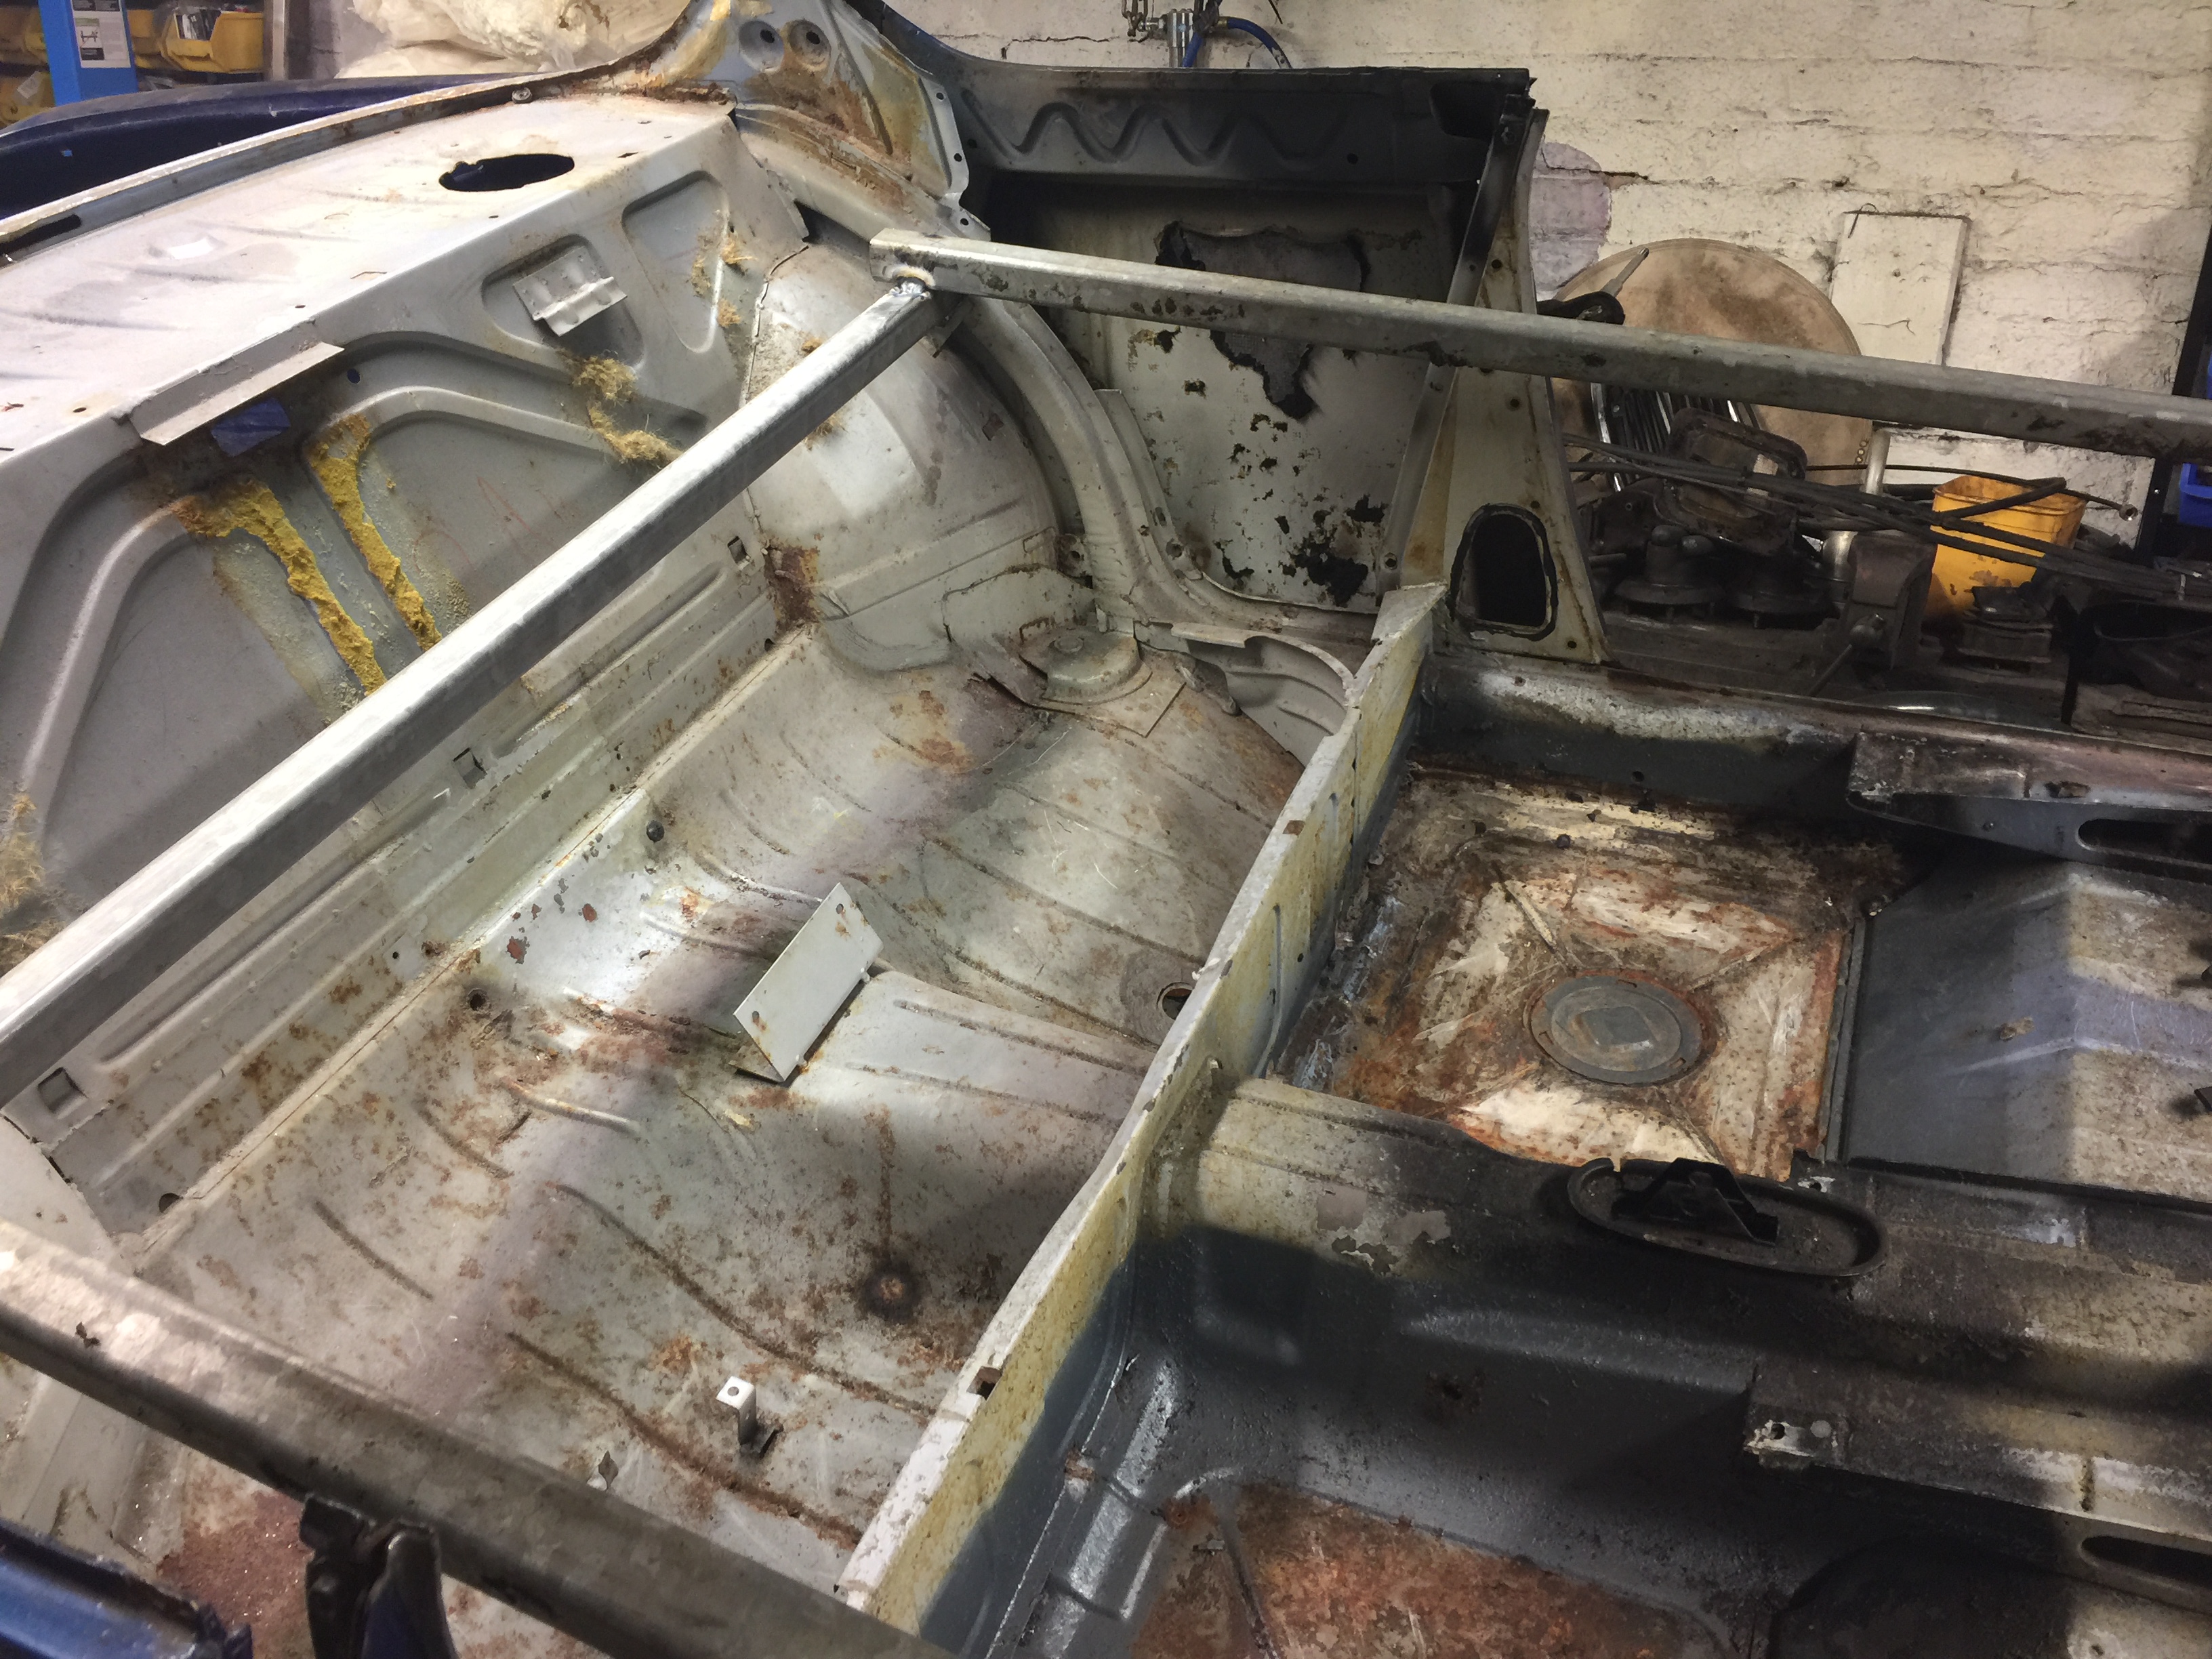
I decided to have a look at why there are 2 skins fitted to the front floor wells and after cutting the top skin out, I think the only reason why it was put there is so the sound proofing was flat.
The lower skins that are left I think are reproductions as they don’t have the plugs in.
One side has surface rust and the other side is completely rust free, but I think they will have to both come out and the correct one put in.
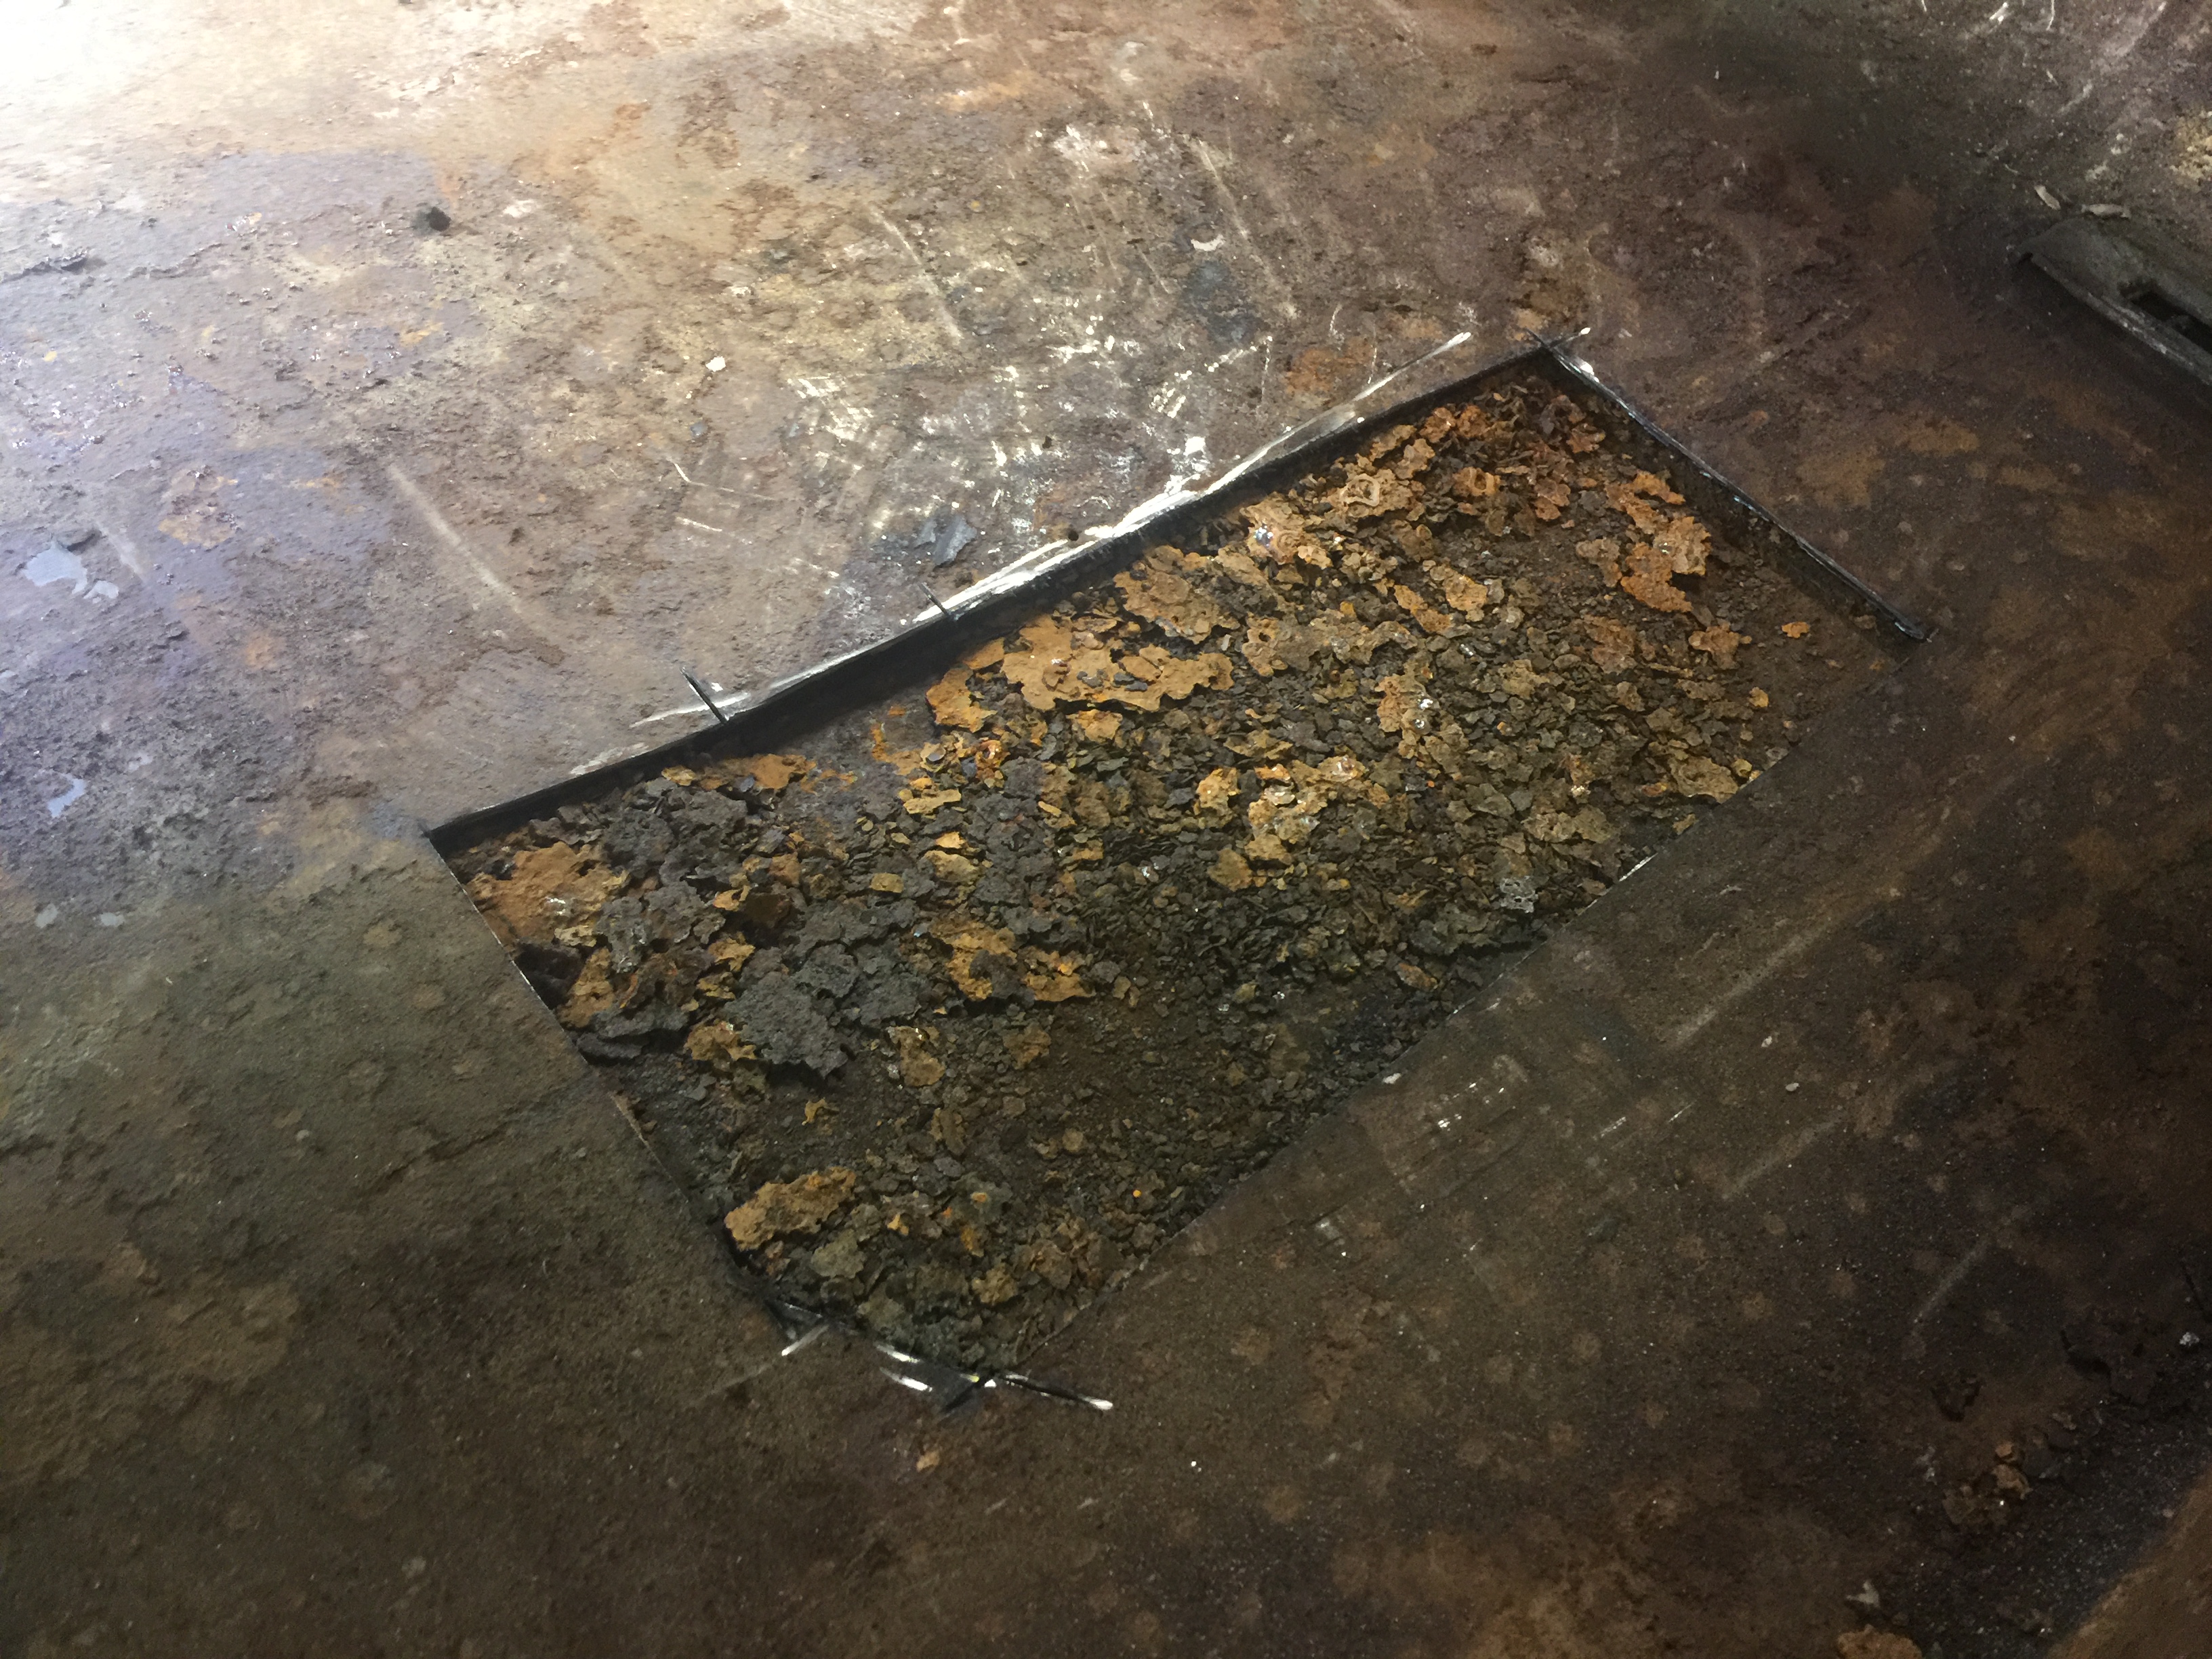
A sea of rust flakes....
Cleaned out and the old floor
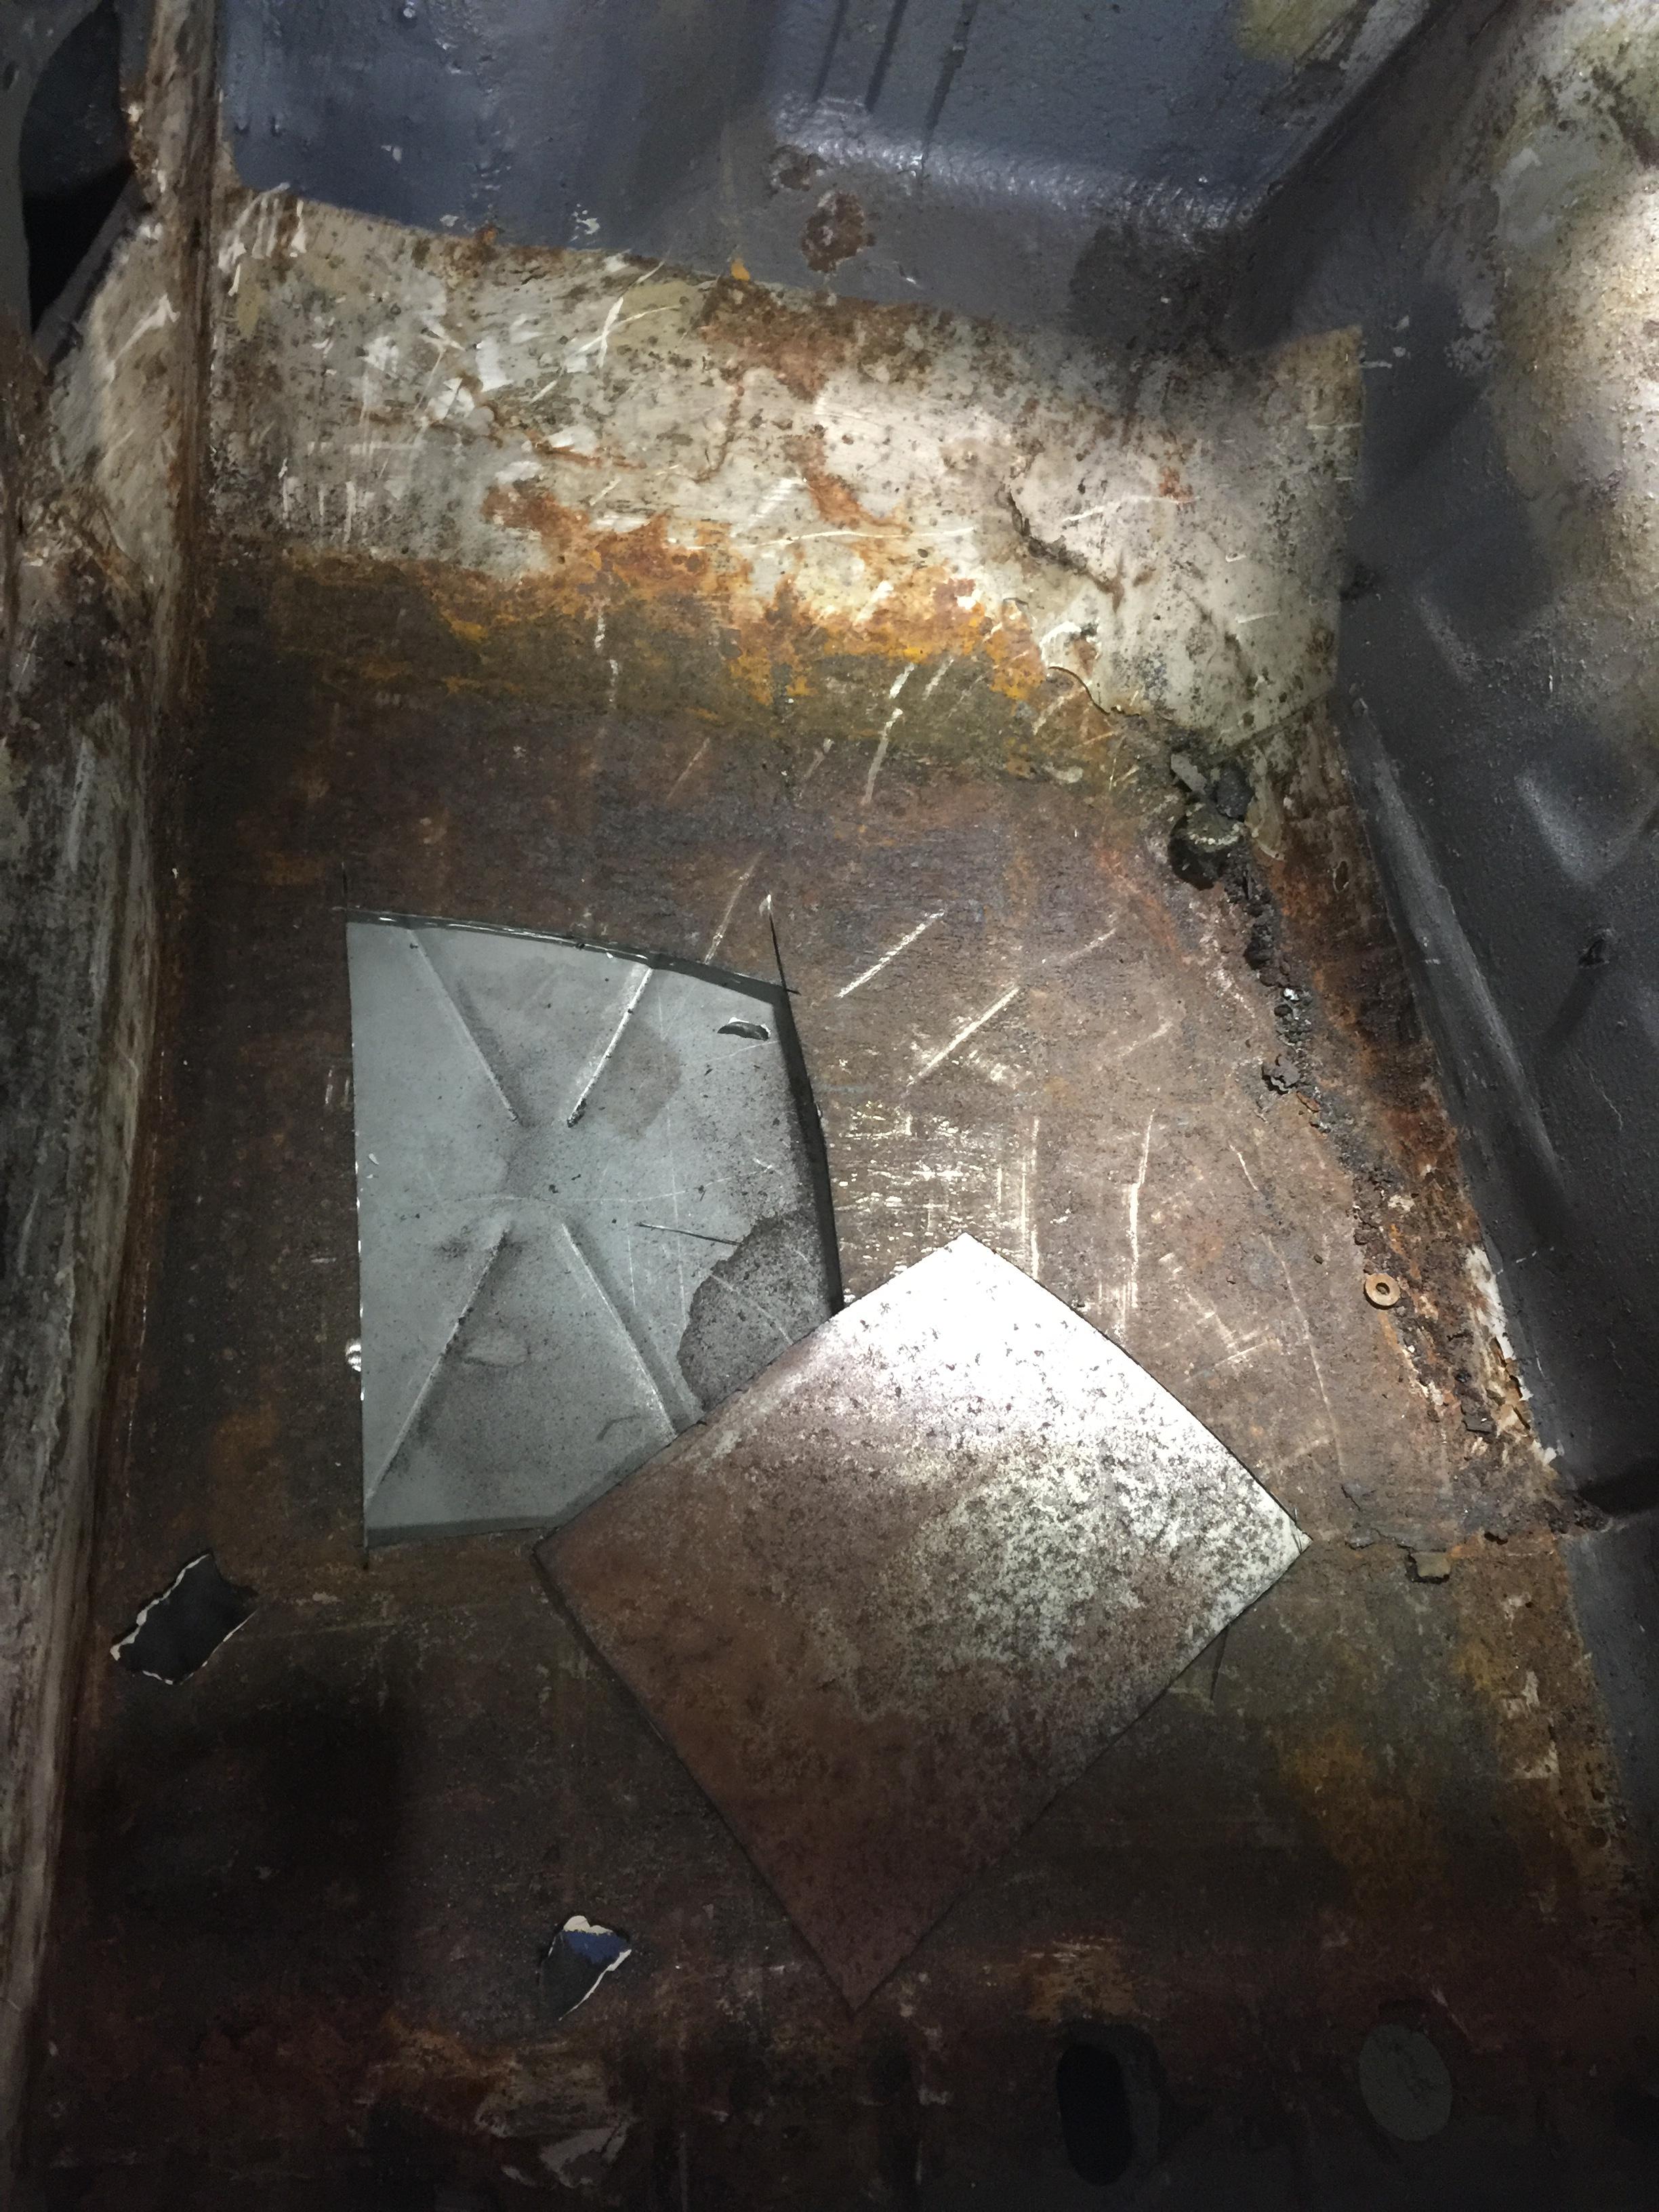
The other side was a different story - all nice and clean steel??? - never seen light of day since 1980s - must have been air tight
I decided to take off the filler flap as I was concerned that the spring loading would get damaged when the car was dipped.
Once off I discovered that whole thing is made of aluminium so it was a good job I did it as the dipping process damages aluminium.
The door hinges had to come off and again these are aluminium.
I wonder if these aluminium parts are exclusive to the CSL?
The last thing I had to do was to make a steel box frame support to ensure that when the car is dipped they don’t manage to bend it, and I feel when it comes back their shall not be to much of the car left, so it should help keep it square
The car goes away tomorrow for 3 week’s, that will give me time to get all the bits sent away for zinc plating and powder coating.
I decided to have a look at why there are 2 skins fitted to the front floor wells and after cutting the top skin out, I think the only reason why it was put there is so the sound proofing was flat.
The lower skins that are left I think are reproductions as they don’t have the plugs in.
One side has surface rust and the other side is completely rust free, but I think they will have to both come out and the correct one put in.
A sea of rust flakes....
Cleaned out and the old floor
The other side was a different story - all nice and clean steel??? - never seen light of day since 1980s - must have been air tight
I decided to take off the filler flap as I was concerned that the spring loading would get damaged when the car was dipped.
Once off I discovered that whole thing is made of aluminium so it was a good job I did it as the dipping process damages aluminium.
The door hinges had to come off and again these are aluminium.
I wonder if these aluminium parts are exclusive to the CSL?
The last thing I had to do was to make a steel box frame support to ensure that when the car is dipped they don’t manage to bend it, and I feel when it comes back their shall not be to much of the car left, so it should help keep it square
The car goes away tomorrow for 3 week’s, that will give me time to get all the bits sent away for zinc plating and powder coating.
Looks great! I think you're right about building a frame to help support the shell, they can be weak if there is much rust, your shell does look pretty good but better safe than sorry.
The filler flap is aluminium on all e9:s, but the aluminium door hinges are exclusive to the CSL, the regular ones in steel weighs a ton.
Cheers,
The filler flap is aluminium on all e9:s, but the aluminium door hinges are exclusive to the CSL, the regular ones in steel weighs a ton.
Cheers,
Marc-M
Well-Known Member
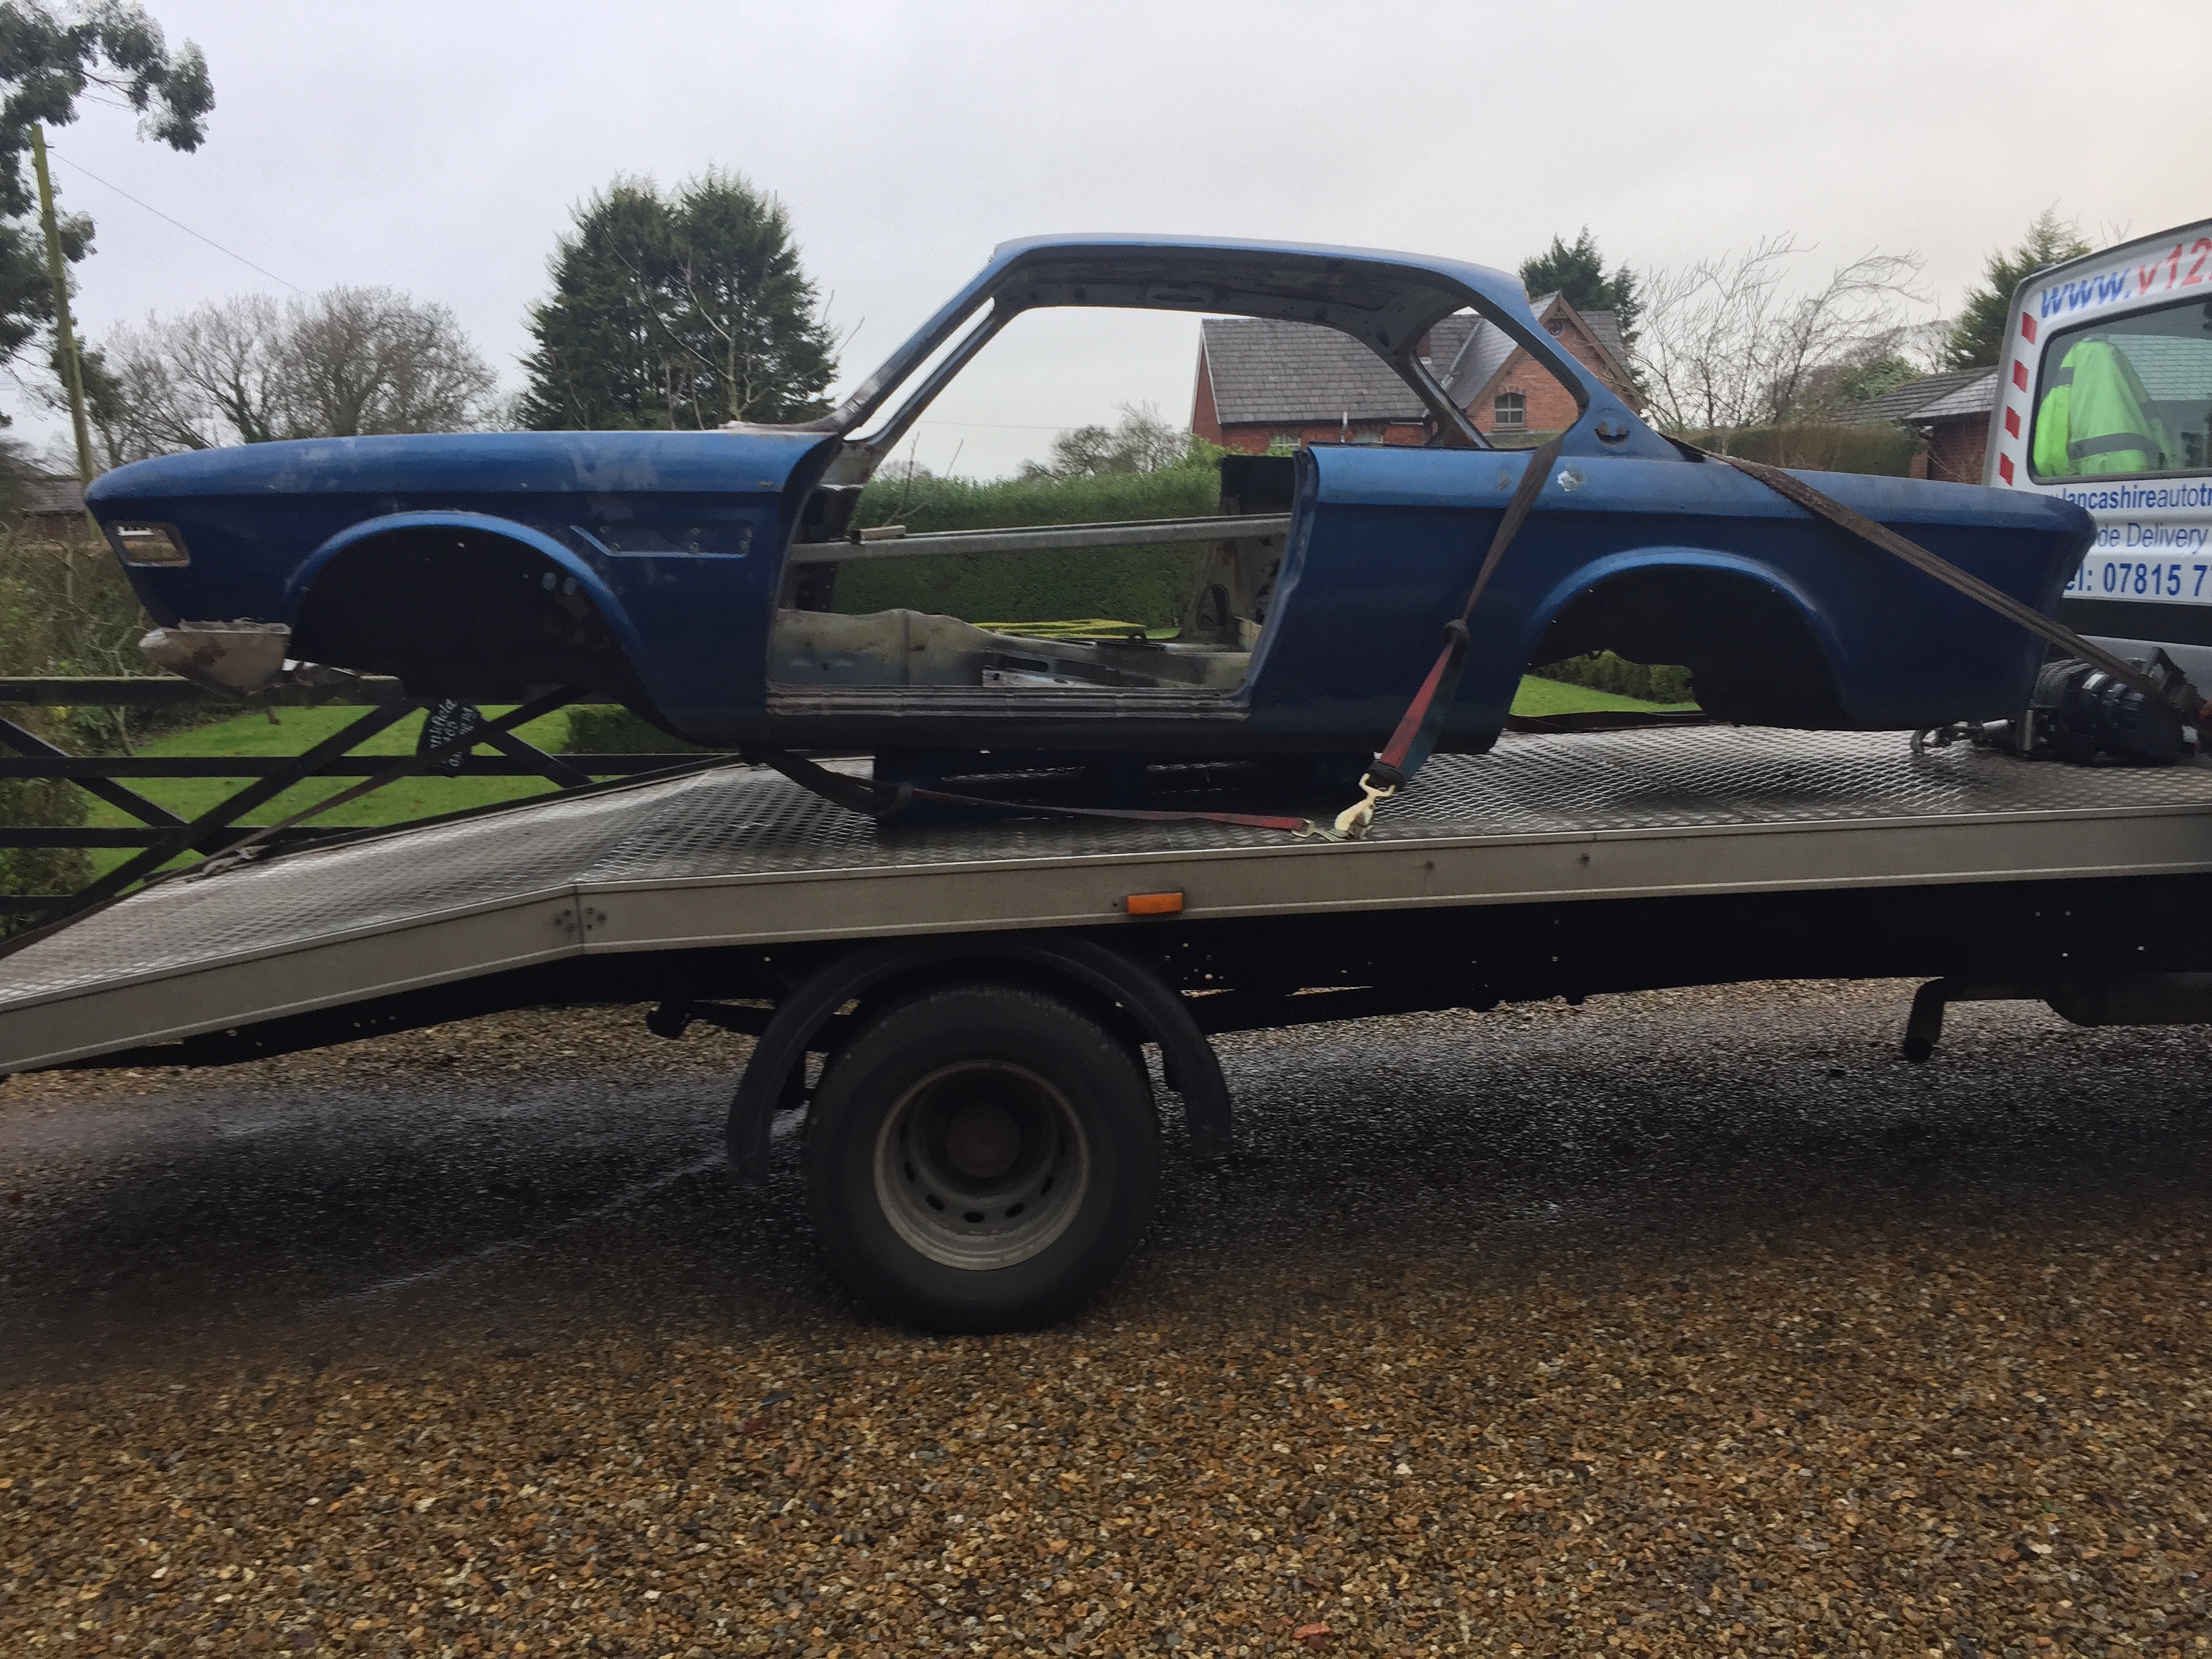
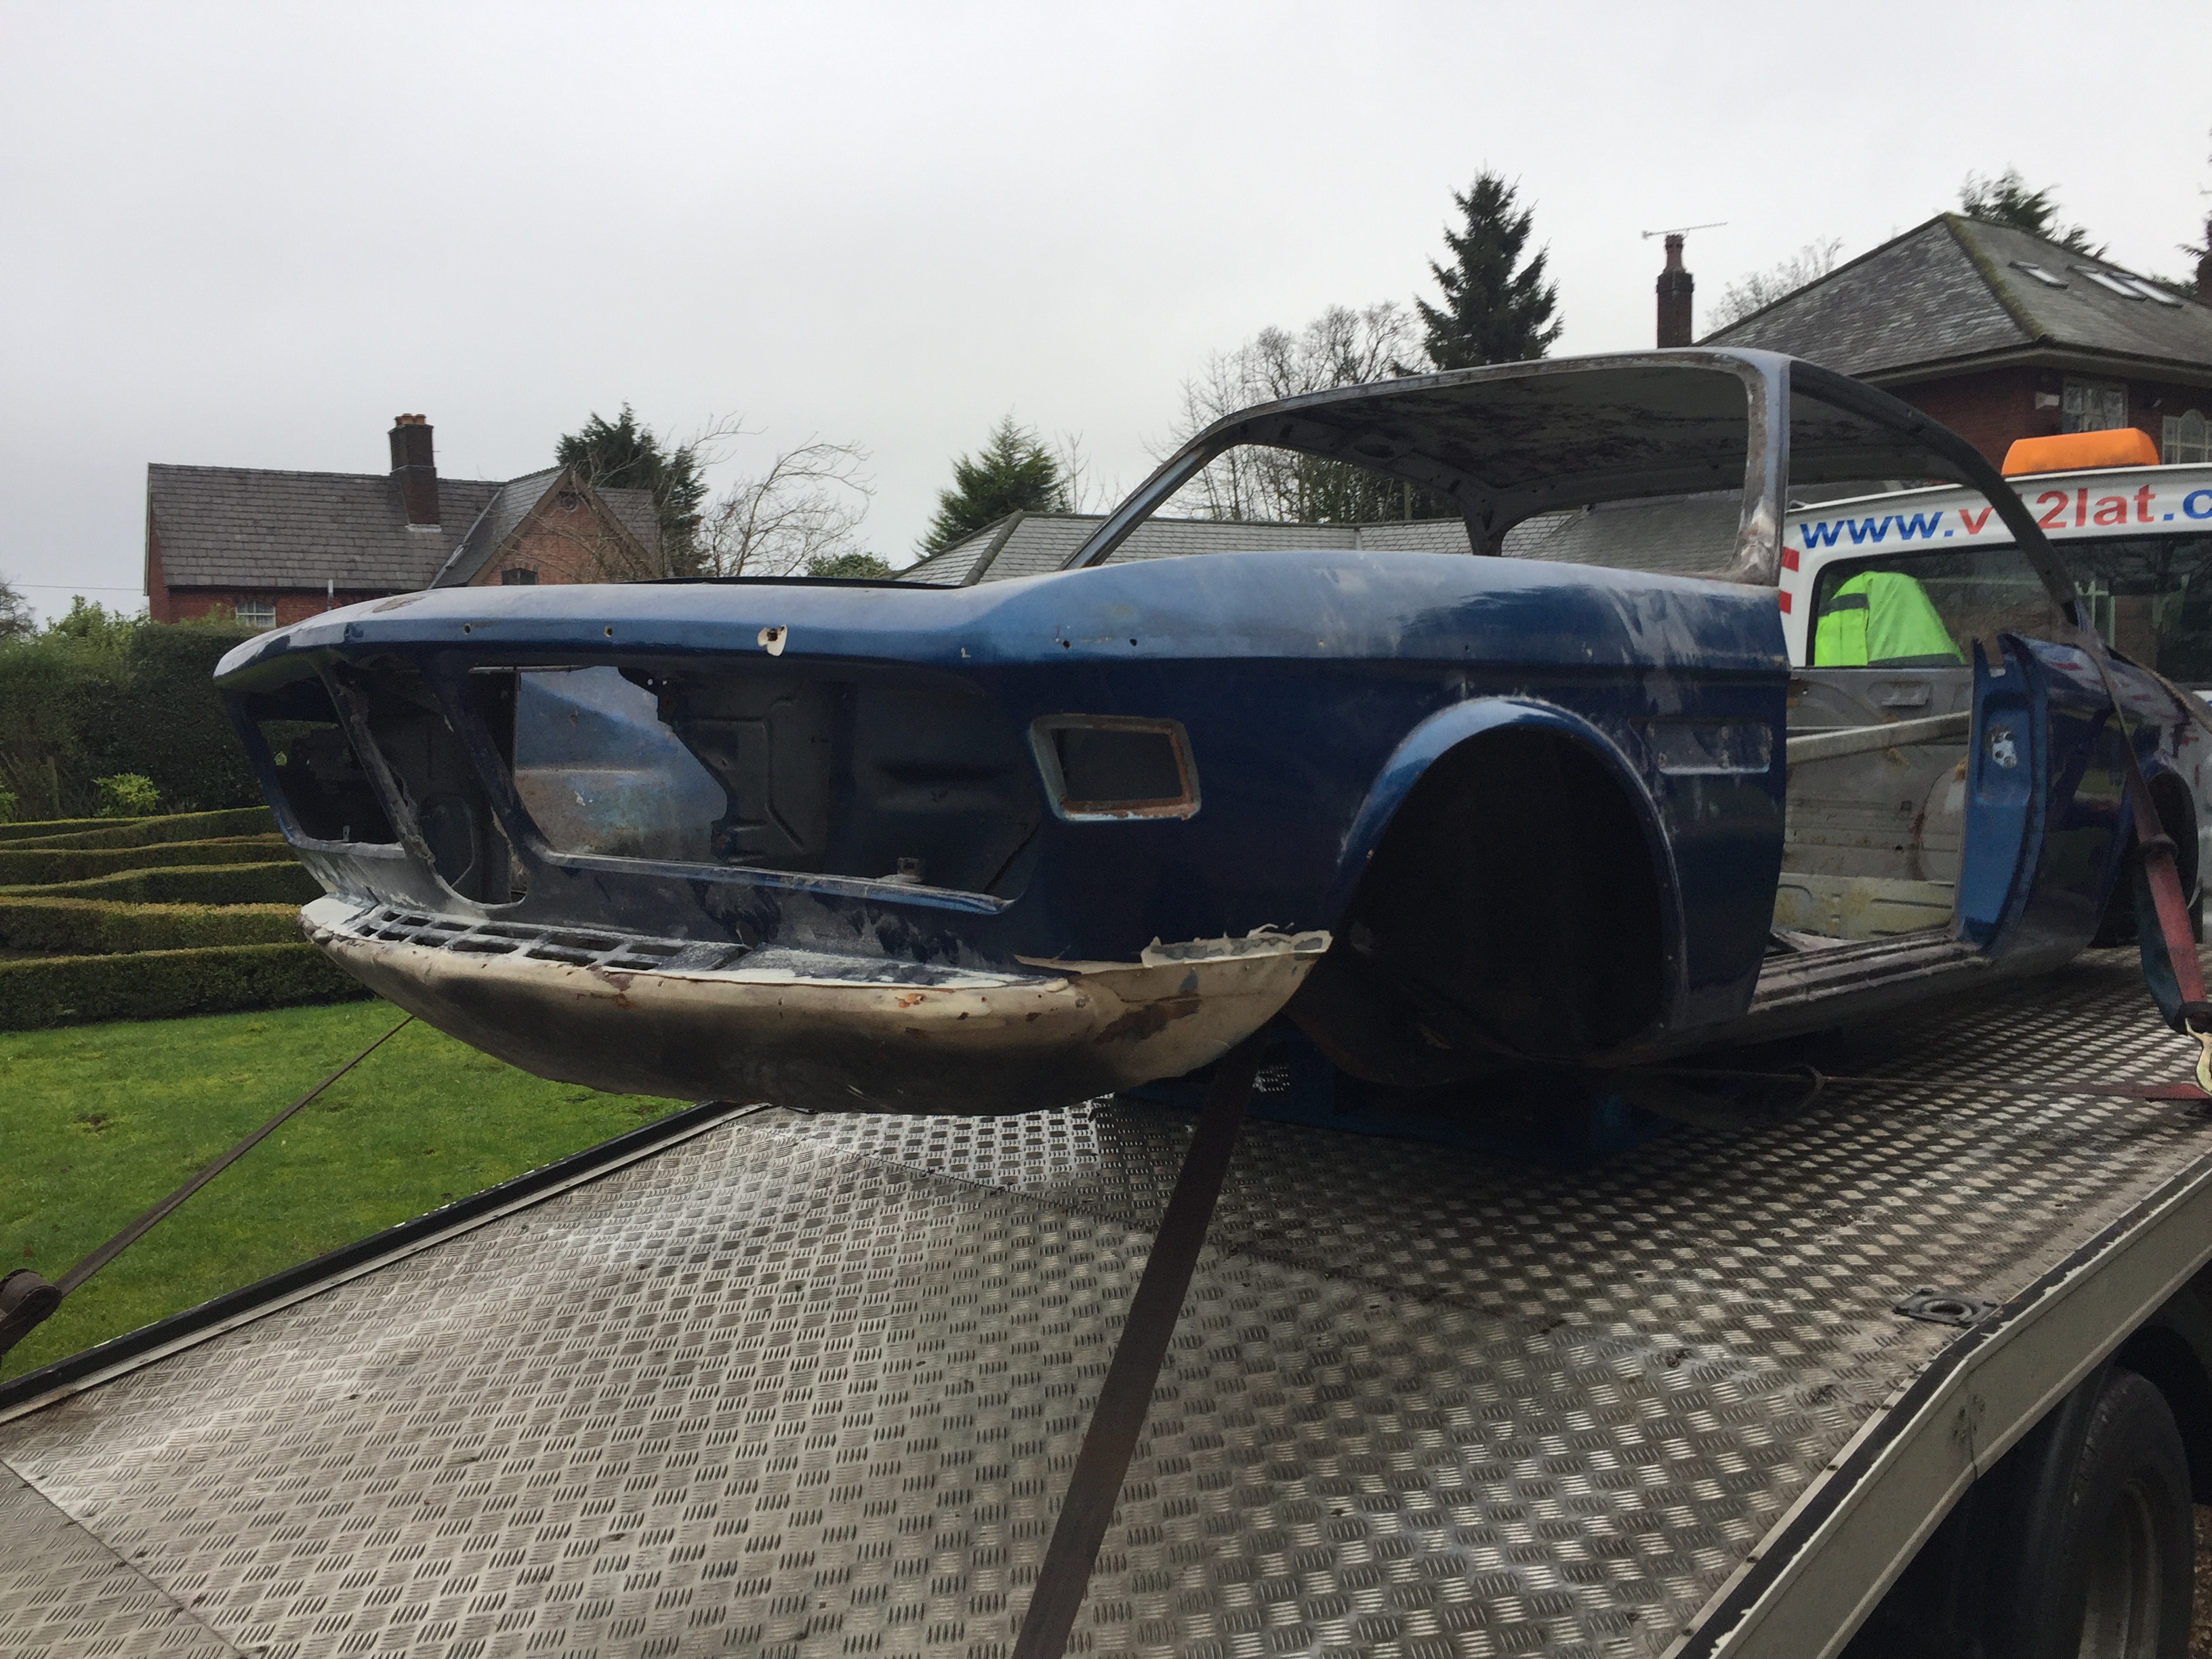
Well its gone to SPL yesterday - so lets see what I get back in 3 weeks time!!!!
daddywad
Well-Known Member
Hi Marc, mine went to SPL no problems. But when we got it back we removed every seam and joint to ensure the acid had gone before reassembling and sending it back to them for Ecoat.
So far so good, no nasty reactions and its 3 years now
Mark
So far so good, no nasty reactions and its 3 years now
Mark
Marc-M
Well-Known Member
Hi Marc, mine went to SPL no problems. But when we got it back we removed every seam and joint to ensure the acid had gone before reassembling and sending it back to them for Ecoat.
So far so good, no nasty reactions and its 3 years now
Mark
Hi
Thanks for the heads up.
I will be taking as much off as required, the doors, boot and bonnet will be media blasted, having said that, the doors skins will have to be separated as the door bottoms are shot at, but will be putting the old skins back on.
I have had a vw camper dipped, and as you said, the stuff leaches out of the seams, so will be quite pedantic about the joints.
However, I will not be able to separate all joints.
The chap from SPL says that the car when it goes back it is dipped again in a pre-clean/ rust killer (so there could be chemicals re introduced) and then goes onto the dipping of the e coating, so I was hoping that the paint will fill the seams - and I would not get any leaching.... but I am slightly sceptical about no leaching.
I will fill the cavity with Dintrol 3654/ML 4, it’s a very runny wax oil with a rust inhibitor made for cavities and is so thin it penetrates all the seams and goes all over the place, and after a week or so clean off and seam seal the joints- then spray in a thicker wax - Dintrol Penetrant HS 1000
I guess that's all I can do, but it should do the job - I hope
Dintrol Link https://www.dinitroldirect.com/product/dinitrol-3654ml-4/
Regards
Marc Mears
Hello Marc,
Say, I am going back a couple of posts with this comment and question. I completely agree with bracing the shell to keep everything as square as possible during this process. Especially if the rocker assembly soundness is unknown/in question. It is great to see the frame you've created. I've been pondering where to attach a frame to effectively keep everything straight and still allow good access for exploration, fabrication and repair. I also see that you have (had) the car on a rotisserie. I see where you've attached the front section to the engine support frame, which is pretty straight forward. May I ask where you attached the rear section? I've been struggling with the best spot to support the body shell for this. Thank you for sharing your project!
Stephen
Stephen,
Although not asked, some advice from my side. (risk of unsolicited advise)
I have no rotiserie, but I am also faced with the same challenge. Working on these weak shells gives quite some risk of unwanted distortion.
I would support the rear on at least more than just the rear bumper mounts especially for EU models without the additional US bumper braces. These EU bumper mounts are not in a very well supported area. Although the shell in the back is quite light, I would definitely choose to link the rear bumper mounts to the rear subframe mounting points as well. This gives you four points. Now you may find that the rear subframe mounting points need some rust mediation as well. If you design your frame yourself, consider the option to make removable 'arms' on your rotisserie to connect to the rear subframe mounts. This gives you the flexibility to work on one, and still have three fixed points.
Others have chosen to include the diff center bearing support.
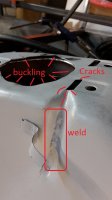
Additionally you may want to add bars from front to rear. Even with a full body, I noticed that our cars flex significantly. (hence the stress cracks in my E9 tunnel, others have experienced the same). Imagine that you remove, say half a sill....
Although not asked, some advice from my side. (risk of unsolicited advise)
I have no rotiserie, but I am also faced with the same challenge. Working on these weak shells gives quite some risk of unwanted distortion.
I would support the rear on at least more than just the rear bumper mounts especially for EU models without the additional US bumper braces. These EU bumper mounts are not in a very well supported area. Although the shell in the back is quite light, I would definitely choose to link the rear bumper mounts to the rear subframe mounting points as well. This gives you four points. Now you may find that the rear subframe mounting points need some rust mediation as well. If you design your frame yourself, consider the option to make removable 'arms' on your rotisserie to connect to the rear subframe mounts. This gives you the flexibility to work on one, and still have three fixed points.
Others have chosen to include the diff center bearing support.
Additionally you may want to add bars from front to rear. Even with a full body, I noticed that our cars flex significantly. (hence the stress cracks in my E9 tunnel, others have experienced the same). Imagine that you remove, say half a sill....
Attachments
Last edited:
Marc-M
Well-Known Member
Hi
Ok I will try and explain and I hope with the photos it will all make sense
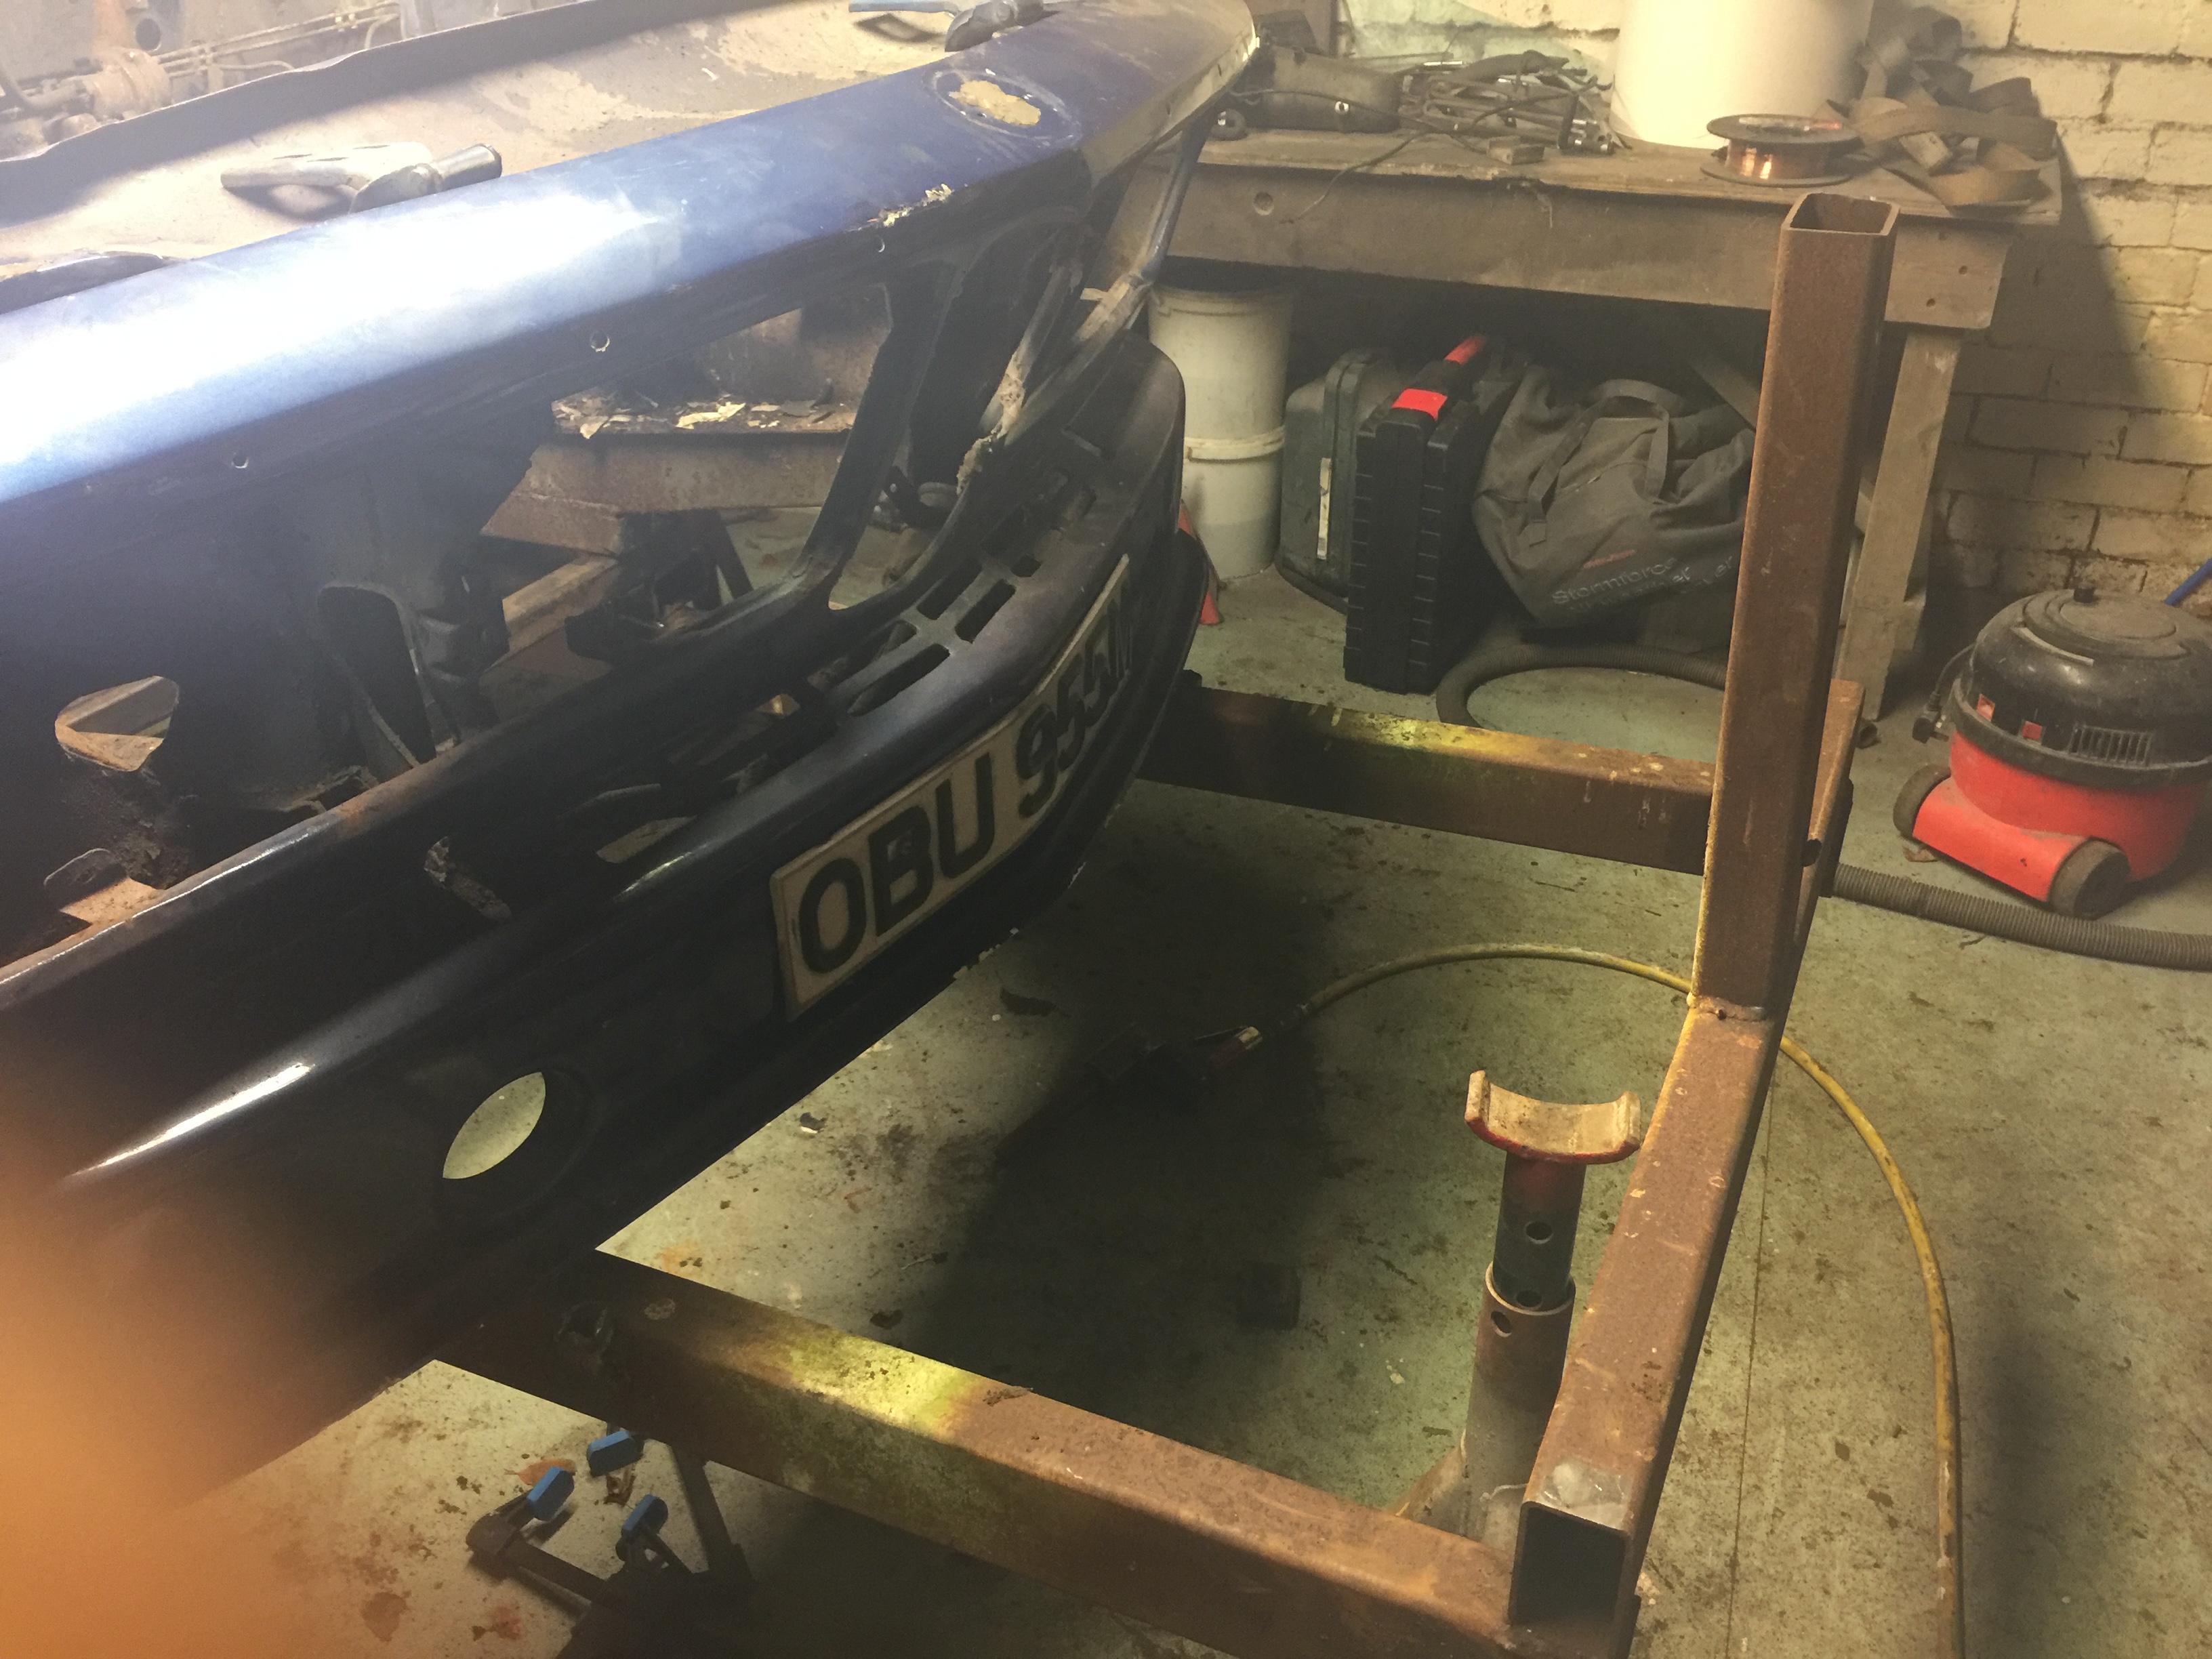
The car to the roll over
The front – the mounting points are the 4 cross member holes.
The rear
There are only two places you can mount from that have any meat....
The rear trailing arm studs and the differential mounting.
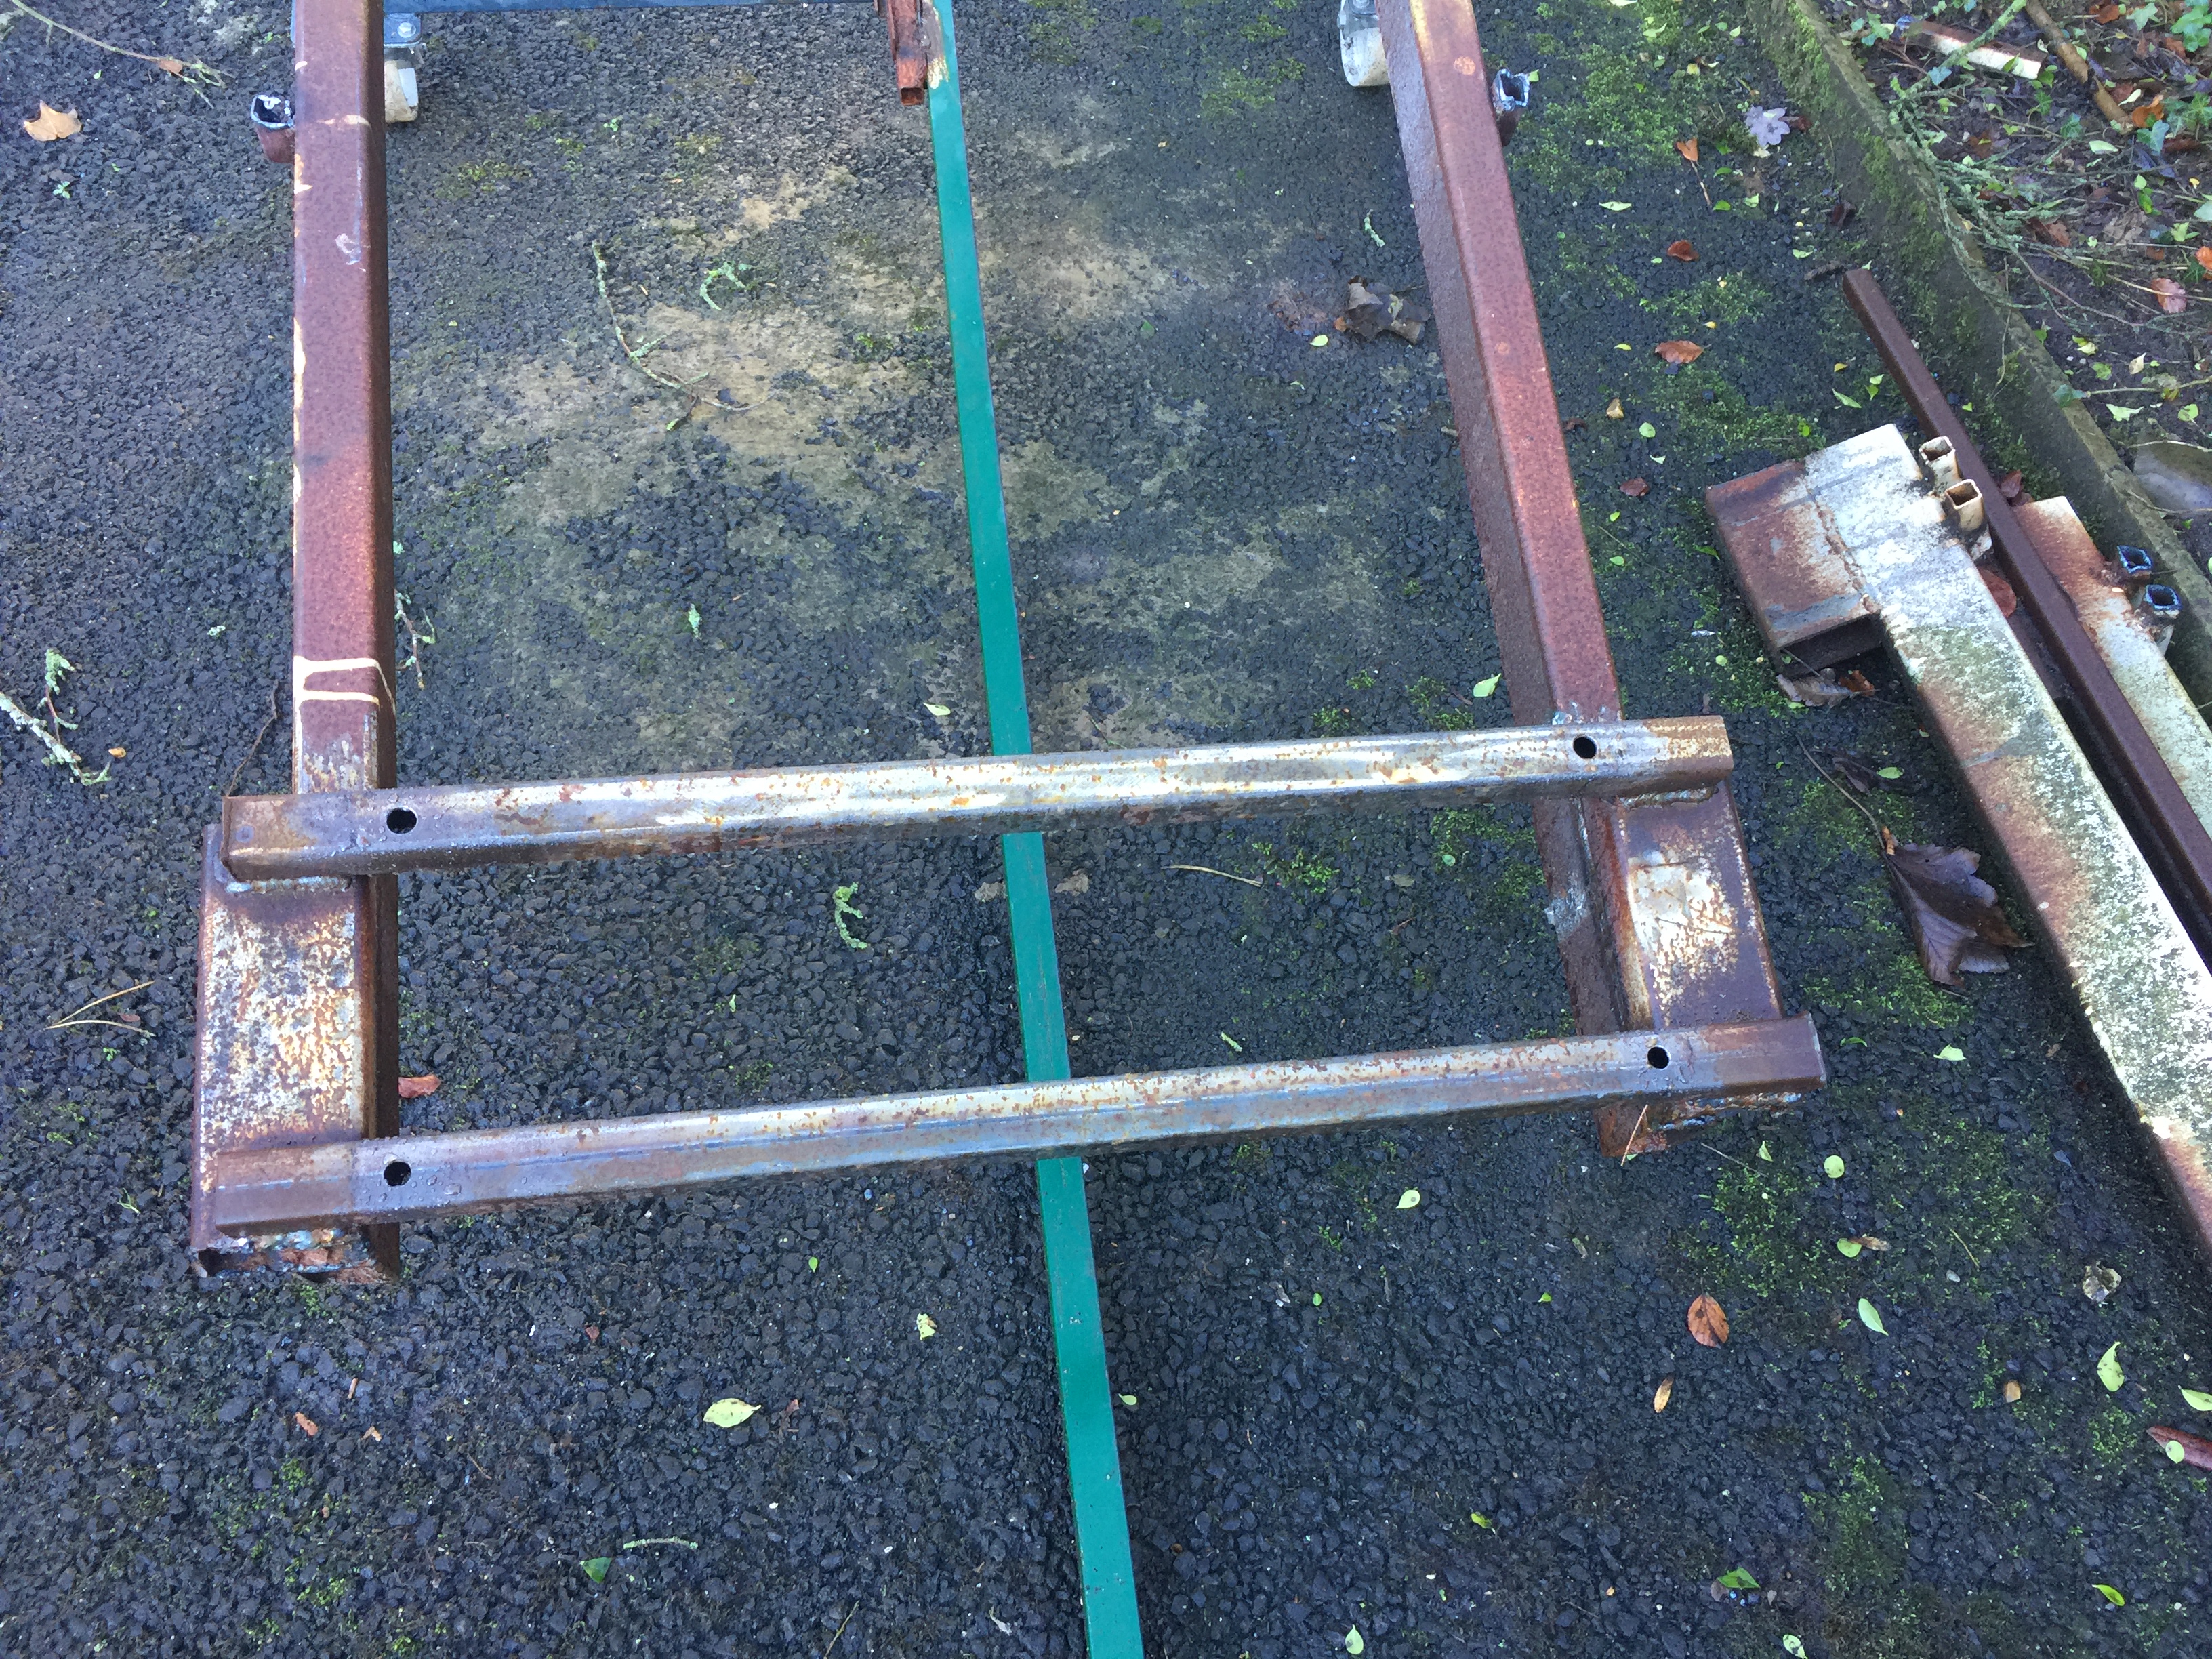
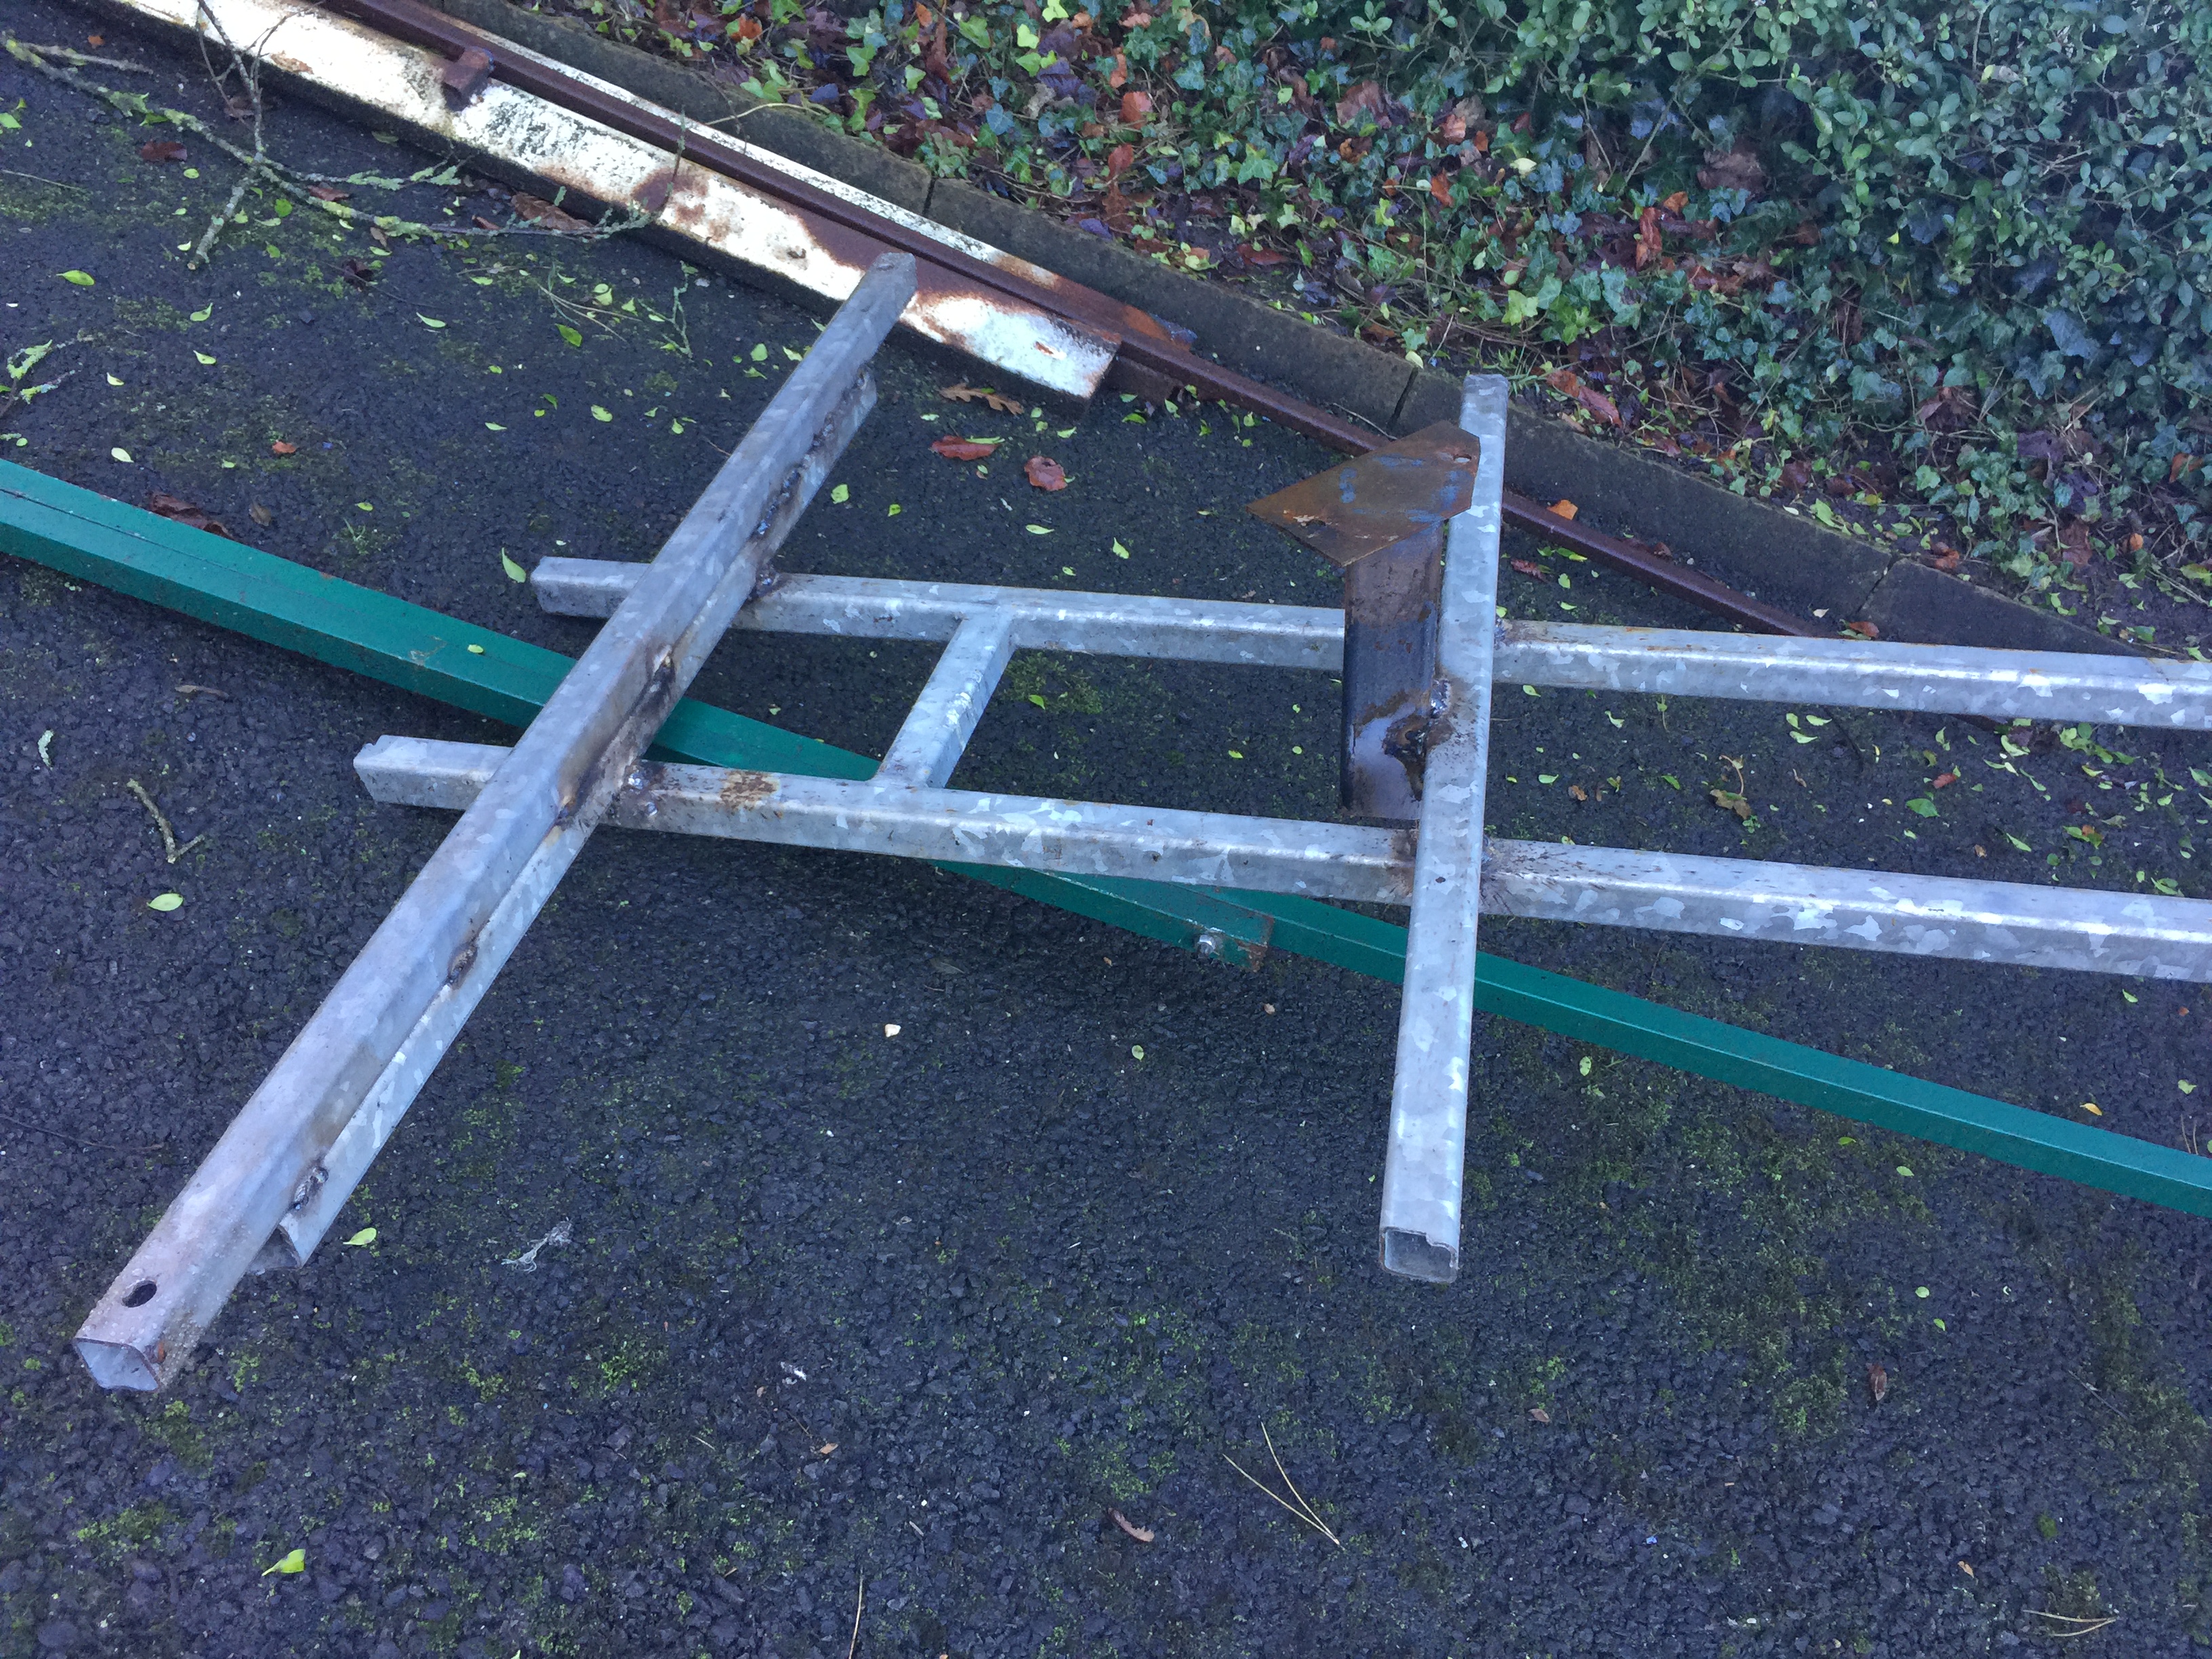
I first made a box section cross member between the trailing arm studs, but when I put it on I had to make 2 spacers out of box section to bring it off the body
Next was to make a mounting plate that will bolt on to the diff mounting on the body – made the plate from a template from the diff mounting rubber.
Welded a big box section to it, and then mounted it.
Then it was just weld a frame to the two mounting points.
My steel was all old stuff and was galvanized, and I was too lazy to grind it off so I got unsightly welds, and its not good for your health - the smoke given off is bad stuff - so a kept my head away from it - but it splatters like hell - so always clean your steel - it makes for a clean easy job - it was only done this was cos im lazy!
My box section was very thick walled – but if I was buying new steel I would get rectangular section probably 2/2.5mm thick
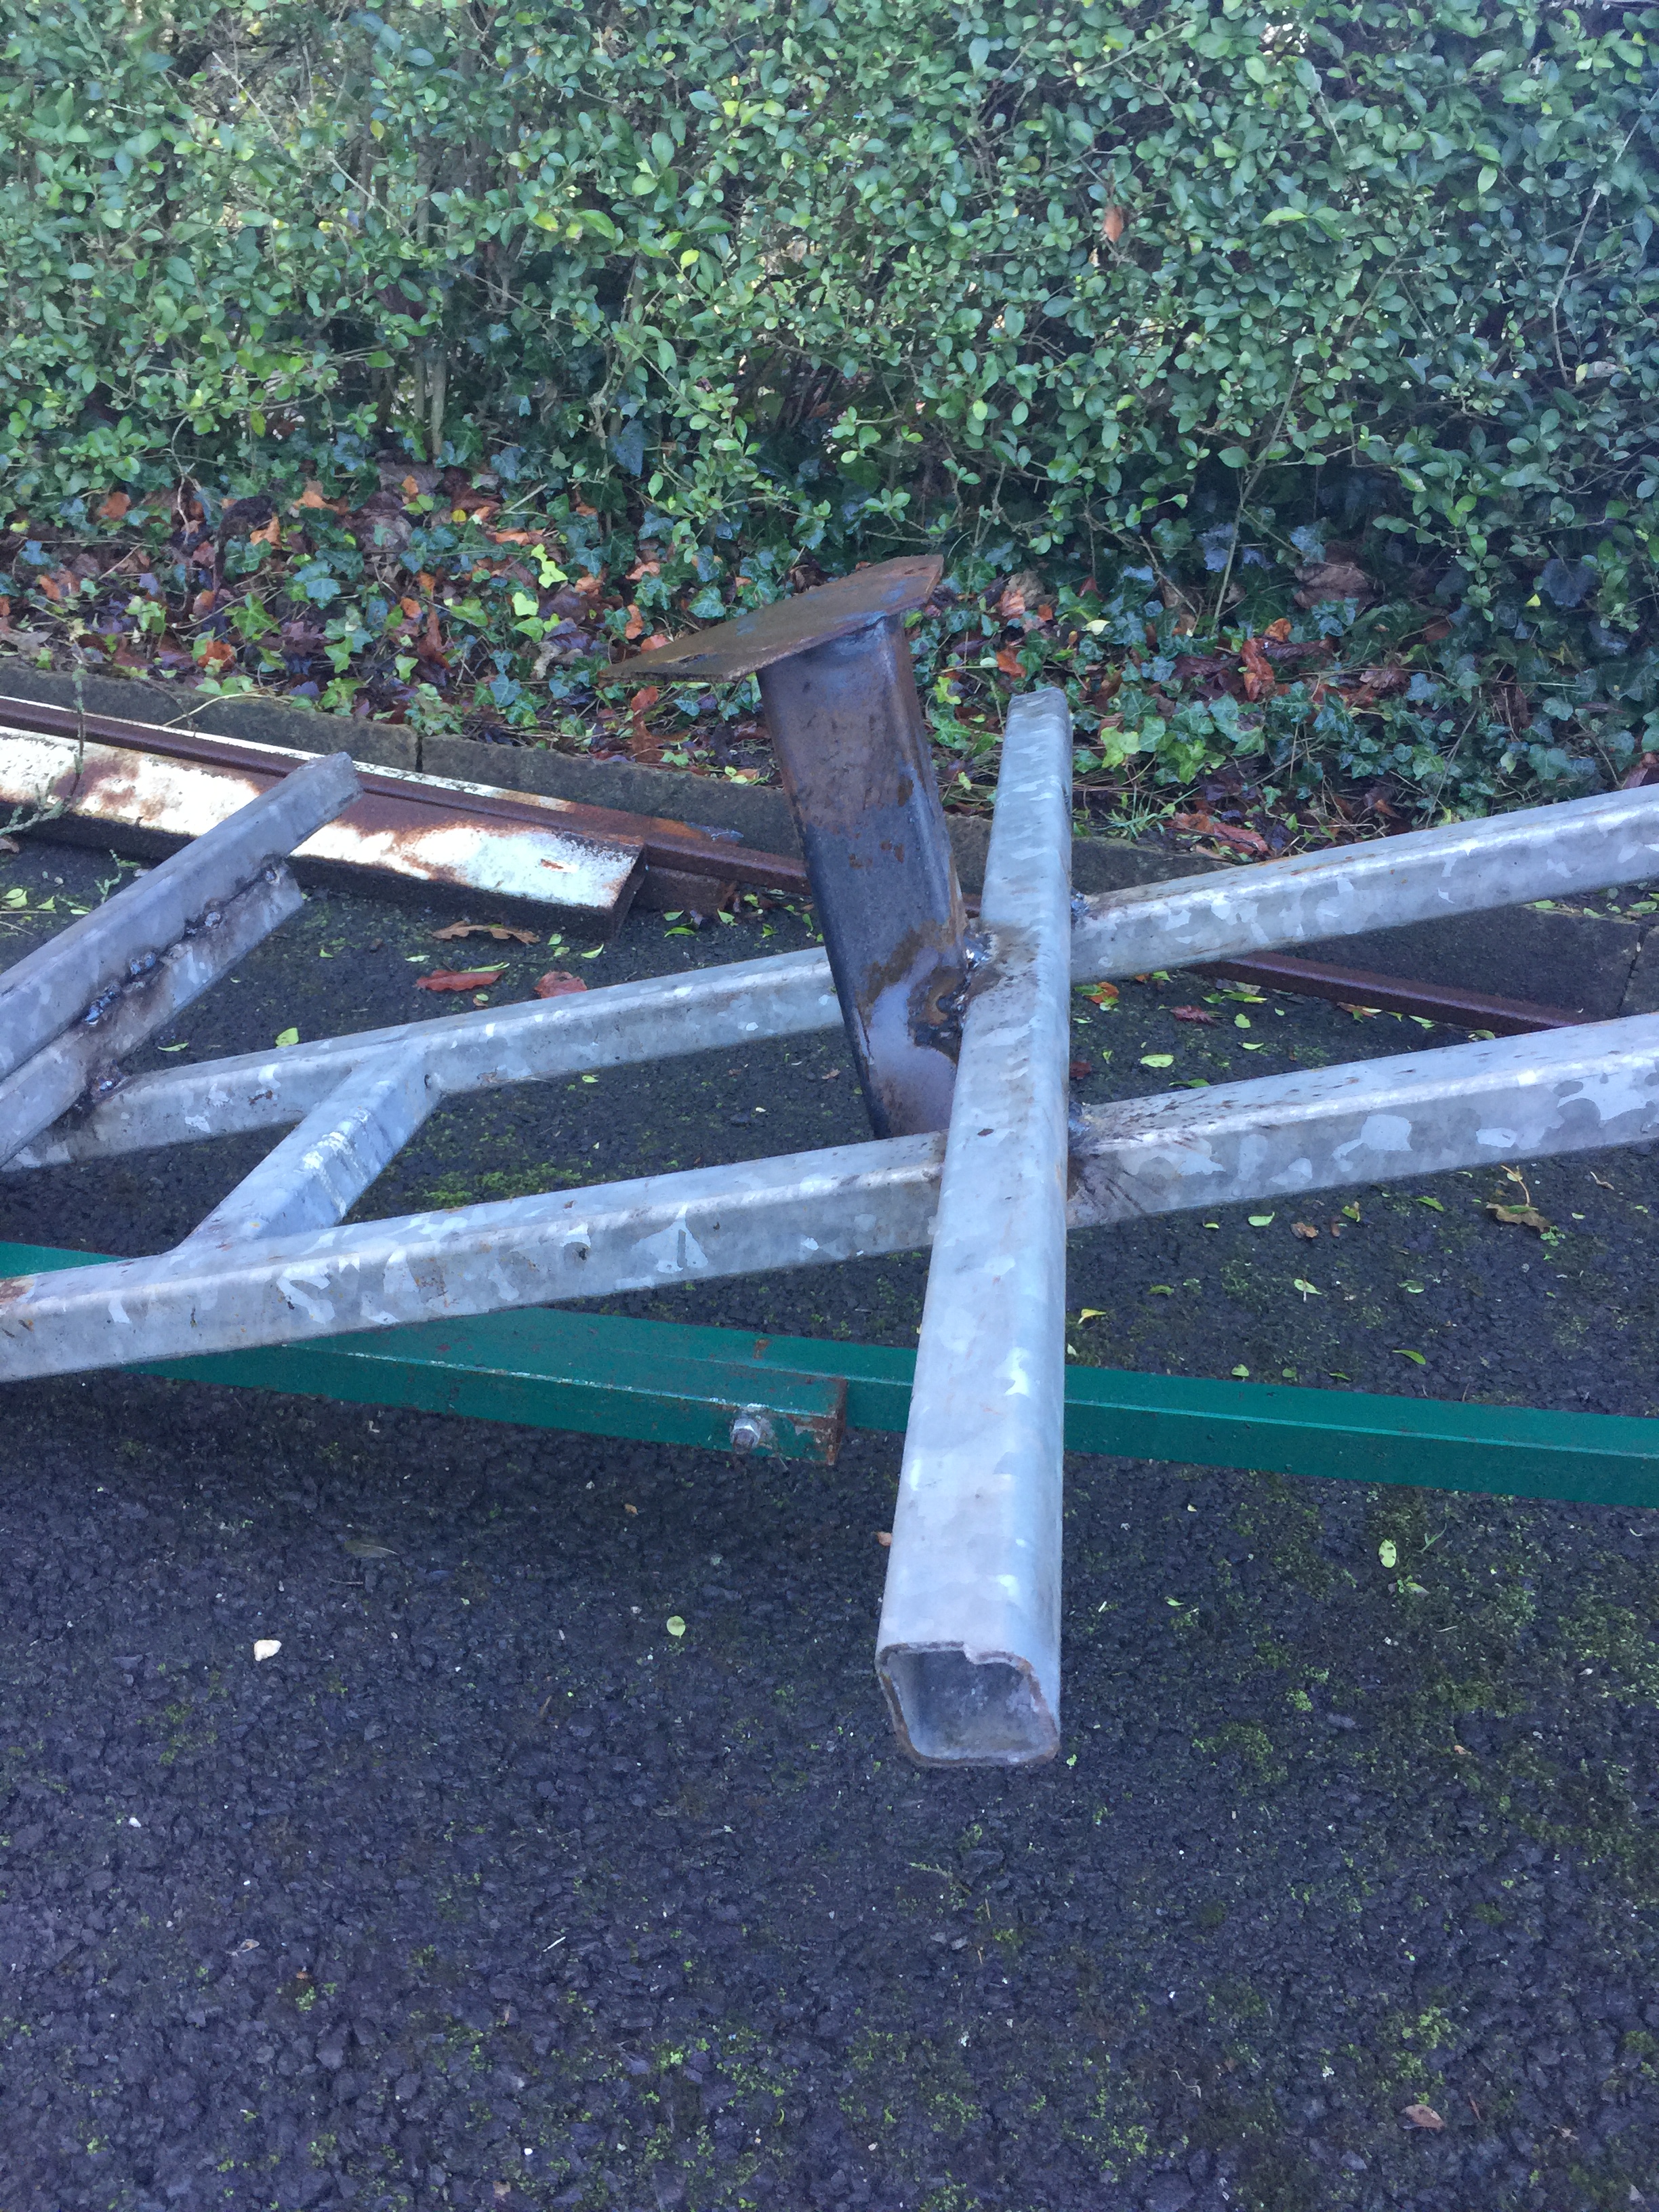
YOU WILL SEE I ONLY USED 2 OF THE DIFF MOUNTING HOLES _ THAT IS ONLY BECAUSE I DID NOT HAVE A SECTION OF 2MM PLATE TO DO ALL 4 _ SO I HAD TO RUN IT DIAGONALY, AND COULD ONLY GET 2 OF THE HOLES…..
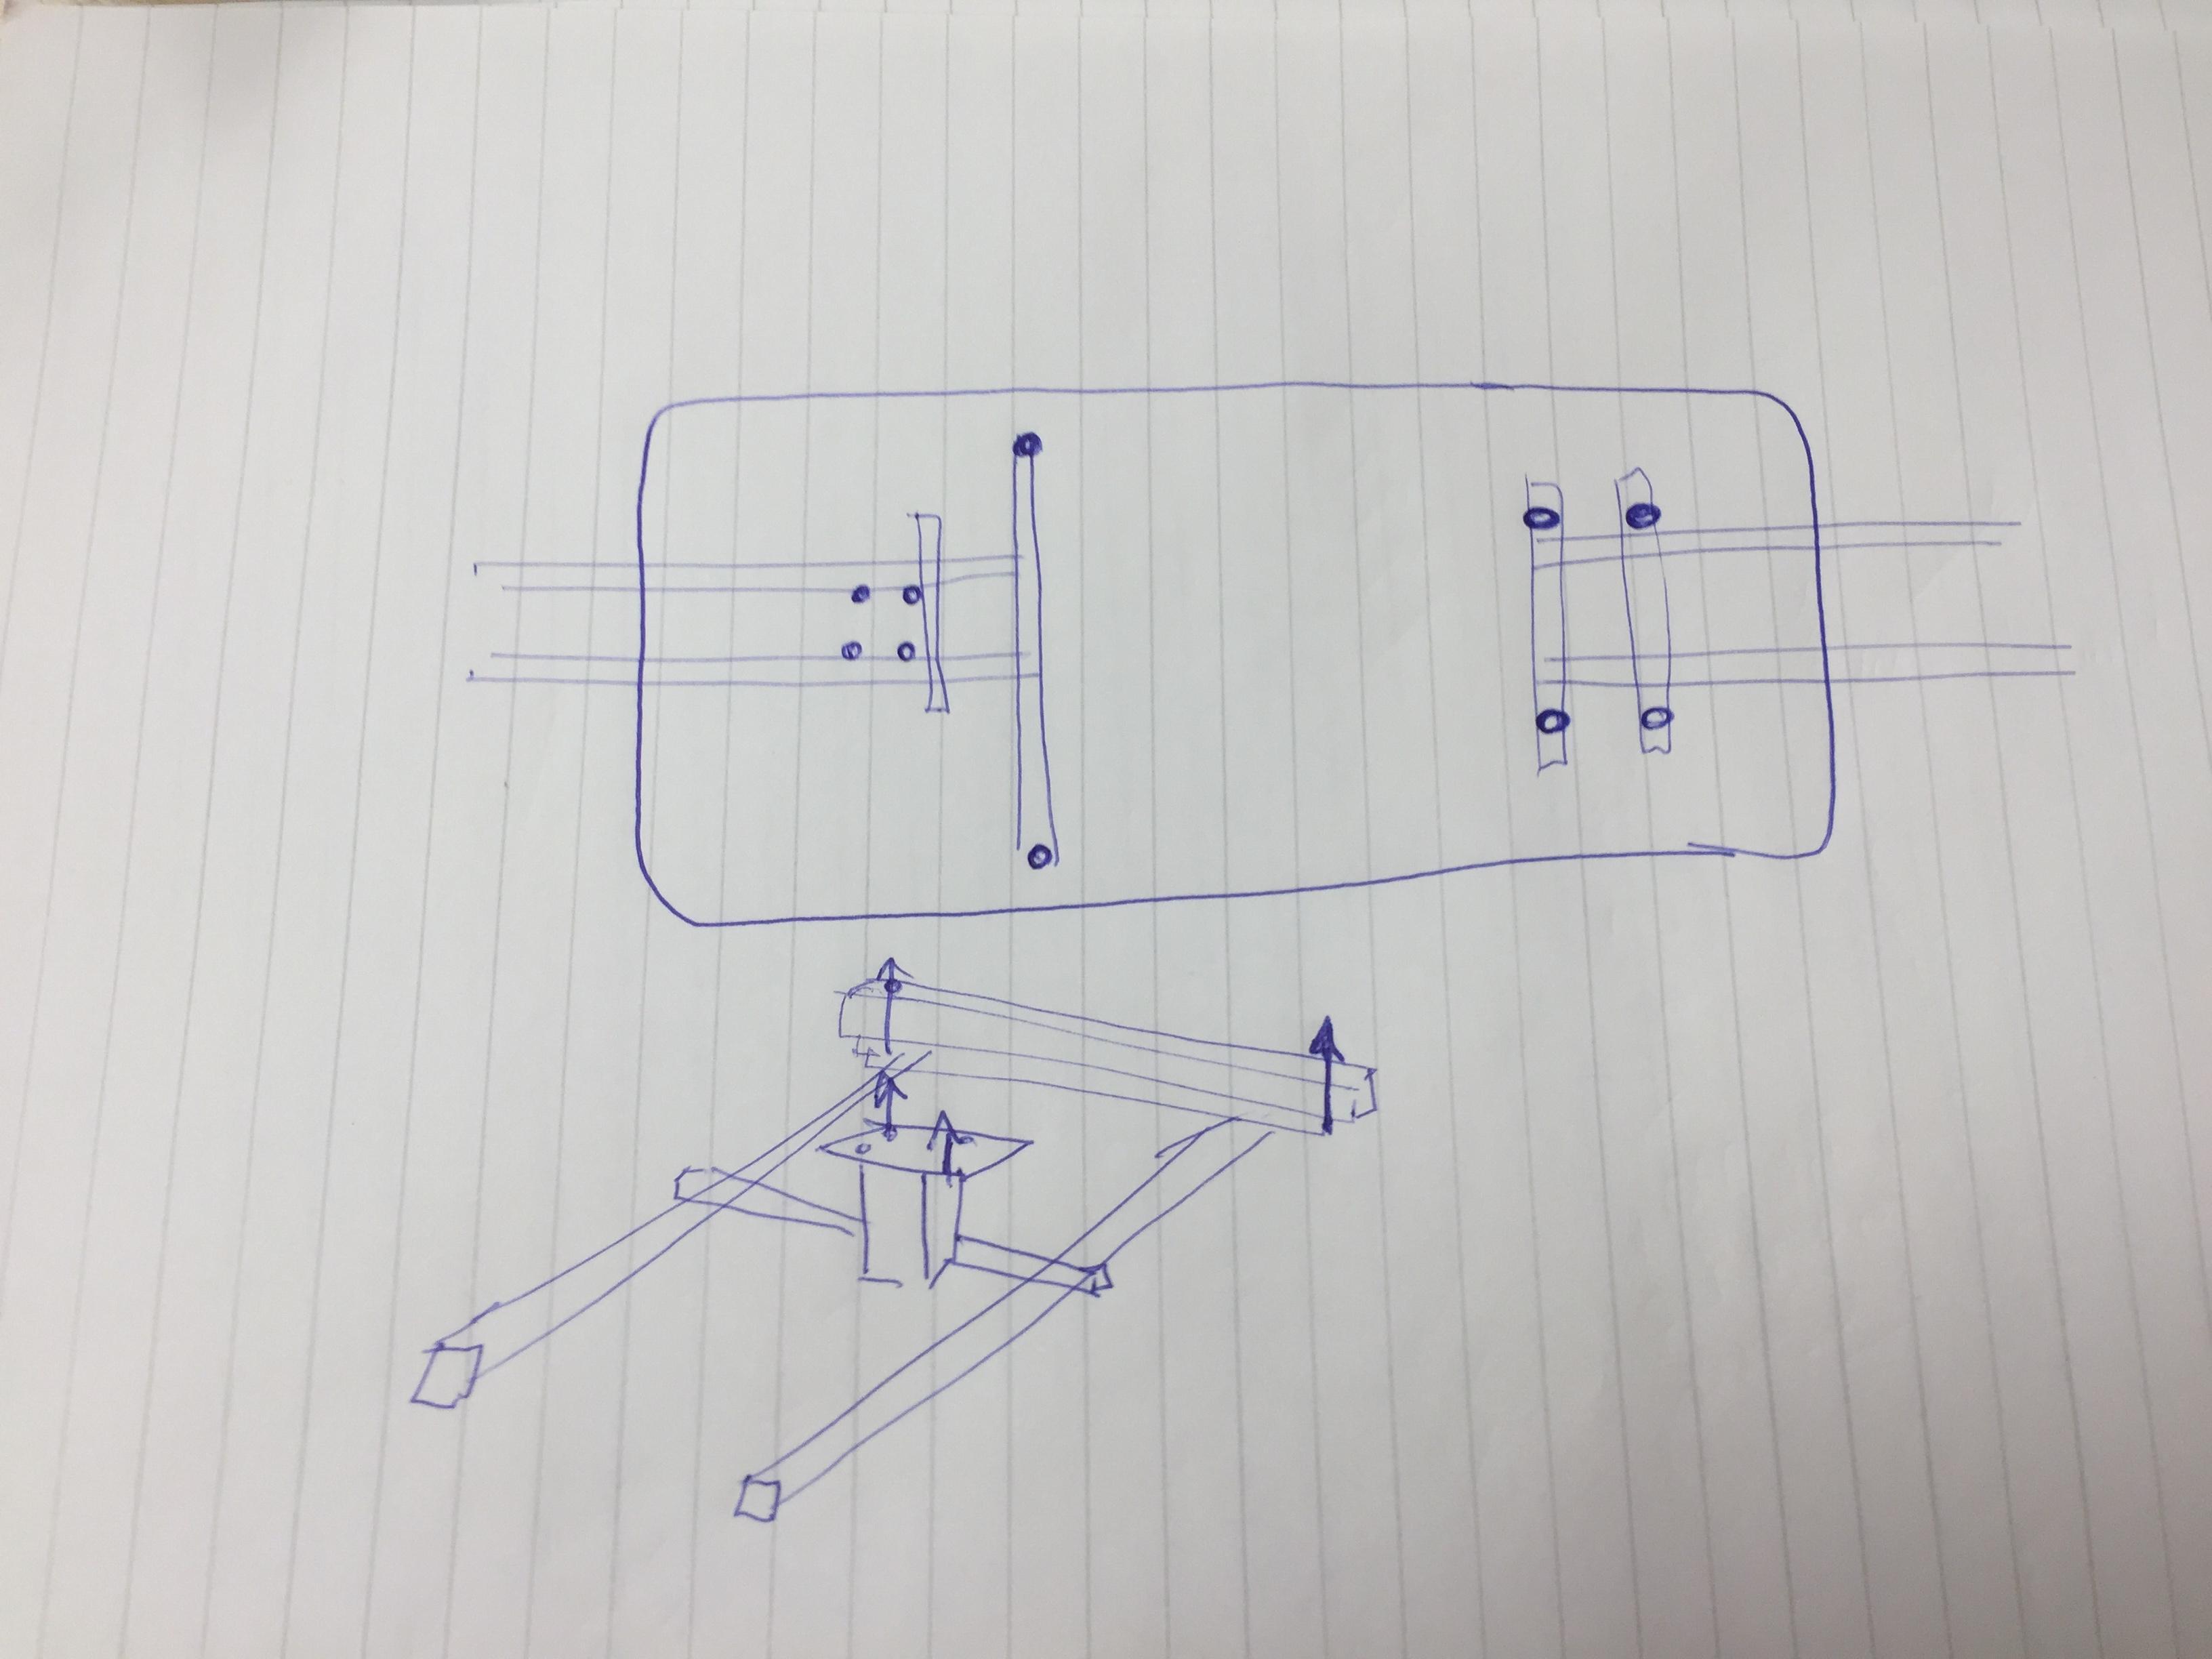
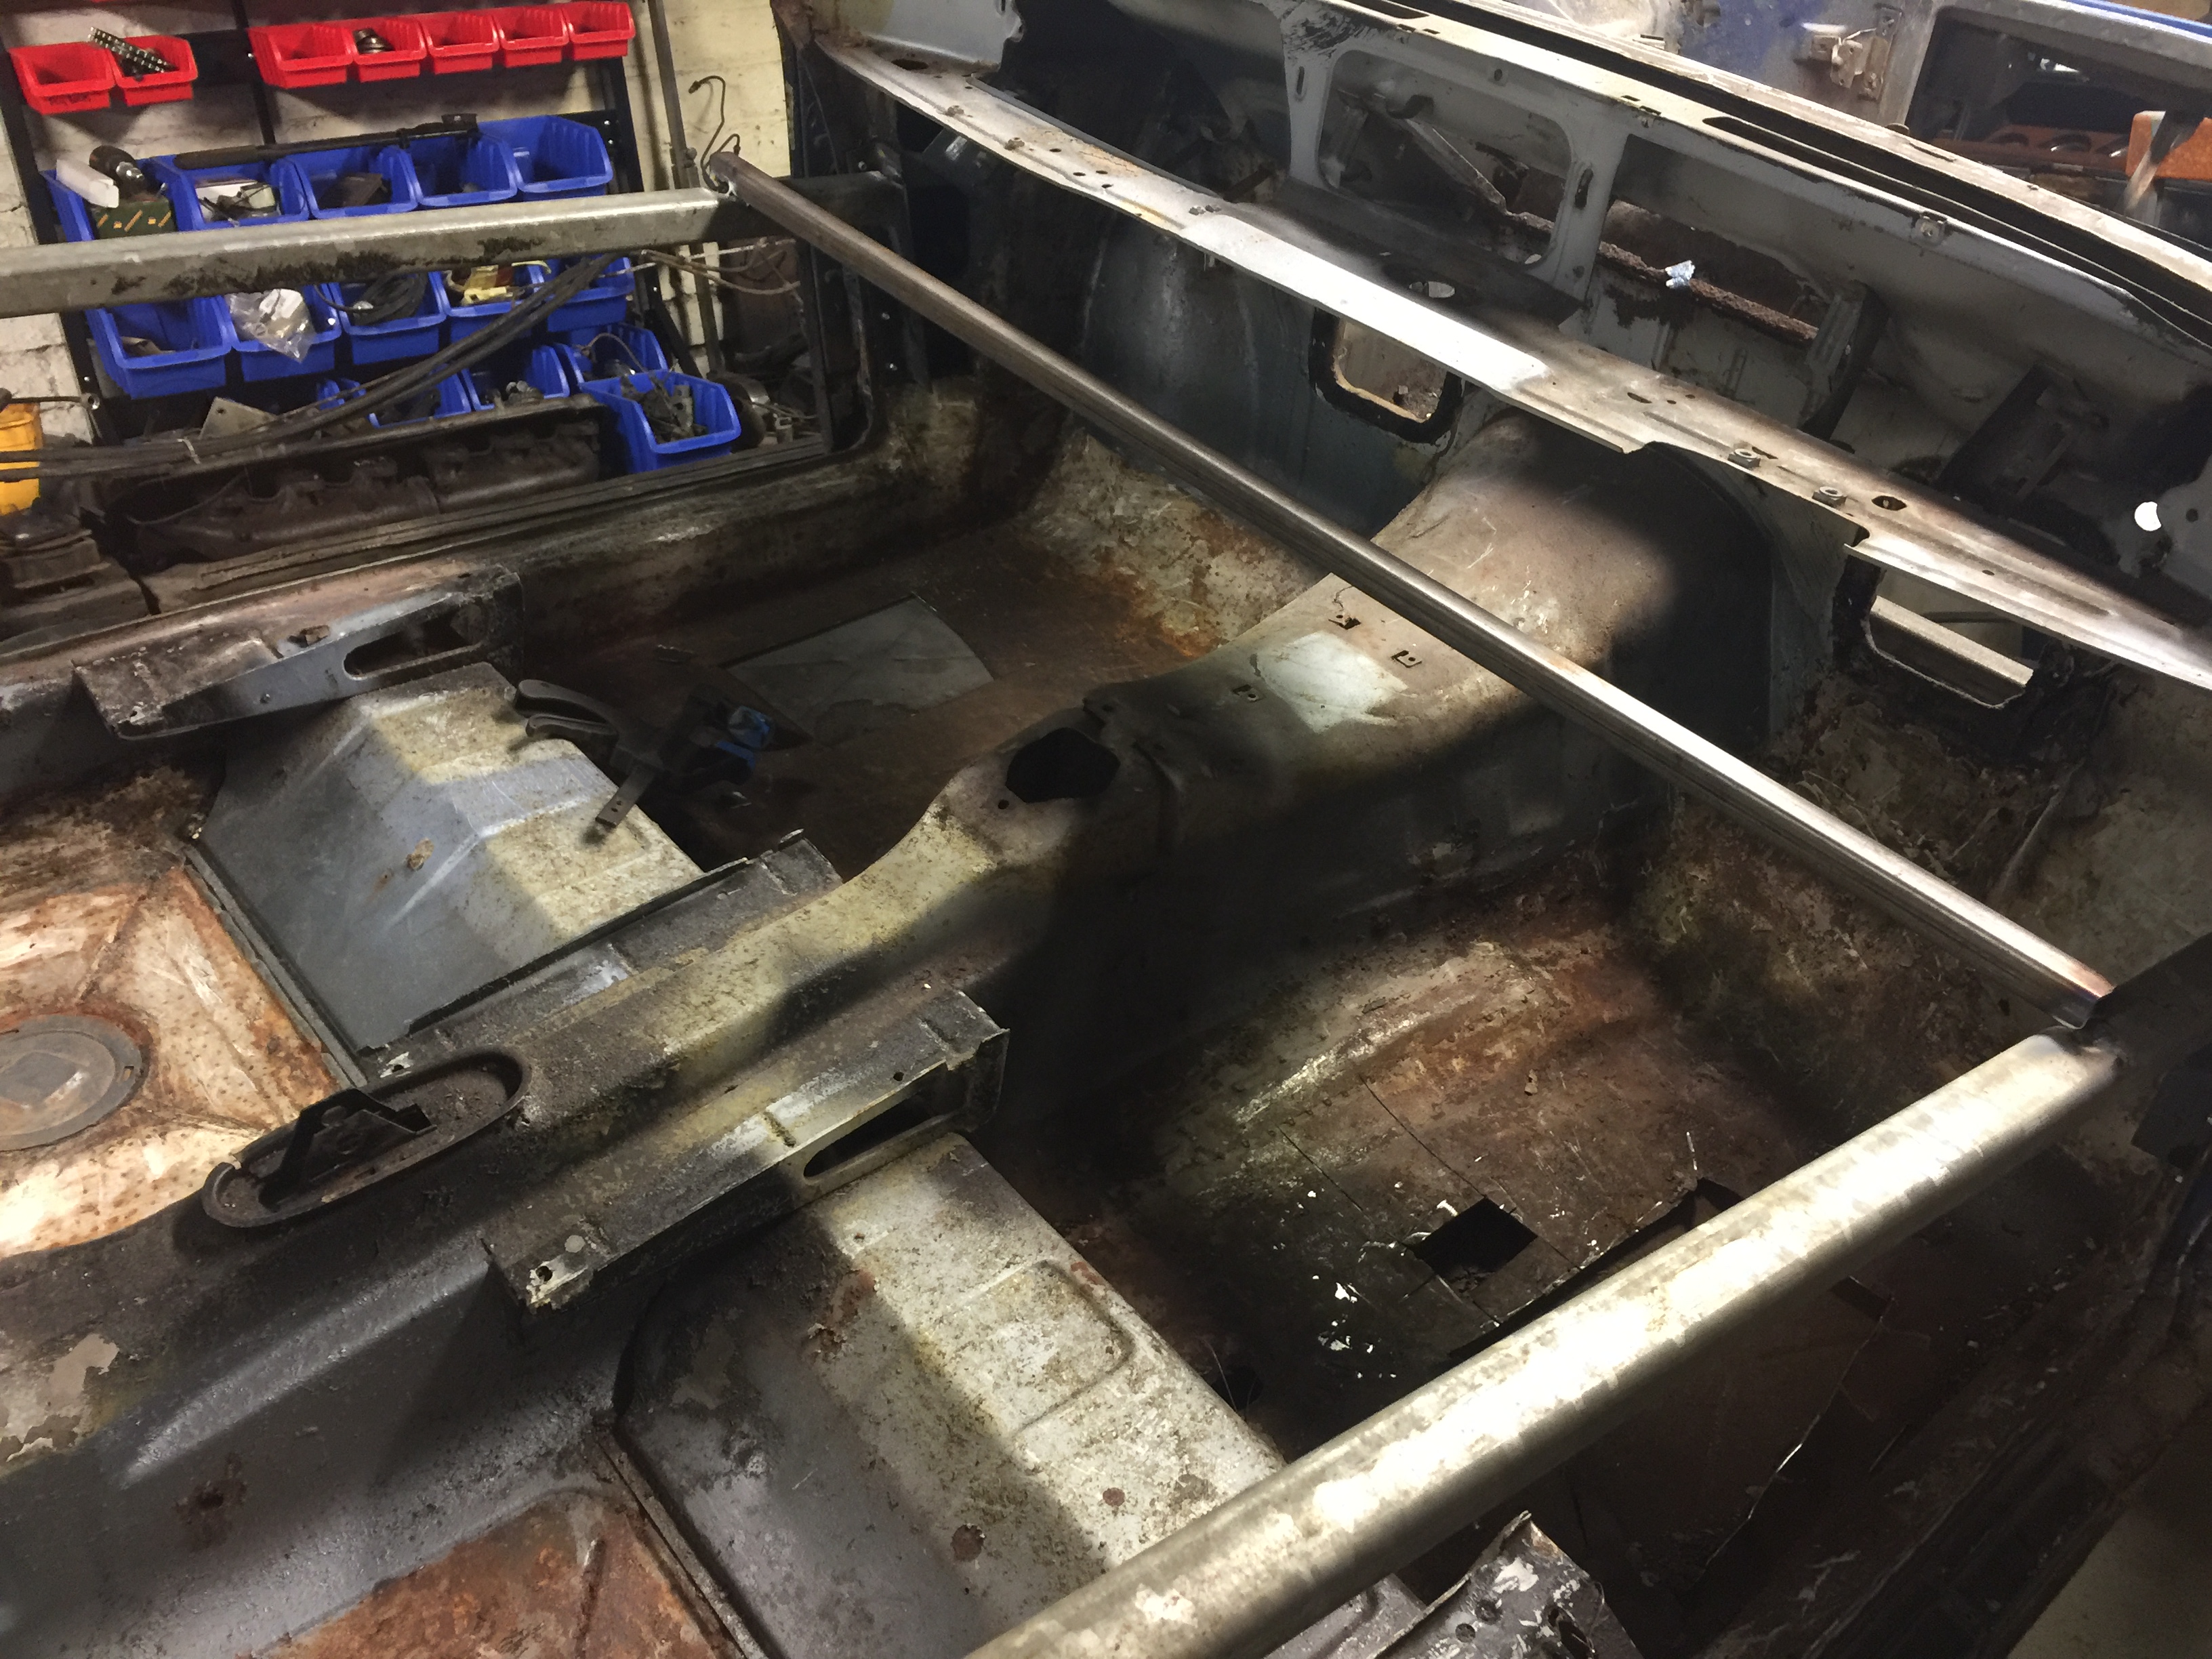
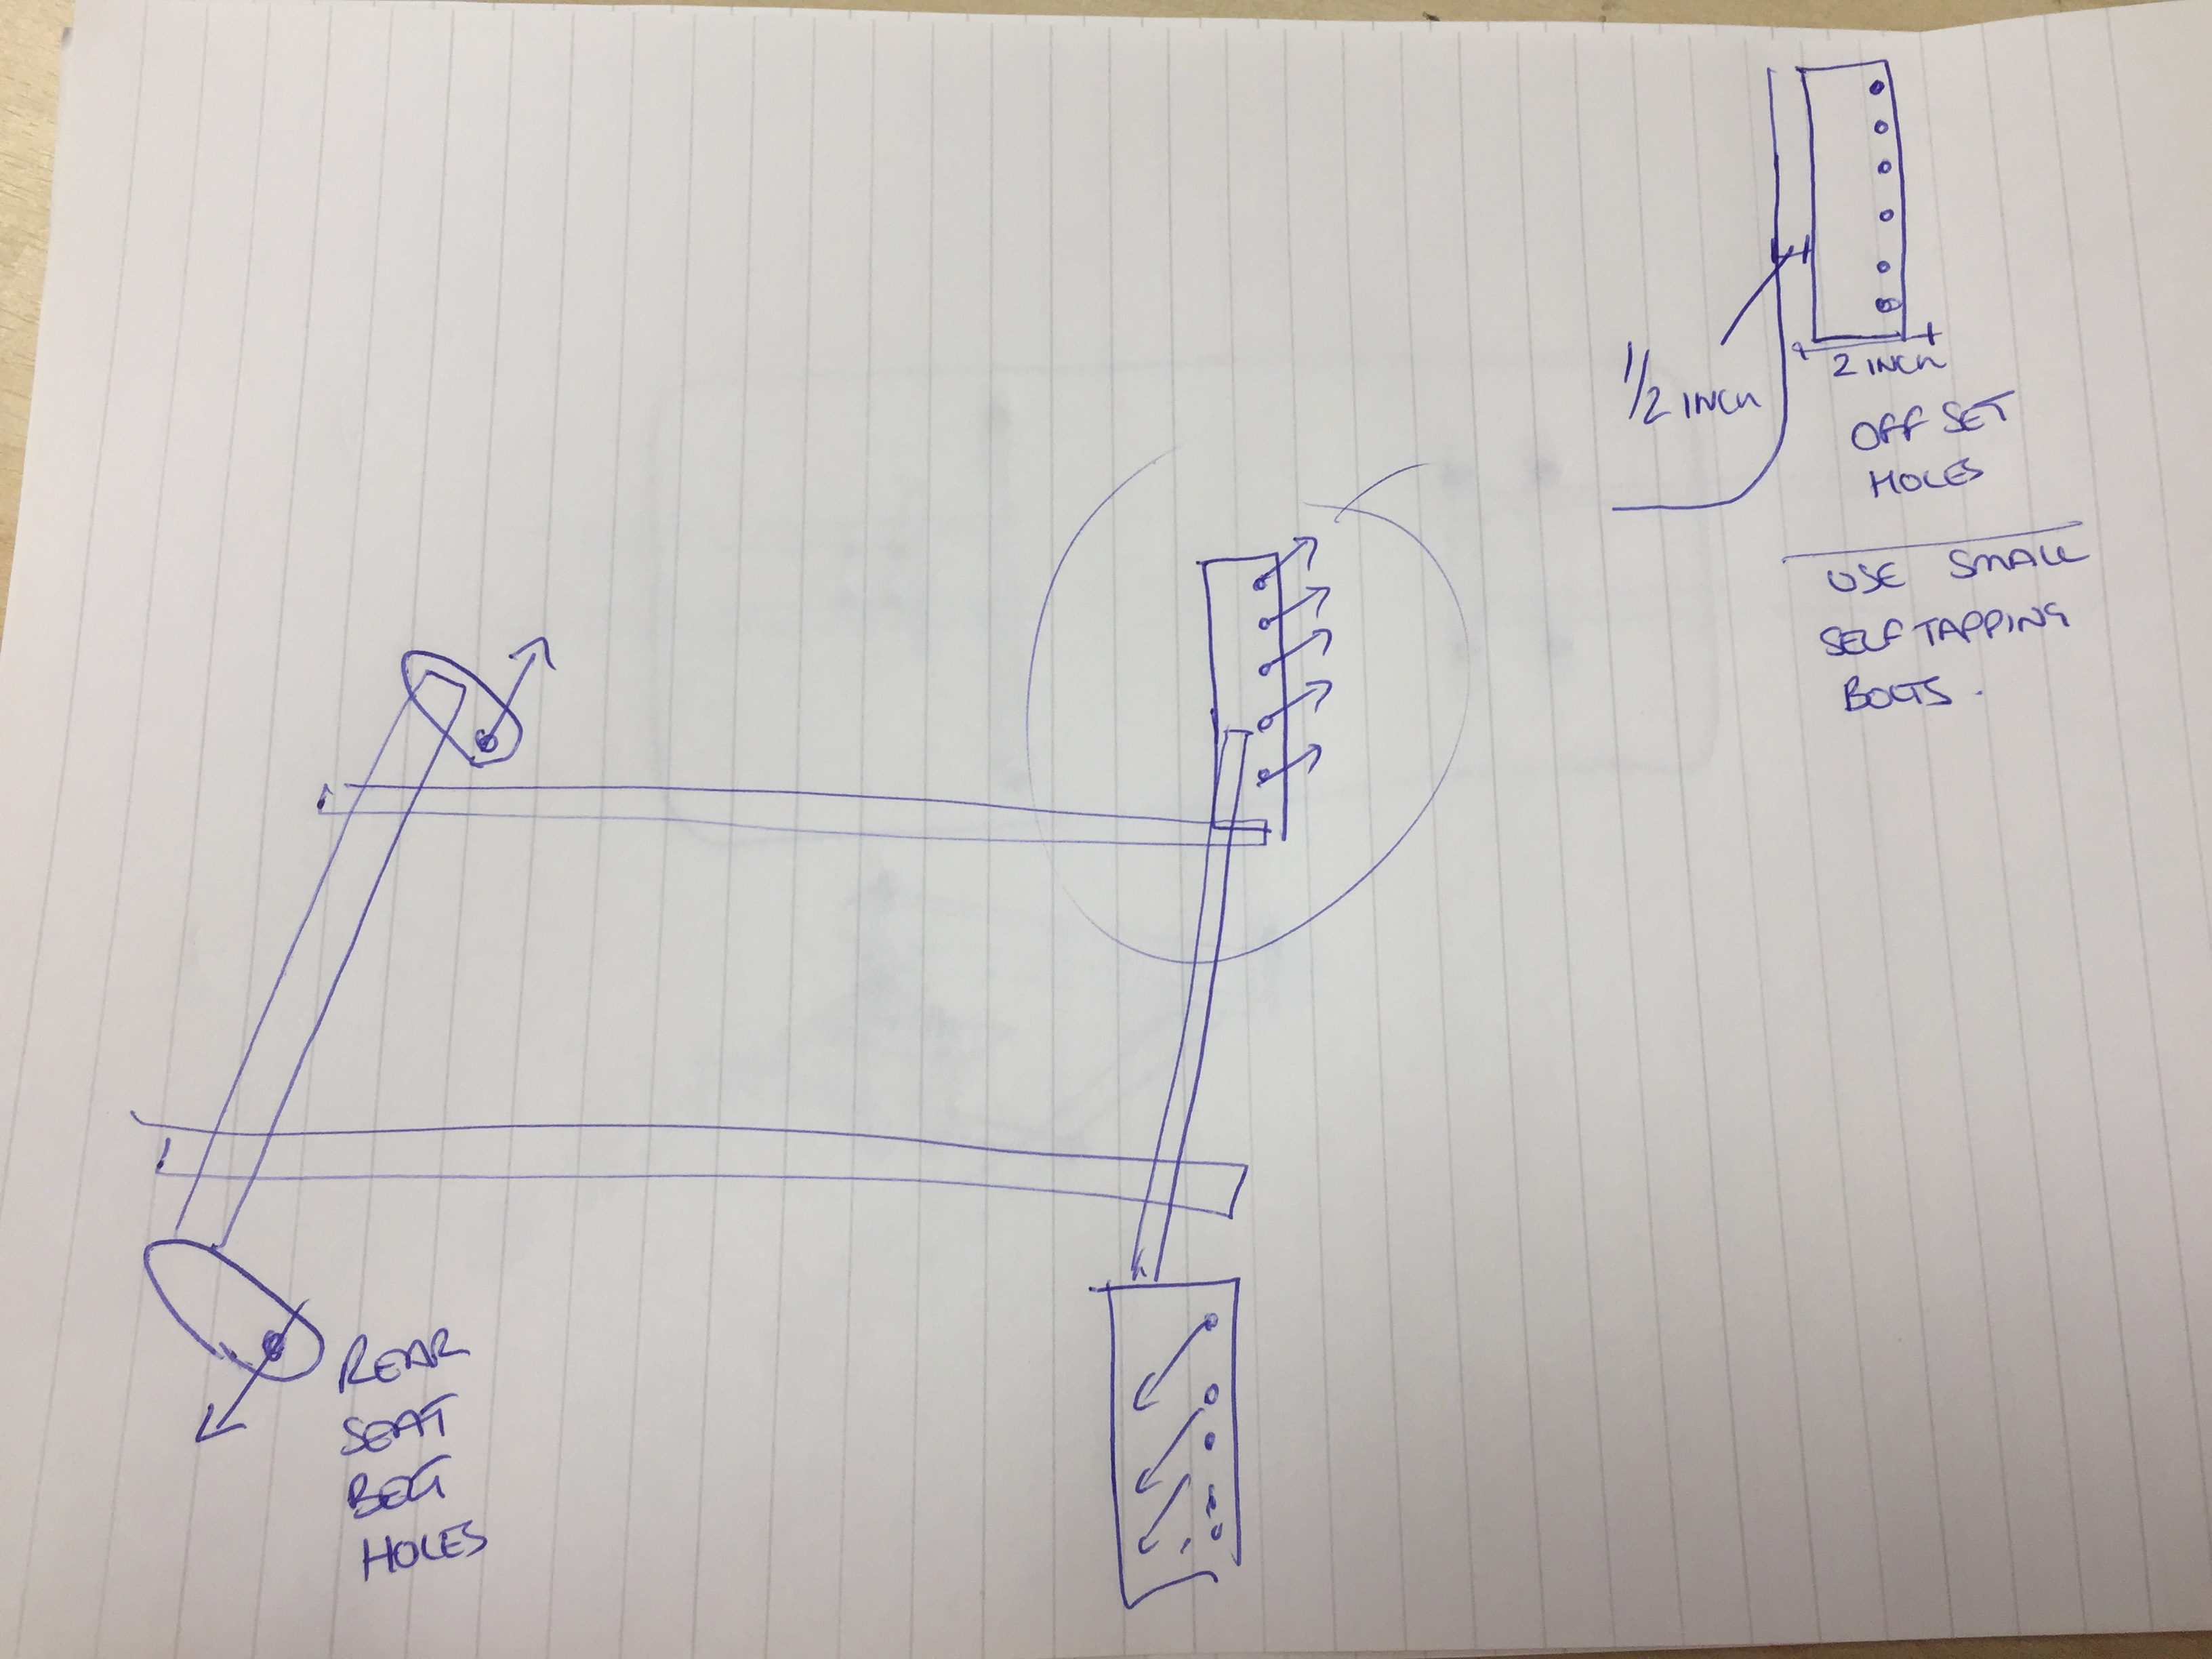
The car bracing…. I did not want to weld anything inside the car so I used the rear seat belt mounting points and at the front I mounted 2 plates that I used screw bolts into the A post – but these were mounted about ½ inch back from the door seal plus the pre-drilled holes were at the far side of the mounting plate as I did not want the penetrating bolts to come through the body.
So, the rear is quite simple – 2 plates were made with large holes – offered up and bolted to the rear seat belt mountings – I then measured the distance between and welded in a bar.
The front was the same – I made 2 long sections – pre-drilled and then fastened then to a post – measure the distance and welded a bar between them – and then just welded 2 bars front to back.
The self tapping bolts - I put a good 6 bolts in each side as they are about 3mm thick shanks - see http://image.made-in-china.com/43f3...g-Screw-Self-Drilling-Screw-Drywall-Screw.jpg
Ok I will try and explain and I hope with the photos it will all make sense
The car to the roll over
The front – the mounting points are the 4 cross member holes.
The rear
There are only two places you can mount from that have any meat....
The rear trailing arm studs and the differential mounting.
I first made a box section cross member between the trailing arm studs, but when I put it on I had to make 2 spacers out of box section to bring it off the body
Next was to make a mounting plate that will bolt on to the diff mounting on the body – made the plate from a template from the diff mounting rubber.
Welded a big box section to it, and then mounted it.
Then it was just weld a frame to the two mounting points.
My steel was all old stuff and was galvanized, and I was too lazy to grind it off so I got unsightly welds, and its not good for your health - the smoke given off is bad stuff - so a kept my head away from it - but it splatters like hell - so always clean your steel - it makes for a clean easy job - it was only done this was cos im lazy!
My box section was very thick walled – but if I was buying new steel I would get rectangular section probably 2/2.5mm thick
YOU WILL SEE I ONLY USED 2 OF THE DIFF MOUNTING HOLES _ THAT IS ONLY BECAUSE I DID NOT HAVE A SECTION OF 2MM PLATE TO DO ALL 4 _ SO I HAD TO RUN IT DIAGONALY, AND COULD ONLY GET 2 OF THE HOLES…..
The car bracing…. I did not want to weld anything inside the car so I used the rear seat belt mounting points and at the front I mounted 2 plates that I used screw bolts into the A post – but these were mounted about ½ inch back from the door seal plus the pre-drilled holes were at the far side of the mounting plate as I did not want the penetrating bolts to come through the body.
So, the rear is quite simple – 2 plates were made with large holes – offered up and bolted to the rear seat belt mountings – I then measured the distance between and welded in a bar.
The front was the same – I made 2 long sections – pre-drilled and then fastened then to a post – measure the distance and welded a bar between them – and then just welded 2 bars front to back.
The self tapping bolts - I put a good 6 bolts in each side as they are about 3mm thick shanks - see http://image.made-in-china.com/43f3...g-Screw-Self-Drilling-Screw-Drywall-Screw.jpg
Marc-M
Well-Known Member
Hope it helpsHello Marc,
Say, I am going back a couple of posts with this comment and question. I completely agree with bracing the shell to keep everything as square as possible during this process. Especially if the rocker assembly soundness is unknown/in question. It is great to see the frame you've created. I've been pondering where to attach a frame to effectively keep everything straight and still allow good access for exploration, fabrication and repair. I also see that you have (had) the car on a rotisserie. I see where you've attached the front section to the engine support frame, which is pretty straight forward. May I ask where you attached the rear section? I've been struggling with the best spot to support the body shell for this. Thank you for sharing your project!
Stephen
MM