Finishing School for a Fjord 3.0 CS / 100 projects to improve a Coupe / Countdown

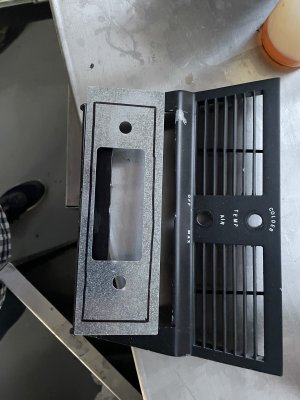
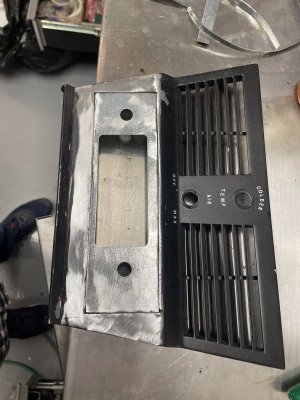
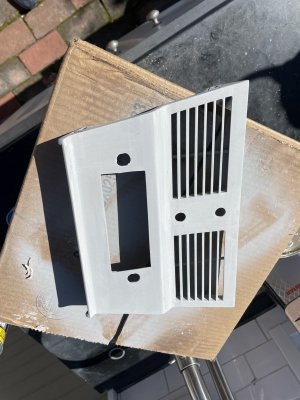
Project 63: Restore the center console face plate back to the original radio size.
Back in the 1980s in was an 'improvement' to install a newer DIN size stereo in your coupe. This started as a fashion with the wood Nardi steering wheels and WED's Bavaria aftermarket wheels. Things in vintage cars always seem to come full circle. We are back to the desirable AM/FM mono channel Blaupunkt Frankfurt radio.
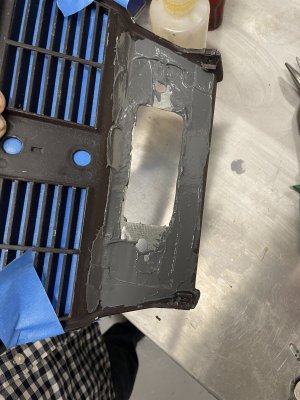
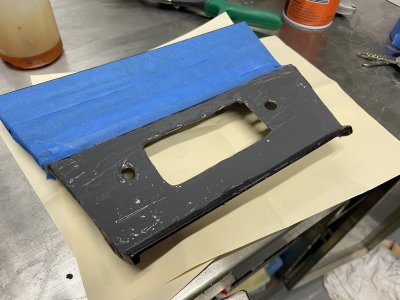
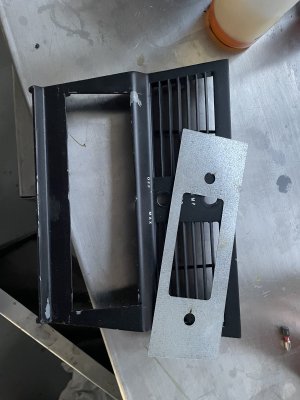
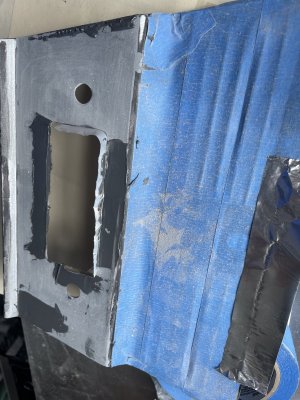
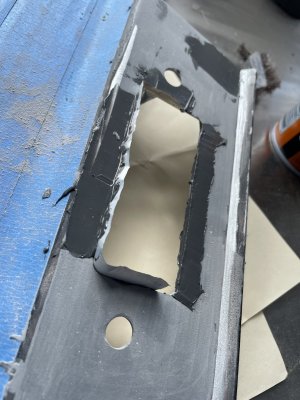
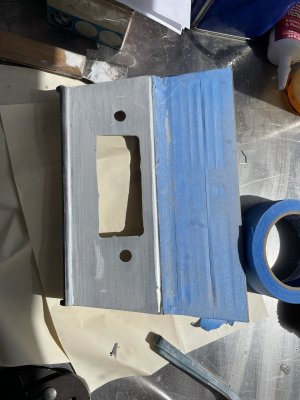
Here is the center console that some one opened up using a butter knife. I purchased this $20 backing plate from Sierra Madre Porsche parts for having a steel plate pattern for the Frankfurt face. I trimmed this down to match the 'rough' opening in the center console. Then ground down all the edges on both sides. Then a liberal application of my favorite two part epoxy - JB Weld. This bonds extremely well to these aluminum and steel surfaces, dries rock hard and is sandable. Next step is to wait 18 hours before sanding. This will need a second coat before priming.
 

Attachments

  • IMG_9764.jpg
    IMG_9764.jpg
    292.4 KB · Views: 146
  • IMG_9765.jpg
    IMG_9765.jpg
    343.1 KB · Views: 141
  • IMG_9766.jpg
    IMG_9766.jpg
    402 KB · Views: 137
  • IMG_9767.jpg
    IMG_9767.jpg
    387.9 KB · Views: 129
  • IMG_9768.jpg
    IMG_9768.jpg
    337 KB · Views: 123
  • IMG_9769.jpg
    IMG_9769.jpg
    280.9 KB · Views: 141
  • IMG_9763.jpg
    IMG_9763.jpg
    290.6 KB · Views: 170
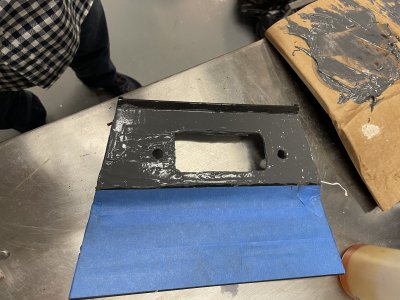
Great idea, I also love JB Weld. I've learned that blue masking tape can be used as a versatile mold - you can use it to contain large amounts to form structures. The adhesive side of the tape is what should contact the JB Weld. Then after 4 hours once it is set, it can be peeled away with no residue left behind. I've also waited >12 hours with the same results.
 
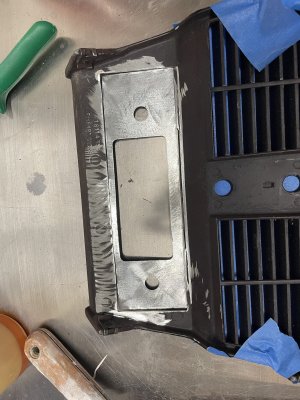
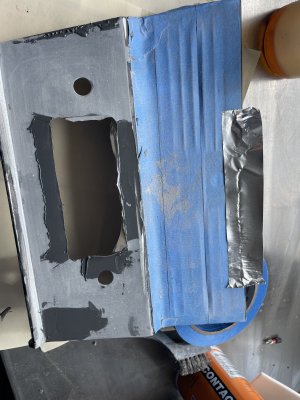
@Stevehose Let's take that tape concept to another level. I like to use the aluminum foil adhesive tape used in HVAC installations. It is highly formable and creates great 'dams' that hold back the slow flowing JB weld. And you can make it hold some pretty sophisticated 3D shapes. Here it is in 2D, used on the Round 2 spot fill in's on the console facia. This is after 1 round of DA sanding.
 

Attachments

  • IMG_9770.jpg
    IMG_9770.jpg
    334.6 KB · Views: 114
  • IMG_9771.jpg
    IMG_9771.jpg
    402.4 KB · Views: 116
  • IMG_9772.jpg
    IMG_9772.jpg
    313.3 KB · Views: 143
Paul and Steve - can you confirm that when you say "JB Weld," you're talking about the good old fashioned, original version? JB Weld, like many other automotive chemicals, adhesives and various compounds, has seen the introduction of many specialized variants - at least as far as the labeling goes. Sometimes all of these choices just lead to confusion and paralysis for me.
 
@Stevehose is right. The original stuff is simply JB Weld. They do sell a JB Weld Quik but like most chemistry tradeoffs, its worthless. JB Weld Quik goes off in 5 min. but the results are a rubbery final texture, it does not dry hard and the adhesion is sub par.

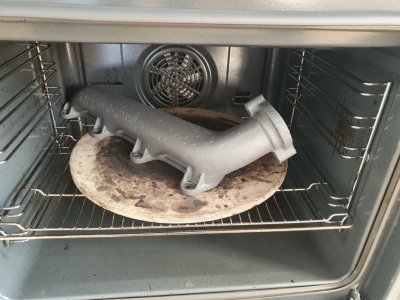
I am not a patient person, and 24 hours is a long time. You can def. accelerate the curing of regular JB Weld with temperature. Years ago I got kicked out of the kitchen for using it as curing chamber. If I am in a hurry, you can accelerate the curing. I've moved on to the patio BBQ, I get the chamber up to about 125F and place the part on the grille, turn the gas off and let it cure for an hour or so with the lid closed. Hard as a rock.
 
Years ago I got kicked out of the kitchen for using it as curing chamber. If I am in a hurry, you can accelerate the curing. I've moved on to the patio BBQ, I get the chamber up to about 125F and place the part on the grille, turn the gas off and let it cure for an hour or so with the lid closed. Hard as a rock.
I once joked with my very patient spouse about curing some powder coating in the oven...that was a non-starter to say the least.
 
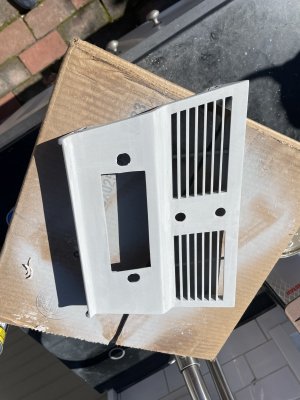
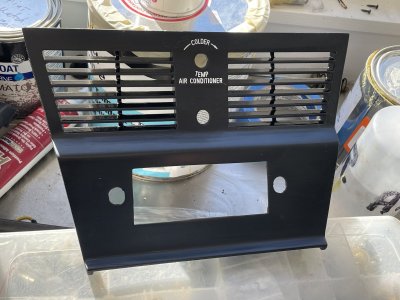
Project 63 update: Lots of struggling with what should have been a simple step -prime and paint the console facia panel. Lots of filing to get the correct fit to the Blaupunkt radio face. Then the high build primer reacted with the poor quality base paint. Lots of spot putty, repriming. This is the end result before catalyzed satin black paint.
 

Attachments

  • IMG_9799.jpg
    IMG_9799.jpg
    291.1 KB · Views: 120
I once joked with my very patient spouse about curing some powder coating in the oven...that was a non-starter to say the least.
Yeah Stevehose seems to be the only guy I know whose wife allows him to take over the kitchen with car projects. I got caught softening up the glue in my e39 lights in the oven prior to disassembly. Not pretty.
 
This wife let's me bake small parts in the oven .First wife let me cook a Ford Model A block in the oven to cure epoxy paint and let me short block a Ferrari motor on the dining room table. Those days are now gone. After a bit of arguing, I get to store dorpanels and other flat upholstery under an unused bed
 
Last edited:
I have hand washed parts in the kitchen sink & run others through the dishwasher which is a home autoclave. The BMW parts I put in there are generally, cleaner than the dishes & few utensils.

For epoxy, I use West System 105 with 205 Fast Hardener. There’s also 206 Slow Hardener. We have built Cedar Strip-Built Sea Kayaks which don’t play well with the Maine Coastal rocks or concrete boat ramps. I repair them every Fall. I I also keep 4 ounce fiberglass cloth & 6 ounce 2 inch fiberglass tape on hand which I used to reattach the Lower Dash Panel foam backed vinyl to the metal backing.
 
B.t.w.
got all finished painted stuff in lack of clean storage aerea stored in the sleeping room.
(got a lot of not used shelfs in there..)
and under the bed the driveshaft and car carpet....
:p
Breiti
 
Last edited:
I have a lot of cleaned, painted or powder coated stuff sitting in our family room on a couple of tables. Downstairs in our walk-out basement is fine, upstairs is not in the cards.
 
Once, I set up a whole work station in our living room so I could watch the Super Bowl with my wife while I put my newly redone BBS RSs back together. I believe it was 32 bolts per wheel and each had to be correctly torqued, my goal was to complete a wheel a quarter.
 
Yes 32 bolts 20#s of torque I measured it when I tore them down and verified at a wheel shop. I also had all of the bolts and nuts chromed.
 
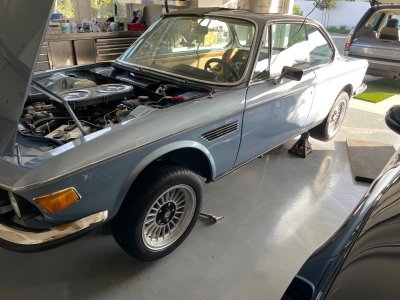
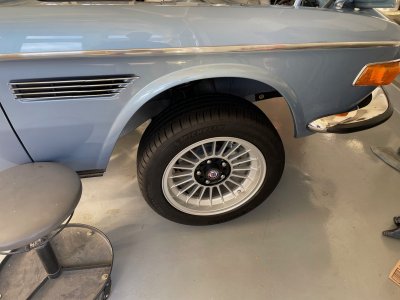
Project 64 Install 16'' Alpina style wheels and Michelin Pilot Sport tires.

No dessert until you finish your vegetables.

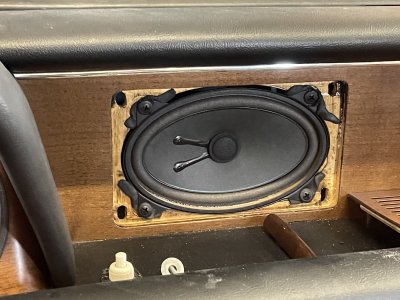
I've delayed the installation of these tires and wheels as I've set it as sort of reward / milestone. The game was I had to fully finish the center console and dash assy. This means full functionality of everything inside the console. The delay has been wiring in both the original Blaupunkt Frankfurt, the new mono speaker (thank @HBChris). The A/C fan speed switch, restoring the center console and getting the shift surround correctly fastened so reverse and 5th gear selection don't slam the console side to side. That project finished today so I installed tires and wheels.

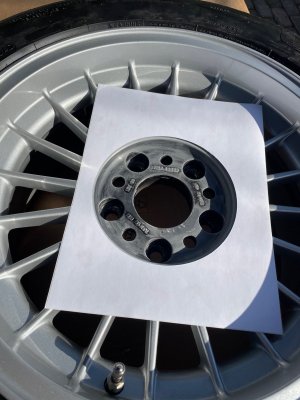
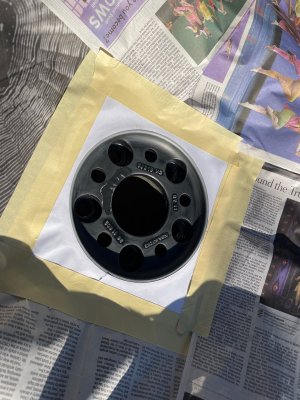
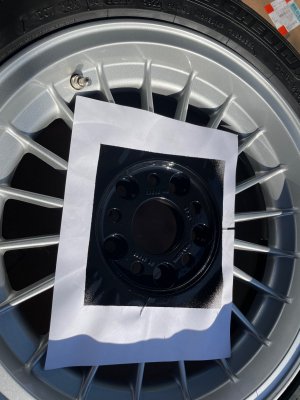
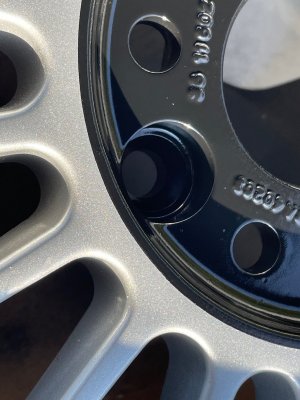
I repainted the centers with the correct Alpina black inserts showing about 4 mm on the face of the wheel. I use an 8 1/2 x 11 sheet of label paper. I then put an exacto blade in a protractor and cut out 162mm ID stencils. I am still using catalyzed satin black paint so you have to remove the stencil within minutes of the paint application otherwise you will have a real mess on your hands. Here is the result.
 

Attachments

  • IMG_9827.jpg
    IMG_9827.jpg
    328.5 KB · Views: 109
  • IMG_9826.jpg
    IMG_9826.jpg
    230.5 KB · Views: 113
  • IMG_9819.jpg
    IMG_9819.jpg
    249.6 KB · Views: 110
  • IMG_9821.jpg
    IMG_9821.jpg
    380.2 KB · Views: 111
  • IMG_9822.jpg
    IMG_9822.jpg
    259.7 KB · Views: 109
  • IMG_9824.jpg
    IMG_9824.jpg
    305.7 KB · Views: 123
  • IMG_9811.jpg
    IMG_9811.jpg
    273.3 KB · Views: 118
  • IMG_9797.jpg
    IMG_9797.jpg
    310.6 KB · Views: 118
  • IMG_9799 (1).jpg
    IMG_9799 (1).jpg
    291.1 KB · Views: 95
  • IMG_9806.jpg
    IMG_9806.jpg
    314.9 KB · Views: 98
Back
Top