You are using an out of date browser. It may not display this or other websites correctly.
You should upgrade or use an alternative browser.
You should upgrade or use an alternative browser.
LAN e9 empresas y tribulaciones, an epiphany in 042BBlau. OPUS MAGNA. XXXXXXXXXXXXXXXXXXXXXXXXXX
- Thread starter deQuincey
- Start date
of oil pumps, oil dipsticks,
I have put a new oil pump, two surprises and an anecdote
The first surprise is that there are no pumps on the market, normally you have to renew the one you have or look for another used one, good luck with it! it is not easy to find
the second is that the new replacement pump (which I bought 6 years ago) is different and does not fit, let me explain...
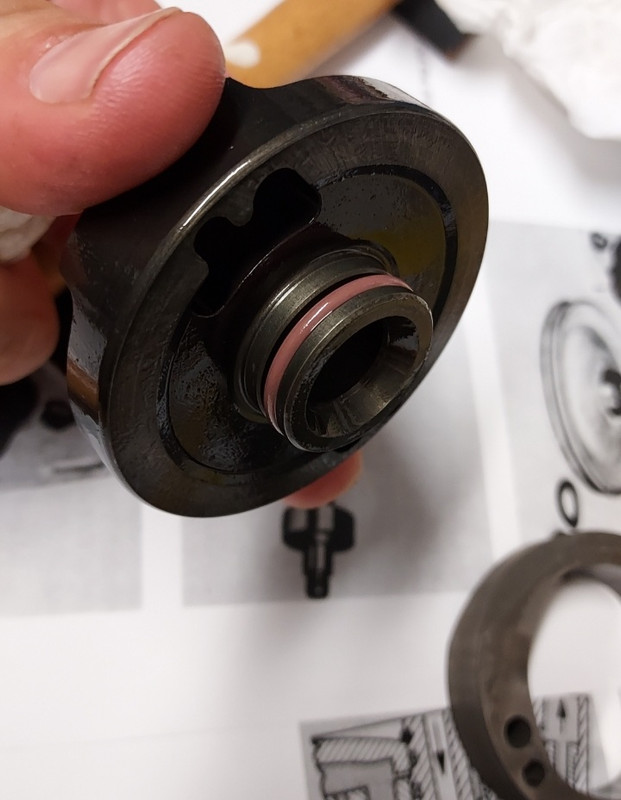
This is the new replacement model, it changes the fastening of the front sprocket going from a plate with three screws to a single central nut, (by the way it is rare metric and rare thread step)

In addition, observant people can see a prominent cup in the suction end, and this is the other surprise, it does not fit in the carter, so you have to cut the cup, it does not look elegant, but it is worse to leave the carter open ;-)

here with the bowl cut:


And now the curiosity, I have wondered how the oil dipstick looks down there, well this is the answer...
matching the level (in the photo the engine is not level as it would later be in the car)
this would be approximately the situation of oil level in the middle

and one last thing that I have learned, and that is that the pump must be assembled with oil so that it is primed, otherwise it will not suck...
BTW, i do have 8 nuts for sale, i was forced to buy 10, i installed one and i will keep one as a spare, so if you plan to install this type of oil pump and you need a nut, do not hestate to ask for it. buyer will pay postage.
I have put a new oil pump, two surprises and an anecdote
The first surprise is that there are no pumps on the market, normally you have to renew the one you have or look for another used one, good luck with it! it is not easy to find
the second is that the new replacement pump (which I bought 6 years ago) is different and does not fit, let me explain...
This is the new replacement model, it changes the fastening of the front sprocket going from a plate with three screws to a single central nut, (by the way it is rare metric and rare thread step)

In addition, observant people can see a prominent cup in the suction end, and this is the other surprise, it does not fit in the carter, so you have to cut the cup, it does not look elegant, but it is worse to leave the carter open ;-)

here with the bowl cut:


And now the curiosity, I have wondered how the oil dipstick looks down there, well this is the answer...
matching the level (in the photo the engine is not level as it would later be in the car)
this would be approximately the situation of oil level in the middle

and one last thing that I have learned, and that is that the pump must be assembled with oil so that it is primed, otherwise it will not suck...
BTW, i do have 8 nuts for sale, i was forced to buy 10, i installed one and i will keep one as a spare, so if you plan to install this type of oil pump and you need a nut, do not hestate to ask for it. buyer will pay postage.
Last edited:
so at home now to final details and bits

plan to install anciliaries and renew eccentrics and make a nice valve adjustment calmly
plan to install anciliaries and renew eccentrics and make a nice valve adjustment calmly
Meanwhile with the excellent company of T.E.Lawrence aka @Stevehose ....
The mighty steering pump...

pressure valve

one oring


this is from 1970


the target…as Steve-in-kitchen demonstrated…

The mighty steering pump...
pressure valve
one oring
this is from 1970
the target…as Steve-in-kitchen demonstrated…
Last edited:
Curious production number high increase in only 2years
older,

newer, 72, less than 2 years, number is increased in 100.000

older,
newer, 72, less than 2 years, number is increased in 100.000
some more...
careful, this will fall down when upside down


the seal sits flush with the wall, see the needle bearing below


to extract this one use a proper stick and hit from the other side


to extract the needle bearing and the seal use a 18mm hex vase, and a proper tool to not hit it with a hammer

this setup works very smoothly

if you place a piece of paper pressed upon the cage, the needles will not fall down


careful, this will fall down when upside down
the seal sits flush with the wall, see the needle bearing below
to extract this one use a proper stick and hit from the other side
to extract the needle bearing and the seal use a 18mm hex vase, and a proper tool to not hit it with a hammer
this setup works very smoothly
if you place a piece of paper pressed upon the cage, the needles will not fall down
hi, @Stevehose
i do have a concern as i found a discrepancy: the position of the saft seal in the steering pump, as i have seen in your pics (see below)
it seems that you put the lip with the spring on top:

but as per my pics on disassembly it is clear that my seal appeared to be mounted just the opposite:

once extrated you can see the seal to identify the sides:

now see the seal and see the spring on the other side

IMHO, you should not tap the rubber side when introducing a seal, as you did (@Stevehose ), that is why the seal has a steel cage to be pushed from that side
comments ?
i do have a concern as i found a discrepancy: the position of the saft seal in the steering pump, as i have seen in your pics (see below)
it seems that you put the lip with the spring on top:
but as per my pics on disassembly it is clear that my seal appeared to be mounted just the opposite:
once extrated you can see the seal to identify the sides:
now see the seal and see the spring on the other side
IMHO, you should not tap the rubber side when introducing a seal, as you did (@Stevehose ), that is why the seal has a steel cage to be pushed from that side
comments ?
another point @Stevehose
you did a profoundness gauge check

in my case i found the needle bearing to be simply bottomed in place, and found a gap between bearing and seal, see here:

can not tell the relevance
regards
you did a profoundness gauge check
in my case i found the needle bearing to be simply bottomed in place, and found a gap between bearing and seal, see here:
can not tell the relevance
regards
I probably put the seal in backwards unless it happened to be that way upon removal for me, fortunately no leaks and working fine all these years. I did the measurement per the manual instructions and I definitely had room for adjustment before bottoming out. Great pics.
You are right SteveI probably put the seal in backwards unless it happened to be that way upon removal for me, fortunately no leaks and working fine all these years. I did the measurement per the manual instructions and I definitely had room for adjustment before bottoming out. Great pics.
some paint and chroming of the steel bits


some time in the kitchen as Steve did


remove old bearing

Using ATF oil to help assembly


some time in the kitchen as Steve did
remove old bearing
Using ATF oil to help assembly
Last edited:
Put a drop of atf oil

Comparing old and new seals

this side to hit with the vase


Comparing old and new seals
this side to hit with the vase
Last edited:
Gear box speedo pinion and seal
you probably will remember this pic from @Stevehose

He was the first to tackle this job
so I have done it myself

you can see the old black rubber seal still in its place
the small steel sort of thick washer is out a bit PITA by the way
you probably will remember this pic from @Stevehose
He was the first to tackle this job
so I have done it myself
you can see the old black rubber seal still in its place
the small steel sort of thick washer is out a bit PITA by the way
Removed the seal using a special tool
Seal was destroyed,
Use washers and pressure to instert the new seal,


