All -
I re-assembled my door today and was cruising along thanks to
@deQuincey great writeup in this thread until I got hung up getting the vent window control installed. Below is the sequence of steps I had to follow to get everything back together. I would have saved much time if I knew to install the vent window control as I installed the triangular window frame. I also installed the lock mechanism and forget the rod that goes up the door so I had to uninstall the lock to get the rod in place. I'm just trying to add a little value in appreciation to everyone elses great posts that have helped me in restoring my coupe
")
Sequence to assemble door:
1) Install the outer door handle.
2) Install the door lock mechanism. As you install the door lock, make sure the rod that runs vertically to the top of the door is installed and in place. You cannot install the rod properly if the lock mechanism is already bolted in place.
3) Install the triangular vent window. Loosely install the two nuts, but do not install the two upper bolts yet.
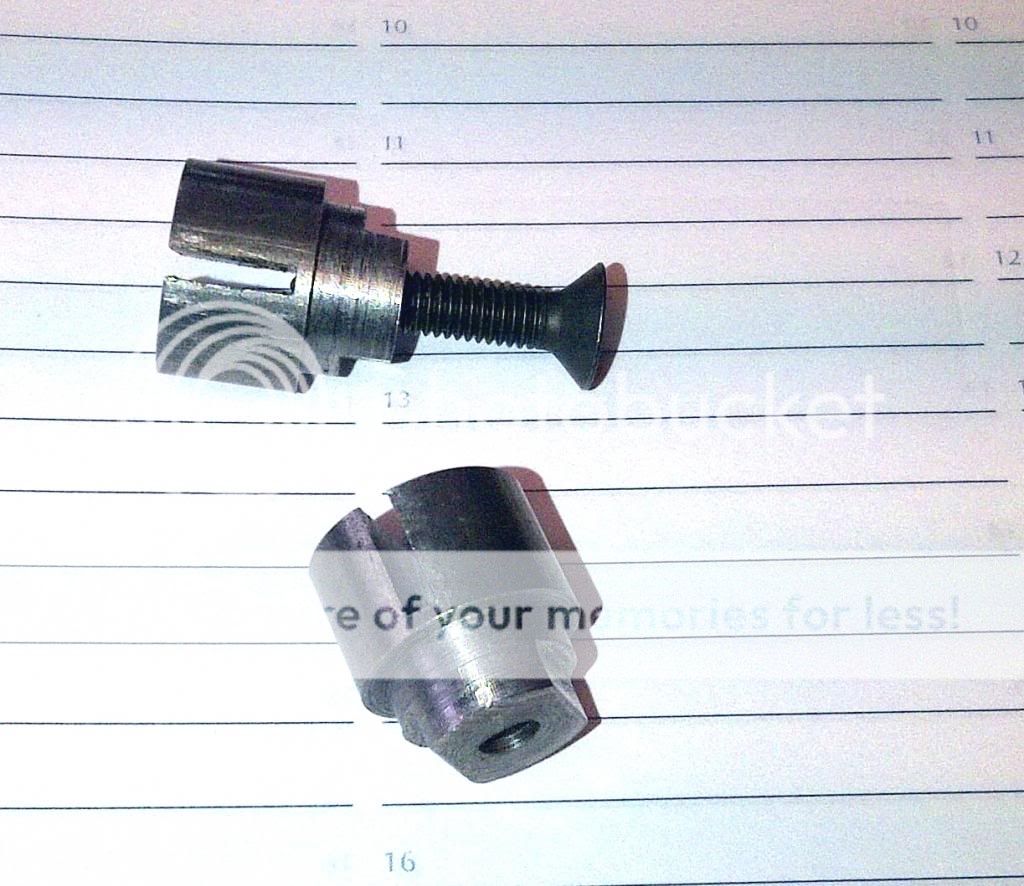
4) Install the triangular vent open/close mechanism.
Before feeding the mechanism up inside the door, remove the bolt that fastens the vent window to the control. The arm of the window fits into the slot of the controller and the bolt goes through the eye of the arm. The fit of the arm into the controller slot is very snug. I had to lift up a little on the window frame to create clearance to get the arm into the controller slot.
5) Gently feed the main window glass into the door. Have bracket the window lift arm connects to already attached to the window.
6) Feed the rear guide into the door. Have the three bolts that attach the guide bracket to the glass removed. Loosely install the fasteners for the rear guide so it is attached to the door.
7) Attach the glass to the bracket of the rear guide mechanism. As you are fastening the glass to the bracket, make sure the guide on the front of the window is in the groove of the vertical track of the triangular window frame.
8) Once the glass is attached to the rear guide bracket, move the glass up and down the track using your hands to make sure it moves freely. You can start with micro adjustments of the rear guide position until the glass is in good alignment in the up position.
9) Feed the window lift mechanism into the door. Have the lift mechanism so it is in the rolled down position. Attach the lower right hand bolt to help hold the lift mechanism in place. Tilt the lift mechanism so you can fit the arm attachment to the bracket on the glass. Then align the lift mechanism to the holes on the door and install the other three bolts. Tighten the bolts.
Micro adjust window position as needed.