Needed a "Go By"

HB Chris

Well-Known Member
Site Donor $$
Messages
19,418
Reaction score
8,757
Location
Huntington Beach, CA
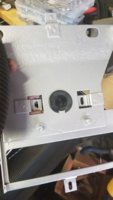
Heater and AC boxes all rebuild and back in their homes. Anyone know if there is supposed to be a condensation drain hose on the bottom of AC box? View attachment 64002

Yes! It’s a large grommet that fits in the trans tunnel, without it you will rust out the floors even quicker. And you will need to remove the blower unit again to gain access.
 

Stevehose

Well-Known Member
Site Donor $$
Messages
12,933
Reaction score
5,598
Location
Sarasota, FL
I installed a slightly smaller diameter tube into the drain hole of the evap unit from below, sealing it in tightly with an adhesive. The tube hangs down below the body by a 1/4" or so, all condensate drains out and never gets near the metal.
 

Thomas76

Well-Known Member
Site Donor $
Messages
1,240
Reaction score
695
Location
Michigan, USA
Thanks guys, with the transmission in place I think there is only one option... Disassemble.. :(
 

Ajay

Well-Known Member
Site Donor $$
Messages
235
Reaction score
170
Location
Irvine, CA
Heater and AC boxes all rebuild and back in their homes. Anyone know if there is supposed to be a condensation drain hose on the bottom of AC box? View attachment 64002

Tom,

I just did this same process on mine. Here is what the grommet looks like.

20190425_114142.jpg
 

Stevehose

Well-Known Member
Site Donor $$
Messages
12,933
Reaction score
5,598
Location
Sarasota, FL
No, there is no tube from the factory, this was an idea that came from the deep recesses of my rapidly aging brain. It prevents any water from spilling into the cabin on turns, stops etc. The factory setup did not always work, as seen by some rusty floors and wet carpet and insulation in that area.
 

Thomas76

Well-Known Member
Site Donor $
Messages
1,240
Reaction score
695
Location
Michigan, USA
So I am clearly missing this piece, W/N has a part (64511352205) but looks like foam that wouldn't seal. Has anyone sourced something that works? @Ajay
upload_2019-5-8_17-20-8.png
 

Ajay

Well-Known Member
Site Donor $$
Messages
235
Reaction score
170
Location
Irvine, CA
Thanks Ajay! So no tube goes through the chassis?

Tom,
The bottom of the rubber grommet has a 1 to 1.5" "finger tube" that goes thru (in my car) a rubber grommet Into the tranny tunnel. Looks like a rubber funnel..

Wish I snapped a pic before the install...
 

Thomas76

Well-Known Member
Site Donor $
Messages
1,240
Reaction score
695
Location
Michigan, USA
I avoided the AC box this weekend, decided to refresh the cooling system. The flip forward hood looks cool, until you work on the front of the engine. Despite the sore back, new water pump hoses and tstat are in.
IMG_20190510_192121853.jpg
 

Thomas76

Well-Known Member
Site Donor $
Messages
1,240
Reaction score
695
Location
Michigan, USA
Two solid weeks of reverse engineering the poorly executed electrical mods have drained much of my enthusiasm to restore.
1. One wire alternator conversion involving an early 80s Bosch ignition controller is leaving me baffled.
2. Wiper and blinker stalks updated to more modern units putting the turn signal on left side. This took major surgery to accomplish, and would be a ton of work to undo this mess.
3. Battery relocated to trunk, again poorly done. Thinking I will move to engine bay.

Anyone understand the alternator conversion?
 

Thomas76

Well-Known Member
Site Donor $
Messages
1,240
Reaction score
695
Location
Michigan, USA
Needed a distraction from the electric stuff, fought this little guy for a couple hours but the gas pedal is now resting in new bushings. Also tore out the tar sound deadening under rear seat and was quite pleased to see only minor surface rust!
IMG_20190603_175936333.jpg
IMG_20190603_175928997.jpg
IMG_20190601_171820591.jpg
 

Ohmess

I wanna DRIVE!
Site Donor $
Messages
4,833
Reaction score
2,639
Location
Aiken, SC
Hi Thomas -- If you can provide a little more on the alternator, I can try to help.

As to the notion of replacing the fuse block with a modern blade style block, make sure you understand the power distribution built into the stock fuse block behind fuses 4 and 5, 6 and 7, and 8 and 9.
Fuse Block.jpg
 

Thomas76

Well-Known Member
Site Donor $
Messages
1,240
Reaction score
695
Location
Michigan, USA
Hi Thomas -- If you can provide a little more on the alternator, I can try to help.

As to the notion of replacing the fuse block with a modern blade style block, make sure you understand the power distribution built into the stock fuse block behind fuses 4 and 5, 6 and 7, and 8 and 9. View attachment 65130
Appreciate the pointers on the fuse block, I quickly found out how special that thing is and decided to stick with it.
From what I recall 1 wire alternators self regulate internally? I'm not sure how the original 3 wire system was cut up to adapt to the one wire, or why it now has an ignition module from a later fuel injection car.
 

Thomas76

Well-Known Member
Site Donor $
Messages
1,240
Reaction score
695
Location
Michigan, USA
Well it's been a while since my last update, I've been busy with slow jobs that don't look like much. I kept the original fuseblock, but chased all the wires and painstakingly proved out what they are. Also wrapping up the e28 window motor wiring. All rust proofing is complete on the topside along with dynomat. New battery tray from jegs and custom support bracket done. Carpet arrived from world uphulstery this week, ran a dry fit and it seems ok for install. Fresh engine oil and filter today, I may hear this thing run for the first time this weekend.
IMG_20190621_170115330.jpg
IMG_20190703_180531774.jpg
 

bluecoupe30!

Well-Known Member
Site Donor
Messages
2,136
Reaction score
1,283
Location
Delta, British Columbia, Canada
You have made amazing progress. Easy to get discouraged though, and we have all made a couple steps forward when chasing resolution of gremlins/issues, then quickly 6 steps back. All part of the process. Take breaks, read up on others trials and tribulations here and find your strength to carry on. If it was easy, everyone would be driving around in these fantastic Coupes! ;)
 

HB Chris

Well-Known Member
Site Donor $$
Messages
19,418
Reaction score
8,757
Location
Huntington Beach, CA
Regarding the alternator, the original had a regulator mounted next to the horn relay with a separate three wire harness and black plugs at the ends. When converting to single wire, you remove the regulator, the three wire harness and the old alternator. The new alternator uses the same large red power wire from the battery. It also needs a wire for D+ terminal on the alternator. The blue wire from your dash ended at the the old regulator where it joined the three wire harness. The blue wire simply needs to be cut and lengthened to reach the D+ terminal on the alternator. Without the blue wire the alternator will not charge.
 

Honolulu

Well-Known Member
Messages
1,918
Reaction score
226
Location
Honolulu Hawaii
I see a bottom bolt oil filter canister (but) the rest of the car looks great and you should get a medal for perseverance and, lo and behold, re-covering your own dash! Since apparently you aren't hooked into the "originality" sickness, almost any Big Six from about 1976 forward will give you a much easier, less messy oil change experience.
 

Thomas76

Well-Known Member
Site Donor $
Messages
1,240
Reaction score
695
Location
Michigan, USA
Cranked the motor over for the first time using the starter, had to use a screw driver in the disassembled and broken ignition switch but it turned over! Oil pressure light works too, think I'm ready for spark check and fuel!
 

Thomas76

Well-Known Member
Site Donor $
Messages
1,240
Reaction score
695
Location
Michigan, USA
After a couple rough weeks battling German engineering I thought I'd switch to Italian for a while, I might not go back! The Weber's are getting rebuilt!
IMG_20190715_201619302.jpg
 
Top