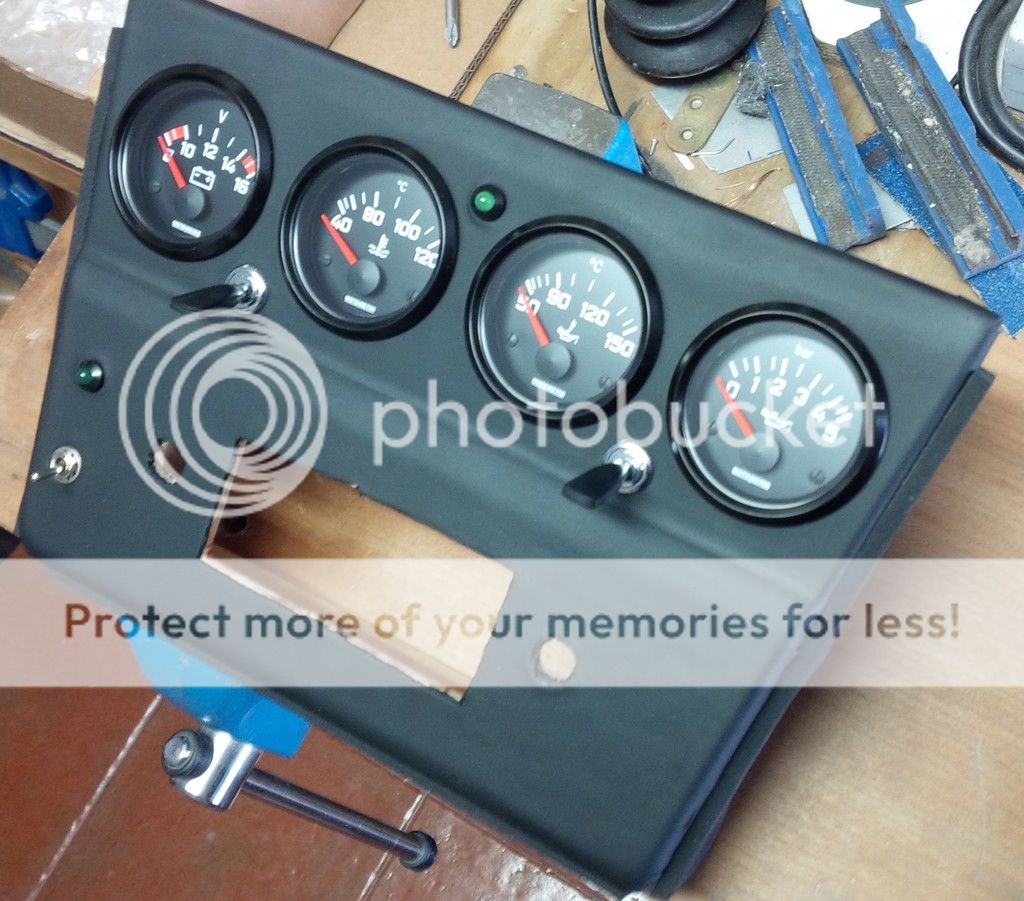
new integrated console for gauges and radio

Measurement question

It appears from your drawing that you drilled 56mm holes. Is this correct, and if so, how did the 52mm gauges fit with the leather installed?
 
DeQuincey-

Couldn't help but notice that you moved the AC switches to the shifter console. I also see that you blocked off the lower front vents usually found with the AC panel. What else have you changed with the console structure to support these modifications? It all looks good.
 
Great information as usual from deQ. Must be getting close to writing a compilation book. Next project? Put me down for a copy.
 
DeQuincey-

Couldn't help but notice that you moved the AC switches to the shifter console. I also see that you blocked off the lower front vents usually found with the AC panel. What else have you changed with the console structure to support these modifications? It all looks good.

hi it was not me who did this
it seems that this was done circa 1974 by a bmw dealer in spain
car was originally not AC when sold first time in paris
once in spain, they fitted a york compressor and correct condenser, correct switches in the weird place you see them now, and an odd behr evaporator not fitting the correct supports, neither the front fascia, neither the lateral console panels provided with openings and grilles, but modified the original non AC panels
so there is a reason for me hunting all those difficult to find AC bits with an estimate cost of more than 2,8k to bring AC to originality
 
the motometer ladies:


not yet installed: i think the radio chromed lines will give a shiny contrast to so much dark background, a pity motometer do not have chromed bezels

 
Hi Dequincy -- your project looks great. I found a 2 1/8" drill for the gauges, which works out to just under 54mm. I believe I can make this work with the 52mm gauges and the leather. (I have already stolen my design from the dimensional drawing picture you posted earlier, thank you very much).

One thought on your side consoles. If you look at the top of your consoles there is a small gap between the top of the side panels and the lower part of the dash. On my car, there is a metal bar across the bottom of these two panels that is bolted to the chassis that connects and braces the side panels. The panels are screwed into the bar. I was able to diminish the side panel gap at the top by using a couple of small washers underneath the cross bar where it screws into the chassis. This raises the cross bar and both side panels at the same time. I think a smaller gap looks better.
 
Leather made a huge difference over the black glossy texture it replaces.
The shift pattern shows you are missing a gear... New project?
 
Hi Dequincy -- your project looks great. I found a 2 1/8" drill for the gauges, which works out to just under 54mm. I believe I can make this work with the 52mm gauges and the leather. (I have already stolen my design from the dimensional drawing picture you posted earlier, thank you very much).

One thought on your side consoles. If you look at the top of your consoles there is a small gap between the top of the side panels and the lower part of the dash. On my car, there is a metal bar across the bottom of these two panels that is bolted to the chassis that connects and braces the side panels. The panels are screwed into the bar. I was able to diminish the side panel gap at the top by using a couple of small washers underneath the cross bar where it screws into the chassis. This raises the cross bar and both side panels at the same time. I think a smaller gap looks better.

thank you for your comments: let me explain myself a bit


you are welcome to steal my drawings, if you stop there your thefts i am still safe ;-)

as to the drill, i am using a drill saw that makes 50 to 51,5mm, not homogeneus, then i complete the work precisely using a sand paper up to 52,5mm, the hole must be slightly bigger than 52mm

the question is that being a soft Wood the center drill bit can easily move causing not a precission cut, so i ended it with the sand paper to get an exact circumference

i have not shown the process of this cuts, but it is quite elaborate, i used a thick Wood below the plywood and firmly attache the plywood to the thick one, this way the centering drill stays firmly centered

as to the leather i cut it afterwards using a blade, i do not think it would be a good idea to use the drill over an upholstered Wood panel, leather is not homogeneus neither isotropic so you might find the drill being suddenly blocked and tearing the leather, subsequently runining your work


gap on top of the consoles, is due to internal interference with the evaporator of the AC.

I will have to fix it as it looks really not top class, but it is a longer shot as i will have to disassemble it and improve the overall aspect of that área

thanks for all your advices,...
 
Hi Dequincy -- your project looks great. I found a 2 1/8" drill for the gauges, which works out to just under 54mm. I believe I can make this work with the 52mm gauges and the leather. QUOTE]

dont go for 2 1/8"
it is 53,97 mm
you wont make it, the hole will swallow the gauge !
IMHO

try to find anything around 49 till 51 then use sand paper to get close to 52,5

i use the sand paper this way, i found a spray paint can that is 50mm in diameter, you might be able to find something similar, and then i wrap sand paper evenly around it making a sort of spiral, so the first layer might give me 51, second layer 51,7 and third 52,5

fraction of milimeters count ! too much and you will ruin the fixing of the gauges, it is a precission work
 
center console

Hi

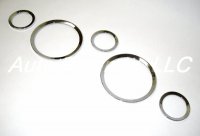
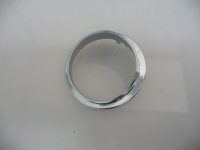
Vry nice work. Have a look at Fiat 124 Spider parts place or used parts, they have a stainless steel chrome look bezels that go over the black ones, they might work See the kit in the first picture Or Alfa Spider 69-75 has these plastic chrome bezels that tilt the gauge to wards the drives, pretty cool. I did a similiar idea in an older 1600 hotrod that I had years ago and it was quite different that other guys.

Nice work on the whole car.

Thanks, Rick
 

Attachments

  • chrome bezels.jpg
    chrome bezels.jpg
    42.1 KB · Views: 158
  • Alfa bezel.jpg
    Alfa bezel.jpg
    19.2 KB · Views: 157
Hi Dequincy -- your project looks great. I found a 2 1/8" drill for the gauges, which works out to just under 54mm. I believe I can make this work with the 52mm gauges and the leather. QUOTE]

dont go for 2 1/8"
it is 53,97 mm
you wont make it, the hole will swallow the gauge !
IMHO

try to find anything around 49 till 51 then use sand paper to get close to 52,5

i use the sand paper this way, i found a spray paint can that is 50mm in diameter, you might be able to find something similar, and then i wrap sand paper evenly around it making a sort of spiral, so the first layer might give me 51, second layer 51,7 and third 52,5

fraction of milimeters count ! too much and you will ruin the fixing of the gauges, it is a precission work

Thanks for this; I will keep looking.
 
Hi

Vry nice work. Have a look at Fiat 124 Spider parts place or used parts, they have a stainless steel chrome look bezels that go over the black ones, they might work See the kit in the first picture Or Alfa Spider 69-75 has these plastic chrome bezels that tilt the gauge to wards the drives, pretty cool. I did a similiar idea in an older 1600 hotrod that I had years ago and it was quite different that other guys.

Nice work on the whole car.

Thanks, Rick

tilting gauges is nice,
do you know where to find ?
rgds
 
created a final one after adjusting the angles

the first prototype has an interference to my odd AC evaporator, so starting from scratch again:


increased the slope between the two planes, thus it became thicker, and had to remove from back for switches


most amazing switches, original lucas from jaguar cars


bits:


process


check


protect with varnish


cover in leather


compare slope


install the bits


Hoping to shamelessly steal DeQuincy's design, I am planning oil temp, oil pressure, voltage and air/fuel mix.

I've installed the VDO oil pressure sender (with the option for the stock idiot light):


The VDO oil temp sender:


And have made provisions for the air/fuel gauge:


DeQ - where exactly did you have a problem with your first prototype? I suspect the cross support behind the face and above the gauges was too deep?
 
Back
Top