so where do you order new ones ... penske recently listed the calipers as NLA.No they do not come with the rebuild kits , one reason I never split them apart . Luckily My stubburn boss has always found a way to get the pistons out , Me , I order new ones , haha
hopefully someone will know where to get some orings that will work , I think a few months back there was a whole thread here on rebuilding calipers ?
good luck Peter
BD
You are using an out of date browser. It may not display this or other websites correctly.
You should upgrade or use an alternative browser.
You should upgrade or use an alternative browser.
Will have to start somewhere
- Thread starter Peter Coomaraswamy
- Start date
-
- Tags
- restoration list
The seals, and bolts are available from W&N. Bolts should not be reused
hi
@peter, the rubber washers are EPDM rubber washers, available from walloth, but probably from bmw too, the bolts for front calipers are available too, the bolts for rear i think are NLA,
nuts are available, and should be replaced in any case
@peter, the rubber washers are EPDM rubber washers, available from walloth, but probably from bmw too, the bolts for front calipers are available too, the bolts for rear i think are NLA,
nuts are available, and should be replaced in any case
Last edited:
http://www.e9coupe.com/forum/showthread.php?t=17483&highlight=caliper+rebuild
This seems to be the definitive post on the caliper rebuild so I wanted to keep it on this thread for easy reference for me, but after reading it looks like this will be yet another job I'll have to do twice. This is becoming a VERY common theme with me. :-(
This seems to be the definitive post on the caliper rebuild so I wanted to keep it on this thread for easy reference for me, but after reading it looks like this will be yet another job I'll have to do twice. This is becoming a VERY common theme with me. :-(
http://www.e9coupe.com/forum/showthread.php?t=17483&highlight=caliper+rebuild
This seems to be the definitive post on the caliper rebuild so I wanted to keep it on this thread for easy reference for me, but after reading it looks like this will be yet another job I'll have to do twice. This is becoming a VERY common theme with me. :-(
Hey Peter -- I'm likely to send my calipers off to this guy even though I've done some rebuilds myself. His article, posts here and recommendations are all top notch.
I was thinking the same thing myself but I figured I'm already more than half way there and I have never had any trouble with any rebuilds I've done and the plating is 98% there so I'll make sure they work. I'm sure this guy is awesome however I have found that caliper paint works pretty well in place of expensive plating and I usually end up servicing my brakes pretty often. Back in the 70's you never got new calipers, always just cleaned up the old ones and put in new seals so unless he's doing these for less than 200.00 a pair......
I did learn an awful lot from reading his post and it was very kind of him to go into such detail for us all, another reason this site is so awesome!!
I did learn an awful lot from reading his post and it was very kind of him to go into such detail for us all, another reason this site is so awesome!!
Last edited:
These were really easy to put in and worked well. I posted a couple shots below
Did you reuse the original rubber or buy new. I need to change out my bent rear bumper at some point.
Chris, I used the original rubber, they clean up pretty well. When I come up I'll have a look at yours. Of course the look I'm going for on the Polaris is "old but perfectly maintained" so that may be a little different than your vision but we'll have a look 
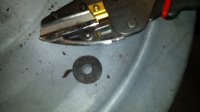
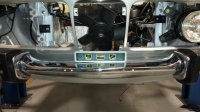
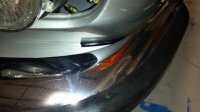
Did a little work at lunchtime, put the bumper back on. I had a few extra sway bar bushings laying around and I just had a problem putting raw metal against the paint so I made these functional washers. I used that handy craftsman tool to safely slice the bushing easily. When putting the bumpers on (and taking them off) it is helpful to loosen the bumper rod nuts at the bumper to allow the bars to twist a little to get them over the carriage bolts. It also helps to have everything a little lose when leveling the bumper. I think I will try to pull the engine off the sub-frame tomorrow and get that sub-frame up the road to the blasters for cleaning and powder coating. Sorry Erik, I will not be "zinking" the sub-frame, but I bow my head to your level of rust prevention.
Attachments
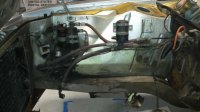
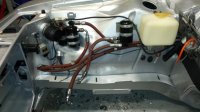
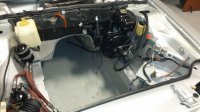
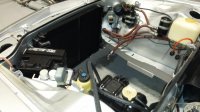
I rarely get a semi-identical before and after but working on the A/C lines I thought I would post this. I replaced all the crush washers but these lines seem bullet-proof so I thought I would try them out before spending hundreds of dollars on new ones because the fittings are definitely expensive.
Attachments
Bwana
Well-Known Member
I've looked but can't find it in this thread? What is the distance between the posts of your MaxJax? I'm pretty sure I'm going to get one this summer but I want to be sure it will fit in my shop.
BW, I don't have a Max Jack, my lift came from a car dealership that closed and I paid 1400.00 for a 2 post lift and a couple of years later had to replace the cylinders which cost about 500.00 X 2.
Sorry, can't help with the Max Jack.
Sorry, can't help with the Max Jack.
Just some more stuff
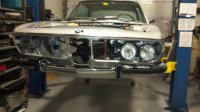
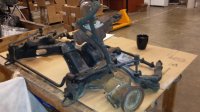
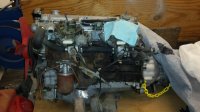
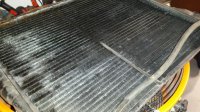
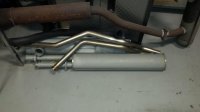
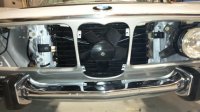
Nothing too spectacular but I'm having fun piecing this car together. So many of the parts just need a good cleaning and the parts that I had/have to buy really fit into the maintenance category. Of course, there is one or two more "big pieces" Namely the engine/transmission and then the interior. Below are a couple of things that got done in the last few days and the dirt block I will have to muddle with. Got some help finding the stock exhaust with the stainless down-tubes from Carl & Ben, I figure if it's going to sound like a stock BMW it needs to be as close to stock as possible- and I do have the originals in good shape for the purists out there. The power steering system will have to be pretty much rebuilt. I may be able to get away with flushing out the box but the pump seems a little crusty- anyone have experience rebuilding those? The radiator was pressure tested and held perfectly and I found a tag on the side so I know it was replaced with an original BMW part as it had BMW and some other name stamped on the top like my other original radiator. Those little rubber buggers that go in between the front sheet metal are a little tricky but went in OK, the condenser checked out so that went in. When sfDon came to visit a while back he expressed his deep disgust for replacement wire ties so I made sure I saved the originals, cleaned them up and re-used them... Happy Don?
Nothing too spectacular but I'm having fun piecing this car together. So many of the parts just need a good cleaning and the parts that I had/have to buy really fit into the maintenance category. Of course, there is one or two more "big pieces" Namely the engine/transmission and then the interior. Below are a couple of things that got done in the last few days and the dirt block I will have to muddle with. Got some help finding the stock exhaust with the stainless down-tubes from Carl & Ben, I figure if it's going to sound like a stock BMW it needs to be as close to stock as possible- and I do have the originals in good shape for the purists out there. The power steering system will have to be pretty much rebuilt. I may be able to get away with flushing out the box but the pump seems a little crusty- anyone have experience rebuilding those? The radiator was pressure tested and held perfectly and I found a tag on the side so I know it was replaced with an original BMW part as it had BMW and some other name stamped on the top like my other original radiator. Those little rubber buggers that go in between the front sheet metal are a little tricky but went in OK, the condenser checked out so that went in. When sfDon came to visit a while back he expressed his deep disgust for replacement wire ties so I made sure I saved the originals, cleaned them up and re-used them... Happy Don?
Attachments
m_thompson
Well-Known Member
I an interested to see how much your red AC hoses leak. I have the same 42 year old hoses that will likely need to be replaced. I hate to give up on the red and replace them with modern black hoses.
i was wondering the exact same thing. i also like the red hoses ... wish we could find replacementsI an interested to see how much your red AC hoses leak. I have the same 42 year old hoses that will likely need to be replaced. I hate to give up on the red and replace them with modern black hoses.
I guess that is the $400.00+ question. When I took everything apart I inspected the hoses, not only were they seemingly strong, but after washing them with soap and water they came out pretty clean. I will have to connect everything up and test it but my guess is if they leak at all they will have to be replaced. My hope is that they will hold the pressure- I can't see why they wouldn't. But I won't know until the car is basically "finished".
I tried and could not find red replacements, especially if you eliminate the vibration damper cannister. Regrettably I have black hoses but they haven't leaked a micron in 3 years.
i was wondering the exact same thing. i also like the red hoses ... wish we could find replacements

