Wiring harness strategies.

Hi,
Are you happy with Autospark wiring?
We are thinking of getting an order to them. Takes 8 weeks to make since they don’t have a LHD system available.
Thanks
Merdad
Hi Merdad,

Yes, very good quality work to my opinion. I haven’t put the harness in my car yet, so need to experience how the lengths of the wires are, but they simply copy the harness. In all honesty I also didn’t check all color codes but what I saw it was copy exact (need to verifiy). But look and feel, connectors, plugs, everything looks well made.

The FI harness was also nicely done. If you want more pictures of it I can make a few this week and share.

Thank you very much. No need to go to the trouble of taking pictures.
I am waiting for the client to approve the purchase, and we will order. Ours is not FI though.

Merdad
 
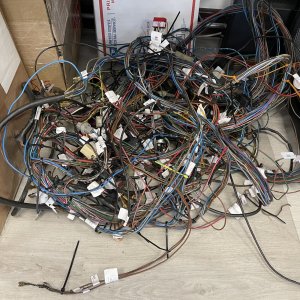
I started to identify each cable and accessory, before removing the tape and cleaning the wiring. I am using zip ties meanwhile.
 

Attachments

  • IMG_1087.jpeg
    IMG_1087.jpeg
    699.6 KB · Views: 66
One thing that I found helpful to keep an overview was to suspended the harness, stretched out, on hooks above my workbench. The interior and engine loom of my car are basically straight main lines, with (mostly) simple branches.

Like you, i first added tape with identifier before removing it from the car. Then removed it:
20220122_172329.jpg


then, i suspended it. This way, getting the old tape off (twisting around it a thousand times!), cleaning & inspection for cracks is easy, as you can work your way from one side of the loom to the other side. I used a clothes peg stuck on the loom to keep track of my progress.
20220122_172339.jpg


sticking the connectors in a ultrasonic bath gets them perfectly clean again:

20220128_234815.jpg
20220128_234955.jpg
 
Yes, great idea with the ultra sonic bath.
Unfortunately to late for me :)

May I ask, which kind of cleaner add you use for that?

Breiti
 
Interesting. I assuming Erik that you replaced the entire length of friction tape?
You should sell refurbished harnesses!
 
Interesting. I assuming Erik that you replaced the entire length of friction tape?
You should sell refurbished harnesses!
i don't think you could sell them for enough money to warrant all of the time it would take ... unless you work for less than US minimum wage.
 
i don't think you could sell them for enough money to warrant all of the time it would take ... unless you work for less than US minimum wage.

It would be bloody expensive. I spend a good 50 hours on it, at least. Did i tell you that I even placed back the original yellow cloth partnumber tab?


If I'd do it for someone else, I'd get my 15 year old kid to do it, taking me double the time, thus double the cost...but it'll teach him some great skills: study all you like, but don't forget to be able to use train those hands as well.

@Arde ; I did rewrap in fresh tape, with the types as advised by Sfdon. High heat version in the engine compartment.
 
Yes, great idea with the ultra sonic bath.
Unfortunately to late for me :)

May I ask, which kind of cleaner add you use for that?

Breiti
I used a cleaner that is made for spectacles, opticians use these things a lot as It cleans quickly and thoroughly. Plus it is friendly for plastics.

If it was really badly contaminated with grease, or underbody coating, I used paint thinner. (I know, bad for the brain!)
 
One thing that I found helpful to keep an overview was to suspended the harness, stretched out, on hooks above my workbench. The interior and engine loom of my car are basically straight main lines, with (mostly) simple branches.

Like you, i first added tape with identifier before removing it from the car. Then removed it:
View attachment 194003

then, i suspended it. This way, getting the old tape off (twisting around it a thousand times!), cleaning & inspection for cracks is easy, as you can work your way from one side of the loom to the other side. I used a clothes peg stuck on the loom to keep track of my progress.
View attachment 194004

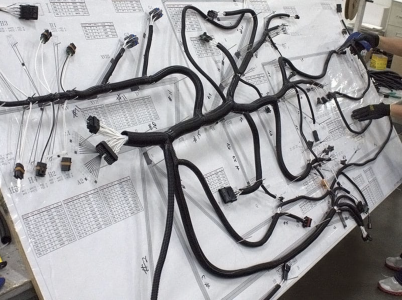
The old way they used to build wire harnesses was to lay it out on a big board, string the wires, bind them, and then put on the connectors.
Screenshot 2024-11-30 at 11.23.31 PM.png
 
One thing that I found helpful to keep an overview was to suspended the harness, stretched out, on hooks above my workbench. The interior and engine loom of my car are basically straight main lines, with (mostly) simple branches.

Like you, i first added tape with identifier before removing it from the car. Then removed it:
View attachment 194003

then, i suspended it. This way, getting the old tape off (twisting around it a thousand times!), cleaning & inspection for cracks is easy, as you can work your way from one side of the loom to the other side. I used a clothes peg stuck on the loom to keep track of my progress.
View attachment 194004

sticking the connectors in a ultrasonic bath gets them perfectly clean again:

View attachment 194005 View attachment 194006
Usually wire harness development is done ona big pin board. Like this:
 

Attachments

  • Screenshot 2024-11-30 at 11.23.31 PM.png
    Screenshot 2024-11-30 at 11.23.31 PM.png
    2.6 MB · Views: 8,046
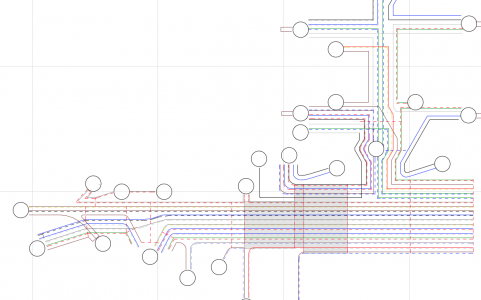
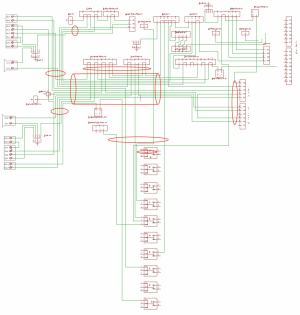
Working on a new diagram organized by wire bundles
Yeah, I think this is the best way to re-create the harness. Are you using a particular CAD program for that?
I have been doing a similar thing in Eagle, a PCB/Schematic capture program. It allows me to name each wire (using thew BMW wire numbering scheme), and when I move components to better organize them, the wires move too.

Still sorting out where the actual bundles are, since my car is not stored in my garage. So I am not super familiar wiuth how the wires are routed. In the attached, you can definitely see the main forward bundle that goes out to the lights and across the front of the car to the igition area. And another roundel that goes to the fuse box.

The current bundle diagram for the forward harness is attached.
 

Attachments

  • Screenshot 2024-12-14 at 8.45.23 PM.png
    Screenshot 2024-12-14 at 8.45.23 PM.png
    1.2 MB · Views: 16
Back
Top