3,3Li project in Norway

kkro

Well-Known Member
Messages
76
Reaction score
111
Location
Oslo, Norway
Hi folks.

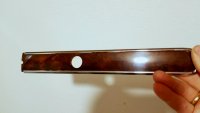
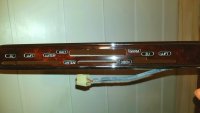
Due to some pitting on the metal frame, I bought a set of new old stock wood trim for the dashboard.

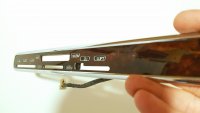
My existing wood trim on the doors have a polished finish, so I have chosen to polish the dash trim to similar finish. Also the NOS part had some scratches which did not look so good.

I think the polished dark wood suits the more luxurious image of the lwb E3 quite well. What do you think? Do you like the polished finish or would you prefer the original matte finish?
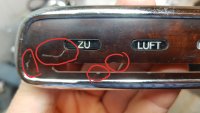
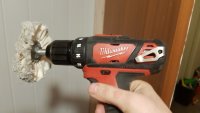
20190926_093008.jpg
20191215_130838.jpg20191215_130348.jpg20191215_130411.jpg20191215_130555.jpg
 

kkro

Well-Known Member
Messages
76
Reaction score
111
Location
Oslo, Norway
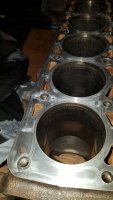
Picked up the head and block today from the machine shop. The head was skimmed 0,2 mm and the block 0,1 mm.
20191215_193950.jpg
20191215_193344.jpg
 

kkro

Well-Known Member
Messages
76
Reaction score
111
Location
Oslo, Norway
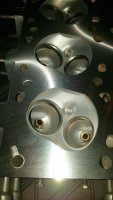
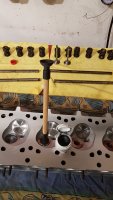
Did some minor clean up of the intake runners today. Mostly close to the valve seat, with particular focus on the short radius.
20200101_172547.jpg

I think BMW did a decent job casting these runners reasonably well shaped.
 

deQuincey

Quousque tandem...?
Site Donor
Messages
8,371
Reaction score
2,389
Location
BIO - 43°15'46.5"N 2°56'03.7"W
very well done,

@kkro : kkro is the new and improved dequincey,....


p.s. my pics are missing
 

kkro

Well-Known Member
Messages
76
Reaction score
111
Location
Oslo, Norway
Yesterday I started to reassemble the block.
20200228_022229.jpg


New bearing shells, piston rings, water pump and gaskets.
20200227_230440.jpg


Bought a rifle cleaning kit for cleaning the oil gallery.
20200227_205404.jpg


Measuring crank clearance with plastigage.
20200228_005206.jpg


Crankshaft installed
20200228_002229.jpg


Ready for pistons and rods.
20200228_091300.jpg
 
Last edited:

kkro

Well-Known Member
Messages
76
Reaction score
111
Location
Oslo, Norway
Yesterday I assembled and installed the rods and pistons. Of course I used new bearing shells and piston rings.

Before assembly I weighed the parts to match the moving assemblies as good as possible.
20200303_221202.jpg


I checked the weight of apparently similar rods coming from different M30 engines. Within each set, the variation was very small(+/-1g), but between the sets, variation was very big. Lightest rod was 699g. Heaviest was 749g, so 50g difference. Be careful if you plan to use rods from different engines.
20200303_221256.jpg


Best matching sets of piston+rod
20200303_223634.jpg


New rings and bearings.
20200303_225250.jpg


Checking bearing clearances with Plastigage.
20200304_005855.jpg

20200304_080029.jpg


Torqeuing the rod cap bolts.
20200304_005624.jpg


Finished installation
20200304_012019.jpg


Looking forward to getting the engine back in the car some day.
20200304_015627.jpg
 

deQuincey

Quousque tandem...?
Site Donor
Messages
8,371
Reaction score
2,389
Location
BIO - 43°15'46.5"N 2°56'03.7"W
excellent work
as to the use of plastigage, which is the procedure ? do you have to give the same final torque to the bolts to check ?
and then, what decissions do you take ? are there different size bearings ? depending on the resulted gaps ?

regards
 

Wladek

Well-Known Member
Messages
1,305
Reaction score
792
Location
Gdansk, POLAND
In general while using plastigage torque should be final, but when i personally know that all is in general good & all should be in specs i use 5nm less than final.
Plastigage is just final confirmation, that each size of bearings for conrods & main are fitted well to the cranckshaft.
Measuring need to be done much earlier with micrometer all round (conrods&main) to confirm that crankshaft is "flat"(perfectly round) & don't need resurfacing. It doesn't make much sense to buy two sets of bearings (main&conrod) to find out that something is wrong with cranckshaft;

Did you measured the gaps on piston rings?

Your cylinderhead is already assembled, but If i can add something about valves (for others) - exhaust valves can be polished on both sides, but intake valves for better flow of air/fuel mixture can be polished only from combustion chamber side. For intake valves it is better when inner surface is little bit "rough". Also it is better when valve shaft have some sort of hone cross scratches, it increase proper oil lubrication between valves & guides (same idea as with cylinder honing).
 
Last edited:

kkro

Well-Known Member
Messages
76
Reaction score
111
Location
Oslo, Norway
excellent work
as to the use of plastigage, which is the procedure ? do you have to give the same final torque to the bolts to check ?
and then, what decissions do you take ? are there different size bearings ? depending on the resulted gaps ?

regards
I see Wladek has answered a lot already. I torque to a little less than full torque to reduce stress on bolts. Have been measuring the crank with micrometer earlier. In the aftermarket I can only find bearings in typical 0,25mm steps, which are used when the crank is reground for repair. So basically, if the gap is to big, you must either take your chances and use it, or regrind the crank and use undersize bearing shells. The plastigage is as such most useful as a final confirmation that things are good.
 

kkro

Well-Known Member
Messages
76
Reaction score
111
Location
Oslo, Norway
In general while using plastigage torque should be final, but when i personally know that all is in general good & all should be in specs i use 5nm less than final.
Plastigage is just final confirmation, that each size of bearings for conrods & main are fitted well to the cranckshaft.
Measuring need to be done much earlier with micrometer all round (conrods&main) to confirm that crankshaft is "flat"(perfectly round) & don't need resurfacing. It doesn't make much sense to buy two sets of bearings (main&conrod) to find out that something is wrong with cranckshaft;

Did you measured the gaps on piston rings?

Your cylinderhead is already assembled, but If i can add something about valves (for others) - exhaust valves can be polished on both sides, but intake valves for better flow of air/fuel mixture can be polished only from combustion chamber side. For intake valves it is better when inner surface is little bit "rough". Also it is better when valve shaft have some sort of hone cross scratches, it increase proper oil lubrication between valves & guides (same idea as with cylinder honing).
Wladek

Thanks for sharing your insight. When it comes to the valves polished on one or two sides I agree that there are different opinions on the topic of aerodynamics. I see that the general opinion is moving towards dimpled intake runners and in this case even structure on valve surfaces. I am not objecting to those theories, and I believe it is possible with minor gains through surface structures . However, there is another part of this: Carbon build-up! In my world it seems like carbon deposits in intake runners and on backside of valves is getting a real problem over time. The carbon will reduce gas flow far worse that any smooth or structured surface, so I think carbon is the enemy of sustained high flow rates. I think the cleaning agents in premium petrols will be more efficient keeping carbon away from my runners and valves if the surface is smooth. So that is my choice. Maybe I am wrong. time will show.
 

Wladek

Well-Known Member
Messages
1,305
Reaction score
792
Location
Gdansk, POLAND
Wladek

Thanks for sharing your insight. When it comes to the valves polished on one or two sides I agree that there are different opinions on the topic of aerodynamics. I see that the general opinion is moving towards dimpled intake runners and in this case even structure on valve surfaces. I am not objecting to those theories, and I believe it is possible with minor gains through surface structures . However, there is another part of this: Carbon build-up! In my world it seems like carbon deposits in intake runners and on backside of valves is getting a real problem over time. The carbon will reduce gas flow far worse that any smooth or structured surface, so I think carbon is the enemy of sustained high flow rates. I think the cleaning agents in premium petrols will be more efficient keeping carbon away from my runners and valves if the surface is smooth. So that is my choice. Maybe I am wrong. time will show.
From my two m30 engines disassembly after many years of usage by someone - deposits on the intake valves from the injector side where very little/almost nothing, of course from combustion chamber side carbon deposits where on both valves & some little deposits on exhaust valves from inner part. That's why intake valves from injector side i just cleaned with steel wool & polishing compound, without sandpaper high gloss grinding.
20200102_105809.jpg
 

kkro

Well-Known Member
Messages
76
Reaction score
111
Location
Oslo, Norway
From my two m30 engines disassembly after many years of usage by someone - deposits on the intake valves from the injector side where very little/almost nothing, of course from combustion chamber side carbon deposits where on both valves & some little deposits on exhaust valves from inner part. That's why intake valves from injector side i just cleaned with steel wool & polishing compound, without sandpaper high gloss grinding.
View attachment 87674
Thanks for sharing your experience on the topic. Could be that I am wrong on this, but anyway I do not think the differences will be substantial.
 

kkro

Well-Known Member
Messages
76
Reaction score
111
Location
Oslo, Norway
Yesterday I did some more assembly of the engine. Oil pump, cylinder head, timing chain and front register cover.

1584433499225.png


Rear crankshaft seal cover. New seal and gasket of course.
1584433679314.png


Installed:
1584433776063.png


New front seal.
1584433840941.png


The engine is starting to come together. Looks quite nice. The oil pan is only a temporary fit from another engine. I will fit the clean oil pan later.
1584434283441.png
 

dang

Administrator
Site Donor
Messages
4,247
Reaction score
3,262
Location
Rocklin, CA
Somehow I missed all of these awesome posts. Keep up the great photos... and progress. It is safe to say that this is NOT how I'm putting my E3 together. LOL
 
Top