4310316 begins

WELL I TRIED TO TURN OVER THE ENGINE WITH A BRAND NEW OPTIMA AND IT BARELY
TURNED IT OVER
ADDED ANOTHER BAT AND I HAD REVOLUTIONS
THIS IS A VERY TIGHT ENGINE AND IM SURE ONCE ITS BROKE IN
ONE WILL BE FINE
THE COMPRESSION IS 11:1 AND TIGHTER THAN A DRUM
TURNING IT OVER BY HAND IS A CHORE.
SO HERE THEY ARE RUFFED IN
CLEAN UP AND ALIGN TOMORROW
IMG_1594.JPG
 
set some foam around the jack mount to keep to quiet protect the jack paint
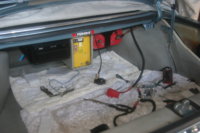
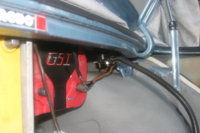
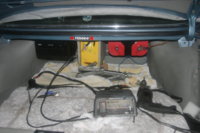
almost done with the batteries. and the ignition switch
it connects the second battery at start cranking only - ill add some foam to the bottom of the yellow battery tray to
keep the terminal away from the frame , althought its all covered with elephant skin and foam
i have a small quarter size dent in the trunk so will try to even it out and then
replace all the deck lid trim.
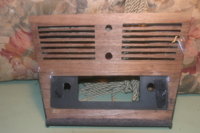
also wanted to see what the wood trim would look like on the ac face panel
not to bad lookin- just had some time to tinker.

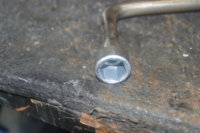
heres the answer to the detail question in general comments. i painted the inside of the
lug nut opening in the handle and painted the lettering
IMG_1598.JPG
IMG_1599.JPG
IMG_1600.JPG
IMG_1594.JPG
IMG_1597.JPG
IMG_1598.JPG
IMG_1599.JPG
IMG_1600.JPG
IMG_1594.JPG
IMG_1597.JPG
IMG_1601.JPG
IMG_1602.JPG
IMG_1598.JPGIMG_1599.JPGIMG_1600.JPGIMG_1594.JPGIMG_1597.JPGIMG_1601.JPGIMG_1602.JPG
IMG_1598.JPG
IMG_1599.JPG
IMG_1600.JPG
IMG_1594.JPG
IMG_1597.JPG
IMG_1601.JPG
IMG_1602.JPG
 
Last edited:
always "danger" when using 2 batteries in parallel.... as in my oem BMW 850i . When 1 batterie go's "bad" it pulls the other also down. Had it with my first set new ! ones… now the second set seems to hold. So more if 2 different batteries… i'm afraid.
Common change mod is converting to 1 batterie.... but the places don't allow 1 big batterie for some serious amp's.
 
NO NO NO THE SECOND BATTERY ONLY WORKS DURING CRANKING
THATS WHAT THE SWITCH IS FOR
WHEN I HIT THE CRANK POSITION- IT GOES THRU THAT WIRE -FIRES THE RELAY WHICH
ADDS POWER FROM THE SECOND BATTERY TO CRANK THE ENGINE
THEN ITS ALWAYS OFF
ALL DONE IN TRUNK
JUST NEED TO MOUNT THE TRIM
IMG_1605.JPG
 
the edges of my tool kit broke so i had previously riveted
a metal plate on the back
yet the edge wasn'
IMG_1609.JPG
t flat so i added some plastic to level it out and am securing with por7
tomorrow ill sand trim and paint
will post update
 
my rear trunk trim was a bit wavy due to water that got in while sitting for the 10yrs so i saved a pressboard spare tire cover from our 96 olds
and cut a new piece and elephant covered it it
looks new now. finished the tool box
came out fairly well. used transtar primer that was a good enuff color or now and used mcquires 40 to shine it up
IMG_1610.JPG
IMG_1611.JPG
IMG_1612.JPG
IMG_1613.JPG
 
Last edited:
more boring stuff finished the trunk for good
couldnt figure out why my lights keep going on and off
so checked the connector and there it was.
over time the little u shape contacts loused up
so i crimped em back tight
laid some bubble wrap under the tire
all fixed.
IMG_1619.JPG
IMG_1622.JPG
IMG_1625.JPG
IMG_1626.JPG
IMG_1627.JPG
IMG_1628.JPG
 
Last edited:
NO ILL REFRESH IT AS NEEDED
there are dividers to charge 2 batteries , more often used in boats.

Are you sure it will stay dry under the spare wheel ? otherwise i would not use the bubble wrap.... water will be trapped and do its work... rust.
 
Is it me, or does that look very different than the original? The original was white (generally yellowed by now), thinner, and did not cover the compartment on the right, correct? Or is this a different part?
 

Attachments

  • 20180610-interior no tools.jpg
    20180610-interior no tools.jpg
    150.1 KB · Views: 288
Back
Top