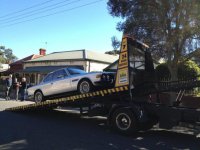
71 Restoration Begins

yet more photos

Dear All,

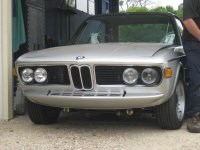
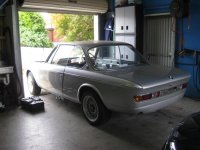
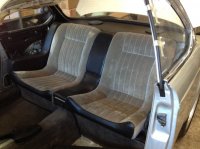
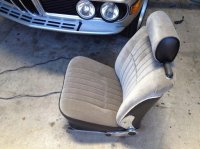
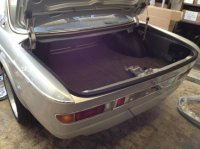
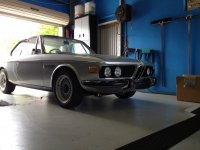
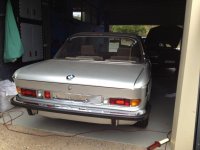
here are some more photos, it is just about ready to go to the trimmers to do the internal fitout...

deQuincey - most of the work I am sourcing out (time poor...), I have a list of references and thankyous that i will pulish later.

Nicad - the engine setup - it hasnt been turned over yet but I am going to start with the setup recommended on this site for 40dcoe triples -settings are: Choke 34, Main Jet 120, Air Correction 180, Emulsion Tube F11, Pump Jet 40, Idle Jet 55F8, Aux Venturi 4.5, Float Level 8mm, distributor with retarded vacuum advance.

Thats about it for now I reckon.

Cheers

Chris
Aussie3.0CS
Nearly... Nearly... Nearly....
 

Attachments

  • IMG_5600.jpg
    IMG_5600.jpg
    92.3 KB · Views: 347
  • IMG_5593.jpg
    IMG_5593.jpg
    92.1 KB · Views: 344
  • IMG_5596.jpg
    IMG_5596.jpg
    93.2 KB · Views: 369
interior

Hi All,

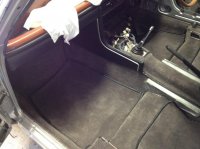
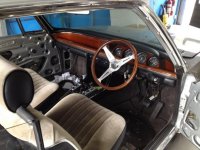
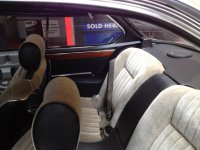
some updates from a partially completed interior... dynamat to the c*ckpit, rebuild foam pad to the passenger wheel well - thanks for all advice.

New seat upholstery (sorry, I know its not an original cloth) and Jaymic carpet - fits well.

timber redone and looks superb....

Cheers

Chris
Aussie3.0CS
Nearly there....
 

Attachments

  • IMG_1794.jpg
    IMG_1794.jpg
    92.5 KB · Views: 360
  • IMG_1802.jpg
    IMG_1802.jpg
    96.1 KB · Views: 359
  • IMG_1796.jpg
    IMG_1796.jpg
    92.2 KB · Views: 366
  • IMG_1808.jpg
    IMG_1808.jpg
    90.8 KB · Views: 354
Very nice looking interior combo. I like everything I see. Looking forward to the shakedown report.
 
Look very nice! You must be getting excited to hit the road soon. Keep the picture's coming,Tim.
 
i know the cut pile isn't period correct, but i like it. it adds a certain luxe look that the loop doesn't have. since my car isn't a concours / original car, its a great driver ... i could get away with it.
 
more photos

Hi All,

more photos, nearly ready to start her up...

apologies for my lack of photo taking skills.....

enjoy

Chris
Aussie3.0CS
 

Attachments

  • IMG_1864.jpg
    IMG_1864.jpg
    97 KB · Views: 328
  • IMG_1866.jpg
    IMG_1866.jpg
    96.6 KB · Views: 318
  • IMG_1867.jpg
    IMG_1867.jpg
    93.1 KB · Views: 319
  • IMG_1873.jpg
    IMG_1873.jpg
    92.9 KB · Views: 347
  • IMG_1876.jpg
    IMG_1876.jpg
    88.9 KB · Views: 340
Just read from start - interesting & juicy read! Seems to have taken a long time though!! Car looks great! Best colors for me are silver or fjord blue. Sexy! Are those replica 16 inch staggered Alpinas from coupe king? Looking forward to seeing finished pics.
 
I've just been able to view your photographs on your restoration. What A fantastic job! I cant wait to see your stunning CS on the S.A. roads!! (might need to get some local contact details for my restoration down the track!!)
 
update

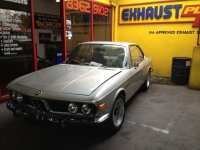
It may be taking forever, but there are signs of life....

Currently the exhaust is being bolted up (should've bought the full stainless rather than just the headers.... looks so shabby...)

Next its off for wheel alignment and balancing.

Then fuel supply, internal panels, water circulation....

its nearly there. but then again, I reckon Ive been saying that for a year now...
icon12.gif


Chris
Aussie3.0CS
 

Attachments

  • IMG_2016.jpg
    IMG_2016.jpg
    91 KB · Views: 339
  • IMG_2019.jpg
    IMG_2019.jpg
    92.1 KB · Views: 363
  • IMG_2014.jpg
    IMG_2014.jpg
    94.4 KB · Views: 353
Looks beautiful. Will be following the engine tuning and final tweaking. What distributor are you running? Are you going to tune on a dyno?
 
it is running a pertronix from LaJolla.

Tuning will be done on a dyno... I am a little interested to see how many horses are left in the paddock...

I have not messed with the engine too much but in a few years, the next stage will be the korman upgrade with pistons, springs, cam etc....

already looking forward to that!

Cheers

Chris
Aussie3.0CS
 
I put a Pertronix in mine too. The reason I asked about the distributor is that if running triple Webers you don't need the vacuum advance (from what I have read) and the advance curve might need to be tweaked to be best suited to that setup. My Weber equipped Coupe still has a vacuum equipped distributor and am curious if yours does as well?
 
Last edited:
Do triple Webers provide a ported vacuum supply for advance or is that why you need to swap distributors?


I put a Pertronix in mine too. The reason I asked about the distributor is that if running triple Webers you don't need the vacuum advance (from what I have read) and the advance curve might need to be tweaked to be best suited to that setup. My Weber equipped Coupe still has a vacuum equipped distributor and am curious if your does as well?
 
Not sure Steve. Mine has a small rail the hooks up to each manifold and could supply vacuum, but no line went out to my distributor. At this point I am starting to forget what I started with. Hopefully photos will supplement fading memory cells. Good thing I haven't taken the carbs off yet.
 
Done

So,
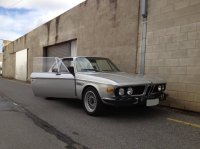
rather roughly running down to the Dyno and got the triples tuned, the jetting suggested on this site was accurate! thanks guys!

The car is now running and sounding good, dyno guy said 138 at the rear wheels, but his dyno is very old...

Any how, sounds great and goes really well.

Cheers
Chris
Aussie3.0CS
 

Attachments

  • IMG_2514.jpg
    IMG_2514.jpg
    95.7 KB · Views: 319
  • IMG_2516 - Copy.jpg
    IMG_2516 - Copy.jpg
    95.8 KB · Views: 322
  • IMG_2518.jpg
    IMG_2518.jpg
    89.7 KB · Views: 317
First round of problems.....

Well,
I knew that there would be teething problems for this project, with the shape and size of said problems only imaginable in my worst nightmare (sheering wheel studs at 80mph, rear strut pushing through the rusted strut housing... you get the gist)...

But I had not imagined a hole in the fuel tank leaking 30 litres into the wheel well and onto the ground....

Parked at the old mans house after putting 3/4 tank in earlier in the day, ready to go for a bit of a blast through the hills.... Showing the old man the 'new' car and smelling a strong smell of petrol. Leaned down to see petrol streaming out of the base hole in the wheel well - 'Thats not where petrol should be coming from...' YIKES!!!

Disconnected the battery, removed the trunk floor, removed the spare wheel, got the fire extinguisher at the ready (in what fealt like 8 seconds...) to find that the tank area was 2inches deep in fuel and flowing under the divider to the wheel well and onto the street.

Nervous times ensued until help arrived to drop the fuel out of the tank.

Turned out a reasonable patch of pitted rust had developed above the seem of the tank and with more than half full, it started flowing out. So tank got repaired and now its all back on the road.

Not too excited about the next teething problem after the last one...

Cheers

Chris
Aussie3.0CS
 

Attachments

  • BEFORE.jpg
    BEFORE.jpg
    97.8 KB · Views: 298
  • AFTER.jpg
    AFTER.jpg
    98.4 KB · Views: 298
  • IMG_2530.jpg
    IMG_2530.jpg
    93.7 KB · Views: 313
Back
Top