72 3.0 CS 2240344 Restoration

Another question for the gurus...

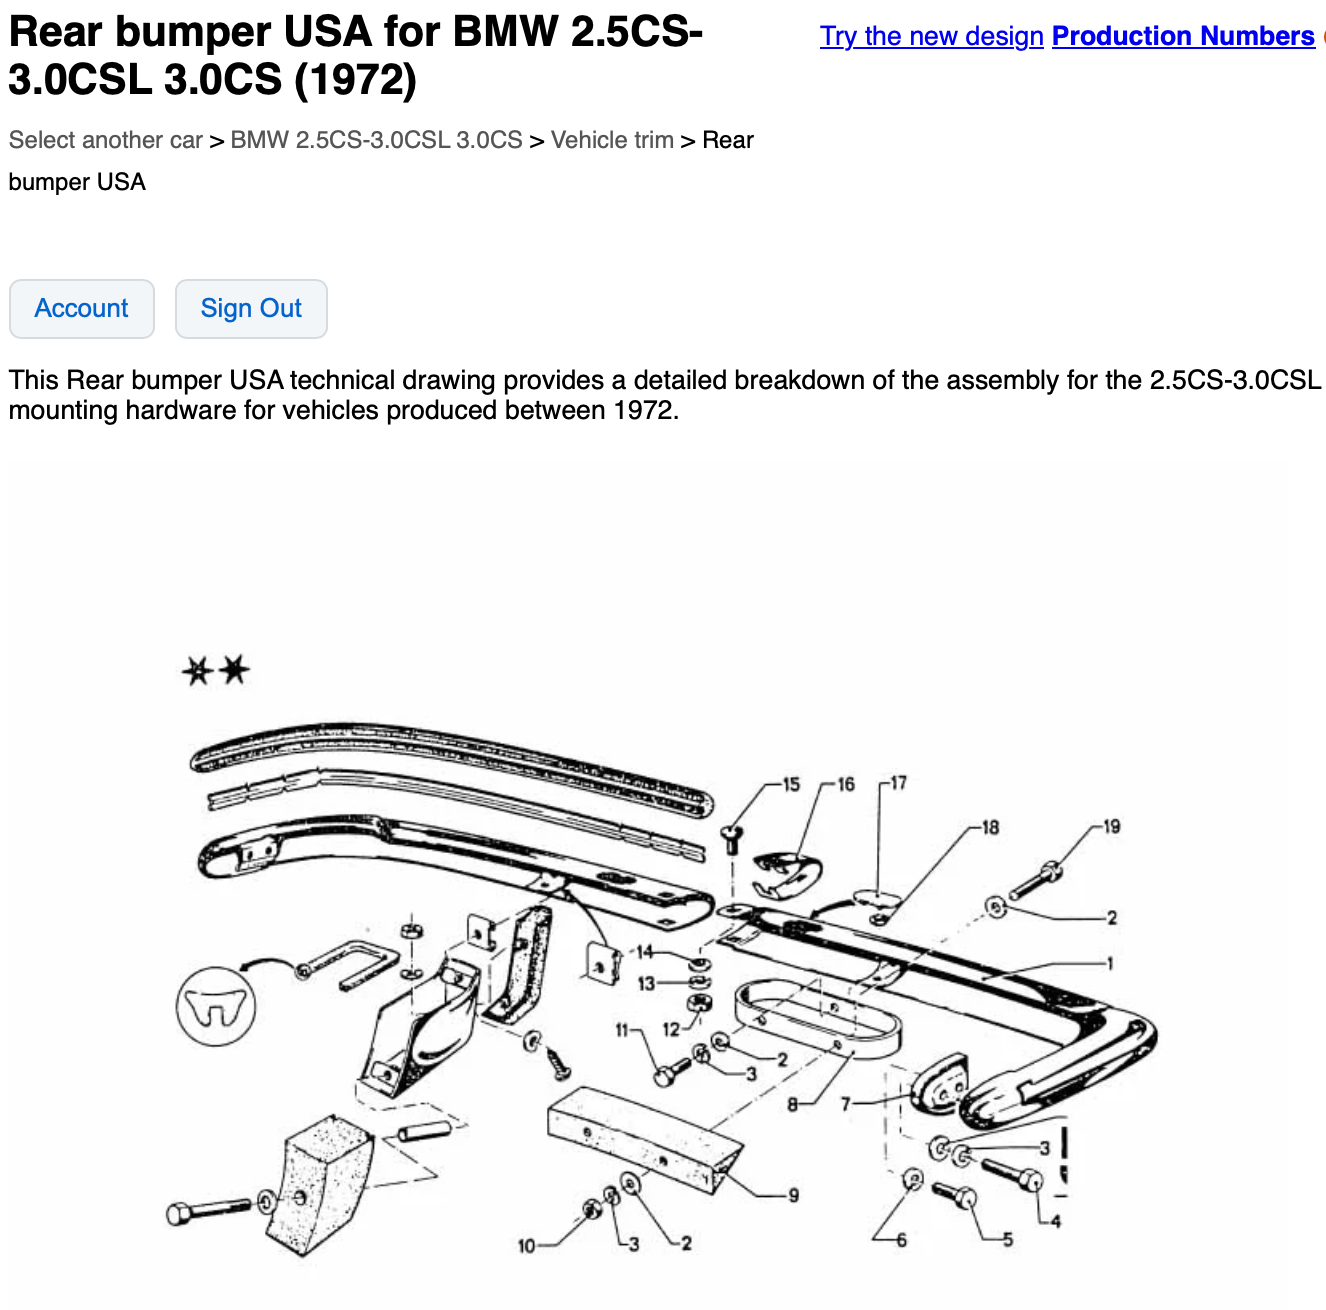
I was taking some parts to be powder coated and started looking for my rear bumper mounts. In RealOEM it looks like the bumper was mounted to the body using two "bows" (basically metal racetrack shaped hoops), and there was a plastic covering over that.

Can't find those anywhere. All I have is a baggie with some bolts taped to the bumper (my special organizing method!)

So I started down the usual parts search rabbit hole, and found a thread from 2018 where guy had made his own coverings.. The photos inthat thread looked decidedly different from my car.

Here is a photo of a car with the "bow" and covering.
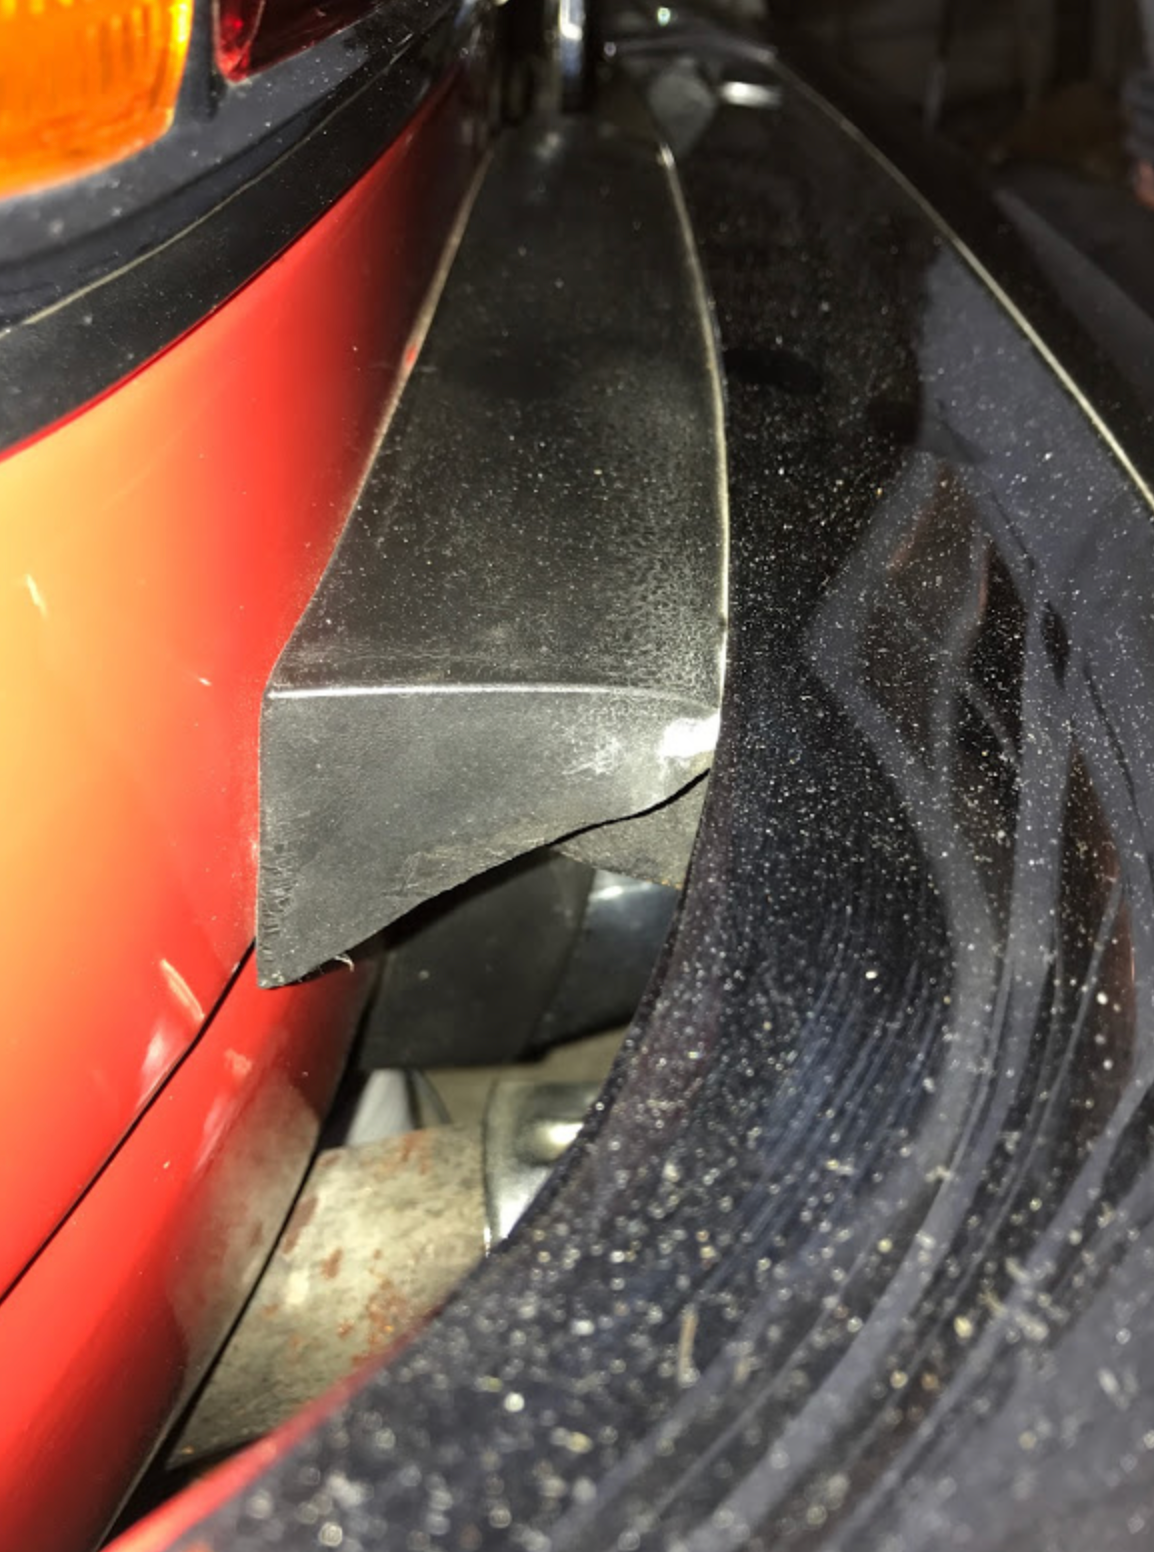
Screenshot 2026-10-07 at 7.50.51 AM.png


Then I notice a post by @HB Chris that mentions this was on 1973 E9s... Mine is an early 1972...So, I go look at an OLD photo of my car (back before I bought it..) and sure enough, my rear bumper is mounted very very close to the body.. No gap, no covering showing...
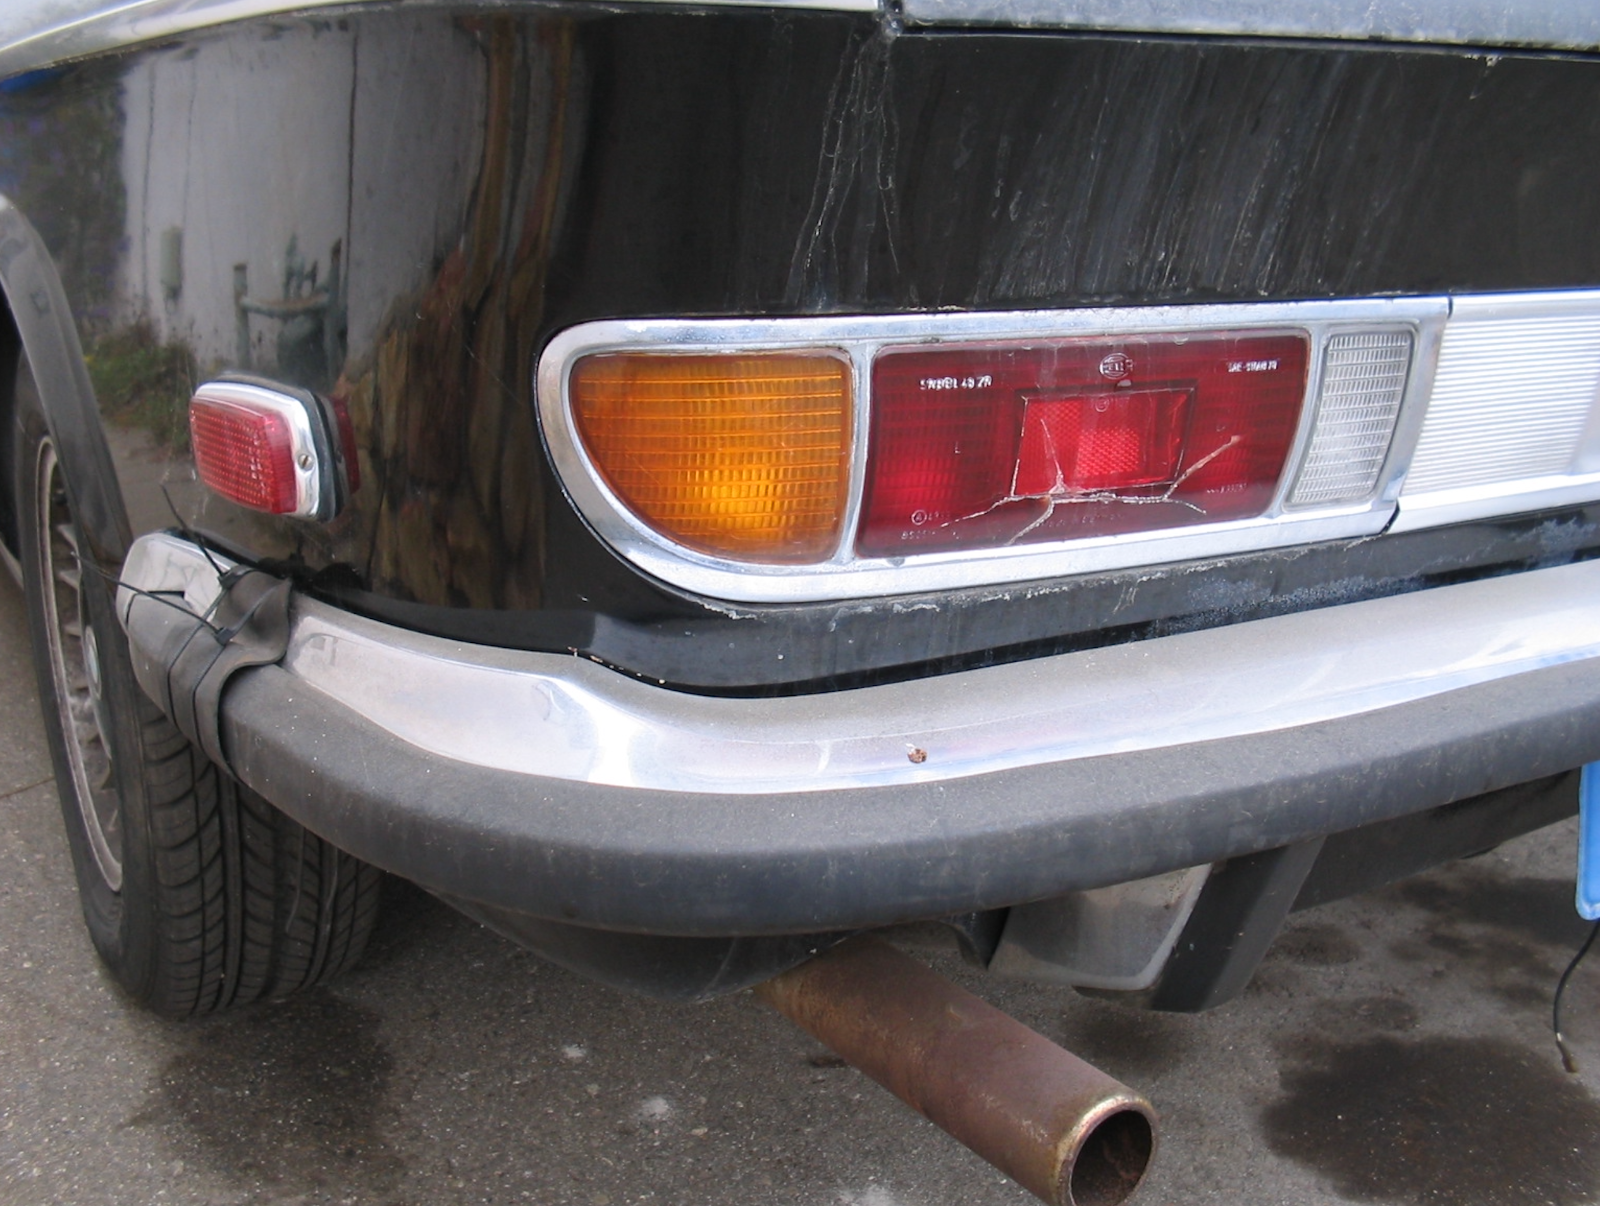
Screenshot 2026-10-07 at 7.43.53 AM.png


Did the earlier cars have the bumper mounted closer to the body? RealOEM shows two different bumper setups for 1972. One with the "bow" and one without it..

No Bow
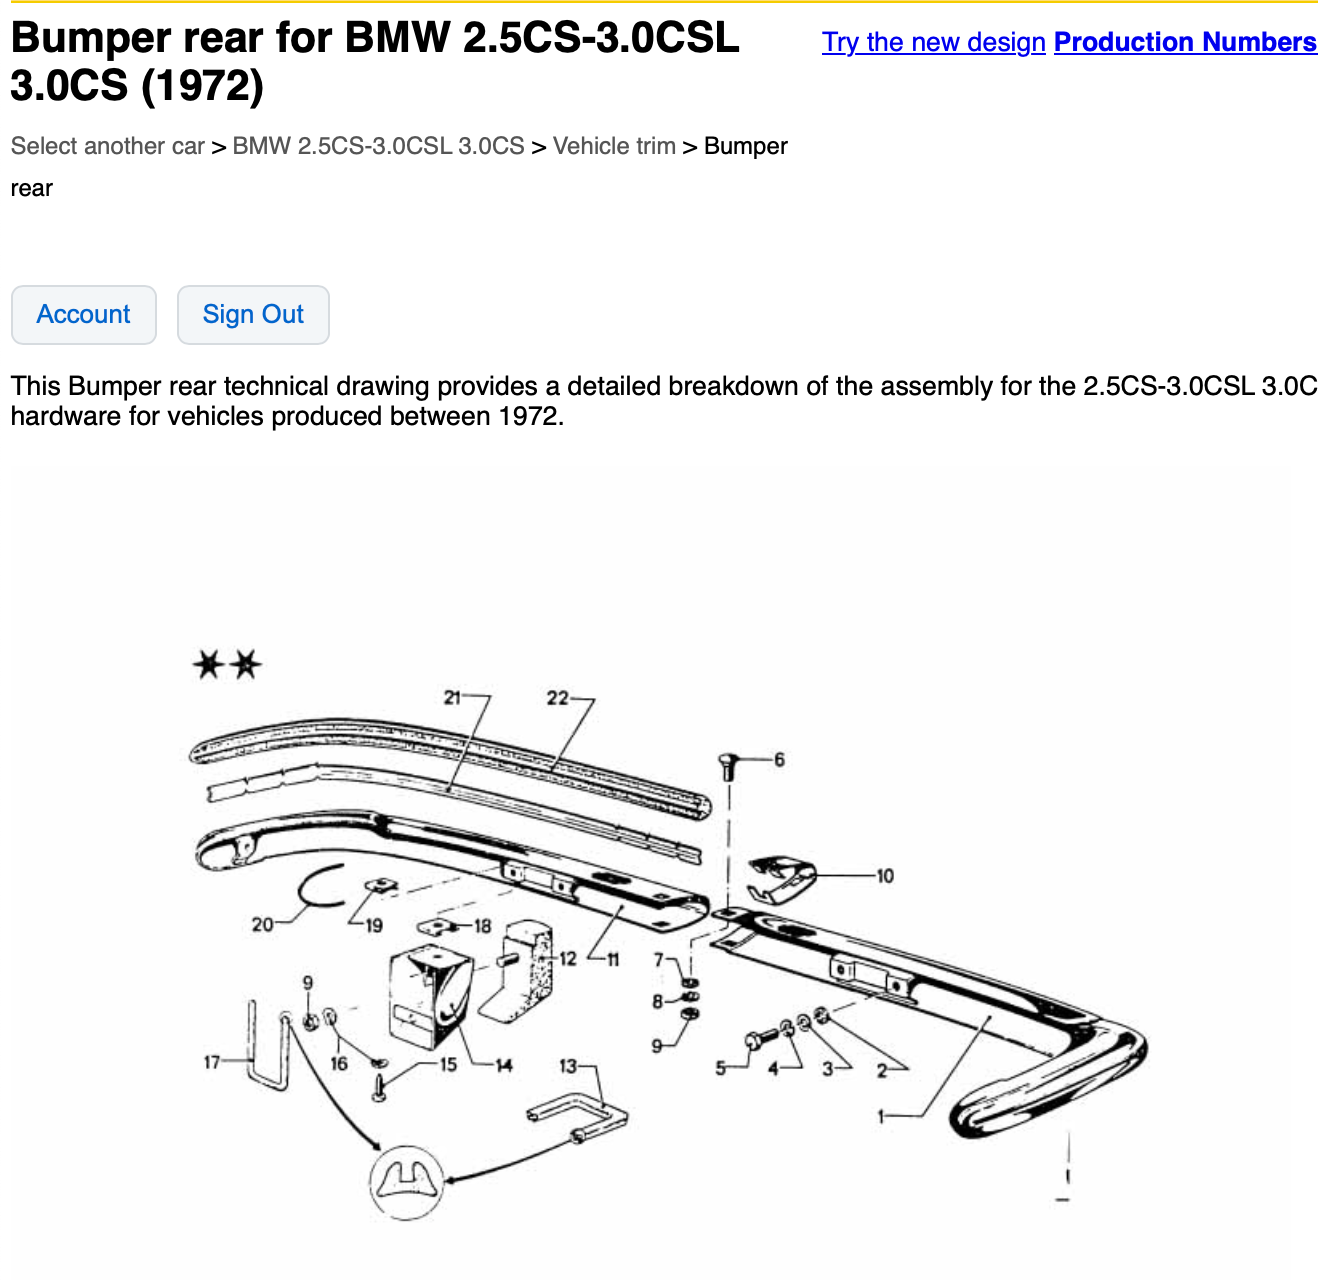
Screenshot 2026-10-07 at 7.57.10 AM.png


Bow (#8 in the pic).
Screenshot 2026-10-07 at 7.57.25 AM.png


I suspect I can't find the bow part because it is not used on my car. Can anyone confirm this?
 
Yes, you have no bows….

1972 cars have early USA or what can best be called “European” only style bumpers.
 
Since the two mounting holes on the rear panel are the same for both years you can mount directly like a 72 or euro coupe or use the hoops. What is different is the mount on the bumpers. The US 73 bumper is unique and you can’t use the euro mount. Strange that they modified it on your car.
 
Since the two mounting holes on the rear panel are the same for both years you can mount directly like a 72 or euro coupe or use the hoops. What is different is the mount on the bumpers. The US 73 bumper is unique and you can’t use the euro mount. Strange that they modified it on your car.
Don cleared this up for me this AM. My car is a 72. It has two holes on each side on the rear valance, but uses those to directly mount the bumper. So I don't think there was any modification to my car. The modification that was needed was to my memory, where I was searching my shop for bumper mounting parts that were never actually there!! :p o_O
 
Got the trailing arm bushings in today. Easy peasy!! Took all of 15 mins, once I ran to the hardware store for a length of all-thread...

IMG_6811.jpeg


And started assembly of the pedal box. Man those accelerator pedal bushings are a B*TCH to install!!!

Need to consult RealOEM to figure out which pedal is which.. so I decided to head home grab an adult beverage and bask in some small froward progress... The W-N pedal refresh kit is very nice!!

IMG_6812.jpeg
 
Am I correct in assuming that the brake pedal has two holes, one for the MC and one for the spring, and the clutch has one (just the MC)?

My recollection, and yes those accelerator pedal bushings are obnoxious. Now imagine replacing them while the pedal box is in the car. One of the most unenviable tasks I’ve had to do on the car
 
You are presenting reason #1572 why I feel like maybe I should have just taken apart the whole car and rebuilt it. Then I remind myself that most of you guys (by your own admission) had a multiyear period of car in parts and go “ok maybe my three hours of pain with a job like those bushings” is worth something…
 
Hey! I only took my car apart a year ago...sniff! ;)

That said, I have had moments where I ask myself if i'll ever get this giant lego project back together again!!

As @sfdon told me one day (we talk on the phone a lot).. Its nice when the work on your car involves washing off some light oil on your hands at the end of the work...

Beats those days a week or so ago where i was gooping bearings with red tacky grease wearing grubby clothes and latex gloves!! Or worse, when I was degreasing the subframes!! OMG that was horrible!

To be sure I still have a few more of those icky days ahead, but 90% of the cleaning work is done, so mostly it's fun little clean-paint-and-assemble jobs. The next icky jobs will be the heater/AC system, and the window channels
 
You are presenting reason #1572 why I feel like maybe I should have just taken apart the whole car and rebuilt it. Then I remind myself that most of you guys (by your own admission) had a multiyear period of car in parts and go “ok maybe my three hours of pain with a job like those bushings” is worth something…
I would actually argue for a rolling restoration - I know it is not as clean and as fundamental as a base-shell approach, but I would not want to miss the joy of driving - it gives me the energy to tackle yet another project.... and with a 50+ year old car there is an endless funnel of projects/ugrades/whilst you are in there/mods/clean-ups....
 
I would actually argue for a rolling restoration - I know it is not as clean and as fundamental as a base-shell approach, but I would not want to miss the joy of driving - it gives me the energy to tackle yet another project.... and with a 50+ year old car there is an endless funnel of projects/ugrades/whilst you are in there/mods/clean-ups....
There is also the potential to get overwhelmed and have the project stall.

But that said, some jobs require some pretty major disassembly
 
And speaking of disassembly...

Got the pedal box put together today. Of course now that that is so clean and new, the brake light switch looks like junk,, so that will need to be replaced. My photos of the original as it came out of the car were very helpful when putting it all back together.

I also started assembly of the front end. Discovered to my dismay that I had forgotten to powder coat the Z-bars, and for a while had misplaced the idler arm. Found that at the bottom of my "old suspension bits" box, and then had to blast all those. The bars must have been powder coated because they took a while to blast clean. The idler arm cleaned up perfectly, and fast!. Then I realized that I had not obtained the bushing for that, so I spent a bit of time trying to get the bushing out. the rubber came out in a jif, but I had to resort to my big press to get the actual metal bushing out.

Because of my forgetting to powder coat these bits, I decided, since they were small enough to fit in my new powder coating oven, that I'd do those myself. Ordered some semi gloss powder (all I had was gloss black), and baked the parts in the oven for an hour at 400 degrees. I'll powder coat those over the weekend.

Other than having to clean the steering box and front hubs tomorrow, it is very nice to have reached the point of putting things together and as @sfdon noted once, washing a little light oil off your hands at the end of the day... as opposed to scrubbing filthy hands and trying to extract the gunk from under my fingernails!!

Cheers,
Scott
 
Last edited:
OK. Icky job of cleaning the steering box and front hubs done. The wire wheel did a great job cleaning up the outside of the hubs! Here's a before and after pic...

IMG_6813.jpeg


Found a handful of other parts to prep and paint, since the Eastwood 2K primer and paint has a finite pot life.. More satin black on order...

IMG_6814.jpeg
IMG_6819.jpeg


Also took a few minutes to sort out the W-N interior bolt kit. That came as a bag of 500+ mixed fasteners... so I sorted them and will put them in labeled containers.

Slowly collecting other appropriate mounting hardware from BelMetric.. I have long lost interest in trying to restore nuts, bolts and washers...

IMG_6820.jpeg
IMG_6821.jpeg
 
Back
Top