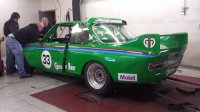
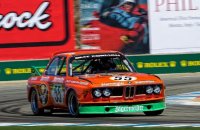
72 Restomod clubracer build

it is very difficult for me to describe how much i do like this project (exception made of the colour chosen, as i do not like green for a car, but that is only my fault)

every step means a brilliant design solution, i am envious, as i am able to do with wood you seem to be able to create solutions in steel, which i can not do unfortunately

excelent work, and beautiful car, congrats
 
Forgive me I haven't kept track and I don't want to know !


005.JPG


003.JPG


006.JPG


got the side window installed


I'm only curious because I'm contemplating turning my turkis into a track/street machine like this; amazing build
 
Just saw a post.....

The car is on the dyno today.
 

Attachments

  • 10649937_10207030688719002_3341520073740376447_n.jpg
    10649937_10207030688719002_3341520073740376447_n.jpg
    61.6 KB · Views: 286
Just saw a post.....

The car is on the dyno today.

The trip to the dyno didn't go as hoped , in a nut shell the car wasn't quite ready for prime time . having car that's nut street legal makes it difficult to sort stuff out before dyno or track time , so sometimes the dyno is where bugs show up . The modified fuel rail leaked and turns out I have the wrong spark plug boots . When I converted to the euro style Coil over plug , the coils are the same as an E36 M3 , what your not told is the plug boots for the two cars are different . with out the ability to put the car under load these issue didn't show up , when loaded up on the dyno they showed their ugliness !

In the meantime while Im waiting for parts to fix the above issues I continued with nagging details . Today we basically finished the windshield install . Made some clips as per the rule book and installed them

002.JPG


general shape of the clip cut out , , nut serts to be installed in the body and some nice cap screws to hold the clip down

003.JPG


004.JPG


Rear straps done and installed


005.JPG


006.JPG


007.JPG


front clips polished, and installed
 
Still waiting on parts to fix the fuel rail issue , in the meantime Ive been "geeking out " on some weird details .

A few weeks back I made these head light blanks , They turned out a bit sloppy and wasn't happy with them .

010.JPG


I had some piece's made to cover up the crappy work

005.JPG


006.JPG


and installed them on the car

003.JPG


001.JPG


Its an unnecessary detail but it give s the car more of a finished look ??

004.JPG
 
humm, fake lights
nicely done, but what is the purpose ?
you do not need lights ? ok, but why do not just fit the original headlights ?
regards


#1 lost at least 20 lbs off the front of the car
#2 make room for oil line to the oil cooler
#3 the out side driver light will eventually be the air intake for the engine
 
#1 lost at least 20 lbs off the front of the car
#2 make room for oil line to the oil cooler
#3 the out side driver light will eventually be the air intake for the engine

Removing the lights are a given. The decals however are genius. Have you been watching NASCAR? Good thinking!
 
Are you gonna run at The Mitty?

Regretfully I will not make the mitty , Kinda ran out of steam /enthusiasm for the project for the last couple of month's . waiting to long to get the injectors and injector rail sorted out . sorry guys . I did however made some progress this AM . I think I have finally gotten the injector's sorted out. the 1st set leaked , the second set didn't fit and the 3ed set seam to work.

short video of it running again

https://vimeo.com/162201124
 
Back to the injector disaster , stock injector pictured on the rt and the non fitting injector from batch # 2 on the left

DSCN1274%2B%25281%2529.JPG


New injector's pictured below

DSCN1278.JPG


you may notice the new injector are a more modern design ,

After I got it fired up drove it out side to give her a bath

DSCN1282.JPG
 
Back
Top