Bringing a '74 back up to her intended glory.

Bmachine

Well-Known Member
Site Donor $
Site Donor $$
Messages
3,525
Reaction score
1,778
Location
Northern California coast
In the grand tradition of Better Late Than Never, I am retroactively starting this build thread many months after it started.

First I feel a debt of gratitude to those who have started and kept up similar threads for their own car. It is both very entertaining and totally inspiring. I want to try and give a little back. Second, it will be good to have a record of this coupe's rebirth and a list of all that was done to it.

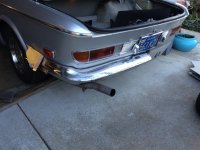
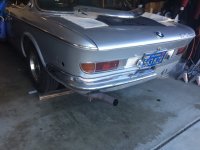
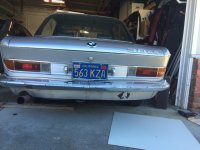
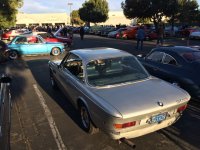
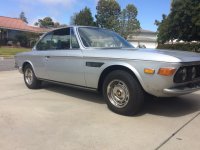
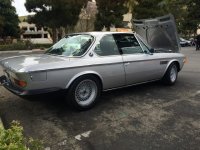
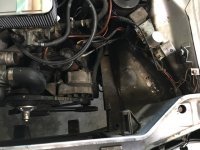
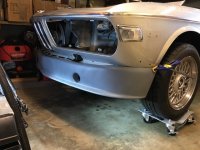
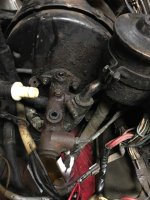
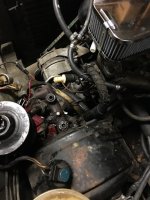
The car was built in December 1973 as a 74 model. While it had a number of really good upgrades (rust proofing, electricals, wiring, crash resistance, seats and seat belts etc...), the US version took a few wrong turns, mainly with the EPA and DOT stuff. The added emission equipment came from a noble intention. But we can now replace all that with a later, much cleaner and more efficient fuel injected motor. This car also succumbed to the lazy man's claim that shifting gears all by himself was too tiring. This goes very much against the spirit of this car in my opinion. And finally, the previous owner also made a misguided color change. All of this will need to be addressed.

So, here is the master plan:

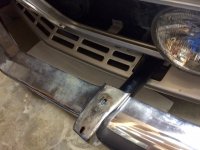
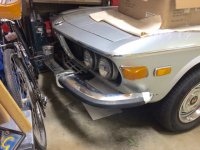
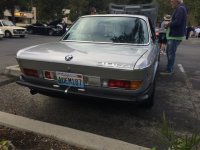
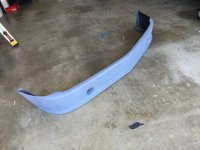
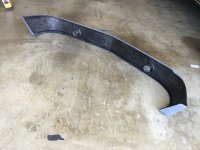
1. Replace DOT bumpers with original ones.
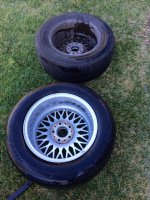
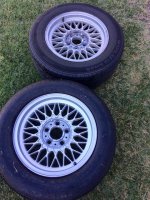
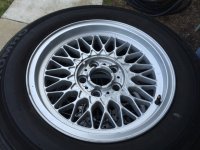
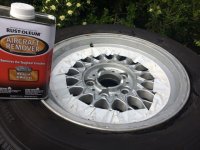
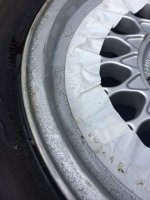
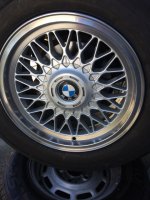
2. Replace strange steelies with 16" BBS
3. Replace the auto tranny with 5 speed
4. Return the car to its original fjord color
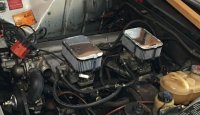
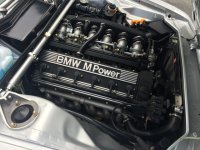
5. Replace engine with B35 one.
That's it.

It will be very important to stick to just these 5 steps and not get caught up endlessly adding things to fix "While we're at it" like most people end up doing.

-----------------------------------------------

Dateline October 2015.

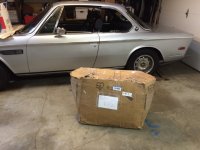
After months of searching to replace my first coupe (http://www.e9coupe.com/forum/threads/returning-after-22-years.19923/)I find an ad in the Classified section of this forum offers a California '74 in apparently decent shape.
http://www.e9coupe.com/forum/threads/selling-3-0cs-santa-barbara.20374/

cupe1.jpg
 
Last edited:

Bmachine

Well-Known Member
Site Donor $
Site Donor $$
Messages
3,525
Reaction score
1,778
Location
Northern California coast
November 6, I drive up to Santa Barbara during my lunch hour and meet Stephen. He had posted many photos so there were no big surprises. As always, the main concern was the health of the body. It does look fairly clean, even after we put it up on a rack. I take it for a spin. It drives decent.

It's got 3 things going against it: 1) Big bumpers 2) Auto tranny 3) repainted polaris from the original fjord. But the general health of the body is too good to pass.

We shake hands on the deal. I put my arm around his shoulder and tell him to smile at the imaginary camera over there and, in my best Mike Brewer accent, burst out "I just bought meself... a BMW coupay!"

I have the car towed back down to L.A.

IMG_8796.jpg IMG_8797.jpg
 
Last edited:

Bmachine

Well-Known Member
Site Donor $
Site Donor $$
Messages
3,525
Reaction score
1,778
Location
Northern California coast
Here is the plan for the car:

1. Remove the visual ugly: The bumpers and the steel wheels.

2. Get the critical stuff completely renewed: Brakes and engine cooling.

3. Remove the mechanical ugly. The slushbox.

4. Remove the color change. Return it to its original glorious Fjord blue.

5. Upgrade the engine to a M30B35.

First things first. I get rid of the diving board bumpers. This lifts 500 visual pounds off the car.

IMG_8805.jpg19379IMG_8806.jpg IMG_8808.jpg IMG_8810.jpg IMG_8818.jpg
 
Last edited:

Bmachine

Well-Known Member
Site Donor $
Site Donor $$
Messages
3,525
Reaction score
1,778
Location
Northern California coast
December 11 I find a great early sport steering wheel up in the valley. I take it apart, sand it, repaint it and order a new leather wrap from Alan Gunn.

While up at my friend Rob's shop I also brought the hood retaining bracket assembly which had cracked as, apparently, most of them do. Rob welded it back together.

One problem this car has is this auto tranny leaks like a sieve. It was never going to stay on the car for very long but it forces me to contemplate the not-so-inexpensive 5 speed conversion sooner than my budget was planning on.

IMG_8919.jpg IMG_8964.jpg IMG_8966.jpg IMG_8967.jpg IMG_9018.jpg
 

Bmachine

Well-Known Member
Site Donor $
Site Donor $$
Messages
3,525
Reaction score
1,778
Location
Northern California coast
December 14. I had found a set of early bumpers through Craigslist in Hawaii. After much back and forth, they finally arrive. As usual, the metal strips that hold the rubber parts are totally rusted. So I order some new ones from W&N.
 

Attachments

  • IMG_8977.jpg
    IMG_8977.jpg
    77.5 KB · Views: 602
  • IMG_8978.jpg
    IMG_8978.jpg
    95.8 KB · Views: 638
  • IMG_8981.jpg
    IMG_8981.jpg
    96.1 KB · Views: 614
  • IMG_9097.jpg
    IMG_9097.jpg
    104.6 KB · Views: 658

Bmachine

Well-Known Member
Site Donor $
Site Donor $$
Messages
3,525
Reaction score
1,778
Location
Northern California coast
December 16. I bought the last set of Pamp's early bumper adapters from Peter at Coupeking. After much cleaning I assemble my "new" bumpers and try them on.

They don't go in all the way at first. It turns out, part of the rubber "sleeves" for the original shocks had collapsed deep inside their "tunnel" I had to remove those and trim them in order to make this work.
 

Attachments

  • IMG_8984.jpg
    IMG_8984.jpg
    85.7 KB · Views: 622
  • IMG_8985.jpg
    IMG_8985.jpg
    92.7 KB · Views: 612
  • IMG_9009.jpg
    IMG_9009.jpg
    68.4 KB · Views: 616

Bmachine

Well-Known Member
Site Donor $
Site Donor $$
Messages
3,525
Reaction score
1,778
Location
Northern California coast
December 20. One thing I have always hated is mechanical ignition. So I got a Pertronix kit and installed it today. The car starts better, runs better and looks better.

I also installed new distributor cap,new spark plug wires, new battery ground cable, etc.
 

Bmachine

Well-Known Member
Site Donor $
Site Donor $$
Messages
3,525
Reaction score
1,778
Location
Northern California coast
December 31. Test fitting of the rear bumpers. They need some persuasion to get in line. In particular, on the 74 there is an added bracket between the wheel well and the rear bumper shock which makes access to the side bumper bolt extremely difficult. I like a lot of the added things the 74 has but definitely not the reduced access!

January 2nd, I bring the car out for the first time to the local Cars n Coffee.
 

Attachments

  • IMG_9025.jpg
    IMG_9025.jpg
    75 KB · Views: 642
  • IMG_9026.jpg
    IMG_9026.jpg
    101.5 KB · Views: 605
  • IMG_9027.jpg
    IMG_9027.jpg
    97.7 KB · Views: 625
  • IMG_9028.jpg
    IMG_9028.jpg
    80.2 KB · Views: 615
  • IMG_9031.jpg
    IMG_9031.jpg
    85.4 KB · Views: 662
  • IMG_9035.jpg
    IMG_9035.jpg
    109.6 KB · Views: 611

Bmachine

Well-Known Member
Site Donor $
Site Donor $$
Messages
3,525
Reaction score
1,778
Location
Northern California coast
January 16, 2016. drop off the car at Coupeking for a full evaluation and their "Body service". A thorough check for potential rust issue and a cleaning and rust proofing of the usual suspect spots. I also have the front fenders rolled.

Car comes out with a very good report. Only sign of rust is a small spot above the left rocker panel.

Apart from the head, most of the mechanicals are originals and should be refreshed. The tranny's got to go but we knew that.
 
Last edited:

Bmachine

Well-Known Member
Site Donor $
Site Donor $$
Messages
3,525
Reaction score
1,778
Location
Northern California coast
February 6. I got a used rear tail pipe from Peter S and a chrome tip from Roger's Tii. Now I need to bring it to a muffler shop to get that installed.

I also got a set of 16" one piece style 5 wheels off Craigslist. From what I found on the site 16" is about as large as you want to go if you cherish the ride quality. TIme to give these a thorough cleanup.
 

Attachments

  • IMG_9098.jpg
    IMG_9098.jpg
    85.7 KB · Views: 580
  • IMG_9099.jpg
    IMG_9099.jpg
    143.3 KB · Views: 575
  • IMG_9100.jpg
    IMG_9100.jpg
    144.3 KB · Views: 599

Bmachine

Well-Known Member
Site Donor $
Site Donor $$
Messages
3,525
Reaction score
1,778
Location
Northern California coast
March 13. After doing lots of research I decide to get those wheels done. I wanted to get the outside lip polished while keeping the inside withe satin paint. As always, this turned out to be much more work than I had anticipated.

Fortunately I had my old racing buddy Gary helping me out, once again.
 

Attachments

  • IMG_9307.jpg
    IMG_9307.jpg
    94.3 KB · Views: 590
  • IMG_9320.jpg
    IMG_9320.jpg
    96.7 KB · Views: 593
  • IMG_9321.jpg
    IMG_9321.jpg
    87 KB · Views: 580
  • IMG_9398.jpg
    IMG_9398.jpg
    80 KB · Views: 570
Last edited:

Bmachine

Well-Known Member
Site Donor $
Site Donor $$
Messages
3,525
Reaction score
1,778
Location
Northern California coast
April 3. I finally replace the broken trapeze mirror with the larger flag one. Soooo much better!
 

Attachments

  • IMG_9337.jpg
    IMG_9337.jpg
    63.2 KB · Views: 571

Bmachine

Well-Known Member
Site Donor $
Site Donor $$
Messages
3,525
Reaction score
1,778
Location
Northern California coast
Another small thing that was irritating is that humongous air filter housing of the carburator cars. In order to be able to do anything on the darn motor, you have to remove it. So I decided to get some temporary simpler and smaller ones. These will only stay there until the injected B35 shows up.
 

Attachments

  • IMG_0067.jpg
    IMG_0067.jpg
    78.6 KB · Views: 611

Bmachine

Well-Known Member
Site Donor $
Site Donor $$
Messages
3,525
Reaction score
1,778
Location
Northern California coast
May 8. Four new Dunlop arrived from Tire Rack and he mobile ASP truck just came by to mount them and balance them. Finally time to get rid of the steelies!\

Before and after:
 

Attachments

  • IMG_9422.jpg
    IMG_9422.jpg
    87.4 KB · Views: 612
  • IMG_9453.jpg
    IMG_9453.jpg
    98.6 KB · Views: 613

Bmachine

Well-Known Member
Site Donor $
Site Donor $$
Messages
3,525
Reaction score
1,778
Location
Northern California coast
May 14. This car still had the old 5 blade red fan. And the temp gauge had the nasty habbit of creeping up to 2 o'clock everytime I climbed up the hill to my house.

So I finally decided to upgrade to a new aluminium radiator and late style clutch and fan with the invaluable help of Don Laurence.

So, new version of The Plan:

6. R n R cooling fan
7. R n R radiator

Damn.

Too busy listening to and helping Don so no pics unfortunately... But my buddy Gavin was also helping out so here are some gratuitous pics of his gorgeous Art Symonds built CSL.
 

Attachments

  • IMG_9419.jpg
    IMG_9419.jpg
    110.3 KB · Views: 649
  • IMG_9418.jpg
    IMG_9418.jpg
    97 KB · Views: 641
  • IMG_9417.jpg
    IMG_9417.jpg
    103.5 KB · Views: 723
Last edited:

Bmachine

Well-Known Member
Site Donor $
Site Donor $$
Messages
3,525
Reaction score
1,778
Location
Northern California coast
May 29. Since we had taken half the cooling system out, I thought this would be a good opportunity to start returning the car to its original fjord color. And while the outside will be done by a pro, the engine bay is something i can definitely do myself.

And while we are in there trying to clean things up, I always liked the better weight distribution of the battery in the rear, so let us take it and the tray out of the engine bay.

So with the help of my buddies Gavin and John, we took off the hood, started to remove all the old insulation and prep for a respray. Then we cut out the battery tray.

Another updated version of The Plan:

8. Move the battery from the engine bay to the rear seats.

Multiple generations of BMW in the street for the occasion: '74 Tii, '90 325is, '15 335i, and in the garage, '74 3.0cs
 

Attachments

  • IMG_0061.jpg
    IMG_0061.jpg
    91.3 KB · Views: 670
  • IMG_0064.jpg
    IMG_0064.jpg
    113.8 KB · Views: 682
  • IMG_0173.jpg
    IMG_0173.jpg
    86.7 KB · Views: 676
  • IMG_0054.jpg
    IMG_0054.jpg
    107.8 KB · Views: 667
Last edited:

Bmachine

Well-Known Member
Site Donor $
Site Donor $$
Messages
3,525
Reaction score
1,778
Location
Northern California coast
We also disassembled the whole nose of the car. Removed the AC condenser and fan, horns, headlights, grilles, etc...

Since the AC system was not working, this was a good opportunity to remove all of that, including the compressor. Much to my surprise, the '74 had actually moved on to a rotary Bosch compressor instead of the old York boat anchor. I still want to remove it and change the system to the much more environmentally friendly R134. I ordered new parts from Nostalgic AC.

"The Plan" is starting to feel more and more like a distant memory

9. While we are at it, (WWRAI) Remove and replace the whole AC system.
 

Attachments

  • IMG_0065.jpg
    IMG_0065.jpg
    90.6 KB · Views: 616
  • IMG_0070.jpg
    IMG_0070.jpg
    102.7 KB · Views: 585
  • IMG_0073.jpg
    IMG_0073.jpg
    169.1 KB · Views: 584
Last edited:

Bmachine

Well-Known Member
Site Donor $
Site Donor $$
Messages
3,525
Reaction score
1,778
Location
Northern California coast
June 3

I bring several disassembled parts to a local machine shop for glass beating. Including headlight assemblies, a set of manual pedals for the upcoming conversion. Never ceases to amaze me how good old metal looks after coming of that kind of cleaning.

June 5. Another purchase that I can't really do anything with until the car gets repainted... But I always wanted a CSL type of air dam. Skip. MrGlassCar makes a real nice one that I went to pick up today.

While in that part of the city, I met up with Bavaria driver Tim and bought his sway bar set. Mine did not have a rear.

New adds to The Plan:

10. Add a CSL airdam
11. Add rear sway bar
 

Attachments

  • IMG_0090.jpg
    IMG_0090.jpg
    85.4 KB · Views: 580
  • IMG_0091.jpg
    IMG_0091.jpg
    82.7 KB · Views: 550
  • IMG_0092.jpg
    IMG_0092.jpg
    93.6 KB · Views: 561
  • IMG_0100.jpg
    IMG_0100.jpg
    89 KB · Views: 553
  • IMG_0102.jpg
    IMG_0102.jpg
    120 KB · Views: 512
  • IMG_0103.jpg
    IMG_0103.jpg
    126.1 KB · Views: 552
Last edited:

Bmachine

Well-Known Member
Site Donor $
Site Donor $$
Messages
3,525
Reaction score
1,778
Location
Northern California coast
June 7. Originally I was going to just repaint the nose. But then I found myself overwhelmed with the deadly "While I'm here..."

The master cylinder is one of the few things that was actually rusted on the car. Pretty weird. Regardless of the reason, it's got to go!

And the PS reservoir looks like a mess as does the brake booster. OK, Those are going to the cleaners as well

Where are we at now? Plan C? Plan D?

12. R n R brake MC
13. Sand and refinish Brake booster
14. Sand and refinish PS reservoir
 

Attachments

  • IMG_0111.jpg
    IMG_0111.jpg
    101 KB · Views: 584
  • IMG_0114.jpg
    IMG_0114.jpg
    92.4 KB · Views: 557
  • IMG_0120.jpg
    IMG_0120.jpg
    100.9 KB · Views: 574
Last edited:
Top