New E9 owner all the way from the UK - How doo! :)

Hey all,

Little update - very little in fact as not much is happening at all. There is no rush though as I need to sell my Integra before I can start using my CSi (Too many cars, not enough space..)

All the body trim is coming off for the re-spray and i've decided to get the dashboard revived with the windscreen still in place - the risk of breaking the glass is too big for my liking.

Work should be starying within the next two weeks, yay! :)

o :)
 
Little update

Hello all,

I have an update! The car is starting its stripping tomorrow! Its all coming off, windows, seals, wheels, you name it! ;)

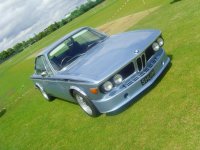
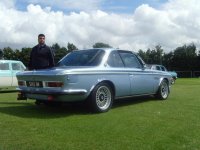
I went to the bodyshop to talk through how I wanted it done now that they have more time to do it. I took a few pictures while I was there - darn it looks great, even BEFORE the re-spray! :)

DSC01369.jpg

DSC01370.jpg


They bodyshop are keeping a full photographic diary of all the work being done - I'll scan them in as soon as I get them.

Comments welcome as always guys,

o
 
I am also new to the forum and want to wish you the best with the body work and spray..very cool car! I am very curious to know what a FI version of the car sounds and drives like but am happy with what I have. Are you doing the same color?
 
Hey Blu,

It drives great with FI, especially on longer trips as the power is really noticeable.

I'm going to stick with red as the colour, yes. Its the original one and I don't want to mess with the car too much.

Thanks,

o :)
 
Its begun!

Work has started and the car has now had all its trim stripped and carefully stored - i'm going to get some pictures up on here ASAP.

Cheers all,

o :)
 
blue csi

helllo mate im from west london as well got a 3.0 csi which just finished restoring after three years, lovely cars a local meet would be good to meet other lovers of the greatest coupe.maybe we can arrange it soon.see ya
 

Attachments

  • SNV30122.jpg
    SNV30122.jpg
    96.8 KB · Views: 226
  • SNV30119.jpg
    SNV30119.jpg
    94.7 KB · Views: 219
  • DSC00308.jpg
    DSC00308.jpg
    92.8 KB · Views: 191
  • 72CSiArrivalInterior.jpg
    72CSiArrivalInterior.jpg
    84.3 KB · Views: 251
  • 3.jpg
    3.jpg
    30.8 KB · Views: 215
helllo mate im from west london as well got a 3.0 csi which just finished restoring after three years, lovely cars a local meet would be good to meet other lovers of the greatest coupe.maybe we can arrange it soon.see ya

WOW, that is a very hot resto!!! Please tell us about the seats. Who did them? Where did you find them? can they be ordered? how did the rear seats turn out?

Many thanks,

Greg
 
Hey all,

I have an update - she'll be completed next week!!! SO excited, i'm going to pick it up next Friday and take it straight to my Dad's garage to get going on the interior.

The bodyshop has been taking pictures as it went, i'll get them scanned ASAP.

Dax - don't have the contavt details i'm afraid but if you cruise ebay for someone selling more than one part that'll propbably be the person - he's based in Chertsey, Surrey.

Manj - that car looks well good and i'd certianly be up for a meet up. Was it your car I sawy on the BMW owners club stand at Silverstone recently?

Cheers all,

o :)
 
Howdy all,

Little update - The car may be finished this week (pleeeease be finished this week body shop!!) and i've been told that they've tracked down a good used rear trunk (boot) badge to replace the one that fell off while the car was on the way to get painted.

Will give you an update when I can :)

o :)
 
Hey all - SHE'S BACK!!! :)

The call came yesterday from the bodyshop saying she was ready for collection so I was straight down there with a trailer..

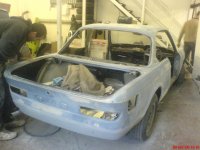
It looks stunning; all the panels have been done and Steve has done a great job (You may see him in a few pictures below. Here are the pictures from when I collected it.

DSC01457.jpg

DSC01458.jpg


More to come later...
 
Wow, yea, its very close to that one!!

Anyway, additional pictures :)

On to the trailer
DSC01458.jpg

DSC01459.jpg

DSC01461.jpg


Then after a 60 mile drive we arrive at my dads house where the car will stay while i'm getting it up to standard.
http://img.photobucket.com/albums/v705/oalloyd/DSC01464.jpg[/IMG
[IMG]http://img.photobucket.com/albums/v705/oalloyd/DSC01465.jpg

Into the garage - my dad love's it and is happy for her to keep his Lotus company for a while..
DSC01466.jpg

DSC01472.jpg

DSC01468.jpg

DSC01471.jpg


The list of jobs to do will be compiled and (hopefully) crossed off as I go. I may look for some professional help (For the car, not me!!) with bits like the tuning and the sunroof.

Rear light clusters - have a minor crack so i'd like to find new one
Carpets - original and scruffy so would like to replace or re-fit these
Windows - very slow or inoperative.
Interior wood - Laquer peeling so need to re-furb
Audio - Need to fit an original head unit and put some new speakers in
Security - Cat 2 needs to be fitted at least
Engine bay detailing - self explanatory
PAS leak - Minor, but should be looked at anyway
MOT - needs sorting
Rear passenger light unit - does not work so need to check it out
Headlights - in only-ok condition so will try and replace
Steering wheel - would like to fit the original version - anyone know where I can find one?
Boot - detailing
Centre console - needs fixing as its cracked on one side
Front wiper - needs re-fitting
Sunroof - needs fixing properly
Headlining - Sagging and old so really needs changing
Tuning - needs to run better
Brakes - pulls to one side, probably sticking caliper

Will add stuff as I thinking of it - comments very very welcome! :)

o :)
 
Last edited:
Hey all,

Will be taking some time off work to get some restoration work done on the beast within the next few weeks - can't wait to get stuck in :)

Comments welcome,

o :)
 
Hello peeps,

Two weeks to go before i'm off to my dads garage again to get stuck in.

First thing's first, i'm going to clean the engine, then take out the seats and carpets. I'm also going to remove the wood trim to aid the re-furb.

I'm still looking for certain bits for the car such as steering wheel etc.

Comments welcome all,

o :)
 
Hey all,

I'm off for my first weekend with restoring the CSI - Very excited! I'm going to strip the interior out and clean up the engine bay.

Numair - wasn't too pricey as I used the classic car bodyshop i've used for years - he's done a first class job :)

Will post pics as I go, comments welcome :)

o :)
 
Project update - Lets get spannering!

Hey all,

Tmy came out of the bodyshop two weeks ago now and has been resting in my dad's garage before the next stage of it's restoration which started this weekend. I can already say that this process is massively rewarding and fun! I have taken pictures as I went and will continue to do so to show how its all going.

I got to dad's house at 1.30 on Saturday and immediatley plugged the car in to charge.
DSC01539.jpg


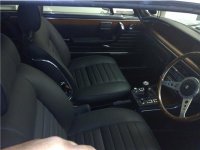
First job for me was to remove the carpets inside to gauge their condition and to establish the state of the floor pan. First out was the passenger seat - very easy as only four nuts;
DSC01515.jpg


Here it is with both seats out and the front carpets removed.
DSC01520.jpg


The condition of the front carpets was quite ropey and the sound-deadening materials underneath are also quite rough so it looks like i'll be ordering a front carpet set. Could prove expensive but I think it will make a real difference to the look of the car inside;
DSC01519.jpg


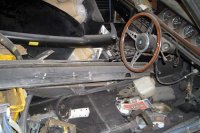
I took out the damaged centre console to get refurbished and while I was there also removed the glovebox. This will get a clean-up and then be re-fitted once any other dashboard issues have been resolved. The nasty early-90's Goodmans CD player has gone straight in the bin, to be replaced by a fully-updated original Blaupunkt Frankfurt radio, complete with bespoke E9 knobs.

Centre console out
DSC01517.jpg


Dash now more bare
DSC01518.jpg


Next up was the engine bay. It was quite dusty from the re-spray and also had some residual oil etc. I got an old paint and tooth brush and applied the Gunk degreaser in all the key areas.

Before;
DSC01522.jpg


After;
DSC01523.jpg


I think the result was worth it, though it took a loooong time. I'll go over the outer part of the 'bay next weekend with the polish to get it looking as new, as well as pianting some smaller parts to give it that as-new look.

While the engine was being cleaned I also removed the flaps that cover the access holes to the headlight bulbs. The items were looking a bit tired and sure enough, on the other side they also had a light coat of surface rust (second picture).
DSC01525.jpg

DSC01534.jpg


The flaps were cleaned off, then rubbed down and painted with Krust treatment to stabilise the surface to stop any future outbreak. On my travels around the engine bay I found a tiny bit of rust under the bonnet so I ground this out and also treated this with Krust. I have now painted this with red primer and i'll rub it down again next weekend.
DSC01526.jpg


After this came the passenger side rear lamp. The only bulbs working were the indicator and reverse light so out came the rear light board for inspection.
DSC01533.jpg


The contacts were cleaned up, as were the reflectors and lenses
DSC01538.jpg


I then put it all back together again for testing and, hey presto, they all worked! :) Very simple fix and very satisfying :)
DSC01540.jpg

DSC01541.jpg


I wanted to organise the boot on day 2; some oil had been spilled and it looked generally tired so out came the covering carpet for a damn good clean with car shampoo. It came up really well and will go back once I have completed my work in the boot.
DSC01530.jpg

DSC01529.jpg


I took out the spare wheel and gave it a good clean and a lick of piant, too. The tyre was very low on air so i'll get this checked out next week.
DSC01531.jpg


There was some minor surface rust in the wheel well so I have ground this out and also treated with with Krust then two coats of red primer. I'll put some top coat on this at a later date.

Next was the job of stripping the doors to take off the wood for re-furbishment. The doors are in good shape so I will clean them up, inject them with cavity wax then make a new thin foam membrane to protect from moisture ingress. The second picture shows the top door trim that is being sent away to get re furbished.
DSC01537.jpg

DSC01536.jpg


Finally I did some detailing. The wiper arm on the driver's side is kaput so I need to find a new one - the screw that secures it to the wiper spindle was cross-threaded; I may try and re-tap the whole but it looks like it'll have to be replaced.
DSC01527.jpg


Last up was the seat belt buckle securing strap - the end was a bit rusty so it was rubbed down, treated, primed then covered with 4 coats of satin black. This will go back on when the carpet is re-fitted.
DSC01535.jpg


Its been a great start and i'm really enjoying it - your comments would be very welcome all!

Thanks,

o :)
 
Hi all,

Another week, another update - but no comments? C'mon all, I wanna know what you think :)

So I arrived at my dad's place today at 12 ready to start work. My mate's Dom and James came too to assist with various tasks. We were there for 5 hours and got a fair amount done.
DSC01558.jpg


Dom is a specialist in wood work and is always working with it so he got cracking with restoring the dashboard No need to remove it as access to the effected areas is fairly simple and I didn't want to risk damaging the screen. The wood was in fairly good shape but the laquer was peeling so got busy with the sandpaper and got the dash looking like new.
DSC01561.jpg


James 'helped' also, haha
DSC01562.jpg


Once all the prep had been done the staining commenced. I went for a slightly darker shade than standard and it looks simply stunning - fantastic work!! I'll apply the clear coat next week.
DSC01565.jpg


I finished off the headlight access flaps I started last week with a few coats of satin black.
DSC01560.jpg


The rear seats were then removed to allow access to the rear door cards so the wood could be removed. I didn't know what to expect when the seats came out but luckily the metalwork underneath was in great condition - phew! :)
DSC01563.jpg


The wood on the passenger side rear card is pretty far gone but i'm sure it can be saved.
DSC01564.jpg


I got to work with removing the front lights and grill to get them cleaned up and the new lenses fitted. Such detailing makes a huge difference to a car like this and I can't wait to do the re-fitting so I can see the final result.
DSC01559.jpg


The headlight grills were in good condition so I have just cleaned them up and will put some plastic restorer in the appropriate areas.
DSC01566.jpg


So, more has been done this week and there is still a long way to go but I am loving every second of it.

Thanks all and comments please!

o :)
 
Comments? Coming along nicely, say some more about the business of fixing the wood in place. Did it have the little crack patterns? By the stubble of the workers it looks like they put like 36 hours of work without shaving :).
 
Back
Top