Newbie - Project begins

Arde

Well-Known Member
Site Donor $
Site Donor $$
Messages
4,726
Reaction score
1,928
Location
Cupertino, CA
Cool. That car should last you another 35 years as long as you don't install a vinyl roof again. Looks like the other E9 in the picture also had vinyl roof.

Knowing deQuincey he is already shopping for 1000 liters of acid.
 

readie

Well-Known Member
Messages
182
Reaction score
21
Location
kent, england
hi the Don, I am in the uk also, down in kent and was intending to get my car dipped at spl, how did you find the process - painfull overall or not ?
 

The Don

Well-Known Member
Messages
98
Reaction score
5
Location
Solihull, UK
Hi Readie,

Process is surprisingly painless. I am glad I went to see the process initially as Phil & Matt took the time to take me through everything that would happen and even showed me a car coming out of the tank (another E9).

It takes 2 - 3 weeks to get the shell back dependent on how many cars they have in front of you. Actual dipping process is probably only 2-3 days.

They take digital shots of the shell when it arrives and will point out any areas that they think might have an issue with the acid before they start and are happy to show you some of their extensive photo gallery of cars.

If you have not checked them out already www.surfaceprocessing.co.uk will show you their gallery.

I have found them very friendly and would recommend them.
 

readie

Well-Known Member
Messages
182
Reaction score
21
Location
kent, england
thanks for that, I had previoulsy spoken to them and had a good look at their website and am pretty certain that when I get the cash together for a full restoration, this will be the way I will go.

Do you have a website adress or contact details for retro BMW ?
 

The Don

Well-Known Member
Messages
98
Reaction score
5
Location
Solihull, UK
+44 7577 795940.

Tell them Andrew gave you the number.

If you check my post in the Parts section on UK E9 breaking, you will see the car they have to part out, though having talked to them yesterday they have received some lists for items already.

cheers.
 

d-ace

Well-Known Member
Messages
142
Reaction score
1
Location
Santa Barbara CA.
Did a search on acid dipping and look what I found.

“How do I get myself into these things!?!” Boy that is an understatement. Although the final end result you will know you have truly restored and e9 coupe correctly and saved another from the scrap yard a few years down the line. As you have found “It is the only way to really know what you have got.” Once everything is removed and the acid burns all rust out all will see. How did you like stripping the undercarriage and wheel-wells, that’s a fun one. Did you check the rocker panels compartments and other compartments through the small holes where you removed the plastic caps?
When I did my CSI anything that showed rust holes in body part was removed and replaced with OEM BMW body parts (no patchwork) really check what someone did on your coupe at one time.

About “zinc primer” I own an aluminum casting foundry, zinc is one of the lowest non- corrosion materials we never use on anything that will be in contact with water. I seen some imported casting aluminum with high zinc oxidizes quickly years back we use only A-356.1 Aircraft Aluminum USA scale only for rating.
A high-grade of synthetic latex burning into the clean metal works the best for the first coat even in all closed compartments. The synthetic latex I am talking about contains rust modifiers that penetrate deep and tightly bond on steel to seal out air and moisture. Once sprayed on and dry even a sandblaster with 175 pounds of air pressure will not remove it.

Anyhow got to go if you would like to check it out here is a webpage on my CSI and a link on how I restored the CSI it is about half way done writting it. http://shred-master.com/new_page_2.htm

Really glad the see someone else is doing the real restoration work on an e9 I thought it was a lost art on this board after doing about 28 cars of my own that way since the 1960’s, many BMW’s more El Camino’s.

Also a Phosphoric acid tank burn is mostly 7-days with three days in the neutralizing tank.
Anyone ever want to try this I know of a high-end restoration shop that does this kind of work with a Phosphoric acid tank on the west coast (NOT CALIFORNIA).

How’s the coupe coming, these things take a lot of time.

Bob
 
Last edited:

The Don

Well-Known Member
Messages
98
Reaction score
5
Location
Solihull, UK
Thanks d-ace,

Agree on the zinc primer and left it alone. Car has now been acid etch primed inside and out and although lead loading is still to be done on boot/trunk lid instead of filler/bondo, the pinholes that were left in the floor panels will not now be lead loaded as I have decided to put new front floor pans in instead. You can see that one side had previously been patched.


Birmingham-20110920-00176640x480.jpg


I am going with new panels where I can as only need to replace the rocker/sill end panels and rear sub frame replacement mounting panels. Everything else thankfully is OK for minor repairs. The spare wheel well/tub had previously been replaced but will be OK once lead loaded.


Panels have now arrived and this will be the next task followed by seam sealing all overlapping joints. (Has anyone used the 3M sprayable seam sealer?) and then waxoyl into all box sections or whereever we can get to.


I bought the car because it was Polaris but made a 'mistake' of including my wife in the executive decision making on colour choice. It was originally Inka code 22 from the factory, and she has decided that this is the best colour for it!?!!!


Though this is still a fair way off, rather than trying to argue with 'she who must be obeyed', Inka it will be! :oops:
 

d-ace

Well-Known Member
Messages
142
Reaction score
1
Location
Santa Barbara CA.
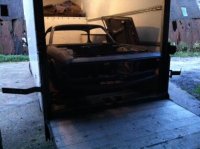
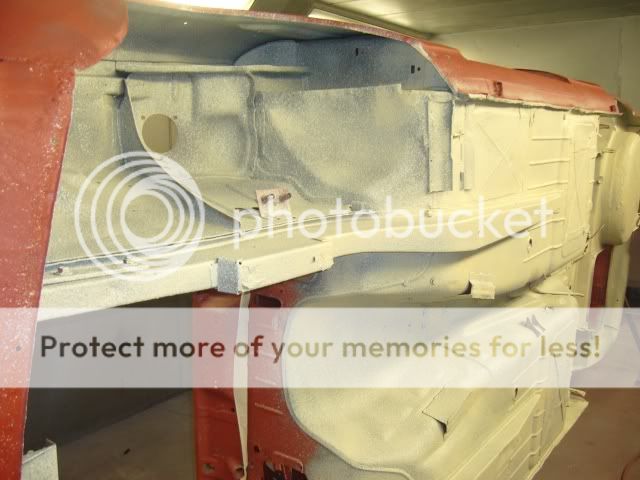
Your project is looking good, although I never flipped one on its side like that before. Should have, we used a lift although after weeks of work standing under there looking up your neck goes off.

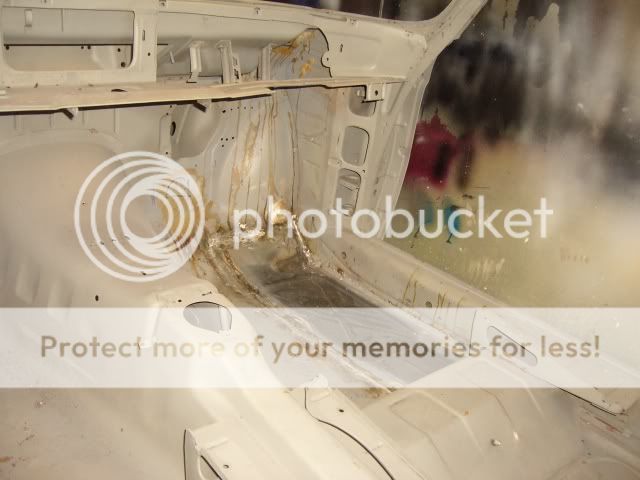
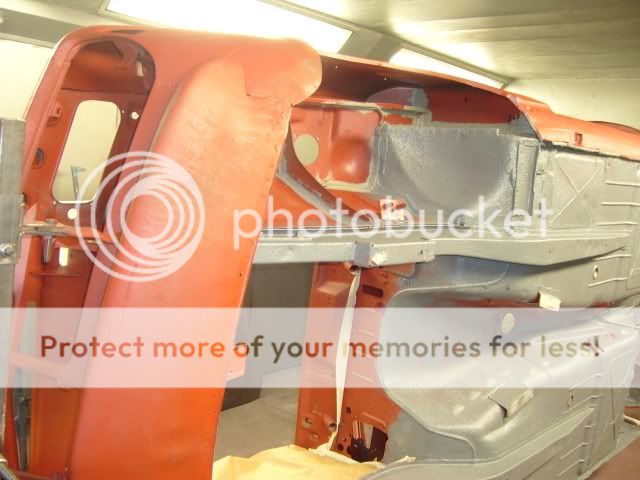
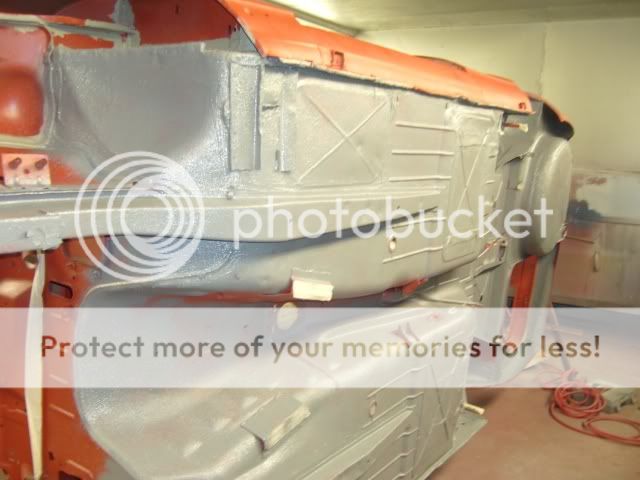
Make sure the second coat in the closed compartments is real good (I did three), otherwise good chance it will just start rusting from the inside out all over again like everone of these coupes did starting 40-years ago>>
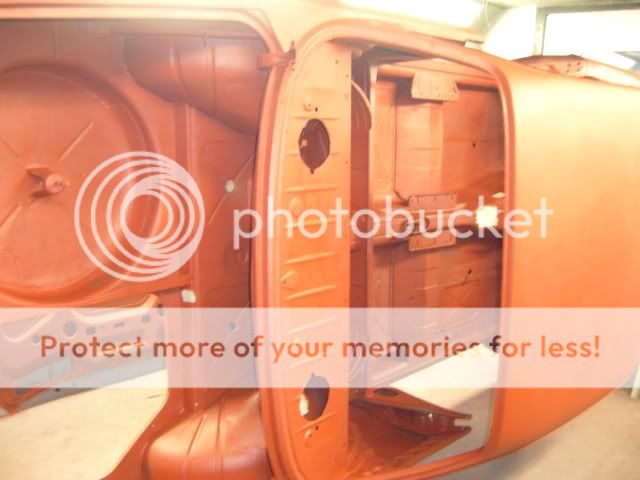
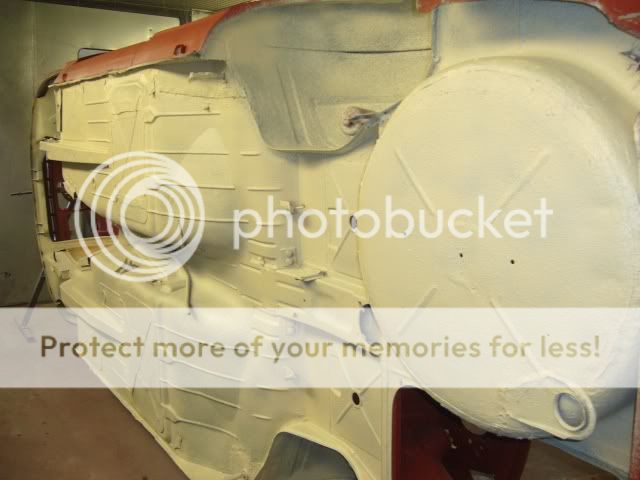
Even after final coating best to check inside with a borescope through the holes where you removed the plastic caps. Here is one for $79 right now after what you have already done don’t short-cut your work, check, check and check again don’t allow the rust cancer to come back >>>
http://www.harborfreight.com/digital-inspection-camera-67979.html .
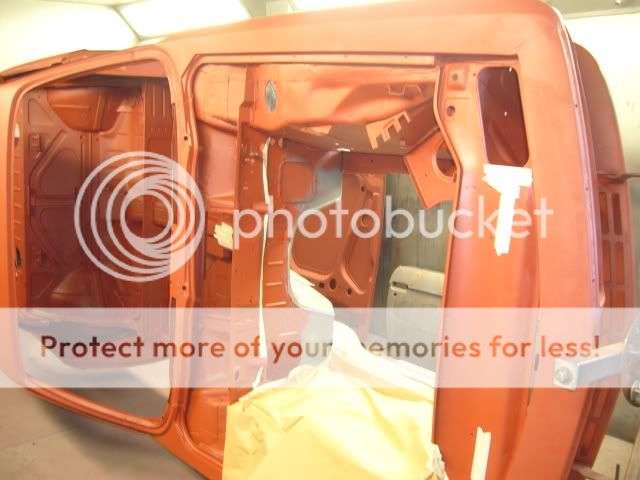
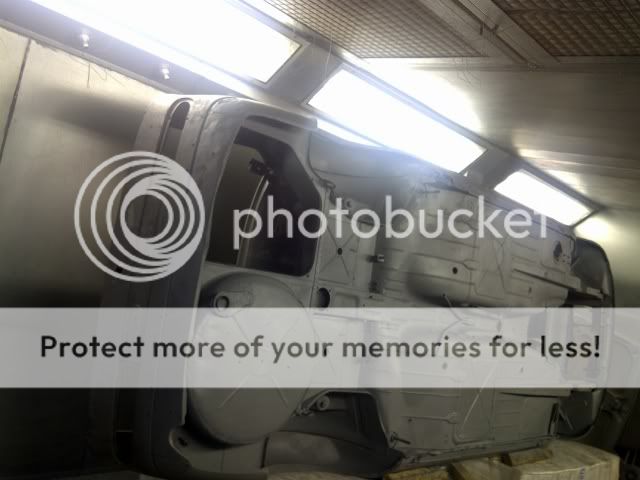
Especially after replacing body parts and spot welding new ones in place.
Check everything, the sup-frame member inside and inside the rocker panels “most important”.
Here is a few more.
Roof post inside especially if it has a sunroof.
Behind the rear seat
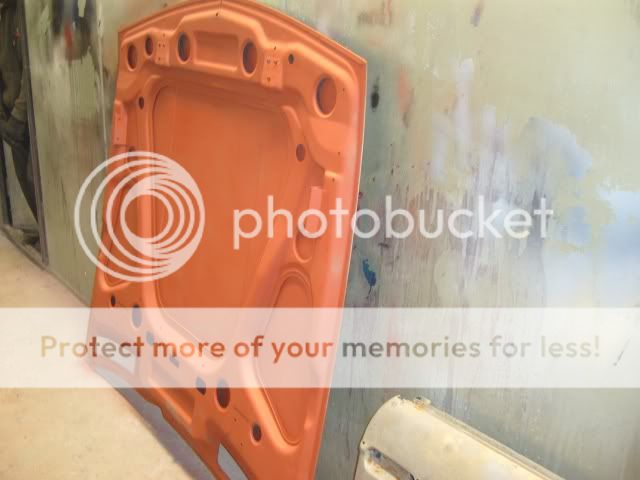
Inside the truck lid
Inside the hood
Doors seams.
And more……..

About the zinc, at work we have old boxes of zinc-plated bolts that are rusted solid in 5-6 years. The OEM bolts on this coupes were cadmium plated and they were rusting in 2-3 years.

Also about as you call it “lead loading”, got to finish the job right its pretty simple if you have not done it before, get out the flux and wooden paddles and go at it. And about the Bondo, as we say in California no Tijuana body coating please.

And I know what you mean about the color every Mercedes-Benz I ever bought over the years had to be emerald green due to my wife, although they did look very good with tan leather.

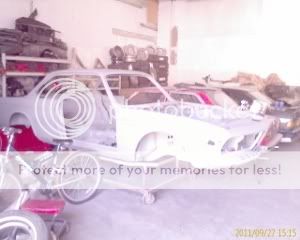
Keep us informed and its going to take time although the end-result is the name of the game. And here its a solid structure and a body that can last another 50 years…..
 
Last edited:

JFENG

Well-Known Member
Site Donor
Messages
3,182
Reaction score
1,398
Location
Bahston (Boston)
Lead versus modern "plastic" filler

I've always been a believer in lead being superior to bondo.
One of our local top restorer agrees. Another local restorer who I used recently swears modern plastic fillers are far superior to lead.

Both agree that either choice needs to be applied over a properly prepped substrate or both will exacerbate the formation of new rust. Lead, in particular, uses an acidic flux which can cause problems on the underlying metal. The best modern, plastic fillers won't help if they're not applied to scrupulously clean base metal.

The guy who swears by plastic over lead did a Pebble Beach best of show car, and has convinced me both types of filler are fine if used sparingly and properly.

John
 

Nicad

Well-Known Member
Site Donor
Messages
3,517
Reaction score
542
Location
Toronto
How did you get it on it's side and what is supporting the side structure? Looks great. Many, many years ago, I got ambitious with my first Corvair. Flipped it on it's side on a bed of old tires, had the bottom sand blasted, drilled 1 inch holes everywhere and fibreglassed both inside and outside. I was thinking this sandwich would last forever. Three years later I flipped the car back upright and the body was not bent. Three years later I towed it to the dump. That was a lot of fibreglass resin going with it.
 

The Don

Well-Known Member
Messages
98
Reaction score
5
Location
Solihull, UK
Thanks for the kind words guys.

car is currently sat on a dolly frame

IMAGE_255300x240.jpg


It would normally be lifted on a ramp, however to prime the underside we had to get creative and, embarrassed as I am to say, we rolled it onto two single beds that a kind householder nearby had thrown out. :)

This allowed us to spray primer it in the booth, rather than the open shop.

We did not leave it like that for long though and got it back onto its frame pronto.
 

paul corcoran

Well-Known Member
Messages
100
Reaction score
1
Location
romford essex
update?

hi don, any update on your project? i got my shell back from spl the other day and its a mixed bag really,,, not sure what to do but come this far and spent a bit already so im going to plough on and have just ordered a rotisserie id love to see where you are at and maybe pick your brains on do's and dont's im sure you have already!! thanks paul
 

Attachments

  • coupe van.jpg
    coupe van.jpg
    40.7 KB · Views: 223

The Don

Well-Known Member
Messages
98
Reaction score
5
Location
Solihull, UK
Hi Paul,

Acid dipping is scary, but glad to hear that you are ploughing on. Keep a mental picture of what the car will look like at the end of the journey or failing that put a picture on your garage wall to keep you going when you really do not want to.

Car now has welding to floor pans and rear subframe mounts completed with new sheet metal from Jaymic.

P1000832640x480.jpg

P1000830640x480.jpg


The lead loading takes a long time but does look good.

Having put the car on its side briefly, I took heed to the questions being asked on here and the car went on a rotisserie to do a proper job.

SPL have been re-contacted for re-dipping and the car is booked in for 5th Jan. After that it is seam sealing, priming, painting and re-fit - sounds a lot when you say it like that!

In the meantime, work on the car has paused, as "she who must be obeyed" insists that all spare money needs to be going on enjoying Christmas with the family.

Still, it allows me to play with a couple of my toys

P1000826640x480.jpg

P1000806640x480.jpg
 

The Don

Well-Known Member
Messages
98
Reaction score
5
Location
Solihull, UK
Update

Car is back from SPL after having its acid re-dip. E-coating would have been ideal but since waiting list is now June/July, have gone back to old school zinc primer.

Car is in the booth on a rotisserie so that it can be flipped over at will.

Seams have been sealed with brushable seam sealer and then covered with 3M sprayable seam sealer. These bags do not cover a large area but finish is tough and excellent. 10 bags have been used so far, but more required to get wheel arches completely covered. Should be completed by Thursday, then its only left to seal the seams in the boot/trunk area and well... everywhere!

After this will be using stonechip in grey or white - Considering using a product called Soudal "Anti Gravel" stone chip after seeing the results on an E30 Sport shell in the shop. Leaves a completely waterproof finish.

Here are some pics taken today
P1000904640x480.jpg

P1000903640x480.jpg

P1000905640x480.jpg

P1000906640x480.jpg

P1000907640x480.jpg


Taking a while but at the end this car will probably last another 40 years :p
 

Peter Coomaraswamy

Well-Known Member
Site Donor $$
Messages
3,787
Reaction score
896
Location
Austin, TX
Scarry!

Stellar work Don,

I have not the brass to put mine up on her side so like many others I am still looking up all day long! I just love seeing these pics and it makes me feel that I'm not so crazy after all (maybe). Of the restorations I have done I think the 3.0 is the most fun; it's quite challenging but things go back pretty well. I'm hoping to have mine done in 2-3 months- I just have to find the right paint and body guy here in Texas, then someone to help with the interior.

I believe you're far from the Lone Star State, but if anyone has any recommendations please chime in.

Really nice though Don, even like the primer color :)
 

frogisland

Well-Known Member
Messages
294
Reaction score
99
Location
Cheshire, UK
Looking good, collecting mine from SPL tomorrow. Oh yes, ecoating, my date is in August!

Your rotisserie, looks like a couple of plates going through to the chassis members? Do you have a photo of the rear connection? Mine is sitting on a large wheeled jig that gets dipped with the car (minus detachable wheels) but needs to go on a rotisserie....although others will be doing the metalwork!

JP
 

paul corcoran

Well-Known Member
Messages
100
Reaction score
1
Location
romford essex
ah jason, you might see my CSI there (odd brownish grey colour) don it looks great spoke to your birmingham guys but think i am going to use a local guy so i can keep tabs, getting the other shell back soon so will decide on which to do first...l

seems we are all doing it properly over here (rotisserie and all) !!! looks fantastic don

jason i have the m30 engine now and its on a stand being cleaned etc a shame but the unidentified gearbox ended up a 260 so id like to go for yours, ill call you as i have a mate up your way this weekend in a van

ill be posting about the new dashboard soon its finished but will veneer it this weekend before posting lhd and rhd!

thanks paul
 

The Don

Well-Known Member
Messages
98
Reaction score
5
Location
Solihull, UK
Hi guys, does the E9 with the bracing/cage inside at SPL belong to one of you?

Frogisland, i forgot to take a photo of the rear attachment of the rotisserie but will do so when I am back at the bodyshop next week. E coating is the real way to go, if you can wait, as shell will be as good as a brand new car for rust protection.

Paul, always good to keep your baby close by!

Today's update sees 3M sprayable seam sealer all over the floor pan and wheel arches/tubs. In addition, the Soudal Anti Gravel stone chip has also been applied. Very pleased with the results.

The underside is ready now but as the anti gravel is white and can be overpainted with colour, just thinking whether I should or not. Any way, once dried the car can be put right side up.

Here is a couple of pics showing the anti gravel stonechip
P1000912640x480.jpg


P1000911640x480.jpg
 
Top