You are using an out of date browser. It may not display this or other websites correctly.
You should upgrade or use an alternative browser.
You should upgrade or use an alternative browser.
Prep for 3.5 Megasquirt
- Thread starter Peter Coomaraswamy
- Start date

Thanks Chris and Barry and Sven, I'm looking forward to completing this soon as I'm anticipating a lot of driving this spring!
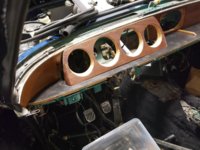
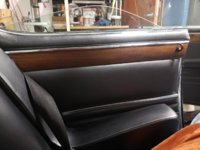
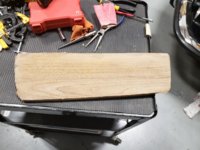
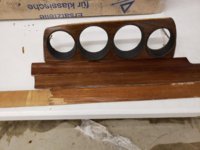
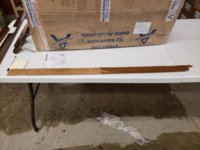
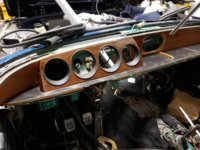
Here are some more pictures of the wood trim, and my take on doing it yourself is that if you enjoy doing this type of stuff it's not that hard, you can (and may have to ) start over a couple of times to get it right- or pretty close. I would say it takes about 10 hours per piece, actually handling the wood-not just the drying of the glue and the multiple coats of poly , but the sanding, and staining and gluing and bondo-ing, and dremmeling, etc. so I'll leave that up to the individual, but figure 40-60 hours for the entire trim plus Xanax.
Even though I used wood from the same package and the same staining method, there are differences in the wood color so that's something you will have to deal with. Also the "blanks" are the priceless pieces, you can see where I had to glue two pieces together because I didn't have a good enough driver side trim blank- but when the veneer is done it should be unnoticeable.
Even though I used wood from the same package and the same staining method, there are differences in the wood color so that's something you will have to deal with. Also the "blanks" are the priceless pieces, you can see where I had to glue two pieces together because I didn't have a good enough driver side trim blank- but when the veneer is done it should be unnoticeable.
Attachments

Peter,
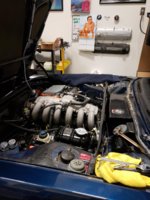
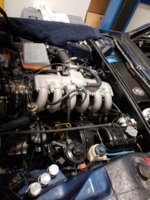
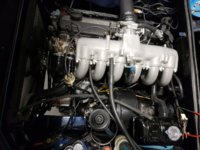
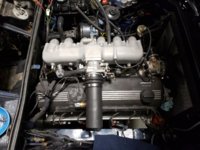
here's mine, not a megasquirt system (ecumaster), but comparable for the requested enviroment (sensors and stuff).

I wanted to have the genuine csi - airfilter box to have a more genuine look. Originally it was a motronic engine with the "modern" one piece intake manifold. Suits now perfect for my own taste.")
here's mine, not a megasquirt system (ecumaster), but comparable for the requested enviroment (sensors and stuff).
I wanted to have the genuine csi - airfilter box to have a more genuine look. Originally it was a motronic engine with the "modern" one piece intake manifold. Suits now perfect for my own taste.
Peter,
Check out Mike Burger’s setup.
Check out Mike Burger’s setup.
Just finished Jabberjaw- ask Chuck for a pic
Arnie, Very nice!!
My exhaust is stock to I installed the O2 sensor just aft of the first silencer in the spot where the middle muffler would go if I hadn't cut it out. Installed at 10 o'clock with wrench access per Sven's note.
Belgiumbarry
Well-Known Member
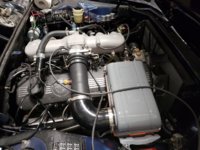
yes , i see something : no carbs ! 
RAL 7022 for your air cleaner please.
Thanks Chris, I am going to celebrate with a pint of RAL 7022 as soon as she successfully makes her maiden voyage!
Next question, When using a "staked distributor", what do you use in place of the pin that gets drilled out of the gear shaft? and is it ok to have about 1/8 inch play up and down??
Thanks!
Next question, When using a "staked distributor", what do you use in place of the pin that gets drilled out of the gear shaft? and is it ok to have about 1/8 inch play up and down??
Thanks!
You will always have a bit of up and down movement due to the gears meshing. I had a dizzy shop stake, I assumed a tiny spot weld?
Thanks Chris, I welded the centrifugal portion just can't seem to find the correct pin size for the shaft & gear. A weld would work for sure-
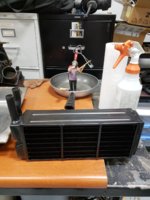
A little update, waiting for the fuel tank sending unit and the heater core so I can put everything back together- this week I hope- Once I crank her over a few times and check all her vital fluids I will send don a ticket on the "greyhound of the skies", southwest, so he can do his special tuning. I will attempt to document this epic saga on video media- no rights reserved... Ian, please visit!
I wanted to post a picture of something (once installed) I hope to never see again!
I know what you want me to look at. It isn’t what I am looking at though.
Last evening I filled the cooling system and pressure tested it with my handy STANT pressure pump (another must-have gadget). Of course there were the plugs on top of the thermostat housing that I forgot to tighten, but once I cleaned up that little mess she help perfectly. Next step, total brake fill and bleed- clutch too