skin exchanges started

arnie

Well-Known Member
Messages
222
Reaction score
69
Location
Germany
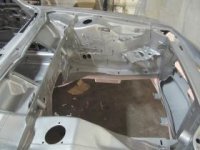
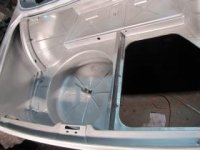
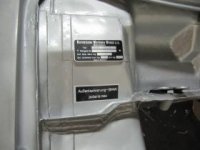
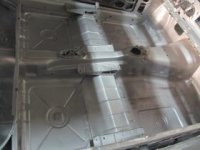
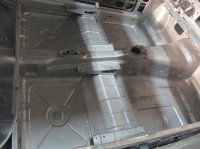
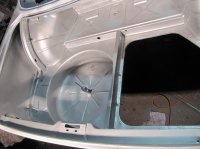
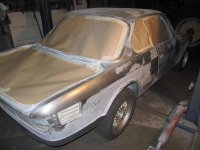
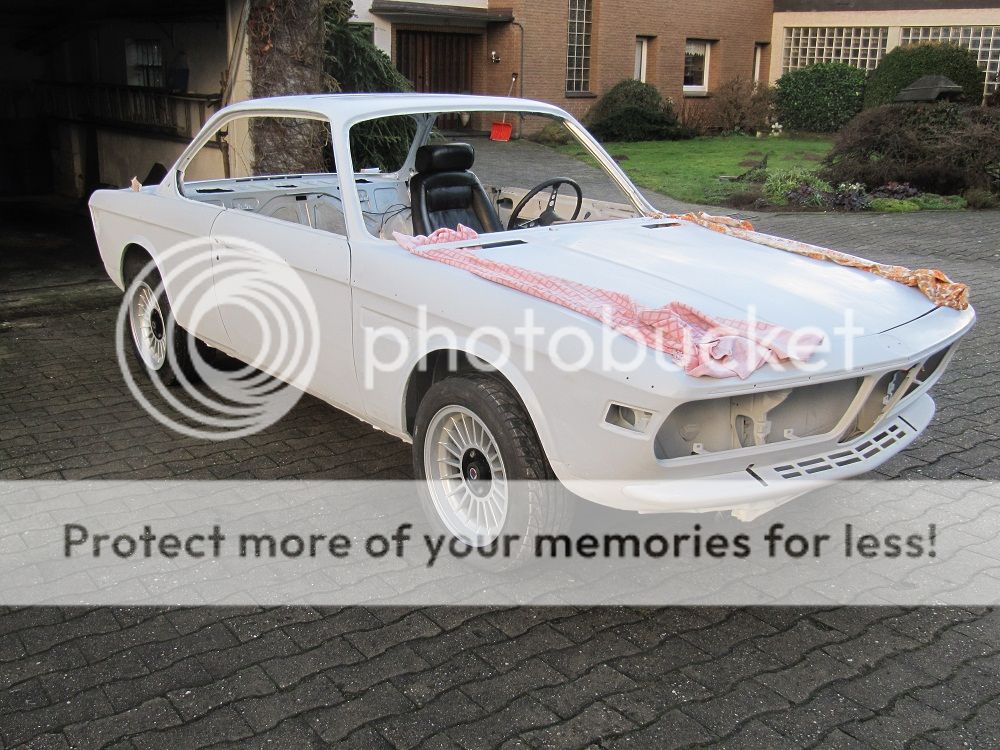
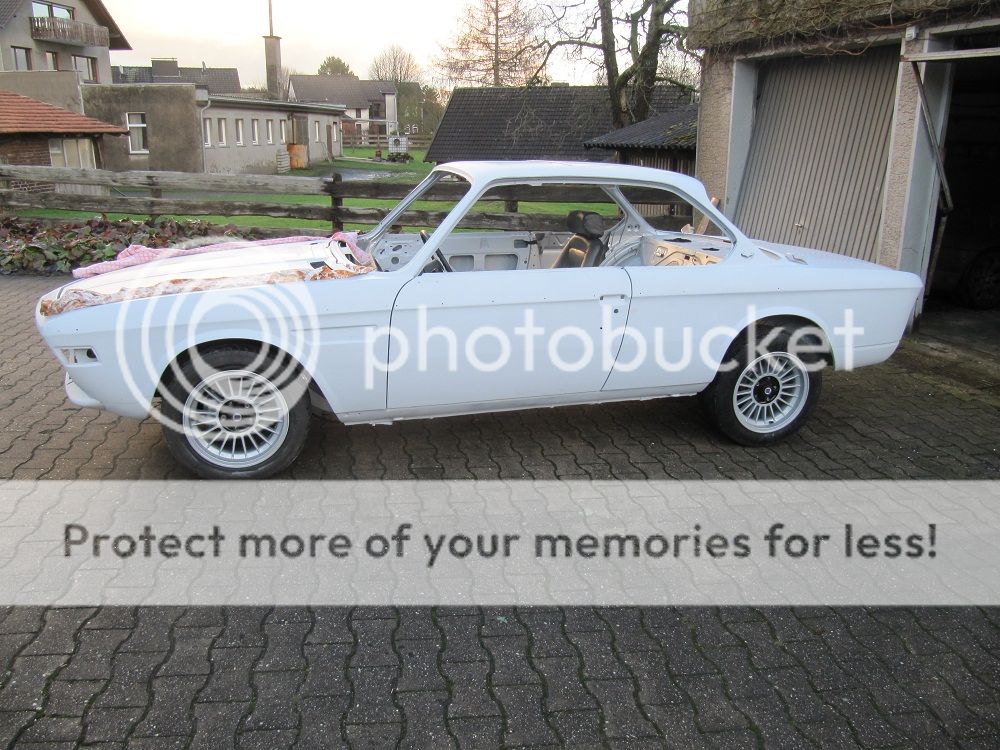
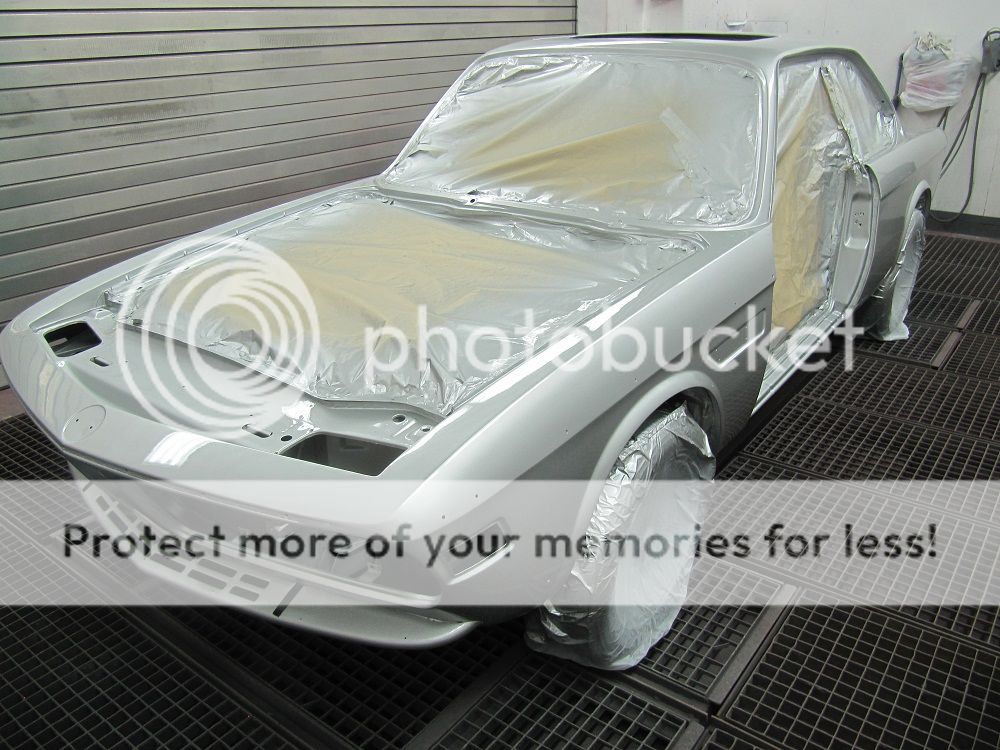
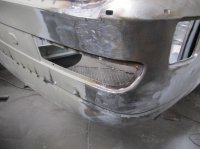
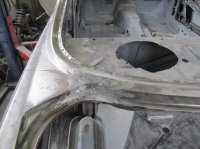
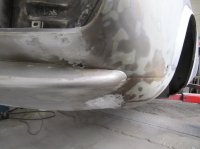
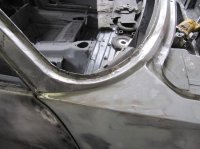
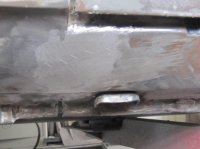
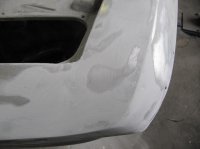
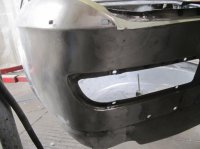
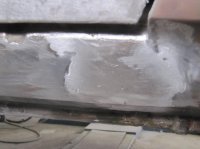
as next steps I decided in the meantime not only to close the remaining gaps and dents of the body with plastic filler. Prior to this I tried to tin the transitions and weldings as good as possible, because this was the first attempt for me.

It worked out very fine so far. Of course the majority of the 4 Kilos I needed was to tin the floor of my garage :-D but in fact there was luckily also some stuff remaining on the desired spots.

This process costs at least more than 10 hours work, but I find it worth at the end. The result is, that there's only a thin layer of filler needed and the spots are getting a good rigidity against twist or vibration, so that there's no higher risk of cracks in the paint later on - I hope so. :???:

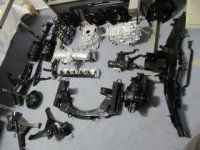
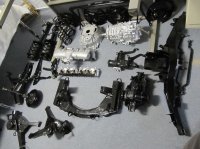
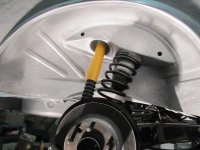
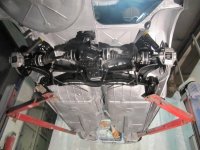
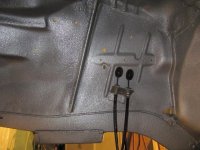
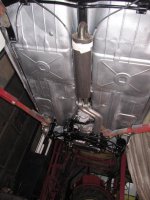
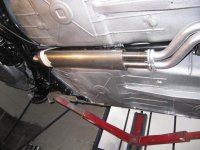
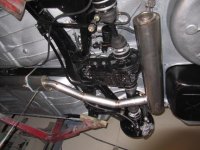
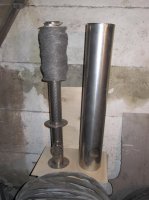
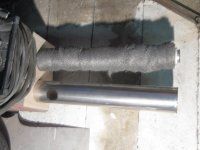
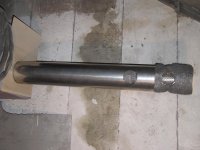
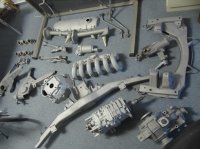
In the meantime I also disassambled and sandblasted the complete suspension and transmission together with some engine parts.

I originally planned to have most of these parts powder coated, but decided to paint them instead by myself with 4 layers (Brantho Nitrofest, 2K-sprayfiller, black or aluminium colourlayer and clear coat). Should be sufficient resistent for everything and I had the complete process in my own hands.

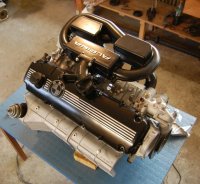
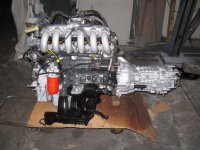
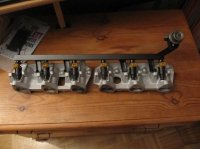
Also in the meantime I started the exchange of the intake manifold from my motronic engine to the old and more original look.
Target was to keep as much as possible from the existing parts. I got a complete manifold of a 633 csi engine from a wrackyard for a good price and found out, that there's already an engine existing which is using the lower piece of the old manifold in combination with the motronic injectors. A buddy gave me this hint, that the Alpina B7 Turbo in an E28 chassis is doing like this. They just add their own upper manifold together with a specific fuelrail and pressure regulator.
There was also coming a lot of informations for this exchange from Don, special thanks again to him. It's absolutely unbelievable how helpful some of you guys out there are !!!

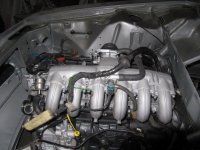
My final approach now is to modify just the fuel rail of my engine. The presure regulator had to be moved and the holders needed a certain change. The result is also shown in the attached pictures. The throttle has also to be a little bit modified, but wasn't also a big deal. Now I'm only in the need of some customized hoses for the idle valve and then I'm optimistic, that the machine's able to run when it goes back to the car.

So far for the moment

cheers

Ingo
 

Attachments

  • IMG_3461.jpg
    IMG_3461.jpg
    72.6 KB · Views: 290
  • IMG_3463.jpg
    IMG_3463.jpg
    89.4 KB · Views: 299
  • IMG_3456.jpg
    IMG_3456.jpg
    61.6 KB · Views: 289
  • IMG_3459.jpg
    IMG_3459.jpg
    89.9 KB · Views: 291
  • IMG_3468.jpg
    IMG_3468.jpg
    60.8 KB · Views: 309
Last edited:

arnie

Well-Known Member
Messages
222
Reaction score
69
Location
Germany
some more pics
 

Attachments

  • IMG_3457.jpg
    IMG_3457.jpg
    55.7 KB · Views: 326
  • IMG_3462.jpg
    IMG_3462.jpg
    63 KB · Views: 295
  • IMG_3471.jpg
    IMG_3471.jpg
    55.5 KB · Views: 323
  • IMG_3548.jpg
    IMG_3548.jpg
    93.2 KB · Views: 351
  • IMG_3550.jpg
    IMG_3550.jpg
    76.6 KB · Views: 329

Nicad

Well-Known Member
Site Donor
Messages
3,517
Reaction score
542
Location
Toronto
Amazing productivity Ingo, Looks like you have a car again. . You must have a Big Blast cabinet with some power. Did you take any precautions about the Media getting by the seals on the tranny and diff? I blasted my diff, and used hot glue to seal the openings, but am not convinced some glass bead didn't get in anyway. For small parts you might want to look into cheap powder coating systems like Eastwood has. Very inexpensive, tons of colours and the parts are good to go in 20 minutes of curing. My system cost $50 for the Oven and $120 for the Gun (it's now $169) but their basic one which probably works the same is now only $69.

http://www.eastwood.com/original-hotcoat-powdercoating-gun-1.html
. It's kinda fun once you get the hang of it.

Since you obviously know your way around paint systems, sticking with what works makes sense as well. I can see you like doing stuff "In House".
Looking forward to seeing what finish you give the Aluminum parts and the final paint on the body. Keep those great shots coming!
 

arnie

Well-Known Member
Messages
222
Reaction score
69
Location
Germany
to be honest I sourced out the sand blasting and I didn't do anything as prevention to the tranny and diff. :( I really hope, that there'll be no revenche later on. I'm not that anxious regarding their seals but of the breathers instead. OK, I can't change it now. It still runs apparently very smooth without the literally sand in the gearbox :). Will change the oils anyway and pray.

The final finish of the aluminium parts you can see on the picture with the fuel rail. It's aluminium paint coming in a spray can, covered with 2K clear coat.

Looks quite good to me.

I really do like doing things myself "In House", but there are some certain border lines. The real paint job will be sourced out also. Probably I can arrange it to do minor jobs prior and during all the preparations. I really would appreciate to learn from the Pros. All the inner rooms and under the floor I'll spray in my garage.

There are for sure very interesting tools for the restoration of cars, which I'm still after, but I need to keep an eye on my budget and so I still do a lot of work arounds. In fact only there, were my personal judge is still fine with it. :lol:

Hope to get it painted around turn of the year. Some issues left on my list to be solved in advance.

Ingo
 

Nicad

Well-Known Member
Site Donor
Messages
3,517
Reaction score
542
Location
Toronto
That Aluminum looks Great. I am playing around with a couple of finishes for mine. So far I am leaning to clear satin powder over fresh bead blasted Al. It looks nice, but wondering what the cars originally came with? I'd like to experiment with a Silver/ Clear finish too.
Does anyone know what finish the high end restorers like CoupeKing, and VSR use on their aluminum components?
 

Stevehose

Well-Known Member
Site Donor $$
Messages
13,004
Reaction score
5,679
Location
Sarasota, FL
I am testing a product called Shark Hide on my recently beaded aluminum (aluminium?) engine components to seal in the nice clean look - so far it still looks good after a month but we'll see...

That Aluminum looks Great. I am playing around with a couple of finishes for mine. So far I am leaning to clear satin powder over fresh bead blasted Al. It looks nice, but wondering what the cars originally came with? I'd like to experiment with a Silver/ Clear finish too.
Does anyone know what finish the high end restorers like CoupeKing, and VSR use on their aluminum components?
 

Sven

Well-Known Member
Site Donor $
Messages
1,145
Reaction score
110
Location
Seattle
Fuel rail & valve cover

Ingo - How are you making that fuel rail work with those manifolds? The manifold cups are 90° to the rail but the seats on the aluminum stubs are off perpendicular by 10°. Are you re-drilling the bottom of the aluminum seats to to allow the injectors to sit at 90°?

Also, did you remove the steel plate that is riveted to the underside of the valve cover? This is a highly recommended, since you sand blasted the cover and there is no way to clean out this area without removing the panel. It is usually gunked up with old oil and traps the sand/media.

The lead work looks good.
 

arnie

Well-Known Member
Messages
222
Reaction score
69
Location
Germany
Sven, if the fuel rail will work, I'll see. Due to the existance of that Alpina assambly it has to work somehow. See attached picture, what I found at the stancework site (if I remember that right).
Relying on the spare part catalog they are using just the regular BMW lower manifold together with regular injectors (which are also mounted in the 745i for example). I also doubted, that this can work out without any changes to the seats.
I attached the holders for the fuel rail in a position, that the screws are giving a certain pressure to the O-ring in the injector seat. If this fails, I need to modify the seats of course. But I'll try it this way first.

To your 2nd hint: No, I didn't do it yet, but this will also follow after I heard a lot of nightmares around sand blast stories

It looks nice, but wondering what the cars originally came with?
Bob,

it seems to me, that there's nothing on it originally but raw aluminium.

I also clear coated a new water pump, which my engine needed, without spraying that aluminium colour first. Looks not that nice to me - some kind of more stainless steel look. But OK, I'll keep it this way.

Ingo
 

Attachments

  • 7vVrM.jpg
    7vVrM.jpg
    88.8 KB · Views: 325

arnie

Well-Known Member
Messages
222
Reaction score
69
Location
Germany
Ok guys,

things were moving on in the meantime:

- sprayed a lot of bits and pieces and some areas of the body already
- repaired the wiring harness and installed it back to the car (nice effects if you mismatch the 9 pin connector for combi switch of turn signal/wiper with the one for the gauge panel btw. - was able to switch on the far shining lights (is that the correct word for it ?) with the wiper switch :) - made me sweat a bit)
- subframes, engine and transmission, complete brakes and steering went back in also

Have now more or less three weeks of vacation and hope to get the paint job done in this period.

I'm already pretty satisfied with the results so far and if it wouldn't be mine I would be jealous :lol::lol::lol:.

Some pics attached

Greetings

Ingo
 

Attachments

  • bth_IMG_3554_zps4a2e6d55.jpg
    bth_IMG_3554_zps4a2e6d55.jpg
    14.2 KB · Views: 270
  • bth_IMG_3591_zps3e13ee5c.jpg
    bth_IMG_3591_zps3e13ee5c.jpg
    11.6 KB · Views: 266
  • bth_IMG_3594_zpsa5792385.jpg
    bth_IMG_3594_zpsa5792385.jpg
    10 KB · Views: 261
  • bth_IMG_3593_zpsc12e5dcd.jpg
    bth_IMG_3593_zpsc12e5dcd.jpg
    8.6 KB · Views: 257
  • bth_IMG_3598_zpsc28b0384.jpg
    bth_IMG_3598_zpsc28b0384.jpg
    9.9 KB · Views: 244

arnie

Well-Known Member
Messages
222
Reaction score
69
Location
Germany
sorry for the poor resolution of these pictures (I didn't recognise that).

Here they are coming again
 

Attachments

  • IMG_3554_zps4a2e6d55.jpg
    IMG_3554_zps4a2e6d55.jpg
    94.7 KB · Views: 298
  • IMG_3591_zps3e13ee5c.jpg
    IMG_3591_zps3e13ee5c.jpg
    83.9 KB · Views: 308
  • IMG_3598_zpsc28b0384.jpg
    IMG_3598_zpsc28b0384.jpg
    73.2 KB · Views: 298
  • IMG_3594_zpsa5792385.jpg
    IMG_3594_zpsa5792385.jpg
    73.8 KB · Views: 271
  • IMG_3593_zpsc12e5dcd.jpg
    IMG_3593_zpsc12e5dcd.jpg
    71.1 KB · Views: 277

arnie

Well-Known Member
Messages
222
Reaction score
69
Location
Germany
and some more
 

Attachments

  • IMG_3588_zps54a67340.jpg
    IMG_3588_zps54a67340.jpg
    94.2 KB · Views: 339
  • IMG_3586_zps1e154ae1.jpg
    IMG_3586_zps1e154ae1.jpg
    92 KB · Views: 331
  • IMG_3590_zpsdf125a1c.jpg
    IMG_3590_zpsdf125a1c.jpg
    95.9 KB · Views: 338
  • IMG_3599_zps07a8c88d.jpg
    IMG_3599_zps07a8c88d.jpg
    93.7 KB · Views: 409
  • IMG_3602_zps1092477e.jpg
    IMG_3602_zps1092477e.jpg
    91.3 KB · Views: 388

Nicad

Well-Known Member
Site Donor
Messages
3,517
Reaction score
542
Location
Toronto
Home stretch Ingo. Well done, You will be driving in Spring. I hope we get a Video!
 

arnie

Well-Known Member
Messages
222
Reaction score
69
Location
Germany
next steps:

since 2 days she's back on her legs - so, mechanically everything is more or less done. :D

engine's back alive 2 days earlier. That was such a thrill to do all the attempts to start it. Very difficult to describe the feeling when it began to ran. The mod with the intake manifold worked out perfectly. engine runs exactly the same like before, nothing is leaking or not working properly. :roll::roll::roll::roll:

It was a little loud just with the B10 downpipes as the exhaust and therefor I also build up my custom made stainless steel exhaust system.

The components for it were about 350,- €. Because it could probably interesting in some way, I made some step pictures of the building of the end muffler (The middle one was bulid the same way). Outer skin was coming from a stainless steel chimney pipe with a diameter of 130 mm for both mufflers. The middle one got his eliptic shape very easily by pushing (wall thickness around 0,8 mm).

middle muffler tubes intakes are 50 mm outer diameter. The single one, which is coming out is of 65 mm outer diameter, which is also the diameter through the end muffler until the end tip.

Sound is allready not to bad, although at the moment I just spot welded everything (waiting for stainless steel welding material) and all the connections and mufflers are still leaking. I can't wait to hear the sound when it's completely welded.

Next step is the preparation for the paint job. It's the first time (beside the sand blasting) that I get help from a buddy, who's doing all the nice filler and sanding work over the next coming weekends. Will be hopefully done until end of January. So the paint will be approximately in February.

cheers

Ingo
 

Attachments

  • IMG_3614.jpg
    IMG_3614.jpg
    82.8 KB · Views: 307
  • IMG_3615.jpg
    IMG_3615.jpg
    90.7 KB · Views: 293
  • IMG_3606.jpg
    IMG_3606.jpg
    93.6 KB · Views: 291
  • IMG_3607.jpg
    IMG_3607.jpg
    94.7 KB · Views: 302
  • IMG_3613.jpg
    IMG_3613.jpg
    90.2 KB · Views: 318

arnie

Well-Known Member
Messages
222
Reaction score
69
Location
Germany
and the pix from the muffler build :razz:
 

Attachments

  • IMG_3608.jpg
    IMG_3608.jpg
    89.2 KB · Views: 271
  • IMG_3611.jpg
    IMG_3611.jpg
    103.3 KB · Views: 249
  • IMG_3612.jpg
    IMG_3612.jpg
    108.2 KB · Views: 255

arnie

Well-Known Member
Messages
222
Reaction score
69
Location
Germany
now she's ready for paint.

It took me about 4 weeks doing all the filler and sanding operations completely by myself. This was a pretty tough step in the restoration process, because I wasn't very used to it. But needed to go through, because my help ( support from a professional painter) kicked me in the a.. :evil: (I don't know how to subscribe it any other way).

Normally this week the paint should take place, but first I got a flu last weekend and wasn't able to prepare anything for the scheduled transport on Monday and then my painter got the same thing on Wednesday, the re scheduled pick up appointment.

Now I hope to get that step done next week. Here are some status quo pics:

IMG_3698_zps43a20ffc.jpg


IMG_3697_zps74848be8.jpg


IMG_3700_zps3febc3f3.jpg
 

Nicad

Well-Known Member
Site Donor
Messages
3,517
Reaction score
542
Location
Toronto
I guess the next shot will be in shiny Polaris. Hopefully the stars align on the day the paint is put down.
 

arnie

Well-Known Member
Messages
222
Reaction score
69
Location
Germany
right guess Bob. Yesterday she got her Polaris suit and looks rather nice in it :p

IMG_3722_zps97d6deb5.jpg


IMG_3719_zps87e50d7d.jpg


IMG_3724_zps7d420d86.jpg


IMG_3727_zps92a29fbf.jpg


IMG_3729_zpsa1f51a80.jpg
 

m_thompson

Well-Known Member
Messages
780
Reaction score
141
Location
Rhode Island
It looks great, but...

With a metallic paint I would never paint the doors, hood, and trunk separately from the body. There is too much risk that the metallic content in the two paint batches is not exactly the same and the color will look just a little different.

I hope that it turns out OK.
 
Top