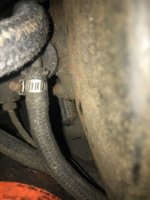
Well, if it was me, I would first make sure the fitting clamps are secure and tight. And be certain that all brakes were bled correctly. Are you losing fluid, but don't see any leaks? Is there any white smoke from the exhaust? These are signs of internal brake servo failure. If not, I would think a new master may be a next step. But please wait for some other comments to help guide you. A new brake master cylinder is never a bad idea on a car from the seventies, I mean we often do not know if it has ever been replaced. Good luck Haseeb and keep us posted. 
You are using an out of date browser. It may not display this or other websites correctly.
You should upgrade or use an alternative browser.
You should upgrade or use an alternative browser.
(update again it drove!)Guess who can’t tune
- Thread starter Haseeb
- Start date
Wait Haseeb -- don't replace the entire brake booster. There is a small, inexpensive check valve in the brake booster line. If this has failed you will have a vacuum leak in your carbs. Also, looking at the condition of your vacuum line, I would replace that too. I believe the part number on the valve is
34331151533; this was used on a bunch of BMWs. OEM hose is 12x19, but I replaced mine with 12x18.5 from Belmetric: https://www.belmetric.com/braided-metric-hose-oem-c-14_138/rh12-braided-hose-12mm-p-954.html. Do these things first.
Sometimes boosters can fail and be the source of a leak. If you need a booster after those fixes, I have the one I removed from my car sitting on the shelf.
Belmetric doesn’t have the wire reinforced hose any longer though.
I had the same carb vacuum leak issue from the brake booster when getting my car going, just got a replacement hose from the O'Reilly by my house and cut it to size, was no big deal and took care of the problem. Try that first, hopefully that's it.
I only read the original post and skimmed through the rest. First thought was a large vacuum leak. When I mess with carbs the first thing I do is eliminate vacuum leaks. Any work done without knowing if there's a leak is wasting time. Carb bases, throttle shafts, booster line (as mentioned), anything that can contribute to a leak needs to be checked and crossed off the list.
I've owned 40+ BMW's over the years, mostly 2002's, and the first thing I do when I get the car is check for vacuum leaks and adjust the valves. For whatever reason, as important these things are to the engine running well it seem to be done wrong most of the time. I bought a '76 2002 that ran horrible but was in amazing condition. 1976 and newer vehicles require a smog test in CA. I flattened the bottom of the carb to fix a big leak and adjusted the valve that had been turned down to reduce noise (I'm guessing) and the car ran awesome and pass smog.
I've owned 40+ BMW's over the years, mostly 2002's, and the first thing I do when I get the car is check for vacuum leaks and adjust the valves. For whatever reason, as important these things are to the engine running well it seem to be done wrong most of the time. I bought a '76 2002 that ran horrible but was in amazing condition. 1976 and newer vehicles require a smog test in CA. I flattened the bottom of the carb to fix a big leak and adjusted the valve that had been turned down to reduce noise (I'm guessing) and the car ran awesome and pass smog.
Last edited:
Remove the booster vacuum line and cap it at the manifold. Tune and synch carbs to your satisfaction. Find leak in booster-hose or check valve as Ohmess mentioned.
Haseeb
Well-Known Member
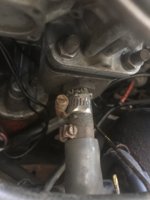
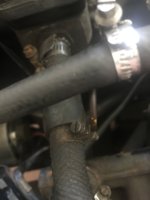
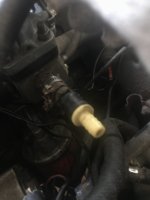
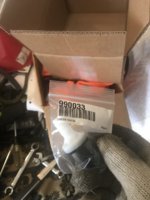
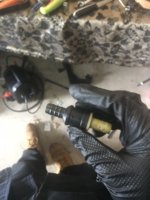
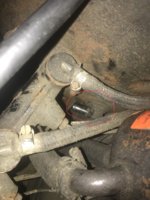
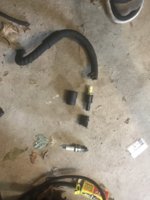
Some progress today! I took out the old cloth vacuum line (or the booster line I think it’s called) and the check valve that was in it. It was pretty tough to get out but the belmetric line you guys recommended fits perfectly. Here are some photos of the old line and check valve, the new one check valve I’m about to install, and the red part circled is where the line connected directly to the brake booster which I did not replace (dunno if it’s needed). Does the last picture look right to you guys? That’s how the previous owner had his set up and I’m gonna do the same thing, I’ll start with the booster line connected at the manifold, I’ll cut it up into 2 pieces and put the check valve in between those two pieces, black side towards the manifold and white side towards the brake booster (I’ll also find a larger rubber line to go over it and put zip ties to prevent any leaks, and then it just goes straight back to the booster (the circled red part). Am I doing it right? After this I’ll rebleed the brakes just in case and hopefully that’s all there is too it!
Attachments
-
 D595BC41-8548-442F-9DFE-C0BB8F7F9A4F.jpeg201 KB · Views: 280
 -
 517C3B2F-401C-410F-8DC8-DA579CB422D2.jpeg137.7 KB · Views: 272
 -
 43697B03-4606-446C-BFF0-D6BD73EC2745.jpeg136.9 KB · Views: 226
 -
 6C521F8F-0DDA-46EC-AAD9-91D29B368879.jpeg193.7 KB · Views: 279
 -
 132C985C-3474-4C9C-8F36-8605B9CC8253.jpeg197.8 KB · Views: 261
 -
 E84F227E-233C-4026-A5D0-BBB57672AF63.jpeg311.1 KB · Views: 298
 -
 1C8D98E6-E774-44C2-9D75-22A33B4BAADC.jpeg320.7 KB · Views: 280
Give yourself a little more room between manifold and check valve, hose is pretty short. You don’t need a rubber cover over it. The elbow at the booster has an o-ring under it, just make sure the elbow is tight to the booster.
Haseeb
Well-Known Member
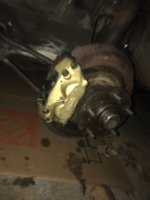
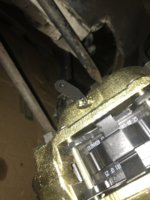
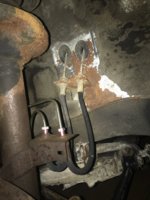
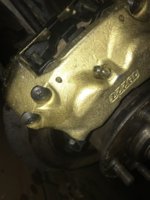
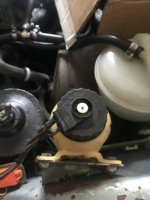
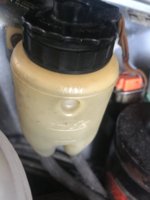
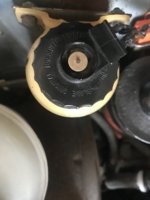
I’ve changed the brake booster vacuum line, added the check valve, and now I’ve bled 3/4 calipers. The only problem is when I tried bleeding the very last one, the driver side front, virtually no fluid would come out no matter how much I loosened the bleeder screw. Oddly enough on the more I loosened the inner screw the tighter the brakes got according to my friend inside the car (which he said had incredible resistance at times). The caliper and pads are brand new, and the metal brake lines are new as well, the only thing that isn’t are the 2 hoses but they didn’t seem in to be in bad shape. On a side note, looks like my brake reservoir cap has suffered a crack
Attachments
-
 A5FABF3E-3625-4C8D-A0F1-504E4030CEF1.jpeg115.8 KB · Views: 291
 -
 6641BFBD-97A5-452F-8015-7B8F9914B833.jpeg246.2 KB · Views: 229
 -
 1F8A70B9-F505-4159-9E5D-51E84B9996BE.jpeg329.1 KB · Views: 332
 -
 23F065C9-29DE-40FC-8309-B3A8CE9304C3.jpeg342 KB · Views: 281
 -
 55CC312C-F5CE-4897-8B9C-211672C45A6F.jpeg186.2 KB · Views: 216
 -
 E3797DC6-1CC4-4125-9B14-F6E353AE8CFC.jpeg190.9 KB · Views: 291
 -
 71F287EB-2FE0-43DF-83CE-DCFFD2BBEE00.jpeg169.3 KB · Views: 248
The rubber hoses look old, they have a date on them, see if you can find it.
Haseeb
Well-Known Member
Just changed the hoses for some new ones I bought from jminj I bought a while back, should I rebleed just this caliper or do I need to restart the whole process?The rubber hoses look old, they have a date on them, see if you can find it.
Attachments
No fluid comes out of any of the three bleeder screws? Always do the inner one first, then lower and finally upper.
Haseeb
Well-Known Member
You were right on the money with the hosesNo fluid comes out of any of the three bleeder screws? Always do the inner one first, then lower and finally upper.
Haseeb
Well-Known Member
Here’s a video of me testing it out! (Engine was warmed up)
Now from what I can see, it seems the stalling issue is no longer there, although if I pump it enough the times the rpm will still go pretty low (that’s probably normal) but now the brakes are incredibly soft, I have to go all the way down to get it to stop and I don’t think it would stop if the car was going anymore than 5 miles an hour. The calipers, pads, rotors, and the first set of metal lines from each caliper to the hose are new. I’m not quite sure what it is, I put papers below the car to detect leaks but I haven’t seen any so far. I did see a lot of white smoke coming out the exhaust when I turned on the car which took a while to start today. Really not sure what it is now, maybe I bled it wrong?
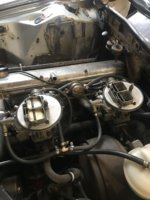
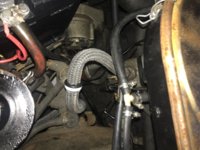
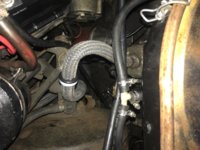
Some photos of the the brake booster vacuum line and the carburetor before I put the air filter on. The lower part of the brake booster vacuum line seems a little loose because it was hard to clamp down, but I don’t think that’s why the braking is so soft. Any thoughts guys?
Important Edit: Those papers showed me a leak on the front driver side! It looks like one of the hoses got loose. I’m gonna bleed it (just this caliper) again and give it another go
Attachments
Last edited:
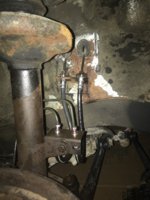
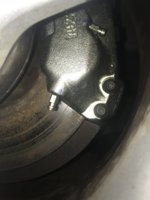
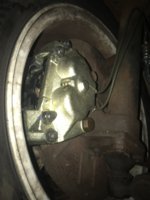
Is that the front left caliper picture?
Is it the correct calliper?
Blenders I thought should be up on top?
I may be incorrect.....
Is it the correct calliper?
Blenders I thought should be up on top?
I may be incorrect.....
Haseeb
Well-Known Member
As far as I know I think it’s the right oneIs that the front left caliper picture?
Is it the correct calliper?
Blenders I thought should be up on top?
I may be incorrect.....
Are the bleeders on the passenger side facing up or down?
Haseeb
Well-Known Member
Latest update: So I bled that front driver side again and now this is becoming really strange. When the car is off, I feel plenty of resistance in the brake pedal. When it’s on, there is virtually no resistance. Strangely enough the engine also briefly stalled while want I gotta up without me touching anything, and even when I pressed The hasn’t pedal it didn’t respond. 5 minutes later I tried again it started up fine. :confused: Colour me very confused...
Also for mot27, this is the caliper on the right (passenger) side front. The bleeders (3 of them) are all facing down. Is that normal?
Also for mot27, this is the caliper on the right (passenger) side front. The bleeders (3 of them) are all facing down. Is that normal?
Attachments
Last edited:
I beieve they should be aiming upwards......air upwards.
Wouldn't they be aiming upwards if you switched sides with them?
Wouldn't they be aiming upwards if you switched sides with them?
Last edited:
Real OEM should be showing two part numbers....left and right
Check that and your part numbers
Check that and your part numbers

