(update again it drove!)Guess who can’t tune

Haseeb

Well-Known Member
Messages
255
Reaction score
74
Location
Piscataway, NJ
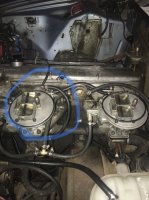
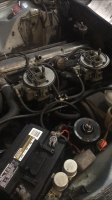
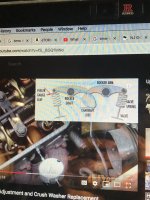
ahh well some good news here! I did as stphers advised and I hear clicking from both connectors when I plugged them into their respective carbs! I left the set up as it is in the video, so (hopefully) that was the correct one. In the meantime I ordered a new ignition coil, new fuses, new distributor cap, and might get some new relays as well (there are good deals on Bavauto). Now, to figure out how to put an engine in TDC, which is a 1st time for me.Will continue with updates!
 

stphers

Well-Known Member
Messages
1,049
Reaction score
511
Location
Port Moody, BC ( near Vancouver, BC )
Easiest way to find TDC 100%, pull the valve cover and slowly turn the engine over ( I pull the plugs and put the car in 4th gear -std and just push the car along by the RF wheel and can watch where the cam is very easily ) Watch for what we call the sister cylinder to # 1 which is # 6 When the cam lobes are split on #6 intake starting to close, ex starting to open, # 1 cyl will be on TDC compression without a doubt. . From there ypu can double check by the timing marks on the frt pulley, or if you can see it, the mark on the flywheel. If you have a shop manual, it will show you that when TDC #1 , one of the bolts that hold the cam gear in place will line up at the top. There is a bit of the head that is flat right at the frt of the head that this bolt will line up with the middle of this little section ( I know, a picture is worth a thousand words but can't post them form this laptop ) Once you see the manual, it will be very clear.

Sister cylinders are #1 & # 6, #2 & # 5 and #3 & #4 Sister cylinders mean that the pistons on each of these cylinders is coming up or going down at the same time. Just on a different time of the cycle example TDC #1 piston is at TDC on Compression both valves closed , # 6 is at TDC at the same time, the intake is closing and the ex is starting to open Valve Overlap

PS don.t forget to take it out of gear before starting the car, scare the hell out of you if you don't. Hope this makes sense to you
 

Haseeb

Well-Known Member
Messages
255
Reaction score
74
Location
Piscataway, NJ
Easiest way to find TDC 100%, pull the valve cover and slowly turn the engine over ( I pull the plugs and put the car in 4th gear -std and just push the car along by the RF wheel and can watch where the cam is very easily ) Watch for what we call the sister cylinder to # 1 which is # 6 When the cam lobes are split on #6 intake starting to close, ex starting to open, # 1 cyl will be on TDC compression without a doubt. . From there ypu can double check by the timing marks on the frt pulley, or if you can see it, the mark on the flywheel. If you have a shop manual, it will show you that when TDC #1 , one of the bolts that hold the cam gear in place will line up at the top. There is a bit of the head that is flat right at the frt of the head that this bolt will line up with the middle of this little section ( I know, a picture is worth a thousand words but can't post them form this laptop ) Once you see the manual, it will be very clear.

Sister cylinders are #1 & # 6, #2 & # 5 and #3 & #4 Sister cylinders mean that the pistons on each of these cylinders is coming up or going down at the same time. Just on a different time of the cycle example TDC #1 piston is at TDC on Compression both valves closed , # 6 is at TDC at the same time, the intake is closing and the ex is starting to open Valve Overlap

PS don.t forget to take it out of gear before starting the car, scare the hell out of you if you don't. Hope this makes sense to you


Winter break is (finally) here so I can try this now! So this is what I need to do a believe
1. Take out all the spark plugs
2. Put the car in neutral (mine is automatic lols)
3. Open up the thing covering the engine (which I think is called the rocker)
4. Push the car slowly until I see the Cylinder #1 reach TDC (I will try to double check with the timing marks on the front pulley)
5. Take out the distributor and match it to where its timing mark is, and then put it back in
6. Put the engine cover back on, and the spark plugs back
7. Go ahead and try to start it, and if it starts proceed with the carb tuning
Seems okay to you guys :D?
 

autokunst

Well-Known Member
Site Donor $$
Messages
3,605
Reaction score
2,618
Location
Milwaukee, WI
Winter break is (finally) here so I can try this now! So this is what I need to do a believe
1. Take out all the spark plugs
2. Put the car in neutral (mine is automatic lols)
3. Open up the thing covering the engine (which I think is called the rocker)
4. Push the car slowly until I see the Cylinder #1 reach TDC (I will try to double check with the timing marks on the front pulley)
5. Take out the distributor and match it to where its timing mark is, and then put it back in
6. Put the engine cover back on, and the spark plugs back
7. Go ahead and try to start it, and if it starts proceed with the carb tuning
Seems okay to you guys :D?
The automatic transmission will not turn the motor like it would with a manual trans. You will have to turn the engine by hand (or with the help of a large socket on the damper nut at the front of the engine). You should be able to turn the engine in this way and look for the same cam/valve conditions as described above. Not sure you'll be able to reach a wrench and also watch the top of the engine, though (which is why rolling the car with the manual trans is rather convenient).
 

Haseeb

Well-Known Member
Messages
255
Reaction score
74
Location
Piscataway, NJ

Engine is now opened up, for some reason I expected to see 6 flat things, but now I learned what a a camshaft is and now what stphers was saying makes a lot more sense LOL. So I believe the side the right side is intake (side closest to the spark plugs) and the left side that’s further away in the vid is the exhaust. So now I need to crank it to the point for cylinder 6 where the intake is about to close and exhaust is about to open. So I’m gonna try to crank the engine, and I think the thing I need to crank is the bolt pictured, which is located in the area beneath where the fan is?
 

Attachments

  • FF810CC7-093B-47B9-9EDD-2C6A73D7E67C.jpeg
    FF810CC7-093B-47B9-9EDD-2C6A73D7E67C.jpeg
    434.5 KB · Views: 174
  • E3536D07-F11D-40C6-A65F-373454FBF57E.png
    E3536D07-F11D-40C6-A65F-373454FBF57E.png
    1.5 MB · Views: 183
  • 05F78639-22A4-4A39-B176-A939121EDF9F.jpeg
    05F78639-22A4-4A39-B176-A939121EDF9F.jpeg
    161.1 KB · Views: 197
  • 5B237031-E6BB-4474-B502-C59CBD8E0F93.jpeg
    5B237031-E6BB-4474-B502-C59CBD8E0F93.jpeg
    148.1 KB · Views: 227
  • 322FA3A0-442D-43AB-A722-2A9DBF2E56F9.jpeg
    322FA3A0-442D-43AB-A722-2A9DBF2E56F9.jpeg
    393.7 KB · Views: 208

autokunst

Well-Known Member
Site Donor $$
Messages
3,605
Reaction score
2,618
Location
Milwaukee, WI
Hey Haseeb,
If I am reading your description correctly, you have the intake and exhaust valves opposite. The intake valves are on the intake side (carb or efi). And the exhaust valves are on the exhaust manifold/header side. This is also where the spark plugs are, coincidentally. You'll be looking for the exhaust side valve closing up on #6 (closest to the car interior) and also for the #6 intake getting ready to open. I hope I wrote that in the correct order...
 

Haseeb

Well-Known Member
Messages
255
Reaction score
74
Location
Piscataway, NJ
So something amazing happened today :) I got a software engineer to help me get the car running, he was really smart! (Also recommended we get into bitcoin :D) but anyways, got big news because the car is like 85% there now! Everyone was right about getting this car into TDC because it can basically idle now but it revs rather high so I turn off the car.
So here’s a breakdown,
-car is roughly timed right now
-it can turn on and idle for a few seconds but revs too high
-this is possibly because the carbs were built wrong (one of the flaps would always be open, no matter what position the car was in)
-There are these vacuum lines (I think they are called that?) (2 on each carb) and on the carb further away from the drivers seat, one line is covered up by rubber hose with a metal screw covering it, and the other is connected to something on the distributor also through rubber hose
-On the other carb, I’m assuming the hole one on the right should be connected to the whole on the air filter with a rubber hose, and idk about the one in the left.

Basically it’s all down to various carb issues, but it’s progress ;)
 

Attachments

  • 25E76C95-5D88-42BE-A772-91ACAA791B4D.jpeg
    25E76C95-5D88-42BE-A772-91ACAA791B4D.jpeg
    310.7 KB · Views: 284
  • AD6471C6-3970-4697-8D58-E53299782EAF.jpeg
    AD6471C6-3970-4697-8D58-E53299782EAF.jpeg
    295.7 KB · Views: 172
  • FF8CF703-3F19-42B4-B3FE-227A8D1B7E01.jpeg
    FF8CF703-3F19-42B4-B3FE-227A8D1B7E01.jpeg
    206.5 KB · Views: 193
  • 6C890922-20B1-4BD0-B4D8-0D64DC631CDF.jpeg
    6C890922-20B1-4BD0-B4D8-0D64DC631CDF.jpeg
    210.2 KB · Views: 282
  • 1D632724-278B-45D5-858C-76264F002CCF.jpeg
    1D632724-278B-45D5-858C-76264F002CCF.jpeg
    240.5 KB · Views: 175
  • CE1E871A-E5F8-4F11-B15E-20F9D2FE4740.jpeg
    CE1E871A-E5F8-4F11-B15E-20F9D2FE4740.jpeg
    243.6 KB · Views: 182

stphers

Well-Known Member
Messages
1,049
Reaction score
511
Location
Port Moody, BC ( near Vancouver, BC )
Those flaps are the choke plates, when cold they should be JUST about closed , NOT completely closed. If they are completely closed, no air gets into the carb The part on the side of the carb that has the 2 cooling lines going to it is the choke housing that contains a bimetallic spring that when cold, keeps the chokes closed to help with starting ( can give a lot more explanation but that is enough for here and now ) As the coolant gets warmer, the choke housing spring starts to loosen up and takes the tension off the choke flaps, allowing the choke flaps to open and be fully open when the car is warmed up. There is also a mechanism attached to the choke housing that will give the car a " fast idle " Again as the car warms up, this fast idle slowly comes off until it is back at where ever the normal idle is set up at. Sometimes , after warming up a bit, you have to blip the throttle to get it to come off the fast idle SO, your high idle may be related to this. Fast idle is usually set at around 1400 to 1500 rpm Sometimes if you " kick ' the throttle too soon, the idle will drop off too soon and it may stumble or die off. That same choke housing can be loosened off and you can rotate that housing to put more or less tension on the bimetallic spring which in turn makes the fast idle stay on longer or less. I get rid of all the emission stuff because where we are, they testing ended a few years ago ( thank god ) here. I block all vacuum ports except for a ported vacuum that I run to the distributor on the advance side, don't use the retard side at all You can run a line to the small outlet on the aircleaner as it was a way of sucking the gases coming from the valve cover breather back into the intake to keep things cleaner up to you,

The high idle maybe because it is on the fast idle circuit. Of course most of this does not come into play if you have a cable that you manually close the chokes and sets the fast idle ( it doesn't look like it here ) so how fast is the idle when starting the car? You also may have the distributor too far advanced at the moment. Start it up with the dist loose enough that it can turn but not sloppy so it will move on it;s own. You can get the idle down by turning the dist just until you can get the car to idle, then adjust to the timing marks.

First and foremost make sure that the point gap is correct as it has a direct function on timing( or set it with a dwell meter 38-41 degrees, set at lower number so when the little rubbing block on the points slowly wears down, the dwell will stay within the required specs ) Once this is all done, set the timing with a timing light Let the car warm up and make sure the fast idle and chokes are off ( choke plates fully open ) then you can adjust the carbs. Pretty easy on the webers, disconnect the linkage connection at the carbs so they work independently . You adjust webers for best smooth idle, so you screw the idle mixture screw in or out as needed to give you the best smooth idle Make sure that the idle set screws are not adjusted too far in causing a higher speed. I think that may be enough for now for you to get your head wrapped around this


Thanks, Rick
 

Haseeb

Well-Known Member
Messages
255
Reaction score
74
Location
Piscataway, NJ

Heres a video of it running, I'll post another by tonight. this is what it sounds like as soon as I turn it on, I didn't even press the gas. The RPM starts all the way at 2000, slowly goes to 2500, and just keeps going up from there.
There was also this weird almost a faint clicking noise when I turned the car off. Smelled like something was burning too, though I don't know if either of those are related to my carb issues. for now I am just gonna play around with the idle speed screw and see if that does the trick. I also have a picture of the carbs open at idle, but I will try to take a clearer one
 

Attachments

  • 48058141-ECF6-4F00-A46E-6C3DE985B487.png
    48058141-ECF6-4F00-A46E-6C3DE985B487.png
    4 MB · Views: 181

61porsche

Well-Known Member
Messages
1,732
Reaction score
28
Location
Dallas
Hmm...

An idle that high would be that the linkage is misadjusted and opening the carbs beyond idle. So start there if it's firing. Parts get worn, parts need lubricated.

Carb tuning begins with disconnecting each/ both carb(s) for this reason.

The main linkage from the block to the carb appears to have an adjustable end. That part on Zeniths is there to balance the linkage- so something got monkeyed with when the rod should have been adjusted with the correct ball end. I've never seen that done.

So- lubricate the main arm /spring bolted on the side of the block. who knows the last time anyone did this maintenance.

The main throttle arm is also bent, presumably to fit between the intake(s). Start there. If the pedal to the carb connection got wonky ( out of adjustment) it could be simple as that is holding the carbs open given that rpm.

The repair manuals for the car have the linkage adjustments, shows you the springs, etc. But the connections shouldn't be under stress when you pop off the ball ends on the linkage- anywhere.

Choke- no that's more than that. But make sure that the bent arm -I somehow got it hooked up- isn't keeping the choke rod from working as it should. In one of your pictures. looks close but may just the angle.

Vacuum and how they're plugged- but some caps at any auto store. Clamp and hoses don't work. Plug everything off the carb except the one line to the distributer. Replace the hose/ bolt stuck on the end of the manifold. Air leaks can do all sorts of things. There were all sorts of emission back when the cars were new, that don't apply now.

But go back to your original post- Popping or backfiring out the exhaust- that means rich- too much fuel. So something was wrong then. Basic fuel level can do all sorts of things if it's high.

You have a mechanical fuel pump. Assuming that there's not an electric pump someplace at the tank excessive pressure shouldn't be a problem.

So what else? Since the carbs were rebuilt- main jets and idle got mixed up? What size are they in case it's still rich? There's plenty of weber info out there. But the idle stop screws look like they also are out far. So back to basics.

Points and timing- dwell is the word. Gaps will get you home but not "tuned". Get the idle down since it's running. Don't replace parts.. you'll never know what you did. One thing at a time.
 

Haseeb

Well-Known Member
Messages
255
Reaction score
74
Location
Piscataway, NJ
Well I have an interesting story for you folks today on Christmas.

After getting the car to successfully idle around 1000 rpm (it reaches this number slowly) I decided to take it for a test drive, I went ahead and put it in reverse to get out of my garage (idled really low once I did that, no more than 200 rpm) it went back slowly. I live on a bit of a slope, so it went down a bit faster. Once I wast out, I pressed the brakes, and voila, it did not stop. Then, I tried putting it in drive, and it did NOT go forward, and idled rather low again. Beginning to panic because there is a small pond of water near me, and because it didn't stop, I did a big car guy no-no...I put it in park. And once again, it did not stop, but I did hear the car groaning, I turned the steering wheel so it would reverse into gradual level ground and then after pumping the brakes a bit, it did stop. I put it back in drive and then pressed the accelerator and then it did go back up this time, and when once I got in the garage and pressed the brakes and then put it in park, it did park

3 things came to mind
-Brake system needs to be bled again. I only know how to bleed the brakes, not the master cylinder and stuff like that so idk if thats needed.
-I think I desperately need to do a transmission flush (mine is automatic), something I never tried but will probably create another thread for.
-That low idle when putting it into gear is concerning. I bought a carb synchronizer and when that gets here in the mail and I will try to use that with a friends help. In the meantime I wonder if I should play around with the idle speed screws or idle mixture screws or anything else... also should into that bent line that 61 porsche mentioned! Can't believe my problem when from too high idle to too low o_O
 

bavbob

Well-Known Member
Site Donor
Messages
3,354
Reaction score
1,568
Location
Boston, Ma
You have an automatic, it should idle high and then will drop 400 rpm or so when you put it in gear, that's why you were at 200 rpm in reverse. Also please make sure you have Type F in the transmission otherwise it will slip. I use Redline racing ATF.

I was in the same boat as you 6 years ago. Read the tech manual here over and over till you get it. Hell buy a Chilton manual for 8 bucks, the forum can fill in the gaps.

I am betting MC needs to be rebuilt or just replace it. My Bav came without brakes also....

Running a hose from one carb vacuum to the other can be a big help. deQ on the E9 side proposed this and it really smoothed things out....this is once you rebuild. Also get a box about a foot high to work in when rebuilding, it will catch all the parts that go flying...and they will.
 

Haseeb

Well-Known Member
Messages
255
Reaction score
74
Location
Piscataway, NJ
hmmm, anyone else wondering about the vacuum hose from the brake servo, or even the servo itself? I haven't seen it mentioned here as yet. Don't give up Haseeb!
Thank you for the motivation (-: means a lot because I have been rather discouraged lately, also interesting you mention those lines because they look pretty old. Would it be necessary to bleed to master cylinder you think?
You have an automatic, it should idle high and then will drop 400 rpm or so when you put it in gear, that's why you were at 200 rpm in reverse. Also please make sure you have Type F in the transmission otherwise it will slip. I use Redline racing ATF.

I was in the same boat as you 6 years ago. Read the tech manual here over and over till you get it. Hell buy a Chilton manual for 8 bucks, the forum can fill in the gaps.

I am betting MC needs to be rebuilt or just replace it. My Bav came without brakes also....

Running a hose from one carb vacuum to the other can be a big help. deQ on the E9 side proposed this and it really smoothed things out....this is once you rebuild. Also get a box about a foot high to work in when rebuilding, it will catch all the parts that go flying...and they will.
Thank you for the sage advice!
 

Haseeb

Well-Known Member
Messages
255
Reaction score
74
Location
Piscataway, NJ
Here's a short clip of it running for anyone who's curious (Engine was not fully warmed up)


I noticed upon pumping the brakes a couple of times that brake fluid seems to be leaking from a bleeder screw on the caliper on the front passenger side. Upon removing the tire I saw what seems to be 3 bleeder screws! I always thought it was just one. They all seemed a bit leaky, but I have no wrench thats actually small enough to fit around it, Current plan is to bleed all 3 individually using my cheapo "bleeder" kit lol after I buy a super small wrench. Some photos for reference
 

Attachments

  • 7D5BA87B-EA4A-4476-B765-457564493CCF.jpeg
    7D5BA87B-EA4A-4476-B765-457564493CCF.jpeg
    316.1 KB · Views: 169
  • DAAC29C2-09BE-4C00-883A-F1E416C3B758.jpeg
    DAAC29C2-09BE-4C00-883A-F1E416C3B758.jpeg
    298 KB · Views: 161
  • 32735217-ECB1-475A-AD56-398DC714A64C.jpeg
    32735217-ECB1-475A-AD56-398DC714A64C.jpeg
    378.8 KB · Views: 187

Haseeb

Well-Known Member
Messages
255
Reaction score
74
Location
Piscataway, NJ
Here's another update folks. The weber synchrometer came in today so we wanted to finish tuning the carbs. After messing around with it for a while and the engine was nice and warmed up, we had a perfect start; when I turned the key it started to 1500 and went back down to 900 while it idled, and when I tried putting it in reverse, it hung around 500.

Now here's two videos from about a half an hour later of a cold start

And here's a couple of minutes after that once I let the engine warm up a tad.
Within the first few seconds I pumped the brakes and the engine nearly stalled, which makes me wonder, were you guys right on the money about that brake booster vacuum line? Here's a picture of it too.

If I am thinking correctly I probably need to change the pictured line that goes from the brake booster to the bottom of the carb. When I put the synchrometer over this carbs, both primaries read 15, the secondary closer to the driver was 3, and the secondary closer to the front of the car read 2. If anyone is selling a line or maybe even a brake booster or know's where I can buy one, lemme know! :)

Of course it is possible that the whole brake booster may need to be rebuilt. or maybe even the master cylinder, what do you guys think? As always any and all comments are super appreciated!

This could very well be the final steps to getting the car roadworthy. I am excited!
 

Attachments

  • 37E70DF0-E09C-4B7C-87C9-8C6A32F2B250.jpeg
    37E70DF0-E09C-4B7C-87C9-8C6A32F2B250.jpeg
    243.1 KB · Views: 167
  • 6DF18B6C-E696-4924-9EDB-88777EB9A0B2.jpeg
    6DF18B6C-E696-4924-9EDB-88777EB9A0B2.jpeg
    186.7 KB · Views: 164
  • 2F08D7E6-4B6A-470C-951C-DCFB6FD2F18D.jpeg
    2F08D7E6-4B6A-470C-951C-DCFB6FD2F18D.jpeg
    206.8 KB · Views: 171
Top