Super job! And yes, scope creep warning heeded, though this repair job has been one big creeping adventure-not without its fun though... of course I have not gotten through the whole thing yet. I'm a little scared of what I'll find when I start cleaning up the engine since it is completely original.
You are using an out of date browser. It may not display this or other websites correctly.
You should upgrade or use an alternative browser.
You should upgrade or use an alternative browser.
Will have to start somewhere
- Thread starter Peter Coomaraswamy
- Start date
-
- Tags
- restoration list
Bwana
Well-Known Member
Hi Peter,
For your trunk lid, I had a similar issue. I suppose you could remove those panels, remove the elephant skin, glue and staple it back together.
I decided to start fresh. Found new elephant skin, matched the thickness of wood as close as possible, cut out the pattern, glued and stapled the material down and inserted new push fittings. Warning: Scope Creep Alert...
See photos of how it turned out here:
https://www.flickr.com/photos/tom_p_pics/sets/72157601967489736/
Good luck!
Nicely done! What wood and thickness did you use? What's the silver tape for?
Well, I couldn't just cover up the little holes under the wiper motor, instead I had to remove the motor, drop it and break the connector, whereupon my warehouse manager commented that my momma didn't raise no brain surgeon, actually she did, it just wasn't me. So the steel piece was not hard at all to make so I welded it in and sealed it up. Now off to more scraping and hopefully painting the engine bay this weekend but I think I have lots of regular work for the remainder of the week so I may be progressing slowly. I also have lots of work to do on the blue coupe, new radiator, pop the sunroof cover on and then put the last pieces of interior trim on (another exercise in spinal contortion). Actually, I think watching the state of the union speech has done more to destroy my health than all the automotive twisting I have performed over the last, ah 6 years. Oh, sorry- that just slipped out. I'll go now.
Tom P
Well-Known Member
@Bwana, I purchased I think 5/32 finish grade plywood = 4mil vs 1/4" =6mil. I believe our cars have 5mil which I couldn't find so the wood I bought was thinner and had more flex. To solve that I used the metal tape in criss cross weave pattern to give rigidity to the wood. Worked great! The panels are very rigid but lightweight and they stay dry. Not that they would get wet! I think this was better than going with thicker 6mil.
MyFemurHurts
Well-Known Member
Hi Peter,
For your trunk lid, I had a similar issue. I suppose you could remove those panels, remove the elephant skin, glue and staple it back together.
I decided to start fresh. Found new elephant skin, matched the thickness of wood as close as possible, cut out the pattern, glued and stapled the material down and inserted new push fittings. Warning: Scope Creep Alert...
See photos of how it turned out here:
https://www.flickr.com/photos/tom_p_pics/sets/72157601967489736/
Good luck!
Wow, that came out great. Funny about the scope creep. That was a big topic this weekend.
Tom P
Well-Known Member
Thanks Brendan, that's actually a good personalized license plate "SCOPCRP." It would pretty much sum up my project that's for sure! 
Aussiecsi
Well-Known Member
...it seems E9 owner profile is a bit of a giveaway....who's up for a hip replacement ?
Aussiecsi
Well-Known Member
...it seems E9 owner profile is a bit of a giveaway....who's up for a hip replacement ?
Whoops , wrong thread...or maybe I thought I was posting on " how to crochet an E9 " ?
Just wanted this on the thread-sorry
D.L.S. of Atlanta ( Drive Line Service of Atlanta)
6285 Buford Highway
Norcross, GA 30071
770-242-9366
Sent them the drive shaft and CSB this afternoon- will report next week when I get the shaft..back
Contact info:Autoworks, and is run by a gent with the name of Bill Marden
www.autoworkstx.com
4000 Victoria Avenue
College Station, Tx 77845
979-690-3032
Last edited:
Charlie Brown's e9 Christmas tree
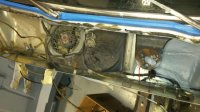
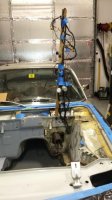
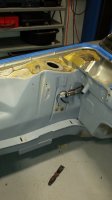
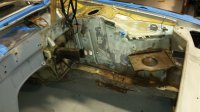
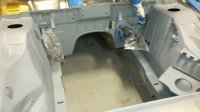
While trying to justify why I should not take Drew's advice and remove the brake lines in the engine compartment I was continually getting tangled up in my recently cleaned and re-conditioned wiring harness. Whereupon my purchasing manager, who just happened to be inspecting the work, said that I should hang it from somewhere up above to keep it out of the way. Well, of course I did heed the advice of our resident e3 expert and remove the lines and devised a holiday decoration to boot. I included some pictures to prove it! Also you can see where I welded up the spot under the windshield wiper motor. I plan on covering it up with a "smooth layer" of seam sealer to have a closer-to-stock appearance once it is painted. I plan on painting the area outlined in blue tape only and hope it gets "cooked" quickly since the older pieces going back in (although clean) will look a little out of place with a shiny engine compartment. I have cleaned up the insulation pads on top of the fenders and plan on priming them and painting them together with the rest of the engine compartment, is this standard practice? I could remove them but that would tell a story that goes beyond repair and maintenance. Thoughts welcome please.
While trying to justify why I should not take Drew's advice and remove the brake lines in the engine compartment I was continually getting tangled up in my recently cleaned and re-conditioned wiring harness. Whereupon my purchasing manager, who just happened to be inspecting the work, said that I should hang it from somewhere up above to keep it out of the way. Well, of course I did heed the advice of our resident e3 expert and remove the lines and devised a holiday decoration to boot. I included some pictures to prove it! Also you can see where I welded up the spot under the windshield wiper motor. I plan on covering it up with a "smooth layer" of seam sealer to have a closer-to-stock appearance once it is painted. I plan on painting the area outlined in blue tape only and hope it gets "cooked" quickly since the older pieces going back in (although clean) will look a little out of place with a shiny engine compartment. I have cleaned up the insulation pads on top of the fenders and plan on priming them and painting them together with the rest of the engine compartment, is this standard practice? I could remove them but that would tell a story that goes beyond repair and maintenance. Thoughts welcome please.
Attachments
hood pics
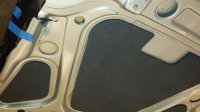
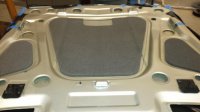
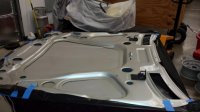
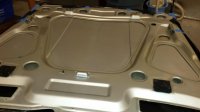
since I took off the hood I figured I would clean it up and put the new pads on.
Just a side note, the torsion bar can be easily removed for this operation without worry if you get some bailing wire and tighten it around the catches so the stops don't slip off. It makes it allot easier to put the new pads on correctly, and cleaning that glue off was not fun! I compounded and waxed the inside of the hood, and the outside and then covered in plastic so I would not have to do it later, the inside was much easier when it was off the car. I also finished priming the engine bay this weekend- this is my first attempt at painting a (portion of) a car (that I care about) so I hope it turns out OK, I plan on doing that this weekend but I still have to clean and prime the cowl and the area in front of the radiator.
Attachments
Don't be shy, send pics of the new e9!!!
PS- notice the brake lines are removed
PS- notice the brake lines are removed
i am jealous, what a nice job !
Thanks, but can't take much credit as the car was in pretty good shape to begin with. 5-6 small patches where there was pretty isolated rust (I know)... but when all you have to do is clean it's not so bad 
Head Rest mechanism
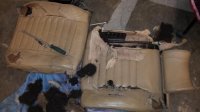
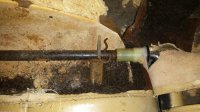
After careful dissection of the delicate cushioning and padding found in our stock e9 front Barcalounger's I have revealed the inner workings of the headrest function, an ingenious little device until any kind of moisture finds its way in there. Since I was advised that the horse hair, which I have ready access to, is not really horse hair but coconut "hair" I am planning on contacting the professor (from Gilligan's Island) to see if he has any use for it now that they have been rescued. If not, I will recycle it in another way, possibly a hair piece for Howard Stern? regardless, I post the items below for those of you who have stuck headrests and wonder if there is a way to free them up. My initial thought, before the dissection, was started was that I would spray some WD-40 down there, which I did but as you can see by the pictures penetration was not complete. I will post more as I move along.
After careful dissection of the delicate cushioning and padding found in our stock e9 front Barcalounger's I have revealed the inner workings of the headrest function, an ingenious little device until any kind of moisture finds its way in there. Since I was advised that the horse hair, which I have ready access to, is not really horse hair but coconut "hair" I am planning on contacting the professor (from Gilligan's Island) to see if he has any use for it now that they have been rescued. If not, I will recycle it in another way, possibly a hair piece for Howard Stern? regardless, I post the items below for those of you who have stuck headrests and wonder if there is a way to free them up. My initial thought, before the dissection, was started was that I would spray some WD-40 down there, which I did but as you can see by the pictures penetration was not complete. I will post more as I move along.
Attachments
ouch, that is not a beautiful corpse !
but very instructive anyway, well done !
but very instructive anyway, well done !
Head Rest alert 
Anyone with stock front seats who can adjust their headrests please remove them and put some grease in the tube! On one side I had to use a small sledge hammer to knock mine lose after cutting the seat open to remove the rusted pin and soak with WD-40. There was absolutely no other way to get it out. Luckily I don't need the seats
Anyone with stock front seats who can adjust their headrests please remove them and put some grease in the tube! On one side I had to use a small sledge hammer to knock mine lose after cutting the seat open to remove the rusted pin and soak with WD-40. There was absolutely no other way to get it out. Luckily I don't need the seats
Anyone with stock front seats who can adjust their headrests please remove them and put some grease in the tube! On one side I had to use a small sledge hammer to knock mine lose after cutting the seat open to remove the rusted pin and soak with WD-40. There was absolutely no other way to get it out. Luckily I don't need the seats
I used P Blaster to free my headrests
restart
Well-Known Member
I think.....maybe...my memory ain't what it use to be.....I seem to remember reading that on a Porsche, Mercedes or vw forum?the horsehair is on the bottom pad and coconut on the back. If you are looking for 100 point car? The foam looks a bit different when installed and covered and debatably not as comfy...sort of overstuffed looking.
I also think the "horsehair" is available at high end upholstery shops, it's needed for restoring expensive Victorian chairs. The formed sisal coconut horsey pads are available for Mercedes at a Germany based cabrio company., you could cut them to shape, perhaps... The name eludes me right now.
Perhaps here
http://www.cabrio.de/khm/en/padding...n/Seat-cushion-rear-seat-Ponton-Cabrio-detail
YMMV and don't quote me

