Will have to start somewhere

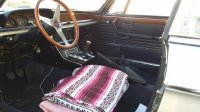
Thanks everyone for the help and support! This was allot of fun, I just have to wait for my front seats to be finished and then have the exhaust welded in a couple of spots then I can drive her around and see what I did wrong:)

I am expecting a really nice driving car that will look like a VERY WELL MAINTAINED e9 and not a restored queen. From all the guys in NH who originally spotted the car to Mario and those who helped me with parts- it's been a quick year (or 13 months) and I'm grateful for the help.

Templates etc, to follow :)

PS, any suggestions on creating/posting/displaying the carpet templates?
 
still finishing- and a part needed

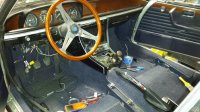
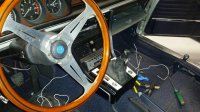
Ok, so I may have been a little hasty in saying this was almost finished:| I am still trying to figure out why the windows work until I start to lock all the switches in place- it must be a BMW thing?

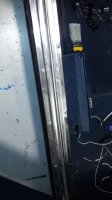
Also I need a part (the inner chrome piece that goes over the carpet to the immediate left of the drivers seat back-and-forward adjustment "clamshell")- if anyone has one please raise their hand! You can see the passenger side in one of the pictures.

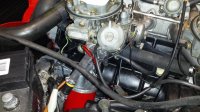
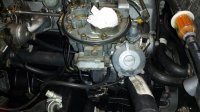
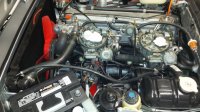
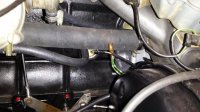
Also, I think I figured out where all the electric wires go to the choke set up on the Zeniths so I included more shots. In the last picture I believe the double green/white go to the bottom side of the choke water jacket-round-thingy.

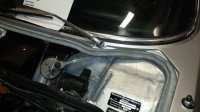
And there is a shot of the hood/cowl gasket glued in; I used the Wurth glue because it's the only stuff I really trust for trim rubber, on this piece I think it's really important to get a good seal completely along the cowl and in the gutter because even a little water could get in there and provide a starting point for the cars "next restoration".

Thanks!
 

Attachments

  • finishing interior2.jpg
    finishing interior2.jpg
    66.4 KB · Views: 299
  • finishing interior3.jpg
    finishing interior3.jpg
    94.7 KB · Views: 303
  • finishing interior4.jpg
    finishing interior4.jpg
    102.1 KB · Views: 310
  • finishing interior1.jpg
    finishing interior1.jpg
    101.4 KB · Views: 299
  • correct choke hookup1.jpg
    correct choke hookup1.jpg
    100.9 KB · Views: 281
  • correct choke hookup2.jpg
    correct choke hookup2.jpg
    97.9 KB · Views: 292
  • correct choke hookup3.jpg
    correct choke hookup3.jpg
    102.7 KB · Views: 275
  • correct choke hookup4.jpg
    correct choke hookup4.jpg
    97.9 KB · Views: 288
Peter,

Looking good. I also just have maintained coupe vs. a highly restored coupe (the benefit is I am not afraid to drive or park it anywhere). I have never glued down my hood seal so I can remove it and thoroughly dry the gutter whenever I wash it. Curious why you mounted the vin plate and color tag on the drivers side?

Doug
 
Hi Doug, I did not move those and they do not belong there, so I found out why it was moved, it seems the PO had a thing with CB radios and he mounted his transmitter above the glove box ingeniously screwing the brackets into the same area where the original VIN plate was so the shop relocated it to the other side. I just left it where I found it- probably should have moved it back but the holes were already there-so...

Curious; which car are you "not afraid" to drive? the restored or the original :) I think my restored would be easier to rebuild should something happen so I drive that around quite a bit.
 
Yes, you are probably right. Mine is neither original or fully restored so its always been a work in progress. I try to keep it mechanically sound for reliable daily driving but have only replaced the cosmetics when they become too worn and unsightly. It still has plenty of battle scars like the dent in the side of the rear bumper where my boss's wife backed into me when I was 29 years old and I was "afraid" to say anything to him. At the time she got out of her brand new Mercedes, said that's nothing, and drove away.
 
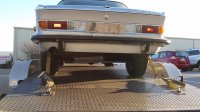
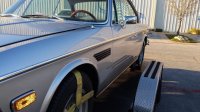
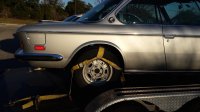
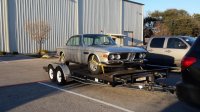
I think most would agree that exhaust fabrication and welding are a unique art form and since I was born without that gene I loaded up the polaris coupe and it's off to the muffie shop in the morning. All new front end sure makes it easier to drive- even if it was just across the lot and on to the trailer and the engine runs fairly well for just timing by eye/ear but the only piece I could not find for the 2800 was the pipe connecting the center muffler to the rear muffler thus I need to have one made and welded up properly because "huffing" is not as much fun as it used to be. Anyhow, this is the first time she's been out of the shop in about a year. The car now needs the seats (almost done), some electrical work, a good tune up, an alignment and a total detail and she should be good to go! Pics below for the record. Thanks for looking :)
 

Attachments

  • on the trailer3.jpg
    on the trailer3.jpg
    100 KB · Views: 282
  • on the trailer2.jpg
    on the trailer2.jpg
    99.3 KB · Views: 303
  • on the trailer4.jpg
    on the trailer4.jpg
    94 KB · Views: 279
  • on the trailer5.jpg
    on the trailer5.jpg
    98.6 KB · Views: 300
  • on the trailer1.jpg
    on the trailer1.jpg
    97.5 KB · Views: 302
looking very good Peter ... you have done an amazing job with this coupe. perfect timing with Keith Martin's upgrade on the 2800cs collectible status
 
Thanks! Once she's mechanically sound I need to realign the doors and trim, hood etc and do all the little things to bring her back to her glory. I have been looking into alternate sources for door rubber or maybe I can find a few pieces from some members- I will post a list of those things needed when I get to that point. I only drove her a little for fear of screwing something up since I have not thrown a light or dwell meter on her but she's not leaking any oil or coolant though I did find a few drops of P/S fluid under the pump (I think it's a fitting). Thanks again to Mario and the boys up north as I think we came up with a real survivor with an interesting history; being purchased in London by one of the two founders of Marine Midland Bank and staying in that family until being sold to a lawyer in NYC. It was then given as a gift to the grandfather of the family where it was spotted by Ski Coach, I think, then maybe Stan, anyway- I have my notes and emails from everyone I spoke with including the original owner and of course the pages here- who knows one day it might find gentle daily use as it should be :)
 
closer

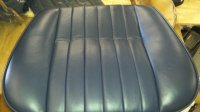
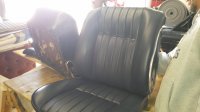
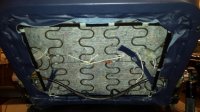
I stopped by the upholstery shop this morning to check out the progress, which has been SLOW, but they look nice. Cost for both seats, full leather is going to be between 1,000.0 and 1,200.00.

As usual, pictures not so great.
 

Attachments

  • seat redo1.jpg
    seat redo1.jpg
    89.9 KB · Views: 262
  • seat redo2.jpg
    seat redo2.jpg
    85.5 KB · Views: 251
very reasonable and look good. did they do any restuffing of the foam or work on the horsehair pads? or just recover
 
Thanks folks, on the driver side some of the foam was worn so he replaced that. If the foam was not deteriorating he left it alone and he did not mess with the horsehair. I may sneak by today and take some shots as I hope he's working on the passenger side today. Auto upholstery seems to be a crazy business, when I walk into the shop I feel like I'm in the 3rd (or 4th) world. Can't wait to drive her around a bit!
 
one down one to go

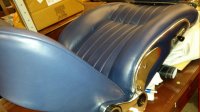
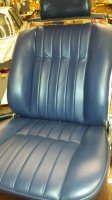
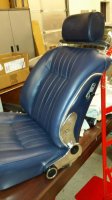
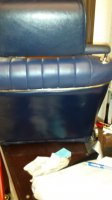
I got one of the seats back yesterday, the shop is only a couple miles from my office so it's easy to go back and forth. I am really happy with the results although the color match is not perfect. The backs and the headrests were not damaged at all so you can see the color difference in the pictures. It looks a little more pronounced since I used some conditioner on the old leather but not on the new since it smells so wonderful :)

Comments welcome-
 

Attachments

  • front seats redo1.jpg
    front seats redo1.jpg
    69.6 KB · Views: 287
  • front seats redo2.jpg
    front seats redo2.jpg
    59.8 KB · Views: 282
  • front seats redo3.jpg
    front seats redo3.jpg
    56.2 KB · Views: 290
  • front seats redo4.jpg
    front seats redo4.jpg
    65.3 KB · Views: 288
  • front seats redo5.jpg
    front seats redo5.jpg
    83.5 KB · Views: 274
Those look fantastic, that shop does great work. I'm sure few people will notice the slight color difference, unless you point it out.

One of my rules for car shows, don't point out what's wrong with your car.
 
help please

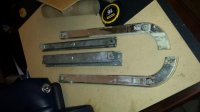
One would think I could remember how these are attached but I am getting old and I can't. In the picture below there are these plastic parts that go around? the front seats? Does anyone know how they are placed. It seems like plastic would not have been used under the seat rails but I don't know.

Thanks.
 

Attachments

  • seat trim.jpg
    seat trim.jpg
    51.2 KB · Views: 267
Peter,

The curved pieces go under the bottom seat, between the frame with the springs and the sliding mechanism. There should be a small bit of the chrome showing at the side of the seat where it is mounted to the sliding mechanism.
 
Last edited:
Back
Top