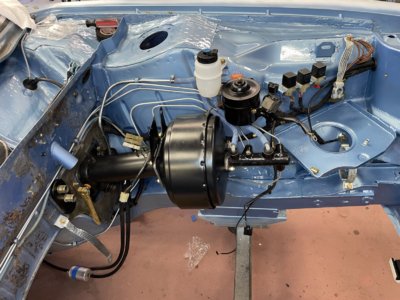
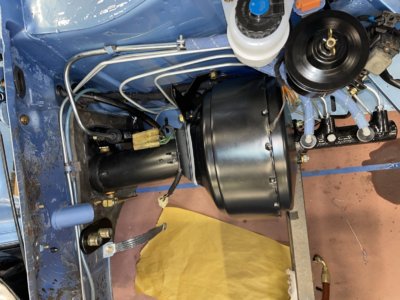
Patricia A. Mayer's 3.0 CS / Paul Cain's Fjord project / The 300 mile Test Drive / VIII / Final Punch List

paul cain

Well-Known Member
Site Donor $$
Messages
679
Reaction score
1,332
Location
Orange County
Nice to see the solution on the oil bar bolt. How did you drill the hole under that slanted angle? Looks well done.

I also notice that you need the link to this thread: oil dip stick repaint :) https://e9coupe.com/forum/threads/yellow-dipstick-paint-match.21304/
I'm sorry if I/m messing up your timing with this.

Doesn't the small hole in the thermostat allow for a coolant passage that is undesired when the engine is warning up? If I understand it well, the hole (besides letting air through while filling as intended), also *always* lets coolant through, even if the thermostat is in it's closed position. Wouldn't this increase the time the engine needs to reach normal operating temperatures?
Erik,
I drilled the hole 'free style' i.e. I start perpendicular to the hex flat. Once the hole starts I begin to drop the angle of drill bit, very slowly ensuring enough material is removed, then drop the angle again, repeat until it's equa-a-distant to the exiting hole on the next hex flat. You gotta use a really sharp bit and go slowly.

Yes, in theory, it would delay the warm up timing. But this hole is less than 3 mm in diameter and the quantity of 'cold water' constantly passing into the block I would say delays my warm up timing to operating temp by approximately 0.000002343 seconds. ;) Joking aside, the benefit of doing this is having an absolutely full cooling system vs. having air pockets in the block that give you a false full level and a spike in temps. And lots of repeated burping of the system.
 

paul cain

Well-Known Member
Site Donor $$
Messages
679
Reaction score
1,332
Location
Orange County
Wurth Stoneguard when on very smoothly yesterday. Lots of masking as this gun is as messy as a drywall splatter gun. Final sealer in the engine compartment.
Image 0582 shows the original paint. Note the sanding stops at the primer on the front fenders. The factory primer will remain as it remains a good sealer on these external surfaces.
Spraying on a hoist is the only way to go to get into the smallest of corners, particularly in the front of the radiator core support.
 

Attachments

  • IMG_0579 (1).jpg
    IMG_0579 (1).jpg
    415.3 KB · Views: 333
  • IMG_0577.jpg
    IMG_0577.jpg
    326.1 KB · Views: 285
  • IMG_0588.jpg
    IMG_0588.jpg
    271 KB · Views: 262
  • IMG_0587.jpg
    IMG_0587.jpg
    321.2 KB · Views: 233
  • IMG_0586.jpg
    IMG_0586.jpg
    312.8 KB · Views: 222
  • IMG_0590.jpg
    IMG_0590.jpg
    263.4 KB · Views: 228
  • IMG_0584.jpg
    IMG_0584.jpg
    271.8 KB · Views: 215
  • IMG_0574.jpg
    IMG_0574.jpg
    237.4 KB · Views: 197
  • IMG_0592 (1).jpg
    IMG_0592 (1).jpg
    254.6 KB · Views: 203
  • IMG_0582.jpg
    IMG_0582.jpg
    164.9 KB · Views: 214

Luis A.

Well-Known Member
Site Donor
Messages
1,533
Reaction score
358
Location
Wisconsin
-Oil sprayer bar is fastened by two hallow bolts that pass pressurized oil into the bar. A famous failure mode is for the bolt to loosen and you no long have oil spraying on your rocker arms. This is an extra 30 minutes to drill a hole in the bolt head and safety wire the bolt ensuring it never counter rotates.
Paul do you believe in the efficacy of the additional flattening constriction of the oil sprayer bar so as to improve oil distribution to the camshaft?
 

paul cain

Well-Known Member
Site Donor $$
Messages
679
Reaction score
1,332
Location
Orange County
Paul do you believe in the efficacy of the additional flattening constriction of the oil sprayer bar so as to improve oil distribution to the camshaft?
Luis,
To the contrary. Any 'flattening' will not improve oil distribution. It will crush the interior volume and create a pinch point that will restrict oil flow. This is a highly engineered fastener, washer and tube. I would not deviate from the factory torque settings.
 
Last edited:

paul cain

Well-Known Member
Site Donor $$
Messages
679
Reaction score
1,332
Location
Orange County
Painting is finished.
Schedule updated.
We blended the Fjord into the drive tunnel
Final sealer image looks like yesterdays image of the Wurth Stoneguard. This is not the same. The entire floor pan was painted this morning with color matched, single stage, catalyzed grey paint to seal off all the Wurth Stoneguard from the elements. One final barrier of protection. I just looks like Wurth Stoneguard.

Once again, having a completely empty engine compartment, on a hoist, was the key in hitting every nook and cranny. Bravo to the access at Reyn's Speed Shop!
 

Attachments

  • Base Only.jpg
    Base Only.jpg
    351.9 KB · Views: 185
  • Blending into the drive tunnel.jpg
    Blending into the drive tunnel.jpg
    392.6 KB · Views: 192
  • Gloss applied.jpg
    Gloss applied.jpg
    348.9 KB · Views: 183
  • updated schedule.jpg
    updated schedule.jpg
    279.4 KB · Views: 178
  • Final sealer applied.jpg
    Final sealer applied.jpg
    522 KB · Views: 223

Erik

Well-Known Member
Site Donor
Messages
418
Reaction score
163
Location
NorCal, CA
Paul, - are you doing all of your paint application in the shop? If so, are you having to control for dust etc.?
 

Stevehose

Well-Known Member
Site Donor $$
Messages
13,006
Reaction score
5,681
Location
Sarasota, FL
Luis,
To the contrary. Any 'flattening' will not improve oil distribution. It will crush the interior volume and create a pinch point that will restrict oil flow. This is a highly engineered fastener, washer and tube. I would not deviate from the factory torque settings.
The old school theory is that by pinching the middle it increases pressure to the ends which apparently get less oil otherwise. I did this modification years ago and I’m not convinced that it does or doesn’t work. I plan on pulling my valve cover and making a special piece to cover the timing chain gear and watch it in action for myself.
 

Luis A.

Well-Known Member
Site Donor
Messages
1,533
Reaction score
358
Location
Wisconsin
The old school theory is that by pinching the middle it increases pressure to the ends which apparently get less oil otherwise. I did this modification years ago and I’m not convinced that it does or doesn’t work. I plan on pulling my valve cover and making a special piece to cover the timing chain gear and watch it in action for myself.
That calls for a video Steve... Let's see it.
 

paul cain

Well-Known Member
Site Donor $$
Messages
679
Reaction score
1,332
Location
Orange County
I arrived late to the shop this morning, having to complete another "coupe loop'' - picking up parts from suppliers.
-Rebuilt and balanced drive shaft, lengthened to fit the Getrag 265. Really good rebuilders, painting? not so much.
-Ceramic coated and lined down pipes and black heat shields
-New brake lines patterned off of the originals
-Misc gaskets and hoses from Mesa Performance

Got to the shop at 11:30 am and this is all that is worth reporting on:

-Dawson Graf continues to demonstrate exceptional restoration skills -beyond his years- in this case cleaning, stripping and re-wrapping the entire front wire harness(es).
-Engine assembly getting closer to completion
 

Attachments

  • Coupe loop.jpg
    Coupe loop.jpg
    466 KB · Views: 198
  • wire harness.jpg
    wire harness.jpg
    367.8 KB · Views: 212
  • getting close.jpg
    getting close.jpg
    537.4 KB · Views: 264

JMinPDX

Well-Known Member
Site Donor
Site Donor $
Messages
1,269
Reaction score
1,310
Location
Portland OR
Luis,
To the contrary. Any 'flattening' will not improve oil distribution. It will crush the interior volume and create a pinch point that will restrict oil flow. This is a highly engineered fastener, washer and tube. I would not deviate from the factory torque settings.
Anyone familiar with these after market oiler pre-drilled bolts?
I seem to remember a discussion regarding sets like these being available.
 

Candia4441

Well-Known Member
Site Donor $
Site Donor $$
Messages
919
Reaction score
311
Location
California
I arrived late to the shop this morning, having to complete another "coupe loop'' - picking up parts from suppliers.
-Rebuilt and balanced drive shaft, lengthened to fit the Getrag 265. Really good rebuilders, painting? not so much.
-Ceramic coated and lined down pipes and black heat shields
-New brake lines patterned off of the originals
-Misc gaskets and hoses from Mesa Performance

Got to the shop at 11:30 am and this is all that is worth reporting on:

-Dawson Graf continues to demonstrate exceptional restoration skills -beyond his years- in this case cleaning, stripping and re-wrapping the entire front wire harness(es).
-Engine assembly getting closer to completion
Hello, you are doing great work the engine is look great nicer than brand new engine the only thing is carburetor if you dis assemble and paint with CERAKOTE it will be completely brand new you really talented person not every one can do what you are doing I can not wait to see your car completed.
 

Candia4441

Well-Known Member
Site Donor $
Site Donor $$
Messages
919
Reaction score
311
Location
California
I arrived late to the shop this morning, having to complete another "coupe loop'' - picking up parts from suppliers.
-Rebuilt and balanced drive shaft, lengthened to fit the Getrag 265. Really good rebuilders, painting? not so much.
-Ceramic coated and lined down pipes and black heat shields
-New brake lines patterned off of the originals
-Misc gaskets and hoses from Mesa Performance

Got to the shop at 11:30 am and this is all that is worth reporting on:

-Dawson Graf continues to demonstrate exceptional restoration skills -beyond his years- in this case cleaning, stripping and re-wrapping the entire front wire harness(es).
-Engine assembly getting closer to completion
Hello again, hey I have lots of extra parts little from everything since I am renewing 2 E9 if you need a part let me know if I have a extra I will send it to you with no charge like I have complete csi engine that I don't need, since I love your way of work and maybe you teach me what you are doing I am new and I love to learn and I enjoy learning
 

paul cain

Well-Known Member
Site Donor $$
Messages
679
Reaction score
1,332
Location
Orange County
Candia4441,
Noted on the carbs. These have been rebuilt and carefully adjusted well before this Phase III program started. Yes there is some oxidation on them and they will have to stay that way. We are not going backwards as getting these balanced and leak free is challenge with 49 year old castings.
 

paul cain

Well-Known Member
Site Donor $$
Messages
679
Reaction score
1,332
Location
Orange County
Closing in on the motor completion. Got the final batch of yellow and clear zinc back today. Just in time for final assembly. Valves got adjusted today and the valve cover is on for good. The distributor is still out for rebuild and re-curving. This is the one item on the critical path.

Apologies to @coupedegrace as my white color balance is still out. The air filter assembly in these photos looks very green. In person its more grey green. Maybe in the direct sun and daylight it will balance out.

Patricia Mayer's Project / Phase III now has a G.W.P. (Guess Worker Program). Rob Edwards brought down the plating this afternoon and stayed to assist with wrestling the fuel lines into final position. Think lots of hammers, wood blocks and large pliers. Having Rob Edwards drop in on your project is sort of like having Michael Jordan stop by for a game pick up basketball in your driveway. @Gary Knox knows of his immense restoration horsepower in the Rennlist 928 world. German sports car restoration skills cross reference in many enjoyable ways between Porsche and BMW. Thank you Rob!
 

Attachments

  • IMG_0631.jpg
    IMG_0631.jpg
    436.6 KB · Views: 215
  • IMG_0632.jpg
    IMG_0632.jpg
    339.1 KB · Views: 214
  • guest worker program Monday.jpg
    guest worker program Monday.jpg
    371.2 KB · Views: 244

paul cain

Well-Known Member
Site Donor $$
Messages
679
Reaction score
1,332
Location
Orange County
Behind the booster plumbing is very difficult to access once the motor is in. Made very good progress today with the brake lines, harness and booster assembly. What is not visible are the clutch and brake pedals installed, clutch master installed and plumbed. Harness is all the way back in. All new brake lines are back in.

Lumber is in the eng. compartment for 12 hours to hold the glue place on the lower fire wall insulation.

Many thanks for Mesa Performance for having a new blower fan / motor assembly in stock as mine was totally frozen.

A/C lines are ready to be reattached to the inner fender

Set up all the front suspension for assembly
 

Attachments

  • IMG_0648.jpg
    IMG_0648.jpg
    367.9 KB · Views: 198
  • IMG_0649.jpg
    IMG_0649.jpg
    330.2 KB · Views: 189
  • IMG_0650.jpg
    IMG_0650.jpg
    345.3 KB · Views: 204
  • IMG_0655.jpg
    IMG_0655.jpg
    354.2 KB · Views: 213
  • IMG_0656.jpg
    IMG_0656.jpg
    392.7 KB · Views: 186
  • IMG_0657.jpg
    IMG_0657.jpg
    345 KB · Views: 187
  • IMG_0652.jpg
    IMG_0652.jpg
    302.3 KB · Views: 187
  • IMG_0654.jpg
    IMG_0654.jpg
    357.6 KB · Views: 203

coupedegrace

Well-Known Member
Site Donor
Messages
688
Reaction score
653
Location
Portland, Oregon
Apologies to @coupedegrace as my white color balance is still out. The air filter assembly in these photos looks very green. In person its more grey green. Maybe in the direct sun and daylight it will balance out.
Ugh - I can barely look at the photos. And I don't understand what you've been doing with your time if you haven't gotten the white balance right yet. Kidding of course. The whole white balance issue does give you an appreciation for the chemistry wizards at Kodak and other old film manufacturers. They didn't have to deal with quite so many light sources as we have nowadays of course, but still. Maybe you need to set your camera to "tungsten."

As to your guest worker, I'm sure he's talented but I think we'd all be a little more comfortable if we could see his H2A visa.

Love seeing the progress and appreciate your engagement with us while being so busy.
 

JMinPDX

Well-Known Member
Site Donor
Site Donor $
Messages
1,269
Reaction score
1,310
Location
Portland OR
Behind the booster plumbing is very difficult to access once the motor is in. Made very good progress today with the brake lines, harness and booster assembly. What is not visible are the clutch and brake pedals installed, clutch master installed and plumbed. Harness is all the way back in. All new brake lines are back in.

Lumber is in the eng. compartment for 12 hours to hold the glue place on the lower fire wall insulation.

Many thanks for Mesa Performance for having a new blower fan / motor assembly in stock as mine was totally frozen.

A/C lines are ready to be reattached to the inner fender

Set up all the front suspension for assembly
Wow! Looks great! I’m inspired to do some engine bay detailing today. Correct clutch master (of course) new or rebuilt?
I rebuilt mine 11 years ago, no issues since.
Just realized that stock brake fluid reservoir cloth covered hoses are Fjord Blue. ;)
 

paul cain

Well-Known Member
Site Donor $$
Messages
679
Reaction score
1,332
Location
Orange County
@JMinNJ This is an NOS Clutch master that was in stock at Mesa Performance, probably back to the Bush I Administration.
Fjord Blau, the best color in the Vintage BMW Pallet!

Today we busted out the big boy tools the hydraulic lift table that makes lifting engines so easy and controllable. Ditto the Forklift.
Image 0030 is the Canon G5X in manual mode with my white light set to fluorescent. And the results are pretty horrible. Compared to the remainder in iPhone 12 auto.

Test fitted the bell housing and clutch assembly. Flywheel was not machined correctly and resulted in too high of a clamping pressure on the disc. It has to come back out. 1 step forward, 2 steps backwards. Fortunately I have spare flywheel.

I ordered the incorrect pilot bearing, the correct one is on the way.

It 'appears' that the ceramic coating heat cycle warped the longer downpipe. I'll know more once the engine is installed, but we may have to cut and bend the three ear'g flange at the manifold. 3 steps backwards on this one.

Dawson noticed a rubbing A/C belt on the front flange. This was a great find before we started the motor.

Test fitting or (dry fitting) is very revelatory, it pulls forward the upcoming issues. We were able to scramble this afternoon with the above discoveries and hope to get back on schedule tomorrow with a complete driveline.
 

Attachments

  • IMG_0030.JPG
    IMG_0030.JPG
    225.8 KB · Views: 172
  • IMG_0660.jpg
    IMG_0660.jpg
    420.2 KB · Views: 154
  • IMG_0661.jpg
    IMG_0661.jpg
    325.5 KB · Views: 161
  • IMG_0662.jpg
    IMG_0662.jpg
    418.9 KB · Views: 171
Last edited:
Top