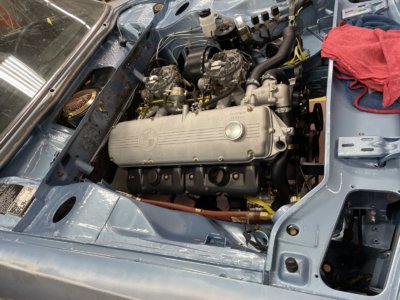
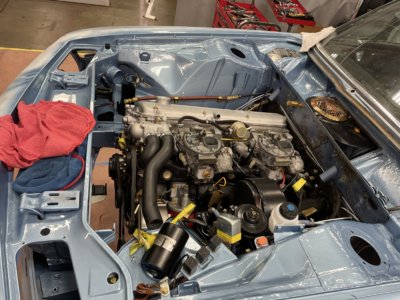
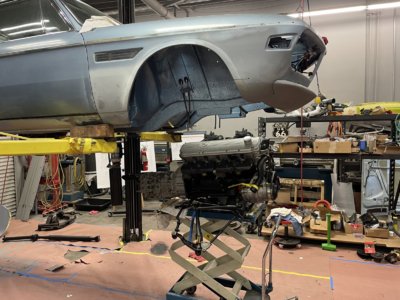
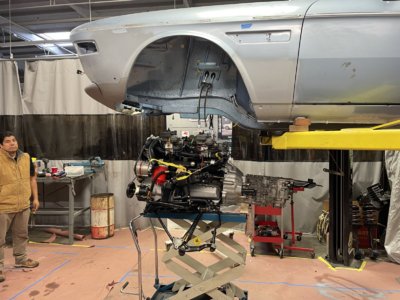
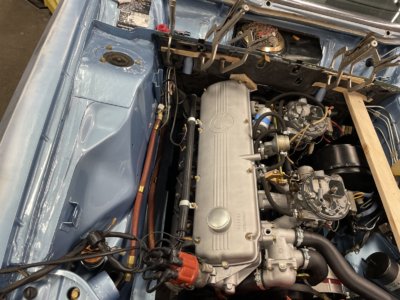
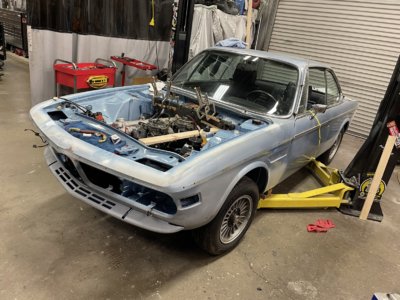
Hello, will you explain what is the wood for in the engine bay?Behind the booster plumbing is very difficult to access once the motor is in. Made very good progress today with the brake lines, harness and booster assembly. What is not visible are the clutch and brake pedals installed, clutch master installed and plumbed. Harness is all the way back in. All new brake lines are back in.
Lumber is in the eng. compartment for 12 hours to hold the glue place on the lower fire wall insulation.
Many thanks for Mesa Performance for having a new blower fan / motor assembly in stock as mine was totally frozen.
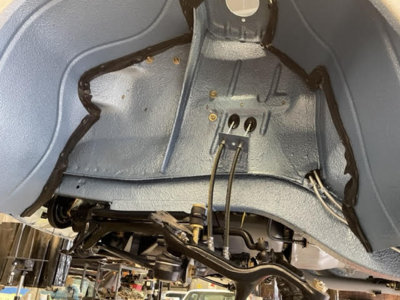
A/C lines are ready to be reattached to the inner fender
Set up all the front suspension for assembly
You are using an out of date browser. It may not display this or other websites correctly.
You should upgrade or use an alternative browser.
You should upgrade or use an alternative browser.
Patricia A. Mayer's 3.0 CS / Paul Cain's Fjord project / The 300 mile Test Drive / VIII / Final Punch List
- Thread starter paul cain
- Start date
-
- Tags
- restoration list
iPhone for the win!Image 0030 is the Canon G5X in manual mode with my white light set to fluorescent. And the results are pretty horrible. Compared to the remainder in iPhone 12 auto.
to hold the firewall insulation to the firewall untill the glue setsHello, will you explain what is the wood for in the engine bay?
I could not articulate it more clearly. Thank you @eriknetherlands
A moment to acknowledge Dawson Graf. Dawson has been working at Reyn's Speed Shop for just over a year. He is immensely talented and mature.
I would not be this far along on this project if not for Dawson's increasing contributions and initiative. In quiet moments during the day, I get comments like: "Paul, what else can I be doing now that is more value added?''
He owns 4 BMWs including his newest acquisition -a $3000 BMW 850 CS with a smog and title issues. I met Dawson before he worked at Reyn, when he was shoehorning in a 4.4 liter BMW V-8 in his E46 330i.
Dawson is 20 years old.
Each day, he keeps checking his email, pinging for the news on his future. He is waiting to hear on his acceptance from UCLA and University of Calif. Irvine (School of Engineering). I just pray that these admissions committees can see through his application and do the right thing. He is head and shoulders above most of the other applicants. They would be lucky to get him.
It gives you hope for the future generations.
Thank you Dawson. It's been an absolute pleasure working with you. Whatever direction you take, you have a very bright future.
I would not be this far along on this project if not for Dawson's increasing contributions and initiative. In quiet moments during the day, I get comments like: "Paul, what else can I be doing now that is more value added?''
He owns 4 BMWs including his newest acquisition -a $3000 BMW 850 CS with a smog and title issues.
Dawson is 20 years old.
Each day, he keeps checking his email, pinging for the news on his future. He is waiting to hear on his acceptance from UCLA and University of Calif. Irvine (School of Engineering). I just pray that these admissions committees can see through his application and do the right thing. He is head and shoulders above most of the other applicants. They would be lucky to get him.
It gives you hope for the future generations.
Thank you Dawson. It's been an absolute pleasure working with you. Whatever direction you take, you have a very bright future.
Attachments
The future of our hobby! Thanks for sharing Paul, we will all have our fingers crossed that he is selected for the school of his dreams!A moment to acknowledge Dawson Graf. Dawson has been working at Reyn's Speed Shop for just over a year. He is immensely talented and mature.
I would not be this far along on this project if not for Dawson's increasing contributions and initiative. In quiet moments during the day, I get comments like: "Paul, what else can I be doing now that is more value added?''
He owns 4 BMWs including his newest acquisition -a $3000 BMW 850 CS with a smog and title issues.I met Dawson before he worked at Reyn, when he was shoehorning in a 4.4 liter BMW V-8 in his E46 330i.
Dawson is 20 years old.
Each day, he keeps checking his email, pinging for the news on his future. He is waiting to hear on his acceptance from UCLA and University of Calif. Irvine (School of Engineering). I just pray that these admissions committees can see through his application and do the right thing. He is head and shoulders above most of the other applicants. They would be lucky to get him.
It gives you hope for the future generations.
Thank you Dawson. It's been an absolute pleasure working with you. Whatever direction you take, you have a very bright future.
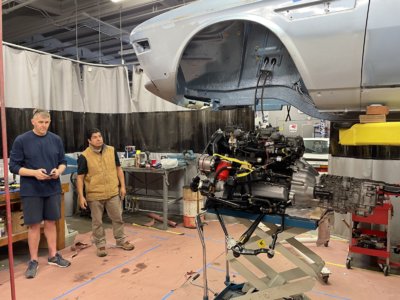
The motor / trans is now back in the car.
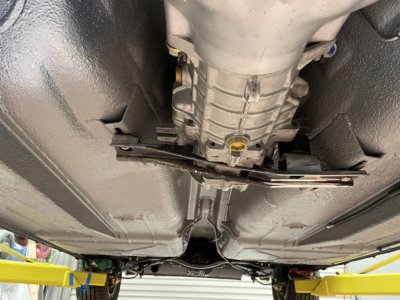
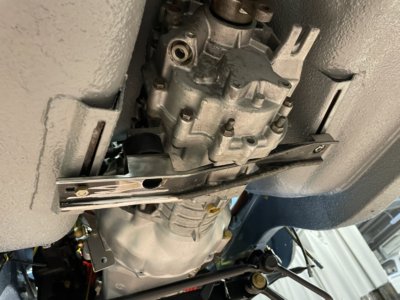
I have serious aversion to using an aftermarket crossmember or the later cast aluminum part off a later model. I want something that looks totally factory. And a design that would use two trans mounts, not the original fitment of one. Earlier I had modified the slot feature holding the two "T" bolts in the drive tunnel that fastens the cross member to the tunnel.
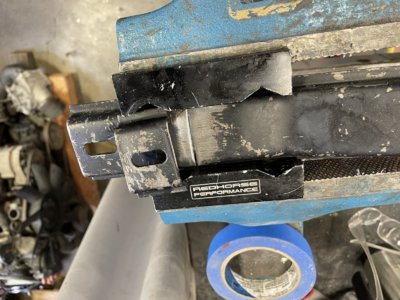
Today I could do the first real dry fit with the transmission (265) now permanently in place. This is when I discovered the 4 spd crossmember is too short to bridge the tunnel in the precise area it needs to be to align to the rubber mounts.
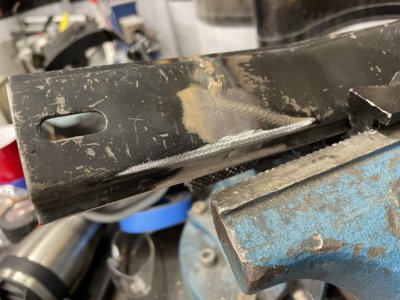
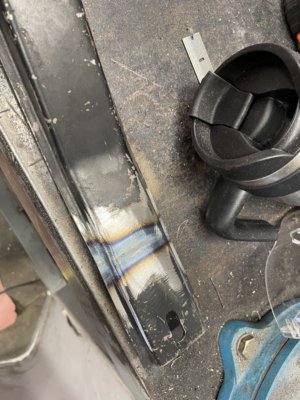
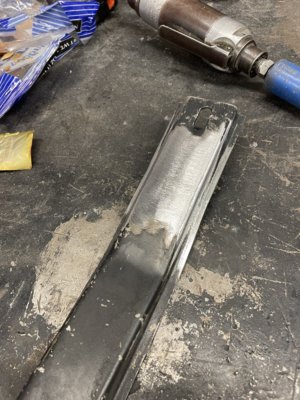
So, having a second crossmember as a donor, it was time to splice in an ~45 mm. Yes, it was welded on both sides. Then ground back flush.
Task 1 done. Who knew there would be three more tasks on this part?
Attachments
Big milestones today.
The morning was rough. I had planned to use my 'spare' flywheel, but as soon as I fitted it to the crank I realized it had not been balanced. And then balanced to the new pressure plate. So much for that solution.
I took the original flywheel back to my machine shop and pleaded for a fast turn-a-round to re-machine the friction surface back to the correct height. He totally delivered having turned the part in 70 minutes. Here is a link to that process:
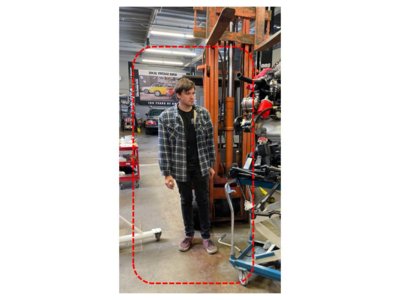
Having secured that proper H1B visa for our Guest Worker, Rob Edwards was allowed back into So. Orange County and provided key help, along with George (Reyn) in guiding the motor in place.
The four subframe bolts go in smoothly when you have both a hydraulic lift table on wheels as well as two poster lift. Lots of placement on the table and then the body can come straight down on to the subframe.
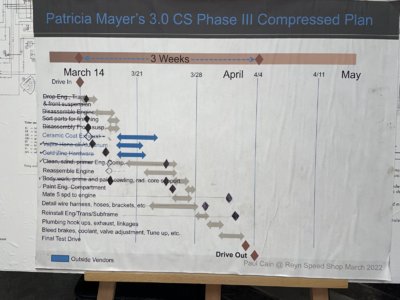
Schedule updated.
Attachments
Last edited:
Back to that crossmember.
The motor was in by 2 pm. I worked on this crossmember till 6:30 pm and its just over half done. It is roughed in for tonight so I could remove the support hoist.
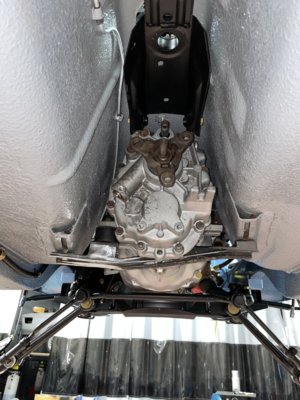
The drivers side has a new mounting pad fabricated and added for the new second mount. It's 27 mm tall. Note the double thickness on the passenger side tunnel mount, this was necessary to keep the crossmember level. Both sides have a new pass through hole for the two sockets (13mm and 17mm) Pass. side has the correct mounting height for the rubber mount.
Tomorrow morning we will finish and re-support the center section that had to be notched to clear the intermediate case on the Getrag 265.
Then its on to fabricating the exhaust down pipe rear mount. Then the hard lines for clutch hydraulics. Then the shift tower support arm.
Attachments
Last edited:
Truly hope your new H1B Guest Worker might be able to help Dawson in his pursuit of Mech E. admission!!
Gary
Gary
I love how pics 689 & 690 show how well everything nestles together with the stock parts - especially the carbs and brake booster.
T minus 2 days. Love seeing all this coming together.
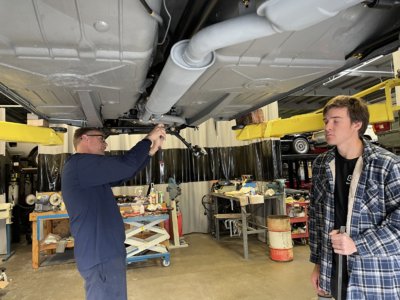
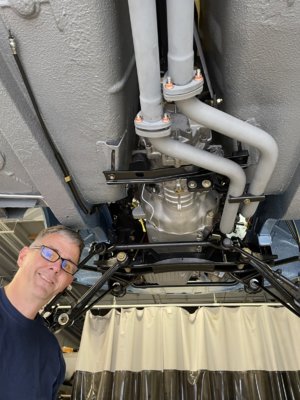
Rob Edwards and Dawson buttoning up the exhaust reinstallation.
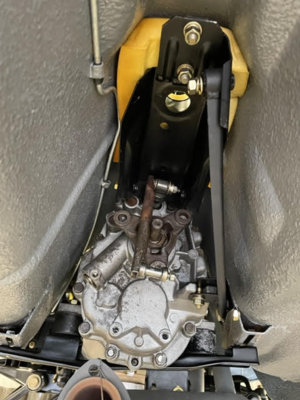
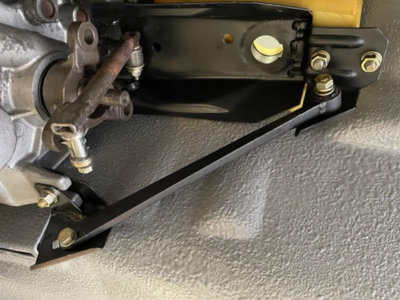
Rob's smile of approval on the shift tower support and sil/bronze shifter bushing modification.
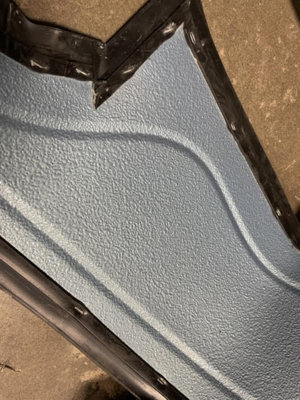
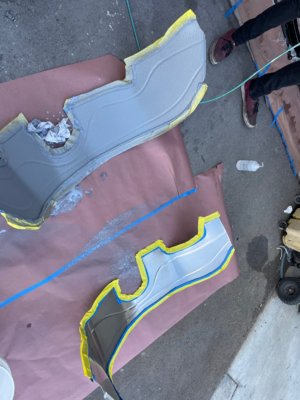
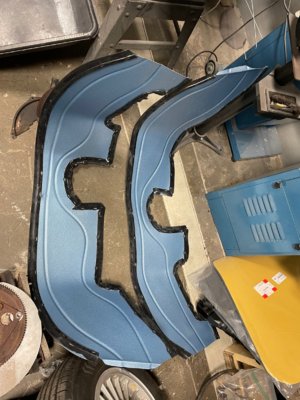
Lokari (sp?) fender liners with etching primer. Wurth Stoneguard, sealer, base coat Fjord Blau and clear coat. I do like how these liners seal off the most vulnerable corners of the inner fenders and wheel wells. The fit is marginal and it really takes some wrestling to get them into position. Fastening down the two ends is the tricky part. Supplied bracket is pretty worthless. Forward edge will work ok once you bend the liner far enough.
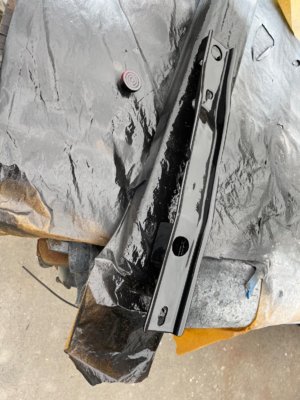
Black cross member getting its final coat of satin black before installation.
The car is back on the ground. The 'downstairs' is finished i.e. the shifter, drive shaft, exhaust, suspension, all hydralic piping, etc.
Final steps are coolant and wiring hook ups, throttle linkage, ground straps etc.
Upper fire wall insulation is glued in.
Attachments
-
 IMG_0721 (1).jpg382.8 KB · Views: 304
 -
 IMG_0724 (1).jpg382.5 KB · Views: 304
 -
 unnamed (1).jpg45.9 KB · Views: 299
 -
 unnamed.jpg48.4 KB · Views: 304
 -
 67060685748__2B6CAE3C-5E06-4EF6-A85A-6D08522AC947.jpg420 KB · Views: 313
 -
 IMG_0713.jpg436 KB · Views: 316
 -
 unnamed (6).jpg53.3 KB · Views: 304
 -
 IMG_0734 (1).jpg380.1 KB · Views: 330
 -
 IMG_0736 (1).jpg422.9 KB · Views: 324
Paul is not only gunning for “Restorer of the year” but also for “Poster of the year”.
How do you find time to not only do such a high level of workmanship but also, photographing, editing, narrating and posting every day?
How do you find time to not only do such a high level of workmanship but also, photographing, editing, narrating and posting every day?
Hello, and god bless you with your work that you are doing, the picture number 0713 under fender cover did you maid it or it buy ready maid and if any one sale that will you please tell me where did you buy it from. thank you in advanceRob Edwards and Dawson buttoning up the exhaust reinstallation.
Rob's smile of approval on the shift tower support and sil/bronze shifter bushing modification.
Lokari (sp?) fender liners with etching primer. Wurth Stoneguard, sealer, base coat Fjord Blau and clear coat. I do like how these liners seal off the most vulnerable corners of the inner fenders and wheel wells. The fit is marginal and it really takes some wrestling to get them into position. Fastening down the two ends is the tricky part. Supplied bracket is pretty worthless. Forward edge will work ok once you bend the liner far enough.
Black cross member getting its final coat of satin black before installation.
The car is back on the ground. The 'downstairs' is finished i.e. the shifter, drive shaft, exhaust, suspension, all hydralic piping, etc.
Final steps are coolant and wiring hook ups, throttle linkage, ground straps etc.
Upper fire wall insulation is glued in.
Albert,
I am most happy to share. And thank you for your kind words.
I learned of these fender liners from this forum. This most generous forum. Thank you @Drew20 and @Keshav.
Good luck with them on your project.

 www.lokari.de
Here are a few more images textured is the Wurth Stoneguard with primer on it. Raw liner comes in raw aluminum with rubber seals stapled on with an industrial stapler.
I am most happy to share. And thank you for your kind words.
I learned of these fender liners from this forum. This most generous forum. Thank you @Drew20 and @Keshav.
Good luck with them on your project.

Innenkotflügel, vorne - BMW 3.0 CS / CSi / CSL Coupé / E9 - Bj. 68-76 - Lokari ® Innenkotflügel, Radhausschalen, Radkastenschutz
BMW, 3.0, CS, CSi, CSL, Coupé, E, lokari, innenkotflügel, aluminium, radhausschale, radhausschalen, PKW, ersatzteile, zubehör, kotflügel, kfz, auto, qualität
Here are a few more images textured is the Wurth Stoneguard with primer on it. Raw liner comes in raw aluminum with rubber seals stapled on with an industrial stapler.
Attachments
Last edited:
@Bmachine Short answer: I am retired.Paul is not only gunning for “Restorer of the year” but also for “Poster of the year”.
How do you find time to not only do such a high level of workmanship but also, photographing, editing, narrating and posting every day?
Long Answer:
the photography and uploading is easy. It's 1% of the total effort. I picked up a lot of forum 'style' by learning the very generous sharing approach from Rob Edwards who assisted me with an early Porsche 928 restoration in 2017 on the Rennlist. I tried to do that entire car in just 1 year, with a full time job. If you really want to rabbit hole:
01117 / Restoration / Phase II / Engine & front Suspension - Rennlist - Porsche Discussion Forums
928 Forum - 01117 / Restoration / Phase II / Engine & front Suspension - Phase II ENGINE and FRONT SUSPENSION I purchased 9288201117 with the intent to restore it back to its as delivered condition. It is a numbers matching 1978 5 speed. slick top, specifically, Silver with black leather, US...
rennlist.com
This current coupe project is a game of further project compression, but I'm retired now. The 'game' is lots prep, absolutely no compromising quality and serious compression. Doable when you are not designing and fab'ing custom parts. (the last 48 hours really slowed us down)
Having said all that, its been balls out for 19 days. And trying to keep up with Dawson (Age 20). I just turned 64 and there have been a few nights where I was really wiped out. And those are the key points that you have to walk away from the project. (The absolute best thing you can do is stop, rest, eat and come back to it) This last three weeks have been a blast. I am hell bent to enjoy a number of cars before I am driving threat to all others on the highway. These next 15 or so years I really, really want to enjoy. And this is my way of accelerating that enjoyment. Sharing is a key element of that.
5-speed & Lokari fender liners are the 2 best things one can do to an E9. Drive your car with confidence.

Paul,
Are you going to reinstall the fuel vapor canister under the battery? I see it in the photo showing the battery tray, and it looks like you restored it.
Amazing project. Puts most other nut and bolt restorations to shame.
If they were smart, BMW would buy this car for their special press fleet.
John
John,
My replies are in italics.
Paul,
Are you going to reinstall the fuel vapor canister under the battery? Yes, I was just waiting for the correct 8 mm cloth hose to arrive. It should go in today.
I see it in the photo showing the battery tray, and it looks like you restored it. It was actually an NOS part that had been sitting in Mesa Performances shop for the past 20 years. The foam was gone and it had a lot of scratches from being kicked around on the floor.
Amazing project. Puts most other nut and bolt restorations to shame. I don't what to shame any one, just inspire as other did for me years ago (before the internet)
If they were smart, BMW would buy this car for their special press fleet. You are too kind! I don't think it is quite to that standard, especially after I chase Andrew through the small rivers!
Thanks for your kind words.
John

