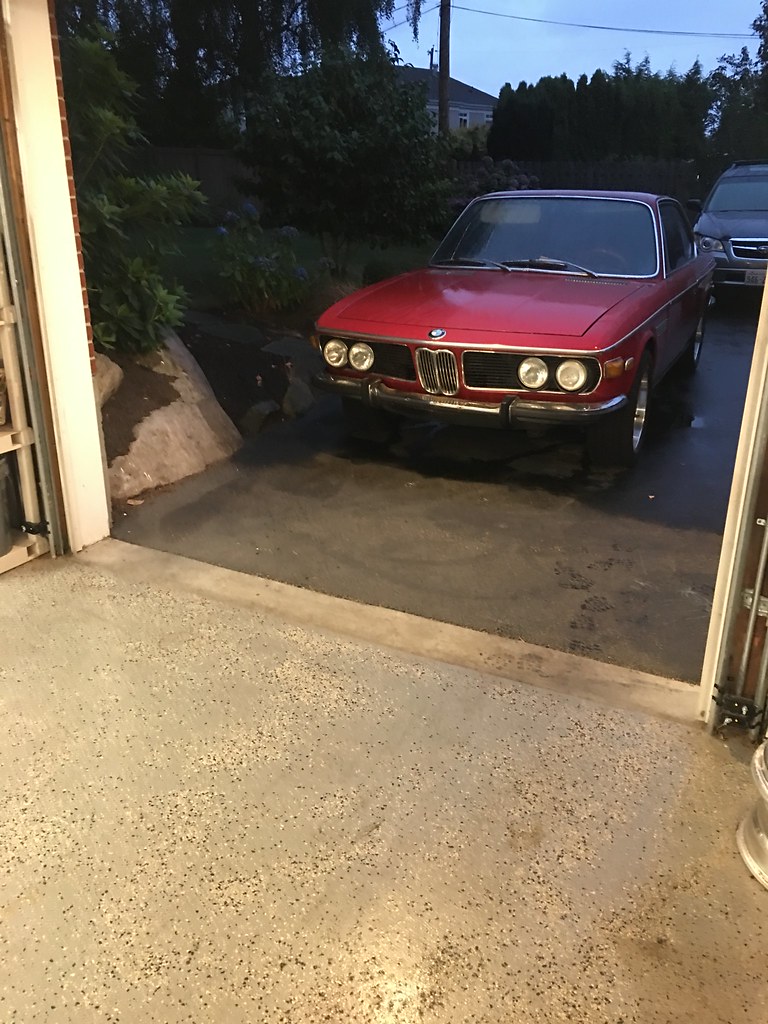
'71 2800 CS Budget Resto

Andrew, It looks like the original is enamel paint in a sand-cast plate and the repro is cloissonné in a chromed casting. Old school versus current technology. Leave it to you to have both...

I agree. he said it was cloisonné. The old one looks better IMO.
 
Andrew, It looks like the original is enamel paint in a sand-cast plate and the repro is cloissonné in a chromed casting. Old school versus current technology. Leave it to you to have both...

The cloisonné is smooth with no relief like the current grill badges. After looking at the repro closely, it is cloisonné too.

BMWCCA Grill Badge.jpg
BMW CCA Grill Badges.jpg
 
Last edited:
It's a minor point, but I ran across this site that states we've been using the wrong name for the process that makes our C-pillar badges and the BMWCCA repro badge we are discussing:

http://www.maxwellenamels.com/FAQs.html

These enameled emblems are often, incorrectly, referred to as cloisonné. Cloisonné is an enamel process in which separate bands of metal are bent then applied to a base. These labor intensive bands encase the enamel and create the design. I have yet to see an automobile emblem done with cloisonné. The process that is used is called champlevé (pronounced shomp´-leh-vay).

The champlevé technique involves applying enamel into depressions in the base metal. These depressions may be etched, engraved or, in the case of automobile emblems, die stamped. The stamping process can also include the beautiful design work that shows under transparent enamels.
Historically the word enamel meant glass but today it seems to refer to any shiny color. The correct terminology is vitreous [glass] enamel. It is a true glass that melts and fuses around 1400 degrees F.
Enamel can be obtained as opaque, translucent or transparent. The colors are created by the addition of metallic oxides to the glass. The most common form is ground to #80 mesh and looks like colored granulated sugar. These enamels are formulated to molecularly bond with copper, silver and gold.
 
I remember you mentioned this in another thread. It's great info and sounds correct to me, but you have an uphill nomenclature battle on your hands.
 
Having created cloissonné items in college art classes I always assumed the process of fusing glass powders into shaped metal areas (hand-formed silver wires in art class) made badges one and the same, but apparently how you create the constraining shapes changes the definition. Champlevé it is. I can see this as an effective argument starter at the next classic car show.

Andrew, the original badge in your first image is different than the one in your later posting. Looks like the badges have gone through several generations, likely due to supplier changes. Apparently you DID need some stinking badges...
 
I simply want to make as much accurate information available about our cars. But I'm not a purist, and tradition wins out most of the time.
It helps to know the correct term, even if the day to day term is less than correct.
 
Disclaimer:
This is an account of my experience. It shows the hoops that I have jumped through to keep my restoration costs down. While technically I have sold thousands of dollars in parts, I don’t consider myself a flipper. I have never sold anything above market rate. I’ve used ebay perhaps once or twice. What this sheet doesn’t show is the countless hours scouring the earth for affordable items that I could keep or sell. The help I have received from friends and contacts in the US, Germany, Australia, Canada etc. I don’t put a dollar figure on my time as this would be a job instead of a hobby that I enjoy. The numbers below don’t represent a repeatable real world restoration and parts acquisition effort.


Accounting:

Purchased (including shipping):

Powder coat spare Weds faces: $150
16x8 Weds wheels w/ 5yo "new" Michelins: $500
OEM 68mm BMW Center Caps: $30
NOS Sidler Euro Blinkers: $150
Speedo Adjuster Knob: $20
NOS Dual pump windshield/headlight washer: $120
NOS headlight washer auxillary tank: $240
HL Wish/Wash wiring and relay: $0
New dual bung wiper tank: $48
Coupe King restored tool tray: $185
Gas pedal pivot: $32
DIY Heavy Duty Battery Cables: $35
Getrag 265/5 “Dogleg” Transmission (never delivered by Bob Beverly): $300
Stan's Dogleg Shift Pattern Sticker: $10
Four Slot Kidney: $0
NOS Door Seal: $0
Early Headlight Wiper Stops: $75
Headlight Grilles w/ wiper cutouts: $100
Shipping from Germany, 2 steering wheels & HL grilles: $110
BMW Motorsport Wheel & Hub: $235
Stahl Headers & Repair: $590
4x Wiper Inserts: $12
Spare wiring harness (just in case): $55
B35 & 265/6 (friend price): $500
265/5 dogleg (265/6 trade + cash): $500
Shortened DS & Crossmember: $100

Carl Nelson Springs and Camber Plates: $200
3.0CS strut Housings & Backing Plates: $200
OEM hood light tab: $43
OEM Horn contact plunger: $33
Period Britax Racing Belts: $248
Replacement Britax Logos: $56


CSL Tribute (ugh so much shipping):
CSL Manual Steering Box: $400
5x 08/72 CSL “five hole” Alpinas: $2,700
Zaprace Replica CSL Rear Bumper: $350
Original Scheels: $2,500
NOS Tilting Scheel Frames by Gerrit:$460
Original CSL Headliner & Visors: $384
Original CSL Hood Prop: $100
Original CSL Wheel Arches: $600
Original CSL fixed rear window mount: $200
Original CSL fixed rear window mounts: $370
Original CSL grille: $242

Butler's Map Light #1: $50
OEM Carb CSL inverted struts: $300
CSL Rear Seat Covers (uninstalled): $800
CSL Lightweight Perlon Carpet: $660
CSL Scheel Fabric (2 yards): $300
CSL Bosch 12v/36ah lightweight (small) battery: $350

DCOE Project + Megasquirt Ignition (including $hipping):
@daddywad Alpina Airbox: $1,369
Korman DCOE Manifold: $224
Ross Machine Fuel Rail, Fittings, and 6AN Tap: $80
M12 to 6AN banjo fittings: $39
Sold: Redline 3 Piece Manifold: -$90
T-Stat housing gasket: $8
T-Star housing (late model): $69
T-Stat Relocation Bracket: $0
Well used CSL/CSI airbox bracket: $55
Alpina-style valve cover (trade): $0
New DCOE 45’s (trade): $0
SFDon’s Megasquirt Engine Harness: $0


Sold (margin only):
NOS Inner Fenders: -$5,900
Miscellaneous Parts: -$4,821
OEM AC Faceplate - DIN cutout - $220
T-Stat Housing (late model): -$50
17” BBS RC090: -$200
Momo A38: -$25
Nardi BMW Button: -$100
Hood Torsion: $300
HL Access Panel: -$25
9 Blade Fan: $6
Strut Bar: -$425
Black Leather Rear Seats: -$250
15x7 Enkei Wheels: -$300
Rear Arm Rests, poor condition: $0
Dash Grab Rail, fair condition: $0
E3 Ignition Cylinder & Key: -$33
E3 AC Console Parts: -$36
Dashboard grab bar trim: -$85
Ceramic Coated Stahl Headers: -$800
16” Staggered Weds Bavaria’s: -$900
1974 glove box knob (plus pre-74 trade): -$50
Passenger side door wood (core): -$50
AC Knobs: -$43
Dashboard Trim: -$65
18" Alpinas: -$500
Nardi/Personal 3130 Hub: -$87 ($38 loss)
M535i Steering Wheel: -$400
Parts Car nose sheetmetal: -$150
16” Staggered BBS Mahles: -$1,000
Hood Latch: -$90
Door Chrome: -$80
Tow Hook: -$40
Marchal Fogs: -$50
Jackie Stewart Momo Wheel: -$200
Power Steering Pump: -$80
AC Face Plate Prototypes: -$200
2.5 CS Badge: -$75
CS Rear Bumper: -$1,000
Four Bar Kidney: -$50
Front Bumper (friend price): -$350
Front Seats: -$300
Sun Visors: -$200
B35/e9 spare subframe: -$200
B35 injection: -$300
B35 motor mount bracket: -$15
2800 CS Visors: -$75
CSI Visors: -$150
Tool Tray (CSL route): -$185
Front Seats: -$300
AC Duct and Face: -$270
9 Blade Fan: -$60
Rubber Wiper Cover: -$23


Budget Resto Spend: $6,189
Parts Car Income (separate thread): $2,985
Net Spend: $3,204


Reference Pics:

This is Bovenseipen’s
personal car. Injected with ITB’s and K-Fisch, but note the valve cover. Despite the injection, the Alpina plenum is Gen1 and would be correct for a carb CSL. No Alpina logo, but an Alpina badge on the valve cover (2002-style):
B2B03CBC-20CF-4BA7-B1B8-190E14979CE8.jpeg


Another period Alpina. Carb CSL - note the CS badge.
4DB7D739-590F-473F-9FCF-695EFFD3FEEB.jpeg

EF0F8E7F-4676-47B6-954F-54A9DCFC4CA0.jpeg


Another carb CSL, seemingly restored. Note the black airbox found on this car and all carb CSL’s.
7655A2BE-100F-4E51-BA5A-41F4D234CE0C.jpeg
 
I had a moderately productive weekend with the project car. I removed the dangerously bad tires and mounted some newer rubber and wheel. Details here:

https://www.e9coupe.com/forum/threads/custom-widened-weds.23669/page-2

I stripped a whole garbage can full of stereo equipment. This included the supplemental wiring up to the positive battery lost. I removed the makeshift veneered particle board radio mount. I removed the wiring for an auxiliary gauge. What’s left is a refreshingly simple 2800 CS harness. Having no power windows up front and no AC helps to keep things simple. I explained my justification for manual windows to a long time coupe owner this weekend. My children would never experience manual windows or a manual transmission if it weren’t for this car. It’s the same novel reason why I want carbs and the four speed (although that ship sailed in exchange for an equally novel dogleg).

I had Sears replace my battery. It tested positive again but it will drain before I get it in the car. The lady working at Sears whom I have had multiple conversations with is certifiably insane (really). I think the tech knows this fact and felt bad for me - so gave me a new batttery. :D
 
I tried to “quickly” tighten my alternator last night but I’m glad I didn’t spend much time on it. Having just removed my alternator on the CSI I was familiar with the three mounting points. I presume that I need to loosen all there to let the alternator move and the tensioning arm articulate. It was late, and dark so I said screw it adter five minutes of fumbling. I was eating into the bed time routine. I can spin the alternator pulley with a bit of force so I need to tighten it up before considering a swap.


With my new battery and new tires I was supposed to take my car for a spin last night. I had a trifecta of issues that led me to believe that my brand new battery was DOA.

First, when installed my car has zero power, not even the warning lights came on. Thinking my battery ground is shot I used my jumper cables to ground. When that didn’t work I tested for sparks when snorting then battery. Still nothing. I used my multimeternand the battery was showing zero volts.

I took the battery back to sears. Thankfully the crazy lady wasn’t there and the other cool russian guy was available. I told him my issue and he said: “Impossible”

Well it turns out that he is right but I’m not crazy. My multimeter isn’t functioning correctly, AND the ground cable on my 20yo jumpers is shot. We tested with his multimeter and the battery was at 12.4. That obviously doesn’t tell you how well it will perform when starting but it is a new battery.

Next steps are to hunt down the power issue. I’m going to start with the battery cables which I had intended to replace nearly two years ago. Although I just checked my fuses last weekend, I’ll take another look.


There wouldn’t happen to be a master fuse in the e9 would there?


Personally I think it is my battery ground but I will know more this weekend. I was supposed to move my car to covered parking last night but now it’s more fun in the rain. Halloween was the last nice day of the year I’m afraid.
 
Last edited:
If you do get a new alternator, get an E12, internally-regulated one. Less wiring to deal with (my wire fried on my 2800).
 
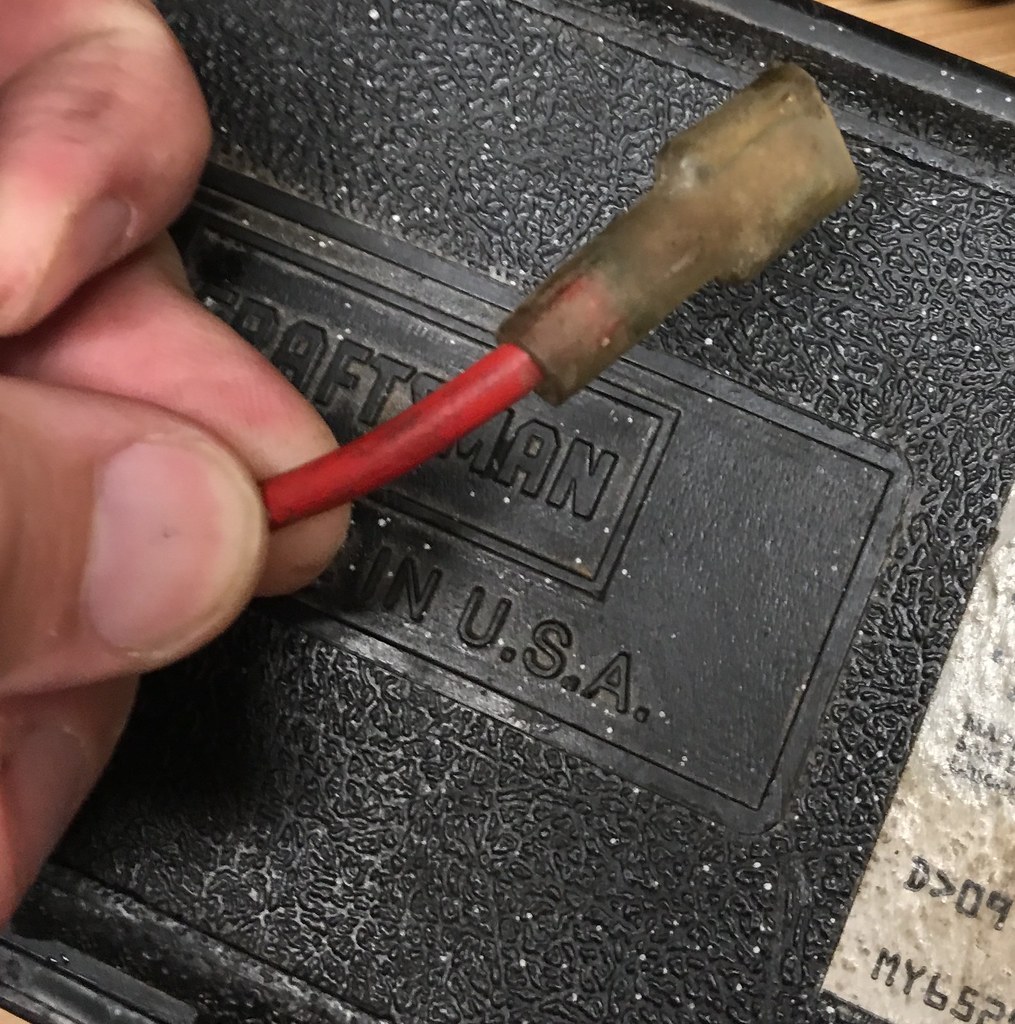
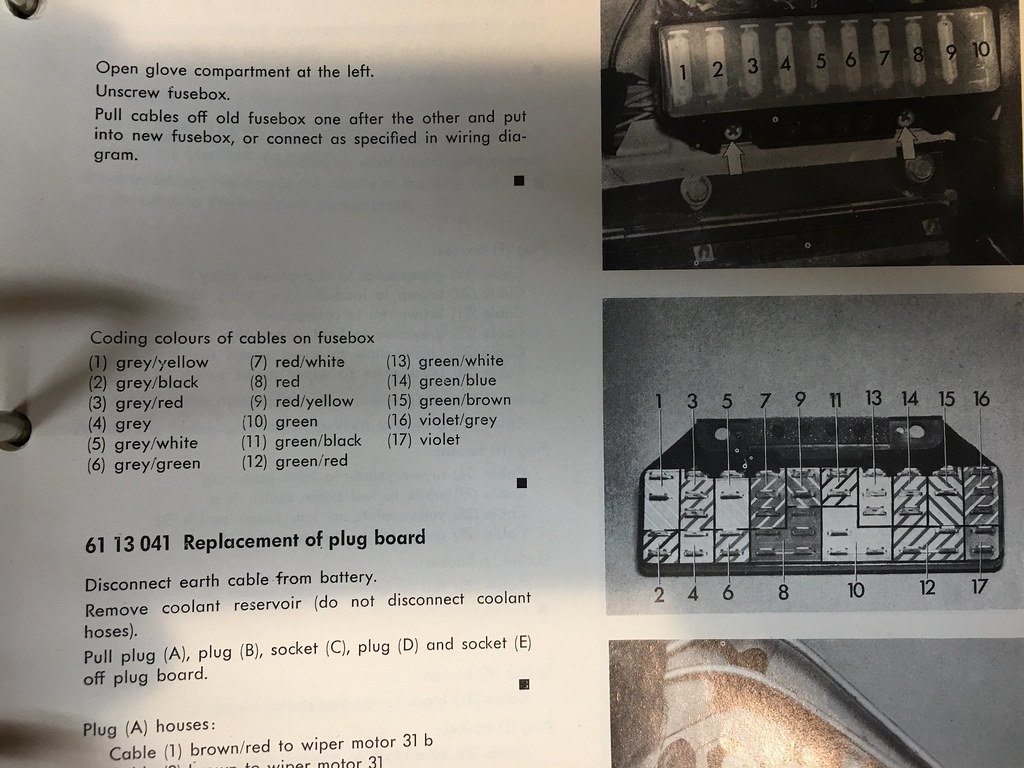
So it turns out that when I stripped out the 20 yards of stereo wiring I accidentally unplugged the red ignition switch wire from the fuse block. Although I harassed Don and he text me fuse location “5”, I confirmed with old blue. Sure enough..

Example wire from my spare ignition switch. Pretty much the only solid red on the top terminals of the fuse block.
26599569069_8600a0e865_b.jpg


Blue book. The fuse block is upside down in the second pic.
26599570889_af7ab08f32_b.jpg


Before identifying the root cause I replaced my battery cables (excluding the alternator cable). I also installed new marine style battery terminals. I made my own cables and outlined the process here:

https://www.e9coupe.com/forum/threads/diy-heavy-duty-battery-cables.26960/

Technically I haven’t addressed the charging issue. My belt is a bit loose but I’m just going to bite the bullet and get a new alternator. I’m going to follow the lead of @GolfBavaria and get a higher amp AC Delco unit. I’ll take that opportunity to swap the old belts as well. Each of these little things makes the car a bit more driveable.

The goal of all of this is to get my car out of the rain until I can cut up the CSI and remove from my garage. Once the power was up and running, I took my car for a spirited drive in the rain. Although the tires are new they break loose pretty easily on wet ground. I’m also used to driving an AWD subaru. I haven’t had a manual transmission car since 2007.

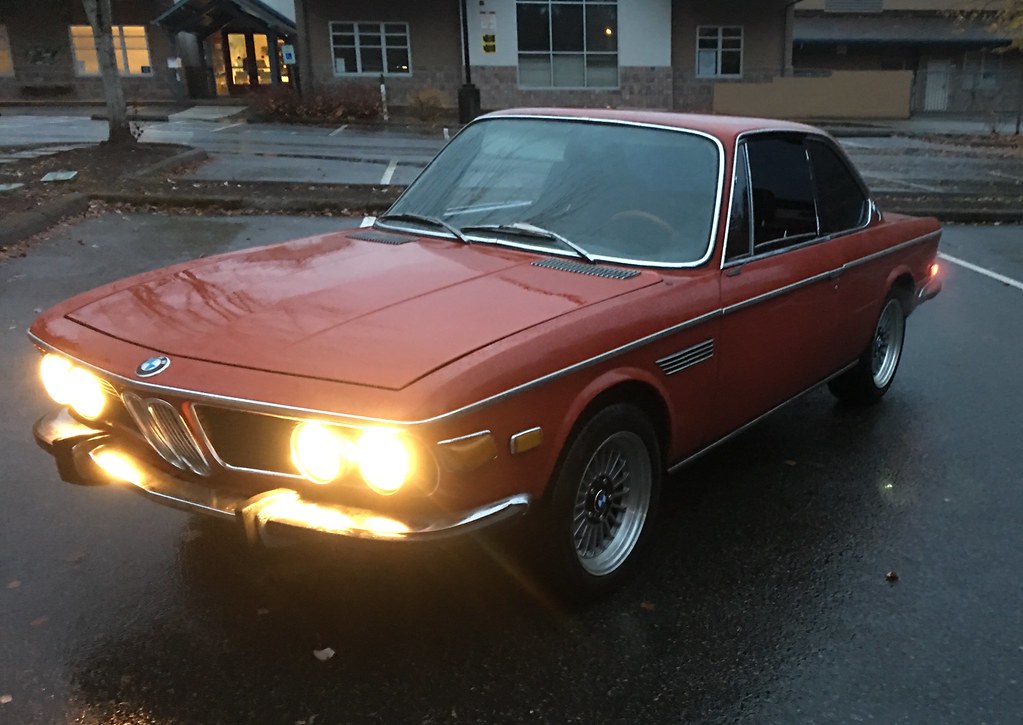
Pit stop in the rain for a gratuitous photo.
26599569139_6d1aa33ed0_b.jpg


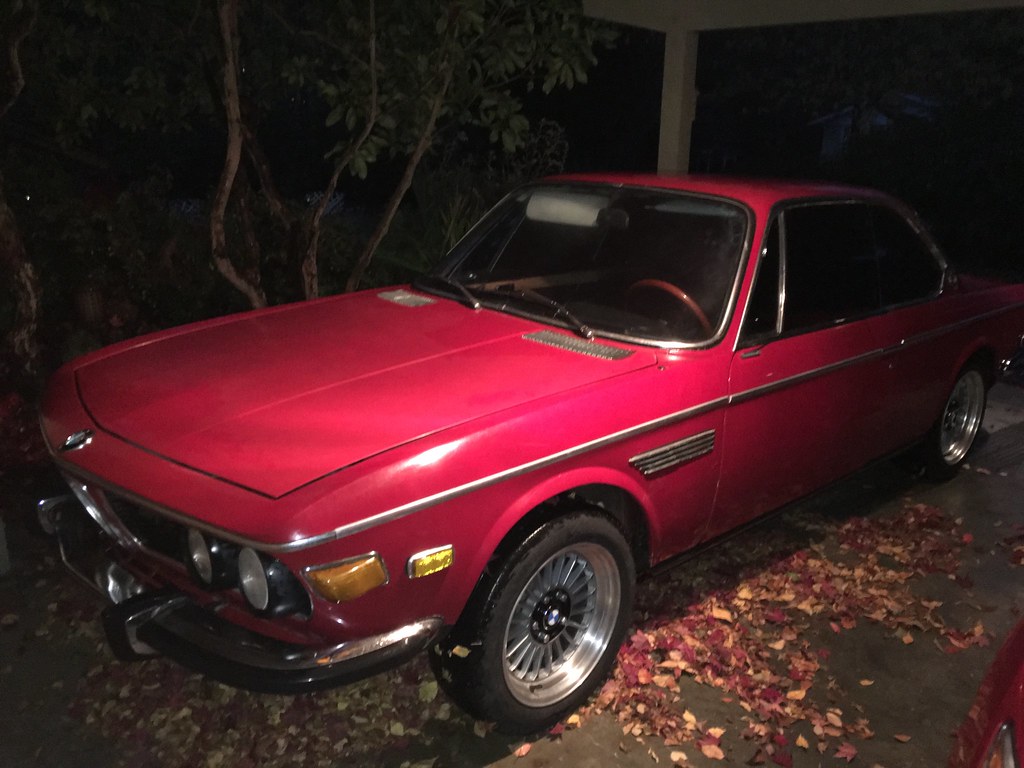
New temporary home.
38375168461_8a14752977_b.jpg
 
Last edited:
Cars looking great! Good idea on the Alternator, mine has been working great!

I know it’s counterproductive but it only looks great in the rain. :D

I’m hoping I can just get that alternator from Autozone. If I have another box show up at my door step my marriage is over! :D
 
I know it’s counterproductive but it only looks great in the rain. :D

I’m hoping I can just get that alternator from Autozone. If I have another box show up at my door step my marriage is over! :D

It's funny, I know we all try and not drive our cars in the rain too much. Some of us are luckier than others demographically. I don't know what it is, the rare time we get any rain here in SoCal is the day I drive it down to San Diego to La Jolla Independent or something. It never fails. I don't mind it too much, seems like the Bav's are a little more immune to the water than the coupes. The angles and secret "Rust Gremlin" caves seem to be sealed up better, anyhow, yes, it looks nice and shiny in the rain though! LOL.
 
Clear a spot for the car in the garage, only to find that it wouldn’t start. A bit confusing as I just drove it on Tuesday.

It caught a few times but wouldn’t fire. I’m in the middle of another project but I’ll check fuel and spark this week. I’ll make sure the plugs aren’t fouled. It took a some persuasion to get it started earlier in the week, but it was sitting for quite a while. Usually if I start it up in the same week it fires right away.

Getting rained on...

44292690331_b17cd77e23_b.jpg
 
Back
Top