72 CSi rotisserie restoration

No problem with that cam- ITB’s and big cams cause issues.
Assume you have a pusher fan at the front and not a puller.
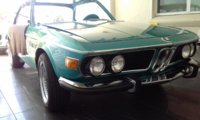
 
Well my trimmer can't fit car in for another 1 1/2 months....so car will go to my place to fit all the trim and lights etc back on . to keep the ball rolling. I shall assemble all the upholstered parts after the trimmer has finished.
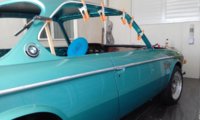
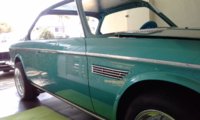
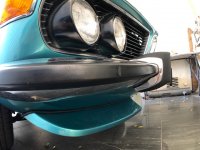
Thought I might share some pics of the buffed car......I have now finished with the painter and what a great job he did.:D:D
 

Attachments

  • 20190909_144014_resized.jpg
    20190909_144014_resized.jpg
    225.5 KB · Views: 348
  • 20190909_144026_resized.jpg
    20190909_144026_resized.jpg
    231.5 KB · Views: 338
  • 20190909_144450_resized.jpg
    20190909_144450_resized.jpg
    411 KB · Views: 310
  • 20190909_144513_resized.jpg
    20190909_144513_resized.jpg
    256.7 KB · Views: 309
  • 20190909_144524_resized.jpg
    20190909_144524_resized.jpg
    275.1 KB · Views: 296
  • 20190909_144508_resized.jpg
    20190909_144508_resized.jpg
    364.6 KB · Views: 334
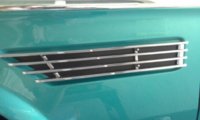
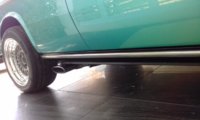
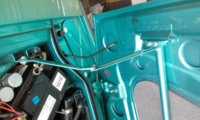
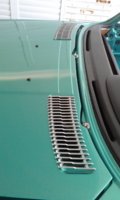
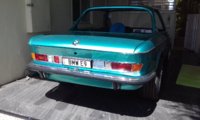
My trimmer could not fit me in until Nov so I decided to get started on my stuff. Most of the external trim is on the car now. Turkis really loves chrome. I ran the window washer hose inside the bonnet..............looked ugly on the outside. Had to adjust the alloy belt line a bit by slotting the holes because of panel work............they are spot on now with one continual line down the whole side of the car. Placed small dome nuts on the side grilles just to give it that mechanical look. Hope you guys like the number plate. Next week I shall move into the interior and fit dynamatt and carpets and fit the console a little better. I am leaving the side windows last as I think this is the big task.
 

Attachments

  • 20190918_112501.jpg
    20190918_112501.jpg
    206.7 KB · Views: 289
  • 20190918_112649.jpg
    20190918_112649.jpg
    182.6 KB · Views: 289
  • 20190916_165033.jpg
    20190916_165033.jpg
    147.2 KB · Views: 304
  • 20190920_124318.jpg
    20190920_124318.jpg
    189.3 KB · Views: 287
  • 20190920_124314.jpg
    20190920_124314.jpg
    209.9 KB · Views: 289
  • 20190920_124416.jpg
    20190920_124416.jpg
    180.2 KB · Views: 294
  • 20190920_124307.jpg
    20190920_124307.jpg
    244.6 KB · Views: 287
  • 20190920_124328.jpg
    20190920_124328.jpg
    171.6 KB · Views: 314
  • 20190920_124432.jpg
    20190920_124432.jpg
    230.8 KB · Views: 303
  • 20190920_124400.jpg
    20190920_124400.jpg
    207.5 KB · Views: 355
My trimmer could not fit me in until Nov so I decided to get started on my stuff. Most of the external trim is on the car now. Turkis really loves chrome. I ran the window washer hose inside the bonnet..............looked ugly on the outside. Had to adjust the alloy belt line a bit by slotting the holes because of panel work............they are spot on now with one continual line down the whole side of the car. Placed small dome nuts on the side grilles just to give it that mechanical look. Hope you guys like the number plate. Next week I shall move into the interior and fit dynamatt and carpets and fit the console a little better. I am leaving the side windows last as I think this is the big task.

Love the plate!
Turkish also loves zinc and brass in engine bay.
 
My trimmer could not fit me in until Nov so I decided to get started on my stuff. Most of the external trim is on the car now. Turkis really loves chrome. I ran the window washer hose inside the bonnet..............looked ugly on the outside. Had to adjust the alloy belt line a bit by slotting the holes because of panel work............they are spot on now with one continual line down the whole side of the car. Placed small dome nuts on the side grilles just to give it that mechanical look. Hope you guys like the number plate. Next week I shall move into the interior and fit dynamatt and carpets and fit the console a little better. I am leaving the side windows last as I think this is the big task.
What a beautiful color and beautiful car. Probably one of my favorite colors I have seen on an e9...
 
how did you manage to pull that lock mechanism of the rear tail panel? having trouble with it, i've taken the barrel out it's just the outer metal shroud left
 
Hi HJ9....the outer tube is held on inside the trunk with a fine threaded barrel nut (approx Dia as the lock) with 4 slots around its diameter for tightening or loosening with a screw driver or similar. :)
 
  • Like
Reactions: hj9
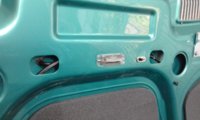
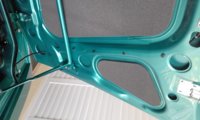
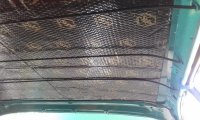
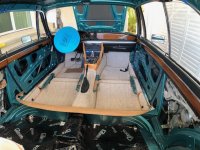
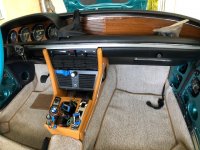
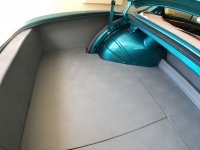
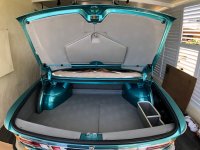
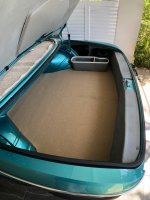
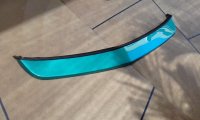
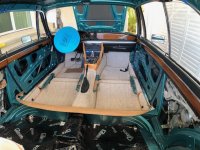
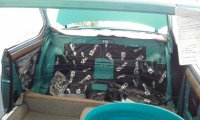
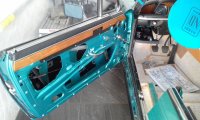
Well I have gone as far as I can and now waiting for my trimmer before I can finish off ( 3 weeks hopefully he can slot me in o_O ) Dyna matting finished...also did the roof /carpet in/trunk upholstery finished....I changed the rear of the trunk as I did not like the way the tail light wires were exposed to damage....I think looks neater.Side windows in and operating (what a task that was) Console waiting on A/C grille (3D unit from Markos )and can then lock that away. I took the front spoiler off as not happy with the gap between body and spoiler and fitted a beaded rubber gasket.....looks great now. All I have to do is fit actuators for central locking before fitting all the seats and trim from trimmer.:D:D
I am aiming to be driving the E9 sometime in January (2020):):)
 

Attachments

  • IMG_6046.jpg
    IMG_6046.jpg
    159 KB · Views: 315
  • 20191106_163923.jpg
    20191106_163923.jpg
    259.3 KB · Views: 316
  • 20191106_163852.jpg
    20191106_163852.jpg
    281.5 KB · Views: 309
  • 20191107_170925.jpg
    20191107_170925.jpg
    310.2 KB · Views: 299
  • IMG_6046.jpg
    IMG_6046.jpg
    159 KB · Views: 319
  • IMG_6047.jpg
    IMG_6047.jpg
    130.7 KB · Views: 301
  • IMG_6045.jpg
    IMG_6045.jpg
    69.4 KB · Views: 299
  • IMG_6044.jpg
    IMG_6044.jpg
    91.4 KB · Views: 294
  • IMG_6041.jpg
    IMG_6041.jpg
    68.6 KB · Views: 299
  • 20191108_121330.jpg
    20191108_121330.jpg
    232.4 KB · Views: 286
  • 20191108_121355.jpg
    20191108_121355.jpg
    231.9 KB · Views: 274
  • IMG_6050.jpg
    IMG_6050.jpg
    88.9 KB · Views: 294
Beautiful! Another Turkis! I'll have to go back and start from the beginning of the thread.
I've wondered what the chrome hood and side vents would look like on Turkis, very nice indeed!
 
Paul,

I don't see the holes in your rear wood trim, so I thought I'd mention this in case you are planning the later-model shoulder safety belts. You still at a good point to make the holes if needed.
Keshav clued me into this. It will be a winter project for me to drill the holes and mount the posts.

This kit from CS-Werk allows you to hang the strap at your shoulder for an easy grab for the belt.
1573385266061.png


1573384933484.png

1573385037274.png

1573385583373.png


It's so nice seeing all of your interior surfaces without old glue for the vapor barriers slathered all over them. Beautiful work!
 
Paul,

I don't see the holes in your rear wood trim, so I thought I'd mention this in case you are planning the later-model shoulder safety belts. You still at a good point to make the holes if needed.
Keshav clued me into this. It will be a winter project for me to drill the holes and mount the posts.

This kit from CS-Werk allows you to hang the strap at your shoulder for an easy grab for the belt.
View attachment 80615

View attachment 80613
View attachment 80614
View attachment 80616

It's so nice seeing all of your interior surfaces without old glue for the vapor barriers slathered all over them. Beautiful work!

Willem,
keep in mind that Paul has a 72 model which doesn’t have the seat belt system your car does. For the swap one not only needs the correct armrests (which Cs-werke sells), the retractors have to be installed a good 10cm above the current bolt on position. That will take some fabricating and possibly correct seat belts too. And to get it really right, you'd need the hockey stick shaped seatbelts!
 
Last edited:
Hi Willem......thanks for the heads up........I will look into it.....but as Keshav says it may be a hassle.
Fitted the central locking actuators today.....tucked in very nicely.
 

Attachments

  • 20191111_141451[1].jpg
    20191111_141451[1].jpg
    178.2 KB · Views: 259
  • 20191111_142534[1].jpg
    20191111_142534[1].jpg
    159.2 KB · Views: 269
Since I am waiting for my trimmer....decided to place all my decals. The Tire Pressure decal is too big to fit inside fuel flap.........SO.......I thought might place it on the toolbox.
Thoughts please. or is there an alternate position??
 

Attachments

  • 20191115_105225[1].jpg
    20191115_105225[1].jpg
    201.4 KB · Views: 234
  • 20191115_105202[1].jpg
    20191115_105202[1].jpg
    216.7 KB · Views: 213
I think the gas tank door sticker is US only, correct?

Being that it’s in English, could very well be...I’ll check with the German E9 club (and it's not in the decals set from Christoph either)
 
Back
Top