i think it looks really great. congrats on the great work.
You are using an out of date browser. It may not display this or other websites correctly.
You should upgrade or use an alternative browser.
You should upgrade or use an alternative browser.
And so the saga begins
- Thread starter bimmerboy73
- Start date
-
- Tags
- restoration list
bimmerboy73
Well-Known Member

Last edited:
I have this wheel, with the integrated horn. I didn't know it was that valuable. The horn button snaps on to three white plastic studs. The studs are NLA, and the female did attached to the button were likely integrated. The female side cracks causing the horn button to fall off.
Anyway, I'll be running a mono wheel. I'll do some research on selling the original.
Anyway, I'll be running a mono wheel. I'll do some research on selling the original.
Cool! The school bus model! I've got one and love it, I wasn't sure it was OEM
bimmerboy73
Well-Known Member
MSD Goodness
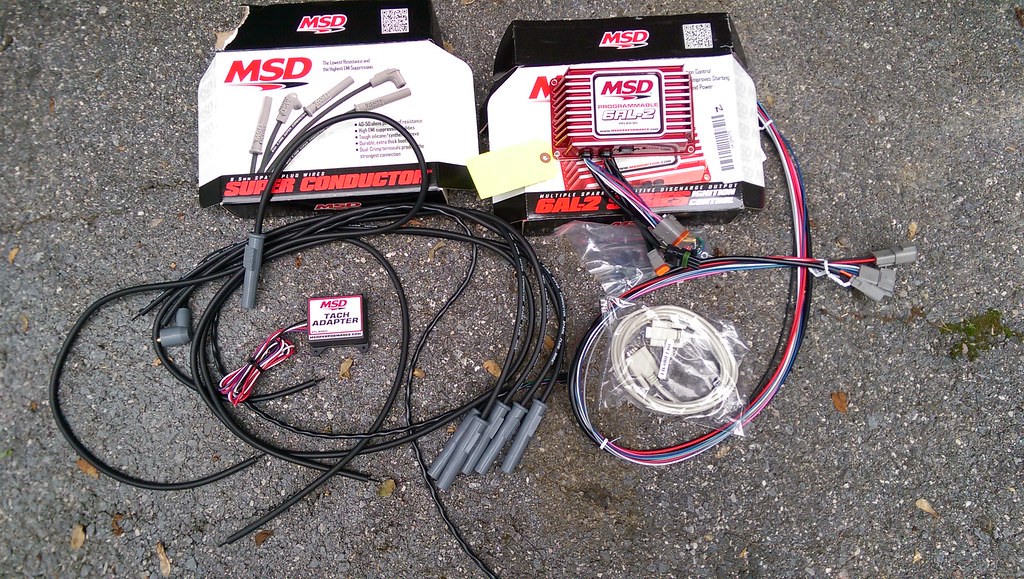
New toys arrived today. MSD 6AL2 , MSD conductor wires, and tach adapter. Excited to get this wired. Fully digital with laptop integration to adjust on the fly.
Hats off to Jegs and MSD. Parts arrived next-day without issue and the MSD stuff is very well built.
 IMAG00482 by J_Otte, on Flickr
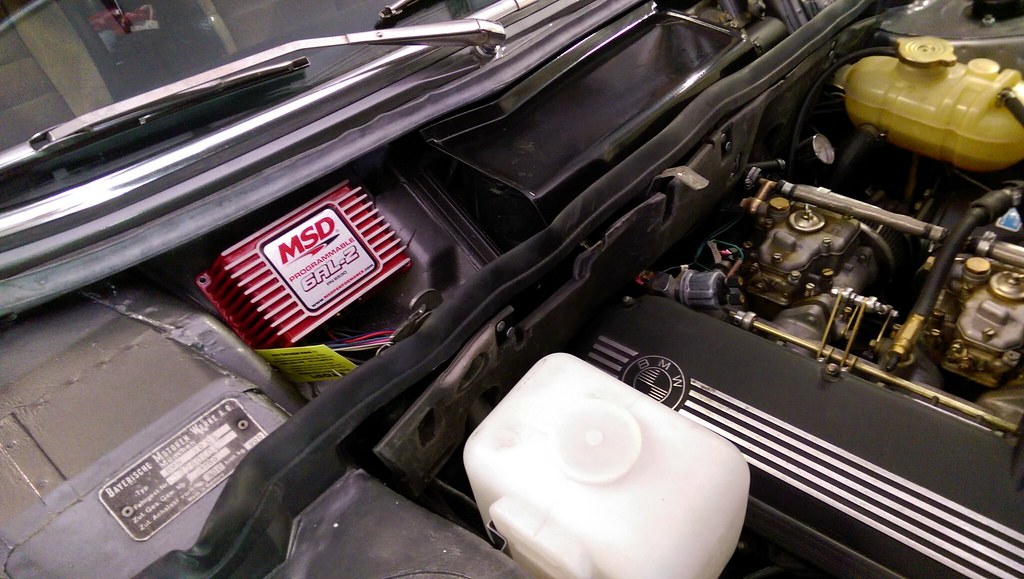
Thinking about mounting the box here. Would need to rig up something to protect it from the elements. Prefer this spot over mounting it behind the pass. headlight
 IMAG00483 by J_Otte, on Flickr
New toys arrived today. MSD 6AL2 , MSD conductor wires, and tach adapter. Excited to get this wired. Fully digital with laptop integration to adjust on the fly.
Hats off to Jegs and MSD. Parts arrived next-day without issue and the MSD stuff is very well built.
IMAG00482 by J_Otte, on FlickrThinking about mounting the box here. Would need to rig up something to protect it from the elements. Prefer this spot over mounting it behind the pass. headlight
IMAG00483 by J_Otte, on FlickrHonolulu
Well-Known Member
If indeed it's "well built" the housing should be weatherproof, or with a little sealant, "weatherproof-able".
It really only needs water protection from above, but if you drive your coupe in the rain, the ghost of Murray will haunt you...
It really only needs water protection from above, but if you drive your coupe in the rain, the ghost of Murray will haunt you...
bimmerboy73
Well-Known Member
If indeed it's "well built" the housing should be weatherproof, or with a little sealant, "weatherproof-able".
It really only needs water protection from above, but if you drive your coupe in the rain, the ghost of Murray will haunt you...
It is water tight and 'weather proof'. I don't drive the coupe in the rain but thought it smart to take precautions (rain deflector mounted below and offset from the vent grill) in the event i'm caught in a downpour, say... on a long road trip - sometimes you cant help it.
The unit is pretty nice and install was a breeze. I did have to run to bestbuy to buy a serial to usb cable , but that was all that wasn't included. The box also ships with anti-vibration mounts that screw into the base. A wiring schematic is also included on the back side for quick reference. Nice touch.
Re-wiring involves reducing connections to the coil to 2 wires - black to (-) and orange to +. The triple black tach wires connect to a lead from the tach adapter. From there, another wire takes the signal out to the MSD box. One white/blu wire connects to the Mallory dizzy, a heavy red wire to the + terminal of the battery, a heavy black wire to ground, and a 'small' red wire to switched 12v (connected to the vacated green wire that was connected to the ballast - also now disconnected). Tach adapter wiring includes the tach wires to and from the unit as well as switched power and ground. Additional connections are available for rev limiters (2 in addition to max), switched retard, MSD MAF, and MSD Dizzy connection.
Curve mapping is by way of retard only. In other words, using the unit requires locking out the dizzy so that all advance is controlled via the MSD. You then dial in your 'all-in' advance and use the MSD to retard the curve in 100 rpm increments, or whatever step you prefer. SO, for example, i set my advance at idle to 32 degrees, opened up the UI software, and plotted the first point on the advance (or retard) curve at -20 degrees @ between 0-1000 rpm. 32-20 = 12 degrees initial . I then set points on the curve to sweep in 100 rpm steps to 0 degrees retard (32 degrees adv) at 3500 rpm ---> redline. Havent driven it yet to test any of this but the curve follows some of the maps i've seen posted on the forum and elsewhere. I can tell you that the car idles like it never has before. Could almost confuse it for a EFI car at anything between 400 and 900 rpms if i closed my eyes and that's saying a lot for a performance minded, triple setup. manually feathering the throttle at the carbs elicited a strong, smooth growl from the motor.engine seems to be all around, just happier. So am I!
Have not poked around into the manifold (vac/boost) advance or rev limits. Not sure how to do it or if its possible.
I ended up swapping out the stock bosch coil for a MSD Blaster 2 (still new) which i had sitting around the garage for years. Not sure it makes a difference, but seemed to make sense to use it. Something i'm still not 100 % clear on is whether the green wire im using for 12v to the msd is good to tap or not. MSD instructions say the LED should come on when connected to switched 12 v but when attached to the green lead (speed relay i believe), it flashes on momentarily and then turns off again. Not sure if its the 'open-closed' nature of the circuit or whether the LED is meant to come on and then turn off again until the engine is started. turning the engine over yields a pulsing LED (pulse for each spark) and then solid when the engine is running. So, it seems to be operating as it should, just not sure whether the LED should remain on when the key is in the on position. Any ideas on the green wire as switched 12v?
Also, the blk/red starter wires are disconnected now. Thought at first that this coudnt possibly be right but connecting the wires to the coil did not yield positive results.
In addition to upgrading the 'hot' side of the motor, i also went ahead and ordered a rebuild kit, floats, needles and seats for the webers. I suspect the perpetually rich condition i seem to have is due to a leaky float at the rear carb. Also ordered new filters for the carbs and crank case so that air moving in and out is as free flowing as possible.
Will post more mid week when i have a chance to take it for a spin.
Hi Richard - keeping the information coming please. My Getrag tranny is in, and the drive shaft and exhaust are back on (save for a three nylock nuts on the drive shaft); and my gas tank clean up reseal (from rust) is almost done. After a shakedown to check this stuff and the tii booster; its on to the fuel pump and carbs.
I can contribute one thing to your setup. The black/red starter wire is installed to enable full voltage to the coil while starting the car, bypassing the resistor which would normally be in the coil circuit. Thus, it makes sense to me that this wire would be disconnected with your setup.
Have you changed your distributor, or are you using a stock one?
bimmerboy73
Well-Known Member
Hi Richard - keeping the information coming please. My Getrag tranny is in, and the drive shaft and exhaust are back on (save for a three nylock nuts on the drive shaft); and my gas tank clean up reseal (from rust) is almost done. After a shakedown to check this stuff and the tii booster; its on to the fuel pump and carbs.
I can contribute one thing to your setup. The black/red starter wire is installed to enable full voltage to the coil while starting the car, bypassing the resistor which would normally be in the coil circuit. Thus, it makes sense to me that this wire would be disconnected with your setup.
Have you changed your distributor, or are you using a stock one?
Distributor is a Mallory 47 series mechanical / centrifugal unit. Thanks for the clarification on the blk / red wire. Same goes for the green i would assume. confirmed with MSD that the LED is meant to illuminate and then turn off after 12v are applied so its working properly. Next step it to regap the plugs and order a MAP sensor and associated parts. Also need to get my manifold ported to receive the line.
gary bellamy
Well-Known Member
- Messages
- 115
- Reaction score
- 0
Great Job, Love the color.
Gary
73 CS -SOLD
86 M535I - SOLD
01 530I
Gary
73 CS -SOLD
86 M535I - SOLD
01 530I