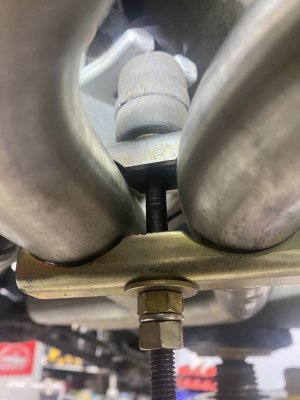
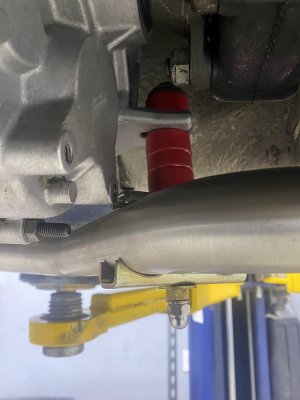
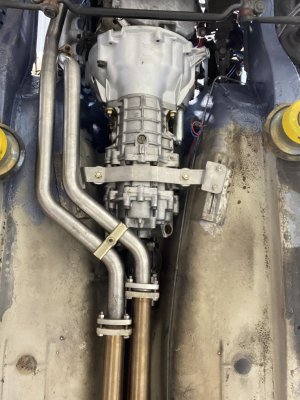
Unused single mount at rear of transmission…long #6 bolt with sway bar bushings top and bottom of the mount and then used cut down bushings to be the right distance down… Seems like it’s gonna work well has little bit of vibration protection….How are you anchoring the exhaust support bracket to the transmisson?
You are using an out of date browser. It may not display this or other websites correctly.
You should upgrade or use an alternative browser.
You should upgrade or use an alternative browser.
Barney’s Baikal Blue coupe refresh
- Thread starter BarneyT
- Start date
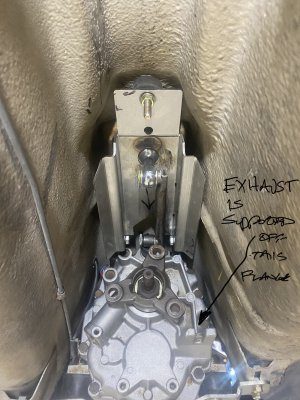
Would love to see a pic of that.How are you anchoring the exhaust support bracket to the transmisson?
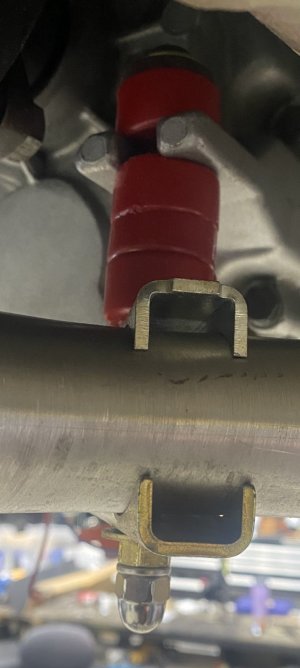
Better pictures of installationWould love to see a pic of that.
Attachments
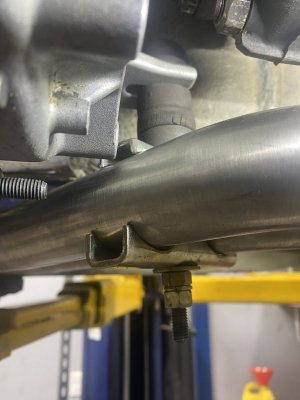
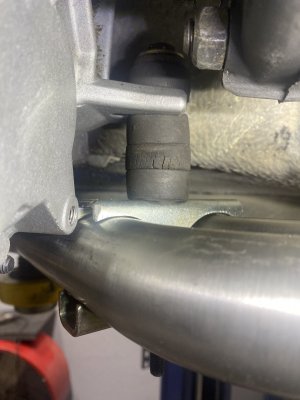
That looks great, I'll have to revisit my hanging system. Please trim those extra threads off that bolt for meBetter pictures of installation

Yes very slick solution. Thanks for the photos. I’m going to revisit my setup. I was planning to purchase the e12 trans/exhaust hangers in hope I could get some combination to work.
 www.wallothnesch.com
Catalog picture 18/006 - BMW 518 - M535i (E12) - Exhaust system | Wallothesch
I was waiting to see final elevation of exhaust to cut that bolt off to the correct size/length…
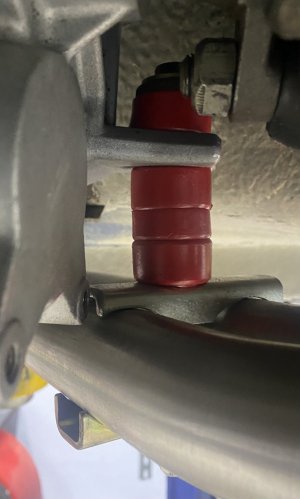
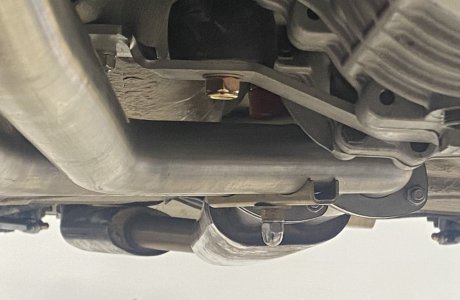
This is the final installation I ended up using some harder red sway-bar bushings I had and I like it a lot better…
This is the final installation I ended up using some harder red sway-bar bushings I had and I like it a lot better…
That looks great, I'll have to revisit my hanging system. Please trim those extra threads off that bolt for me
Attachments
-
 081654A6-C032-4E94-B2D6-17D03ACCB5BF.jpeg144.5 KB · Views: 256
 -
 92964A9B-7C16-4828-A0B0-0228833DAEE2.jpeg174.1 KB · Views: 249
 -
 E913AE6C-5ED9-47C6-98A2-005E5A831177.jpeg217.7 KB · Views: 253
 -
 E757B951-B8CB-490F-9DED-AE0DDCBD4BC6.jpeg144.5 KB · Views: 259
 -
 C1528F0B-BEDC-4CDE-9607-EF2CF9F11153.jpeg200.7 KB · Views: 258
 -
 6D512B14-F4F1-4A6F-B1B9-99F1812CD9C2.jpeg303.6 KB · Views: 298
I was waiting to see final elevation of exhaust to cut that bolt off to the correct size/length…
This is the final installation I ended up using some harder red sway-bar bushings I had and I like it a lot better…
isnt it too hot there for those PU bushings ?
heat transmision matters... ¿?
I would think using the cupped washers and cutting down a sleeve from the sway bar hardware to fit would be more advantageous than just stacking the bushings that way. Interesting idea nonetheless.
In case the bushings melt, I know for a fact that having a solid mount doesn't create any vibrations or problems. (The metal plate has a threaded hole, and a lock nut on top.)


Nothing is going to melt or the rubber transmission mount would also melt.
Last edited:
oh heat transmission, radiation, convection and conduction...
Much ado about nothing……..
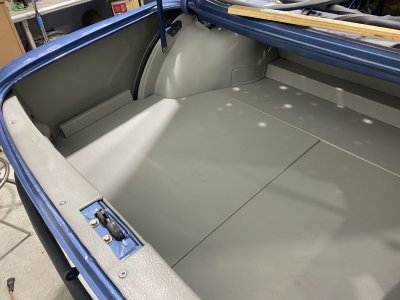
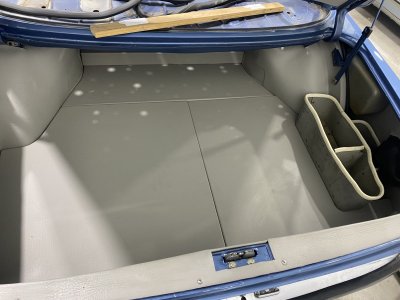
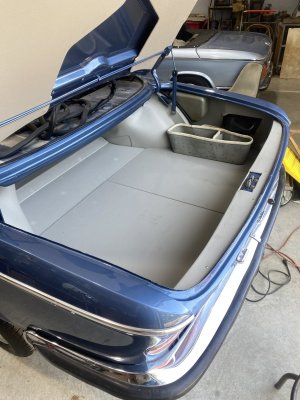
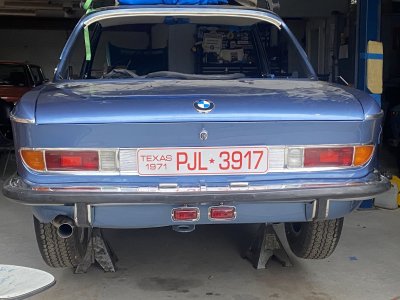
Working on the interior of trunk today looks like it going to fit…waiting on side panels im going to remove rear bumper one more time tomorrow to install two little horns under bumper …
Attachments
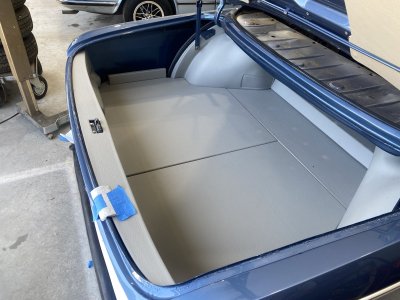
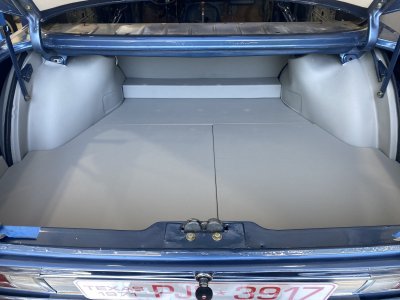
Very nice, but I see four points, if you want to improve, read this, if not skip it…there is not a real needWorking on the interior of trunk today looks like it going to fit…waiting on side panels im going to remove rear bumper one more time tomorrow to install two little horns under bumper …
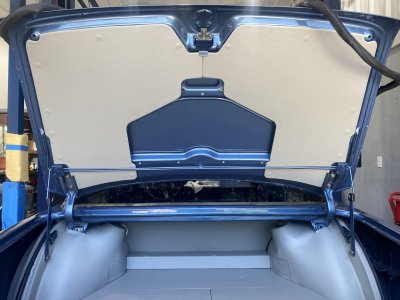
one, the rear piece opening for the lock is too small and not the correct position, aslo the top Piece should not be flat, body has shape in that area
that piece is fixed in place with small screws that are missing in your setup
upholstery made a mistake glueing the vynil on the bonnet panels and probably there is a foam layer missing
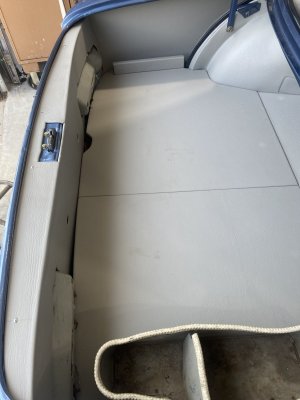
this way you see the bottom of the clips, which is not a pleasant look
I would ask them to redo this in a proper way
find the white weatherstrip to fix the wheel well covers in place
the plastic blocks that get the torsion bars in place should be black and not painted
regards
No worries at all! thanks for the feedback the E9 is new to me…in pictures I am/was Just test fitting the panels in place at this time…Very nice, but I see four points, if you want to improve, read this, if not skip it…there is not a real need
one, the rear piece opening for the lock is too small and not the correct position, aslo the top Piece should not be flat, body has shape in that area
that piece is fixed in place with small screws that are missing in your setup
upholstery made a mistake glueing the vynil on the bonnet panels and probably there is a foam layer missing
this way you see the bottom of the clips, which is not a pleasant look
I would ask them to redo this in a proper way
find the white weatherstrip to fix the wheel well covers in place
the plastic blocks that get the torsion bars in place should be black and not painted
regards
1) good eye the anchors show Thur the vinyl, those are new panels from walloth/nesch…I have emailed them about the look.
2) looking for white, I had black
3) I have those blocks unpainted and will install.
4) on the back rear panel I plan to install four screws with trim washers… still trying to decide if I’m going to try to hit the existing holes or move over and put new holes
I appreciate the feedback, I will post more pictures as I complete the trunk and the rest of the car. My plan is to be finished in about 95% in six weeks.
Last edited:
Shoot the trim pieces with SEM Ranger White paint, it will look OEM.
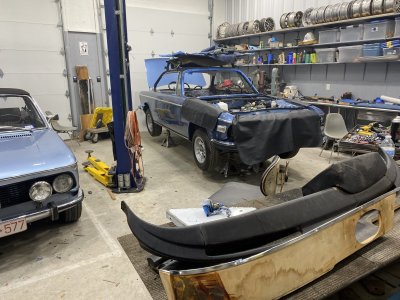
We moved the coupe over to the final assembly spot Today, first time outside in a while.
The trunk is pretty much sorted out still a few small adjustments, Going to pick up some trim rings for the screws.
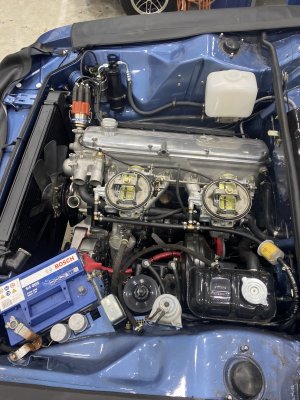
waiting on new fan for radiator to finish up engine bay.
right on time the Upholstery shop called me today and said my seats & door cards would be ready on Friday for pick up.
plan on starting on dash/interior tomorrow…
The trunk is pretty much sorted out still a few small adjustments, Going to pick up some trim rings for the screws.
waiting on new fan for radiator to finish up engine bay.
right on time the Upholstery shop called me today and said my seats & door cards would be ready on Friday for pick up.
plan on starting on dash/interior tomorrow…
Attachments
-
 EC2CF954-9870-4A1B-875B-C920259149F4.jpeg629.1 KB · Views: 262
 -
 020A2F43-C0D7-4AF9-9187-1453C04EEE9D.jpeg588.8 KB · Views: 264
 -
 B982711E-B152-41F9-B4F0-C6DA9385EB9C.jpeg220.9 KB · Views: 255
 -
 7B4AFB3E-2C44-47FA-AE02-98D586FF3D2E.jpeg313.9 KB · Views: 243
 -
 CE7F7FAB-1FE0-47AC-93CA-D0A01DC047FC.jpeg304.6 KB · Views: 240
 -
 6E3ADF8D-A8CE-4F0B-A91A-F1A2513F145B.jpeg371.9 KB · Views: 247
Trunk done except for white windage strips that are headed this way.
picking up first batch of finished Uphostery on Friday…
New radiator fan installed.
Heater installed next day or so should be able to start after that…
picking up first batch of finished Uphostery on Friday…
New radiator fan installed.
Heater installed next day or so should be able to start after that…