Bringing a '74 back up to her intended glory.

It seems that, after all the big stuff is done, the momentum to update this build thread slows down dramatically. Over the last 8 to 9 months I have done many smaller things which I need to update. Here are some of them, albeit woefully out of chronologically order.

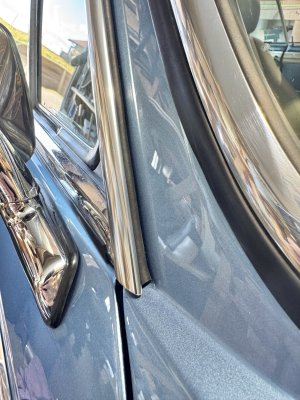
I posted separate threads on some of them such as installing all new weatherstripping around the door:
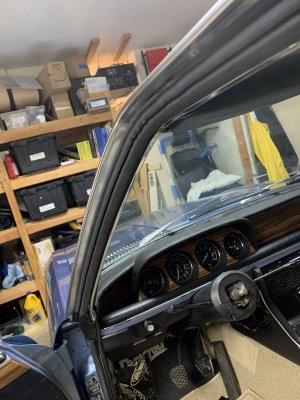
IMG_1416.jpeg


Then I build a wireless iPhone holder/charger that is both rock steady yet can easily be removed. This is mainly used for gps maps.
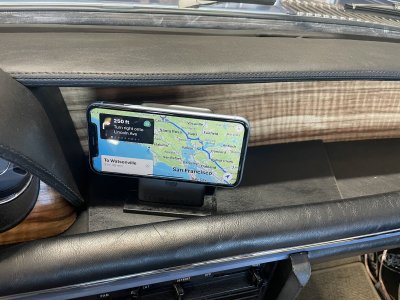
IMG_3034.jpeg

 
Last edited:
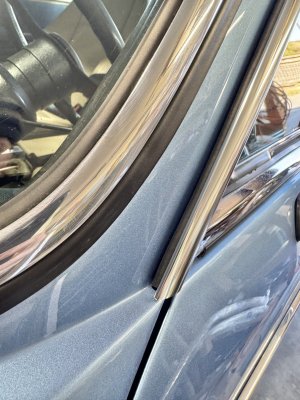
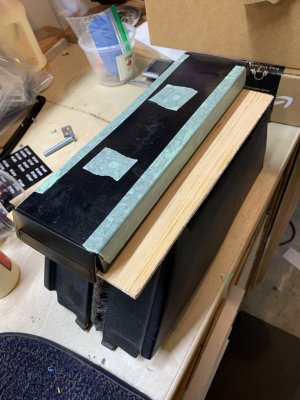
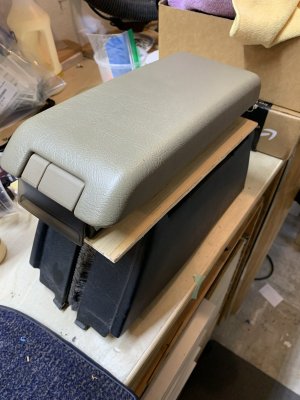
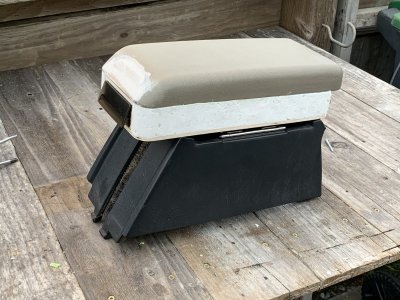
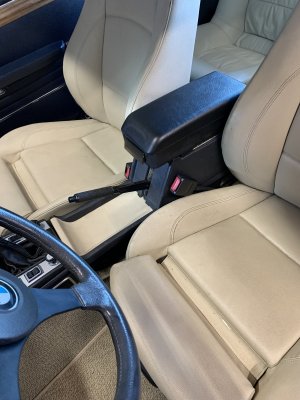
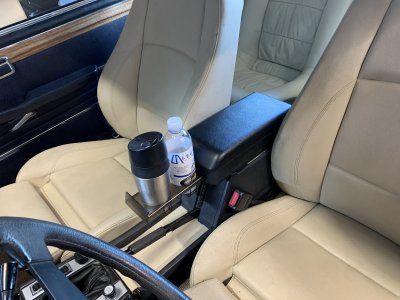
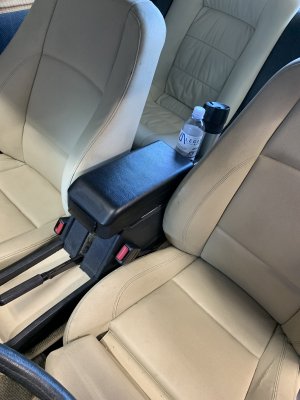
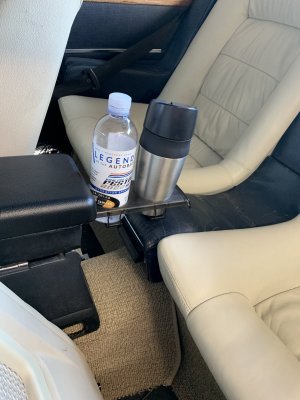
I also built a proper center armrest. I had adapted an e23 center console a long time ago which worked great. But I often wished it had a way to hold a coffee cup or a water bottle. I wanted it to be discreet, meaning that it could disappear easily and yet still be available but out of the way when driving and shifting gears. After doing a lot of research, I found a Volvo cassette that solved my dilemma: it offered 2 retractable cupholders: one sliding forward and the other sliding backwards. This allows you to use the forward one when you are stopped and the rear one when you are driving.

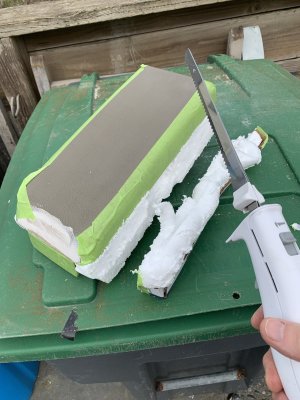
I used a later 5 series armrest top and combined the two into a solid unit using expandable foam. Then I figured out a way to secure that to the e23 console.

IMG_0725.jpeg IMG_0726.jpeg IMG_0730.jpeg IMG_0734.jpeg IMG_1891.jpeg IMG_1892.jpeg IMG_1894.jpeg IMG_1895.jpeg
 
Last edited:
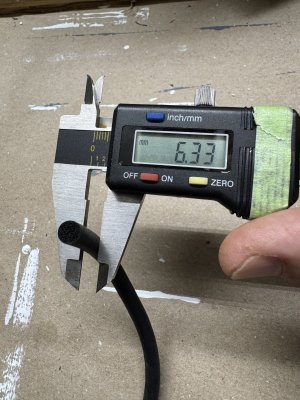
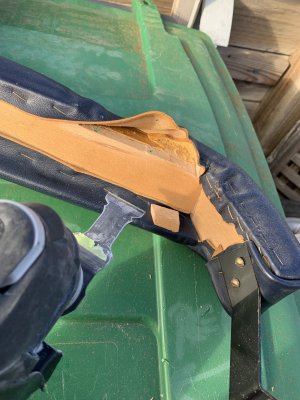
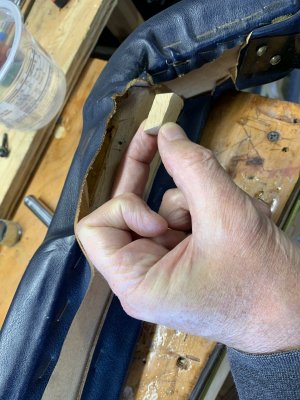
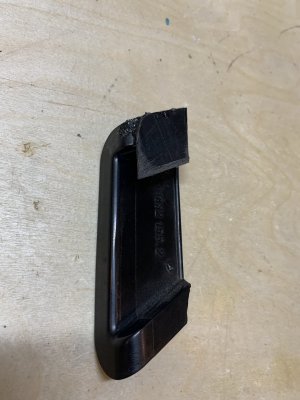
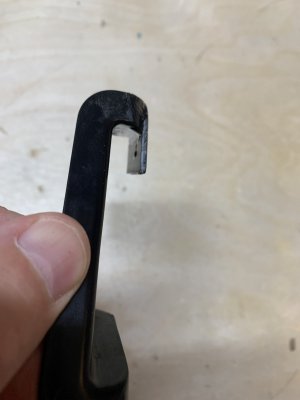
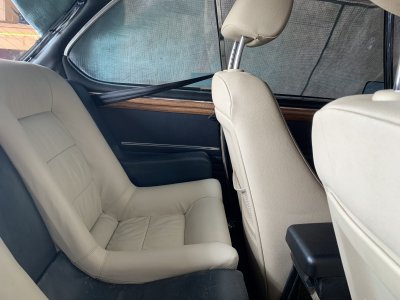
Another seemingly small item to make the driving experience more enjoyable. On the 74, the seatbelt system has the inertia reel being bolted to the outside of the rear seats. Unfortunately its path through the rear seat armrest has been designed to fit the triangle buckle on the B pillar. This is very low and makes the belt pinch your shoulder on long drives, especially for taller drivers. But I f you don't use that buckle, the seatbelt tends to get caught between the plastic opening in the armrest and the door card. When you do a lot of driving, this starts to get really annoying, but fortunately, the fix is really quite simple.

I took the little plastic opening guide out , peeled off the leather and moved the opening in the wood frame up a bit. I then took a piece of hard black plastic and epoxied it onto the outer top side of the plastic channel guide to keep the belt where it is supposed to be.

This makes for a much more comfortable position on the shoulder and the seatbelt never gets pinched against the door card anymore.

IMG_0664.jpeg IMG_0663.jpeg
IMG_0660.jpeg IMG_0662.jpeg
IMG_1901.jpeg
 
Last edited:
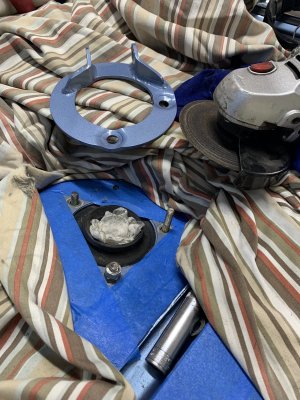
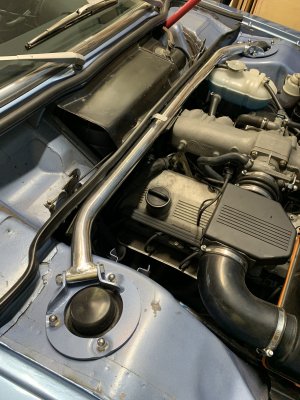
I’ve been stuck on the sidelines for six weeks now due to a bit of knee surgery. But not being able to seemingly accomplish anything each day was driving me nuts. So today I took care of one of those items that never rises very high on the priority list but that also bothers you every time you see it. And that is trimming the front strut bolts that protrude into the engine bay. Mine were way too long and I had only hastily cut the highest one which was rubbing against the hood a long time ago. I also took advantage of this to install the Walloth Nesch front sway bar after I painted the outer rings in body color.

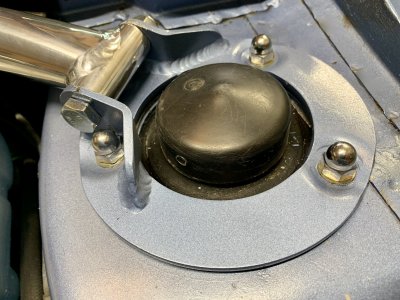
I wanted to use @bavbob ‘s trick of screwing in an M8 die on each bolt before trimming them so the die could clean up the threads when you unscrew it. Unfortunately my die set is a cheap Chinese one and after trying on a few I got nervous that it was actually causing damage to the threads. So instead, I screwed 2 nuts and cut the stud right above that. (This, by the way, ended up being the perfect height when you use a swaybar and the acorn nuts on top of that with a thin washer.) You then slowly unscrew the top nut and force it to clean the threads as it comes off. Then you do a lot of filing to clean the top of the stud and you use the second nut to clean the filing. You never remove the second nut until you can screw the top one back on with ease.

After doing some research on these front sway bars, I’m not convinced that it’s going to make much difference in the handling. But I had gotten it during one of their sales so I figured that at least it will not hurt and it’s easy to take off if it really does not make any difference.

IMG_2036.jpeg IMG_2039.jpeg

The only issue with the WN swaybar is that, on the driver side, the innermost hole (left on the picture) is very close to the tab and therefore the acorn nut is difficult to tighten

IMG_2040.jpeg
 
I’ve been stuck on the sidelines for six weeks now due to a bit of knee surgery. But not being able to seemingly accomplish anything each day was driving me nuts. So today I took care of one of those items that never rises very high on the priority list but that also bothers you every time you see it. And that is trimming the front strut bolts that protrude into the engine bay. Mine were way too long and I had only hastily cut the highest one which was rubbing against the hood a long time ago. I also took advantage of this to install the Walloth Nesch front sway bar after I painted the outer rings in body color.

I wanted to use @bavbob ‘s trick of screwing in an M8 die on each bolt before trimming them so the die could clean up the threads when you unscrew it. Unfortunately my die set is a cheap Chinese one and after trying on a few I got nervous that it was actually causing damage to the threads. So instead, I screwed 2 nuts and cut the stud right above that. (This, by the way, ended up being the perfect height when you use a swaybar and the acorn nuts on top of that with a thin washer.) You then slowly unscrew the top nut and force it to clean the threads as it comes off. Then you do a lot of filing to clean the top of the stud and you use the second nut to clean the filing. You never remove the second nut until you can screw the top one back on with ease.

After doing some research on these front sway bars, I’m not convinced that it’s going to make much difference in the handling. But I had gotten it during one of their sales so I figured that at least it will not hurt and it’s easy to take off if it really does not make any difference.

View attachment 167703 View attachment 167704

The only issue with the WN swaybar is that, on the driver side, the innermost hole (left on the picture) is very close to the tab and therefore the acorn nut is difficult to tighten

View attachment 167706

there are thin wall hexagonal vases that will do the trick
 
I have a lot to catch up to.

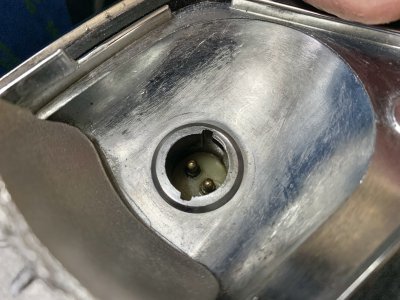
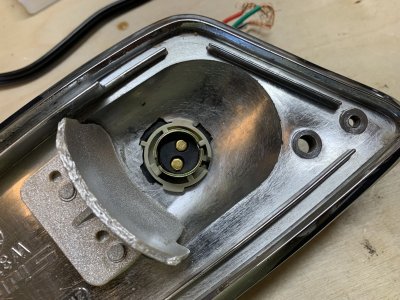
I had noticed that my front turn signals were getting intermittent at times. Since the bulbs were new I knew it had to be some poor electrical connection. Sure enough, as I tried to pull the bulbs out the springy action was getting more and more difficult to negotiate. So I did a bit of research on this site and found Gary @m5bb 's excellent idea on replacing the holder part of the unit. This is a destructive mod but it is invisible to the outside and it is definitely an upgrade. I wrote the details here:


Unfortunately I do not have pics of the end result from the side but here is what it looks like from the bulb point of view:

Before:
IMG_3816.jpeg

After:
IMG_3851.jpeg

Super nice to have clean contacts and a smooth bulb replacement operation. After this mod, the turn signals work perfectly again
 
My car was out of commission for a while and I had forgotten to turn my kill switch off. There must have been a very small current draw which, combined with the fact that my ACM batteries were now 6 years old basically killed one of them.

So I decided that, since this car is used only once or twice a month, I need an easy way to hook up a trickle charger to the batteries. But in order to make this as easy and therefore more likely to be used regularly, I did not want to have to take out the rear seats (my batteries are relocated there - or for a standard battery location, to have to prop the hood open) and fumble with charger leads every time I took the car out and back in. On top of that, I did not want to have the cable rubbing against the fresh body paint, especially since I leave the cover on in between drives.

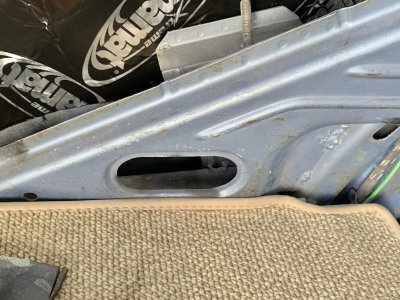
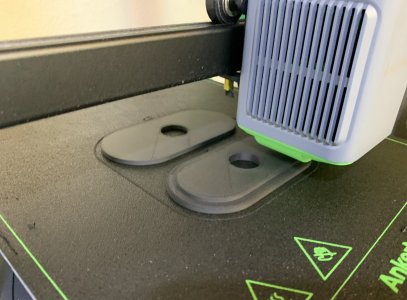
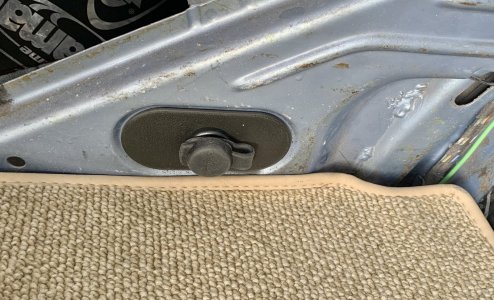
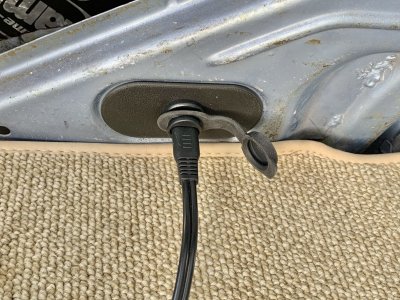
So I decided to install an SAE connector in the trunk and run a cable from there to the batteries. My car has the rear reinforcement structure on each side of the trunk which has an oval opening that is unused. So I designed a clipping system in CAD and 3D printed it. It has a front and a back part which "sandwich" that opening and allow a female SAE connector to be installed without any mod to the body.

IMG_3847.jpeg IMG_3846.jpeg IMG_3848.jpeg IMG_3849.jpeg

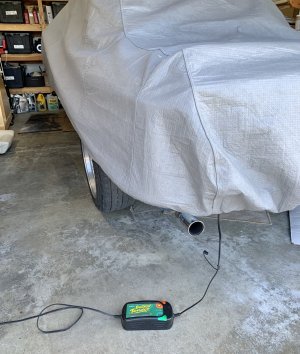
So now when I drive the car back in the garage, I just plug the charger in there, the cable rests on the trunk rubber seal at the top and the bumper rubber at the bottom without touching the paint and I can keep it like that with the cover on

IMG_3866.jpeg
 
One of the things that is truly stunning about the e9 and many other vintage BMW's is how a 40 year old piece of rubber will come back to life after a good cleaning. Thus you spend more time on redoing old parts than actual money buying new ones- Of course there are plenty of things to spend money on. Enjoy your kids when they're around, my daughter is still young enough to think I'm actually "OK" to hang around with.... I think :)
I have restored three cars: 1965 Mustang GT, 1972 Bronco (body off), and my 1980 BMW 635 Euro. All of these projects were different, but the one common thread was that I think most of the hours went into cleaning and painting bits and pieces vs the really "big things"!

In planning my upcoming coupe project, the other thing I am doing is preparing a lot of storage room, so I can clean, paint and catalong these little bits to make later installation easier and less frustrating. When I did the Mustang (first car restored) I recall being unable to find one of the headliner ribs, and the parking brake mechanism. In frustration, I finally went and bought a new brake mechanism, and located a fairly expensive used headliner rib. Of course later I found both of these parts in the garage...:mad:
 
Here is a quick and dirty video... and I mean REALLY quick and REALLY dirty, complete with phone camera acting up, dirty windshield etc. I clearly need to practice this technique a lot more.

Franklin School Rd. Ridden my bicycle up and down that road both directions many many times! Beautiful!
 
Juat completed reading this entire thread. Thanks for doing such a great job documenting things. Truly inspiring!

Scott
Good grief! You are a brave man. Thank you.

Although it does take the fair bit of time and commitment, to me, writing a build thread serves several purposes:
Most importantly, I feel an immense debt of gratitude to all the others on this forum who have documented their own journey of discovery and tips and tricks. This has helped me, and, I assume many others, tremendously. It is only fair to give back and return the favor in a small way.
Second, I’ve had instances where I’ve had to redo a task either on this or on another car and it really helps to go back and read how I did it last time
And third, I think we all look back after a while and go “Where the hell did all this time disappear?“. There is a certain personal gratification in being able to say “Oh, that’s right, I had to go through all of these steps to solve this seemingly minor problem“
 
Last edited:
Back
Top