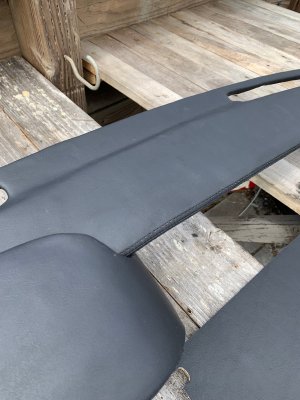
Bringing a '74 back up to her intended glory.

Bmachine

Well-Known Member
Site Donor $
Site Donor $$
Messages
3,534
Reaction score
1,792
Location
Northern California coast
I too am waiting to hear how it goes.
I have an old GTV dash that I would like to recover in a similar way. Like the E9, the original cover is a heat mounded/formed plastic that can be removed from the foam core.
Are you going to recoat the old foam core to give the new vinyl a stable surface to bond to?
John, the glue I am using (DAP Weldwood Landau top) is made for this foam so no recoat should be needed.
I am behind schedule on this dash because I ran some tests with the marine vinyl and, although I really liked it, I thought it scuffed too easily. So I am now looking for an alternate more robust vinyl.
 

Bmachine

Well-Known Member
Site Donor $
Site Donor $$
Messages
3,534
Reaction score
1,792
Location
Northern California coast
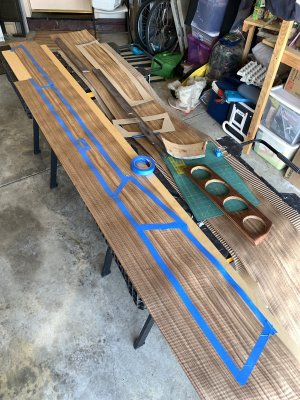
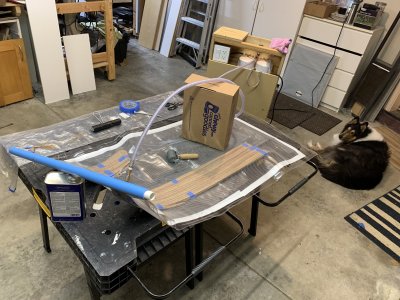
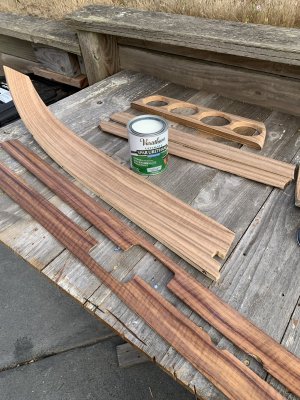
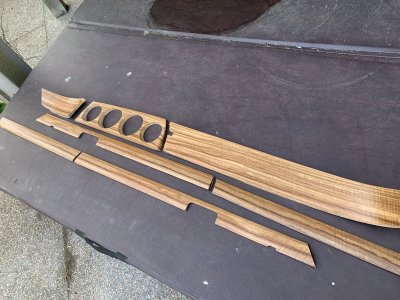
I also started on the dashboard veneer re-cover. I found some really nice figured etimoe online and designed it so the grain will flow all the way around the car almost seamlessly

F89190AC-E1E0-4012-914D-3400024CA288.jpeg 5AED3E71-1040-41F2-BA73-9128E610CC12.jpeg C3071707-E6E1-4A28-9F18-AD1C6657C6FE.jpeg 95D8AFA6-A6E8-468C-86EA-5653BD9A1164.jpeg
 

tygaboy

Well-Known Member
Messages
223
Reaction score
493
Location
Petaluma, CA
When you're so excited to drive your car, you say "Wind shields? Real E9 enthusiasts don't need no stinkin' wind shields!"

I would have sent this pic to Bo for him to post but I just couldn't be sure he'd actually do it, so...
Bo brought his coupe over to the Red Barn to have some fab work done. I'll leave it to him to tell you about that. I just wanted to be sure you got a look at our resident mad man and his driving "attire"!
IMG_5913.JPG
 

Bmachine

Well-Known Member
Site Donor $
Site Donor $$
Messages
3,534
Reaction score
1,792
Location
Northern California coast
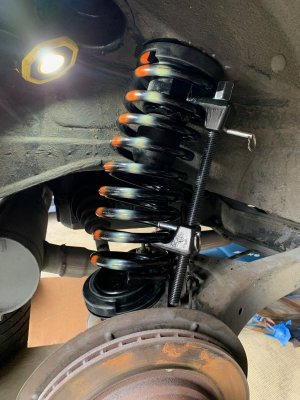
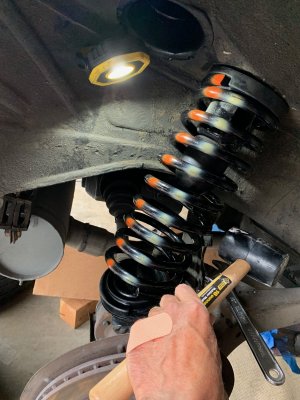
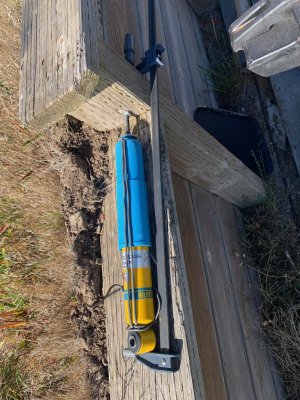
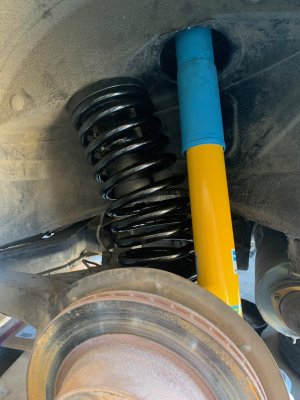
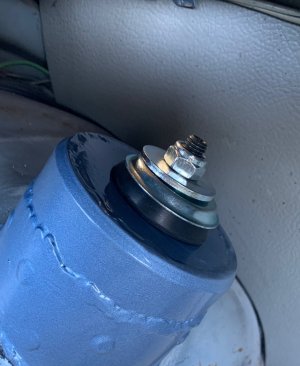
I have a lot of catching up to do. A few months ago I had the rear bilsteins revalved by Performance Shock in Sonoma California to match the springs from Hardy & Beck. Since I now had new heavy duty shock tower tops, it was time to reinstall the shocks and springs. This ended up being a king size pain as the new H&B springs didn’t want to go in easily and had to be compressed first. I hate working with spring compressors. And then, of course, once you have finally forced them in, either the top of the bottom end does not match the indentation of the rubber ring and you have to twist the damn thing which ridiculously difficult to do....

Then I installed the shocks. I am using the E12 rubber bushing with the matching E12 metal sleeve at the top. I compressed the shocks with electric wire and discovered that you really don’t need to jack up the rear trailing arms very much in order to be able to slide the bottom of the shock onto that big M 10 bolt.

After much swearing and bruised knuckles the whole thing finally went in.

IMG_9612.jpg IMG_9614.jpg IMG_9626.jpg IMG_9623.jpg IMG_9625.jpg
 

Bmachine

Well-Known Member
Site Donor $
Site Donor $$
Messages
3,534
Reaction score
1,792
Location
Northern California coast
As Chris briefly alluded to above, driving a car without any windows is quite the experience. And special attire is definitely needed.

IMG_9684.jpg
 

Bmachine

Well-Known Member
Site Donor $
Site Donor $$
Messages
3,534
Reaction score
1,792
Location
Northern California coast
Show us the ride height.
I don't have any measurements yet, but it seems like the height is actually a little higher than with the very tired old original springs. I imagine that it will settle a bit with time and after the glass and everything else is back in. I was happy with the ride height I had on the old springs. But not with the ride quality. So as long as we get back to that, I'm a happy camper.
 

Bmachine

Well-Known Member
Site Donor $
Site Donor $$
Messages
3,534
Reaction score
1,792
Location
Northern California coast
I had a date with Chris @tygaboy so I wanted to get the car as road worthy as possible, even without windows.

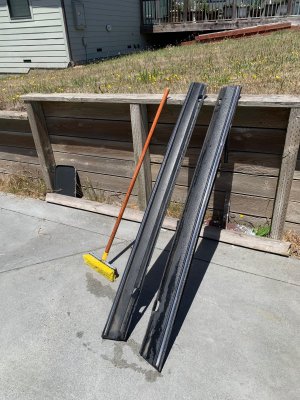
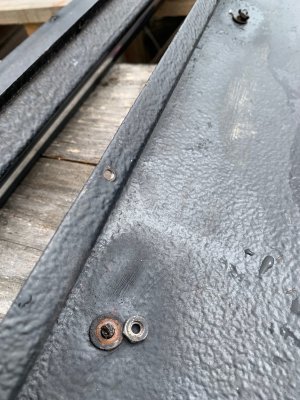
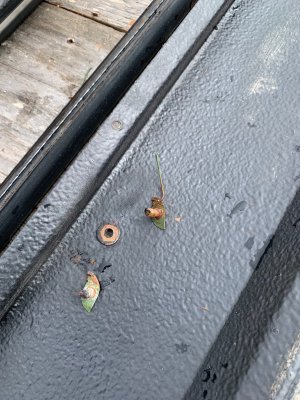
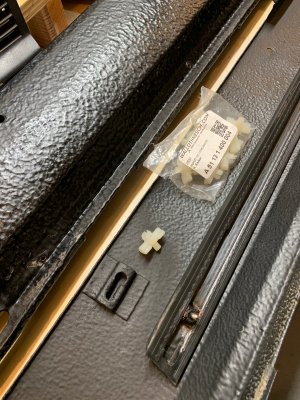
My rocker panel covers looked pretty good so I thought I would give the a good cleaning and put them back on. HA!!! AS usual, once you start looking at a part from a little closer, the inevitable "I really should bring this back to full strength while we're here" syndrome set in. One side had the chrome/rubber trim installed with hardware store screws instead of the proper plastic clips, several screw holes had rust starting to gather around them, bottom line, I took the whole thing apart and cleaned and rust proofed what need to be. Fortunately, I had bought the proper clips from W&N a while ago.

IMG_9648.jpg IMG_9658.jpg IMG_9659.jpg IMG_9698.jpg

BTW, am I assuming correctly that those get pressed into the sheet metal part first and the "chrome rail" then gets pressed onto them, which theoretically locks them in place, is that right? It seems pretty chancy since if 4 out of the 5 do lock in properly but the fifth one does not settle in place, you have to rip the whole thing apart and start again. These appear to be single use clips
 

Bmachine

Well-Known Member
Site Donor $
Site Donor $$
Messages
3,534
Reaction score
1,792
Location
Northern California coast
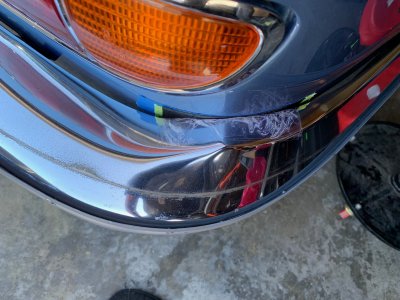
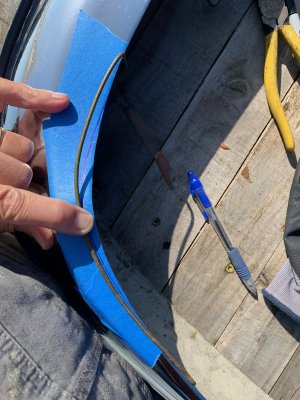
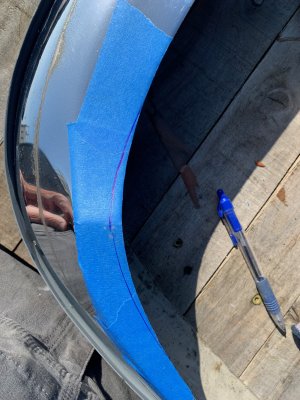
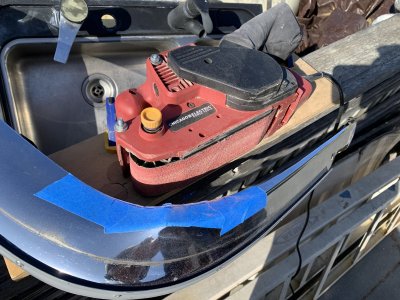
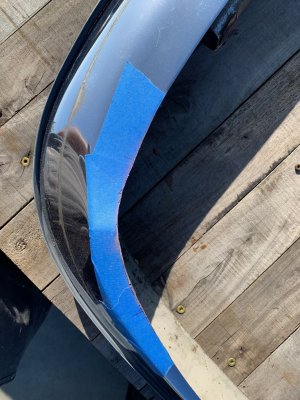
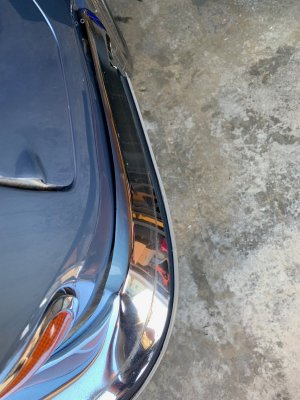
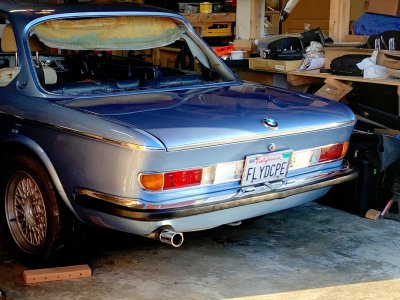
I also needed to reinstall the rear bumper. For some reason the right rear corner of my bumper always rubbed against the body. At first, I thought that, at some point in its previous life, it must have had a little love tap in the area. But there was no body filler anywhere nearby, the light frame fits the contour perfectly and there is no trace of any deformation inside. Maybe some weird hand assembly quirk?

Before the new paint job, I did not care too much but suddenly, with all the shiny stuff, I really needed to address this. So I decided to rework the contour of the bumper and that area. After that, it fit much more comfortably. Not perfect but at least it is safely away from the new paint.

IMG_9667.jpg IMG_9670.jpg IMG_9671.jpg IMG_9672.jpg IMG_9673.jpg IMG_9679.jpg IMG_9681.jpg
 
Last edited:

Bmachine

Well-Known Member
Site Donor $
Site Donor $$
Messages
3,534
Reaction score
1,792
Location
Northern California coast
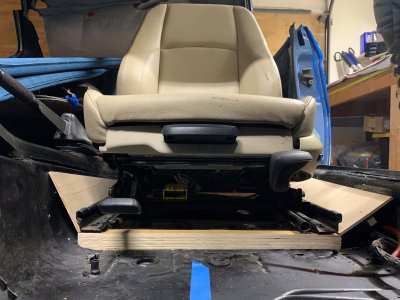
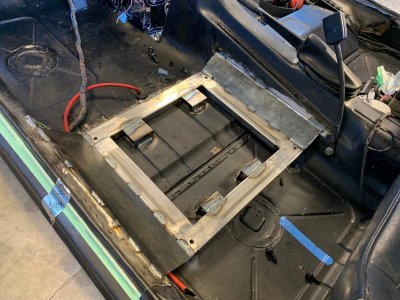
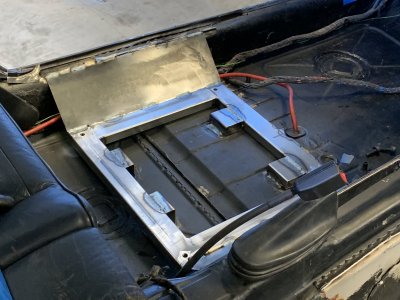
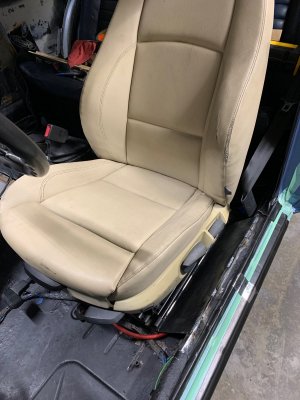
Today was a big day. As I mentioned here and there, I had always wanted a better seat and I really liked the e92 sport seat for their comfort, and adjustable side supports. I especially liked the fact that the 2 door version of the seats were in a style that looked it could have evolved from the original cs seats. Only problem is, they don't work with the original seat brackets at all. I was also very concerned about losing any kind of structural strength by removing the original "bridge" that goes from the tranny tunnel to the side rocker. I did a lot of research and a few people who had installed these seats had to add plates on the underside of the car. I wanted this mod to be as invisible as possible, so with the help of @eriknetherlands and later @tygaboy we designed a frame that would sit as low as possible without requiring any visible change under the car.

First I removed the original seat brackets. Originally I had tried removing only the center part of the bridge. Later we realized the whole thing would need to come off.
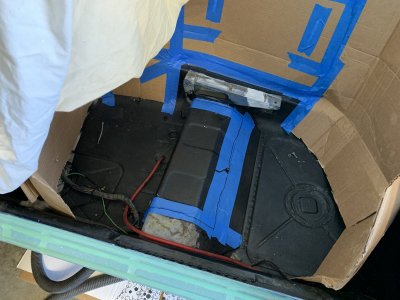
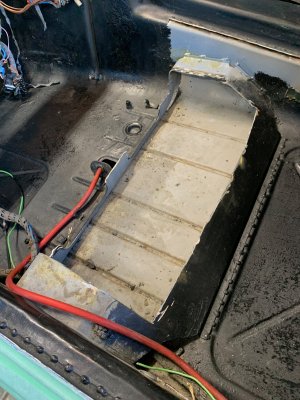
IMG_8296.jpg IMG_8301.jpg
Then I tested the base frame with a wood mock-up.
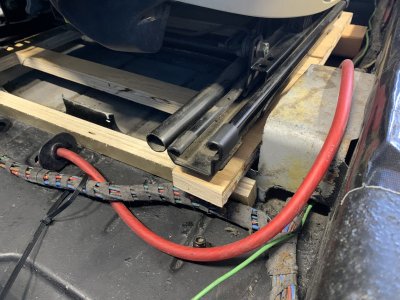
IMG_8303.jpg

But it needed better structural support
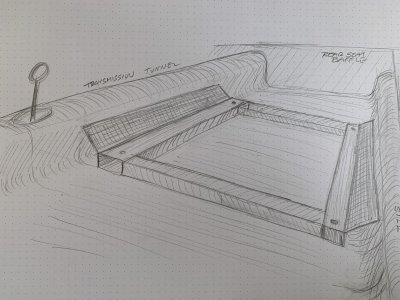
IMG_8435.jpg seat bracket C v1 flat.jpg

Finally, today, I drove the car to Chris Baker's and he did his usual welding magic to build the whole frame and the side wings. With that done, we have an incredibly strong base which ties as high as possible to the tranny tunnel and to the side sill (he used the original weld location there) but extends quite a bit further back than the original. I had noticed that, when adjusted for taller drivers, the original seat would hang unsupported in the back because the length of the original seat bracket is so short. This system fixes that problem nicely.
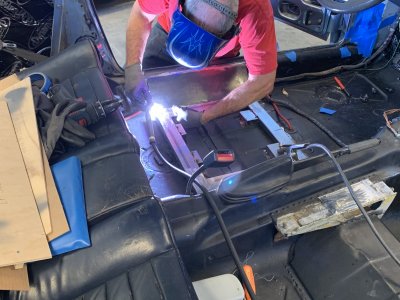
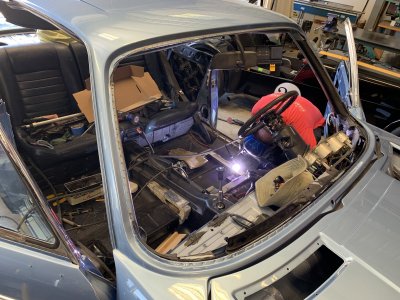
IMG_9686.jpg IMG_9692.jpg IMG_9694.jpg IMG_9697.jpg

Chris also welded a bracket which ties to the front subframe.
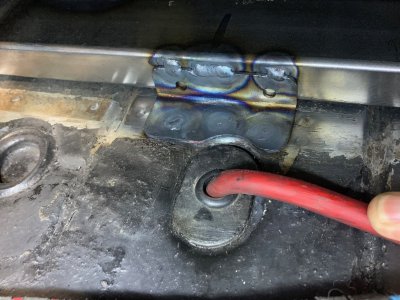
IMG_9700.jpg

After we reinstalled the seat, we were looking at it and Chris says "Damn, after all that work, we can't even see anything." I didn't tell him at the time because he worked so hard on it but, that was exactly what I had hoped...
IMG_9699.jpg

The driving experience is significantly improved and the structural rigidity I was so concerned about does not feel like it had been compromised at all.

A million thanks to Chris @tygaboy for his invaluable help and to Erik @eriknetherlands for his early engineering help on the design.
 
Last edited:

HB Chris

Well-Known Member
Site Donor $$
Messages
19,418
Reaction score
8,759
Location
Huntington Beach, CA
I had a date with Chris @tygaboy so I wanted to get the car as road worthy as possible, even without windows.

My rocker panel covers looked pretty good so I thought I would give the a good cleaning and put them back on. HA!!! AS usual, once you start looking at a part from a little closer, the inevitable "I really should bring this back to full strength while we're here" syndrome set in. One side had the chrome/rubber trim installed with hardware store screws instead of the proper plastic clips, several screw holes had rust starting to gather around them, bottom line, I took the whole thing apart and cleaned and rust proofed what need to be. Fortunately, I had bought the proper clips from W&N a while ago.

View attachment 144733 View attachment 144735 View attachment 144734 View attachment 144736

BTW, am I assuming correctly that those get pressed into the sheet metal part first and the "chrome rail" then gets pressed onto them, which theoretically locks them in place, is that right? It seems pretty chancy since if 4 out of the 5 do lock in properly but the fifth one does not settle in place, you have to rip the whole thing apart and start again. These appear to be single use clips
Correct, I could not get them to catch so I used bolts with the heads ground down and discussed on the Forum.
 

rsporsche

Moderator
Site Donor $$
Messages
10,685
Reaction score
3,713
Location
Atlanta, GA

HB Chris

Well-Known Member
Site Donor $$
Messages
19,418
Reaction score
8,759
Location
Huntington Beach, CA
Erik N did something similar


Bmachine

Well-Known Member
Site Donor $
Site Donor $$
Messages
3,534
Reaction score
1,792
Location
Northern California coast
Erik N did something similar

Yes, that’s it! Thank you for the link.
 

Bmachine

Well-Known Member
Site Donor $
Site Donor $$
Messages
3,534
Reaction score
1,792
Location
Northern California coast
The suspense is killing’ me! So, then….how did you recover the pieces??!
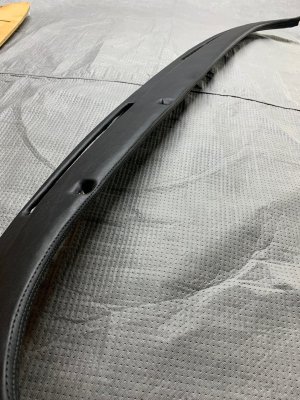
Dashboard re-cover part II

As is often the case, this turned out to be more work than I thought.
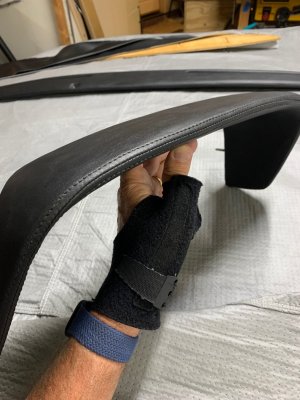
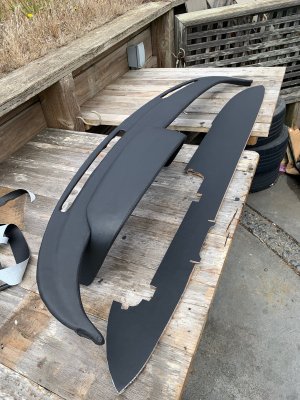
At first I thought about stretching that "4 way stretchable" vinyl to cover the whole thing. But, if nothing else, the two outer ends of the upper piece are super fragile and any pressure on them would have either broken them or, at the very least, bent them way out of shape. So I realized that this vinyl had to be done in 2 sections. One for the top and one for the bottom with a nice french seam in between. After doing a few tests at home, it very quickly became obvious that this is not something you can learn quickly. ON top of that, while much of what we do on the car may be hidden or hard to see, the dashboard is staring at you in the face every time you get in the car. So it better be absolutely right. To a pro it went. Which is easier than it sounds because for some reason, out here at least, any auto upholstery person is booked at least 6 months in advance.

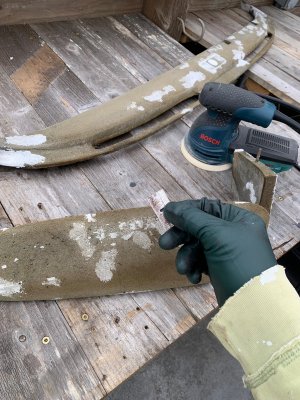
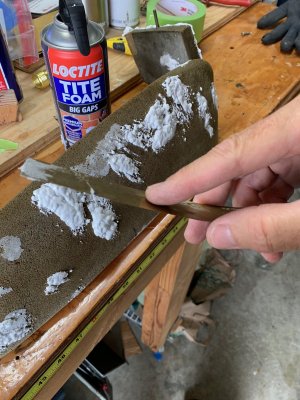
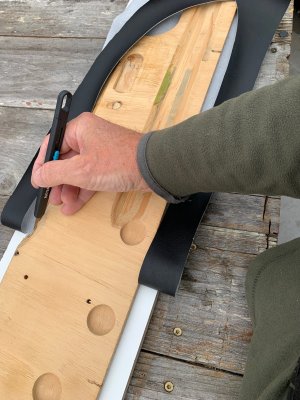
So I continued to fill in all holes and imperfections in the foam to make it as smooth and clean as possible.

IMG_9756.jpg IMG_9748.jpg

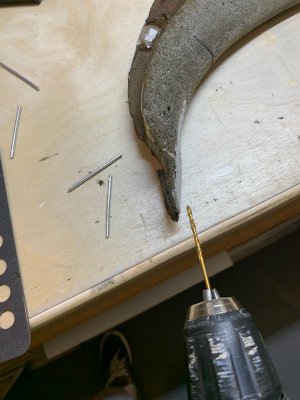
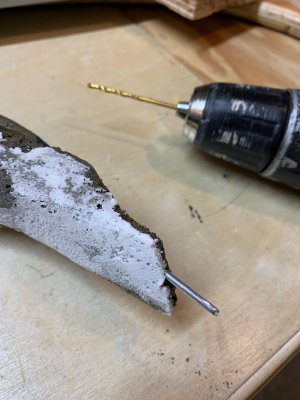
Then I inserted several aluminum bars on the outer ends to add a little bit of strength

IMG_9758.jpg IMG_9760.jpg

And finally found one guy who came in during the weekend to sew and glue the two curved pieces.

IMG_9783.jpg IMG_9786.jpg

I then glued the flat part and we have a dash ready to go...

IMG_9798.jpg IMG_9800.jpg

... without Fasten Your Seatbelt sign.
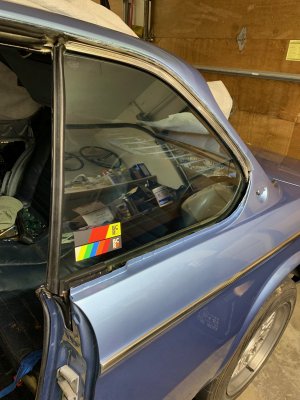
IMG_9802.jpg
 
Top