These close up photos show how deep and rich the paint job has turned out. Very nice Bo! 
You are using an out of date browser. It may not display this or other websites correctly.
You should upgrade or use an alternative browser.
You should upgrade or use an alternative browser.
Bringing a '74 back up to her intended glory.
- Thread starter Bmachine
- Start date
-
- Tags
- restoration list
Happy to help, Bo. I almost always have an opinion. 
As is often the case, life gets in the way, projects stall for one reason or another, then you have a few minutes to do a small thing here, another one there, not enough to warrant a new post and next thing you know 6 months has gone by without updates. So here is a quick attempt at bringing this to date.
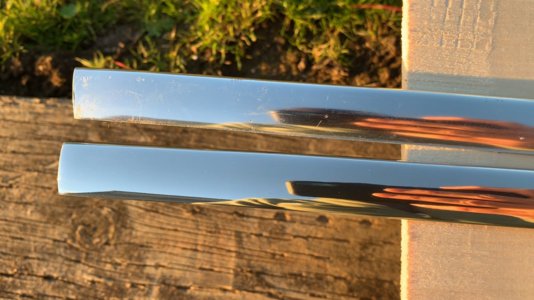
First, Speedway finally finished (part of) my trim cerakoting. He forgot to do one piece (grrrr...) so that gives me an opportunity to show the before and after.
Then I reinstalled the ignition lock. I had sent it down, along with the door locks to Santa Monica lock and key and they did a great job.
 e9coupe.com
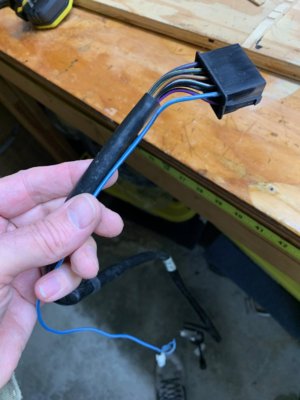
Next, my wiper switch was broken. So I bought a new one from @Sebs. I noticed that this euro version was missing one wire, which turned out to be the one for the little light bezel by the key. So I cut the wiring sheath from the old one, carefully removed the pin from the multi connector and added it to the connector in my car. When I say "carefully", that was the original plan. the reality is that I ended up having to tear that connector apart. Unlike modern ones, these old german ones are not designed for easy modification.
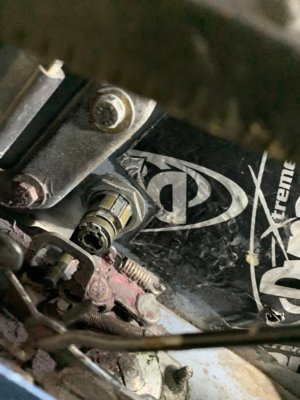
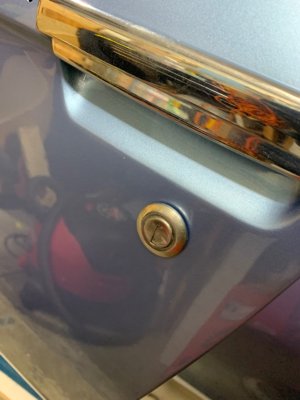
After that, it was the door locks turns. Anyone who has done it knows what a pain it is because, as usual, access is very difficult.
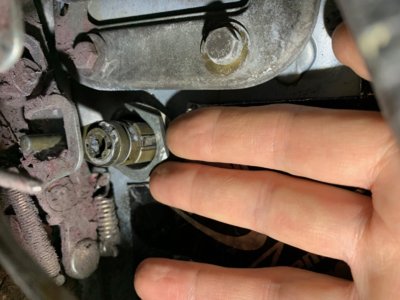
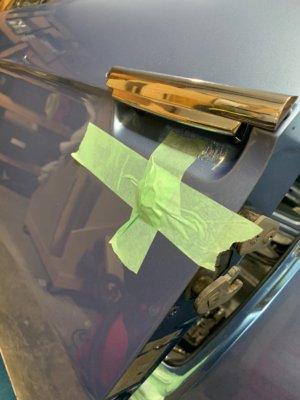
Next was the outside trim. I may do a separate thread on this but, in a nutshell, my observations are:
- Be sure to get 49 bolts and nuts and not the 45 than WN sells in their trim package (see other thread on that subject),
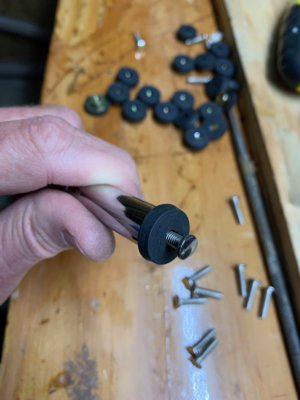
- Get the trim spacers available from La Jolla to protect your paint
- Test every single nut and bolt before installing them. Nothing worse than installing 5 of them only to realize that the 6th has some burrs and won't bolt properly,
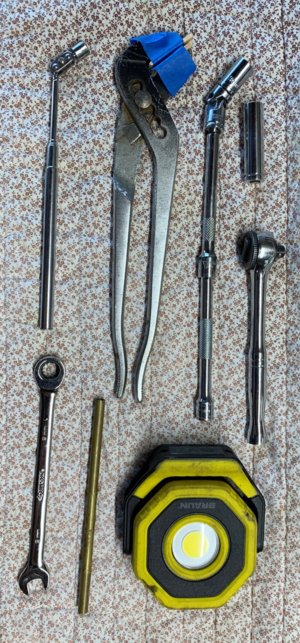
- Have a wide assortment of 9mm sockets, open and closed wrenches, ratchet wrenches, masking tape, magnet to fish the nuts that inevitably fall into impossible to see areas, etc.
- Have your hands surgically shrunk but have your fingers elongated at the same time.
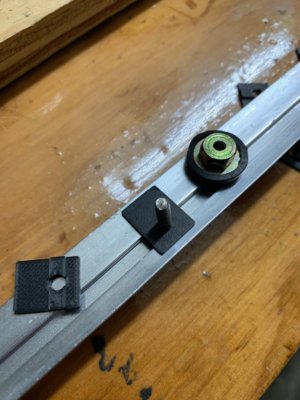
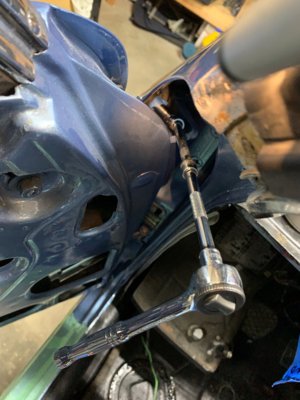
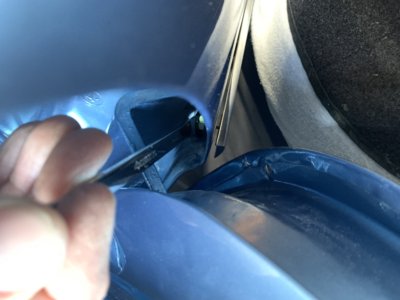
Eventually it gets done.
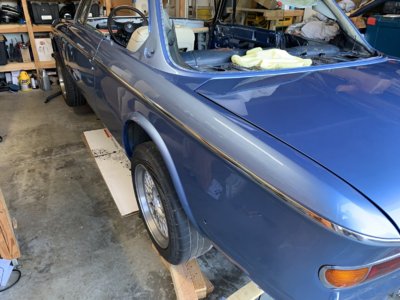
First, Speedway finally finished (part of) my trim cerakoting. He forgot to do one piece (grrrr...) so that gives me an opportunity to show the before and after.

Then I reinstalled the ignition lock. I had sent it down, along with the door locks to Santa Monica lock and key and they did a great job.
Re-installing ignition lock cylinder
Since I just did this, here is a little step by step. This represents the re assembly but the removal is, obviously, just the opposite. Important note: This is for a late style: 10/73 and later. So earlier models may be slightly different. The infamous shear bolts were not present in my 74...
 e9coupe.com
Next, my wiper switch was broken. So I bought a new one from @Sebs. I noticed that this euro version was missing one wire, which turned out to be the one for the little light bezel by the key. So I cut the wiring sheath from the old one, carefully removed the pin from the multi connector and added it to the connector in my car. When I say "carefully", that was the original plan. the reality is that I ended up having to tear that connector apart. Unlike modern ones, these old german ones are not designed for easy modification.

After that, it was the door locks turns. Anyone who has done it knows what a pain it is because, as usual, access is very difficult.


Next was the outside trim. I may do a separate thread on this but, in a nutshell, my observations are:
- Be sure to get 49 bolts and nuts and not the 45 than WN sells in their trim package (see other thread on that subject),
- Get the trim spacers available from La Jolla to protect your paint
- Test every single nut and bolt before installing them. Nothing worse than installing 5 of them only to realize that the 6th has some burrs and won't bolt properly,
- Have a wide assortment of 9mm sockets, open and closed wrenches, ratchet wrenches, masking tape, magnet to fish the nuts that inevitably fall into impossible to see areas, etc.
- Have your hands surgically shrunk but have your fingers elongated at the same time.


Eventually it gets done.

I then reinstalled the heater box. That was detailed here:
 e9coupe.com
DIY: Re installing the heater box
There are a few threads on removing the heater but not many on reinstalling it. Here is the way I did it. Please add / correct as needed: As discussed elsewhere, re building this box is quite an undertaking and many agree that it is best to leave it to the pros. That is what I did. New...
 e9coupe.com
That paint looks fantastic.
tygaboy
Well-Known Member
Can't hardly wait to see this beauty back on the road. I call 2nd in line for a ride!
The "after" trim looks great. Probably silly question, but did they polish it prior to cerakoting?First, Speedway finally finished (part of) my trim cerakoting. He forgot to do one piece (grrrr...) so that gives me an opportunity to show the before and after.
Yes they did. You can sort of see it in that "before and after" pic in post 283. I think if you click on it, it will enlarge.The "after" trim looks great. Probably silly question, but did they polish it prior to cerakoting?
Great Progress. Starting that rebuild process is sooo rewarding!
That Ceracoat looks awesome. It's not available in Europe as far as i can tell. Anyone knows what it is, technically? And if comparable alternatives exist in Europe?
I know Alu can be polished, but it requires ( a little) attention once in a while; I like the fact that the Ceracoat gives us one less item to take care off.
And do I see correctly that you dare to use the long pliers from the e9 toolkit? I bet is is the most valuable pliers in your garage!
Still curious to see what you did with holes on the edge of the trunklid... I couldn't help but notice that the pic in post # 283 was just cut short of the trunk lid edge ...
Last edited:
Thank you Erik.Great Progress. Starting that rebuild process is sooo rewarding!
That Ceracoat looks awesome. It's not available in Europe as far as i can tell. Anyone knows what it is, technically? And if comparable alternatives exist in Europe?
I know Alu can be polished, but it requires ( a little) attention once in a while; I like the fact that the Ceracoat gives us one less item to take care off.
And do I see correctly that you dare to use the long pliers from the e9 toolkit? I bet is is the most valuable pliers in your garage!
Still curious to see what you did with holes on the edge of the trunklid... I couldn't help but notice that the pic in post # 283 was just cut short of the trunk lid edge ...
I will let real experts like @HB Chris and @OCCoupe answer the ceracoating question.
I’ve had those long handle pliers for ages. They were in one of the toolkits of one of my Tii’s many years ago and they see action constantly.
See PM for your last question
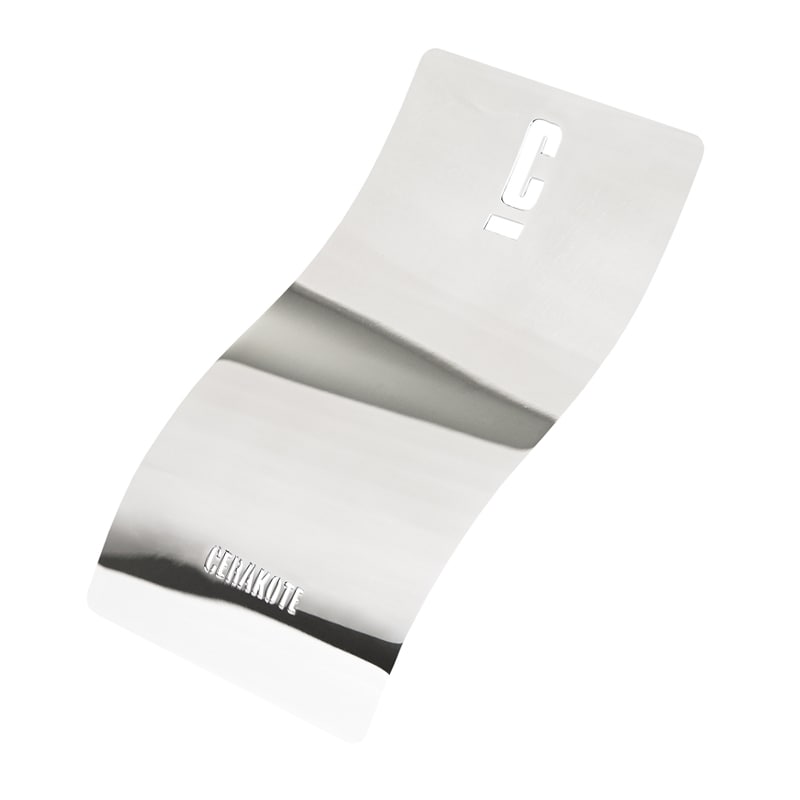
Cerakote does ship internationally. Here is the high gloss clear, $60 a pint which you shoot from a finish gun, no mixing.
 www.cerakote.com
I have used the matte clear on engine components like manifolds and valve covers. It gives an OEM appearance after vapor honing aluminum parts.

Cerakote - HIGH GLOSS CERAMIC CLEAR
Shop Cerakote HIGH GLOSS CERAMIC CLEAR MC-160. Find the coating that fits your application. Choose from a wide variety of coatings with specific attributes and specialties.
I have used the matte clear on engine components like manifolds and valve covers. It gives an OEM appearance after vapor honing aluminum parts.
Tons of small stuff has been done over the last few months but I have not had time to update this build thread. So I'll do a quick one now since I just poured myself a glass of Racer5 IPA to catch my breath.
As indicated in the Heartbreak - broken rear shock thread, my passenger side shock tower had evidently suffered that very failure at one point and had been poorly repaired. Since my rear glass is still out I figured now was the prefect time to repair this properly. Well, no. Actually, not at all the perfect time! That would have been BEFORE the repaint! Grrrr... One of the sometimes difficult part of restoration is to identify which task absolutely need to be done before which other tasks. Tbh, after having redone all the drivetrain and myriads of other fixes, I thought the car was finally ready for its new coat. Inevitably, that's when you realize that you really should have done those 5 other things first...
Anyway, first thing to do was to remove the rear suspension. I knew I would have to do this sooner or later because I have purchased a set of Hardy & Beck springs (thank you @sfdon ) and had new rear Bilsteins revalved to match them. My car still had the original shocks and springs in the rear.
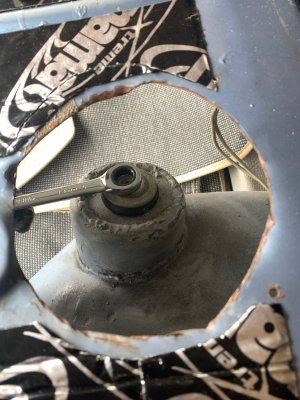
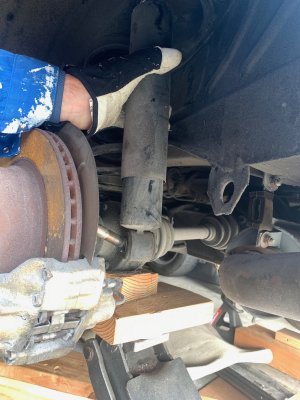
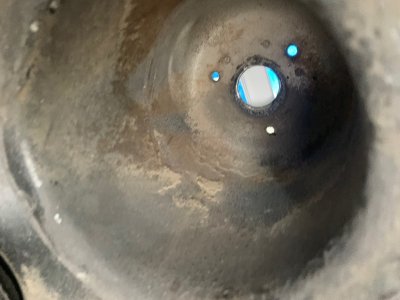
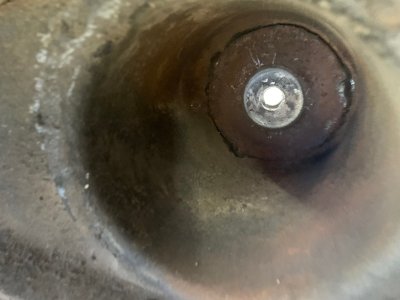
The inside view of the shock towers tells the story of what happened in a previous life:
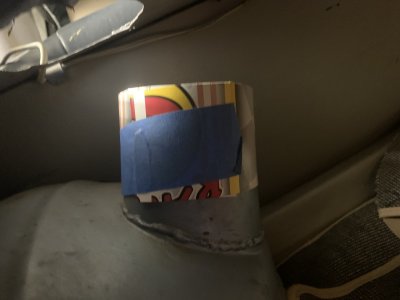
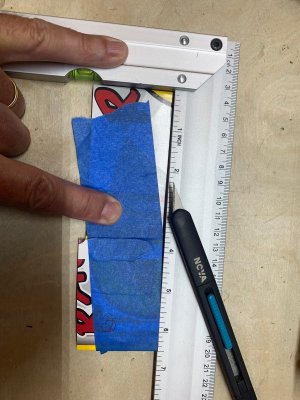
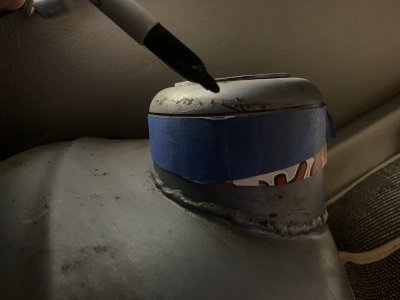
In order to cut as straight as possible, I wrapped some cardboard as tightly as possible around the tower, removed it and then cut the top perpendicular to the side. I could then slide that back on and trace the cut line. Far from very scientific but it worked relatively well.
Trying to keep flying sparks and metal shavings contained as much as possible, I push an empty can of dog food with some aluminium foil up the tower from underneath.
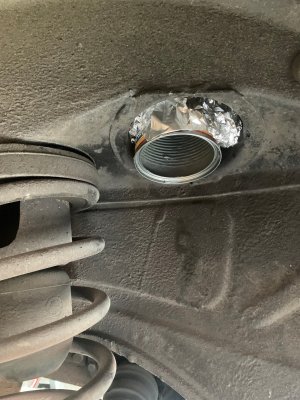
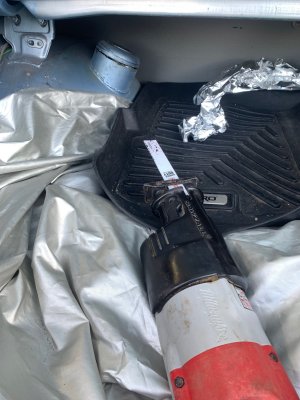
I cut what I could access from the front with a cutting disk and finished the back side with a Sawzall. Then cleaned all the edges with a grinding wheel and by hand. I also applied weld-through primer to protect it all until the new caps arrive.
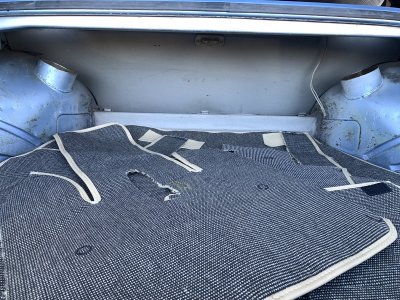
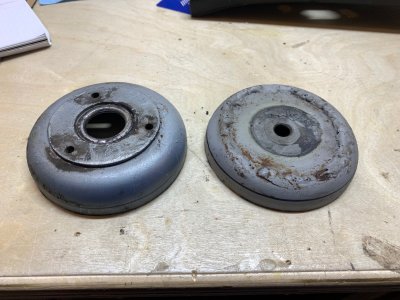
I'll now bring the good side to a machinist friend so he can make a couple of new ones.
As indicated in the Heartbreak - broken rear shock thread, my passenger side shock tower had evidently suffered that very failure at one point and had been poorly repaired. Since my rear glass is still out I figured now was the prefect time to repair this properly. Well, no. Actually, not at all the perfect time! That would have been BEFORE the repaint! Grrrr... One of the sometimes difficult part of restoration is to identify which task absolutely need to be done before which other tasks. Tbh, after having redone all the drivetrain and myriads of other fixes, I thought the car was finally ready for its new coat. Inevitably, that's when you realize that you really should have done those 5 other things first...
Anyway, first thing to do was to remove the rear suspension. I knew I would have to do this sooner or later because I have purchased a set of Hardy & Beck springs (thank you @sfdon ) and had new rear Bilsteins revalved to match them. My car still had the original shocks and springs in the rear.


The inside view of the shock towers tells the story of what happened in a previous life:


In order to cut as straight as possible, I wrapped some cardboard as tightly as possible around the tower, removed it and then cut the top perpendicular to the side. I could then slide that back on and trace the cut line. Far from very scientific but it worked relatively well.


Trying to keep flying sparks and metal shavings contained as much as possible, I push an empty can of dog food with some aluminium foil up the tower from underneath.

I cut what I could access from the front with a cutting disk and finished the back side with a Sawzall. Then cleaned all the edges with a grinding wheel and by hand. I also applied weld-through primer to protect it all until the new caps arrive.


I'll now bring the good side to a machinist friend so he can make a couple of new ones.
Last edited:
tygaboy
Well-Known Member
Taking a Sawzall to an E9! He's a mad man, I tell you! 
But seriously, I think you're approach to this fix is a good one. I look forward to seeing the part, once it's back from your machinist.
But seriously, I think you're approach to this fix is a good one. I look forward to seeing the part, once it's back from your machinist.
Dashboard recover part I
My dashboard was a bit of a dilemma because it was overall in very good condition. But it had three things I didn’t like: two small cracks which 98% of people would never notice but also the infamous fasten seatbelt sign which left big holes in the center.
Having the windshield out is both a blessing and a curse. It gives you access to all kinds of things which means you feel obligated to take advantage of this unique opportunity to repair some things that would be much more difficult to deal with with windshield in place. So I decided to take the plunge.
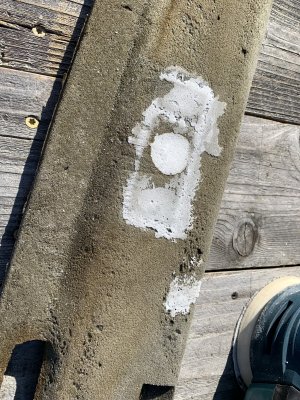
First step was to remove the old vinyl. As it turns out it’s not really vinyl but some sort of plastic that was formed around the foam. Using a heat gun and some scrapers it was not too difficult of a job. Once I had the foam laid bare, I filled the holes from the fasten seatbelt sign as well as several other areas where the original foam had not completely filled the space. I tested several different options and finally chose Loctite Tite Foam for having the closest cell structure and density to the original. It is also exterior rated and uv resistant. Then shaped it with a random orbital sander.
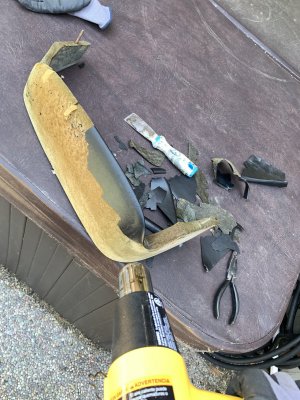
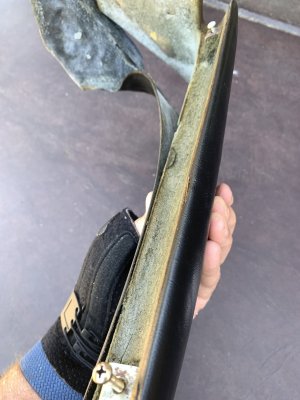
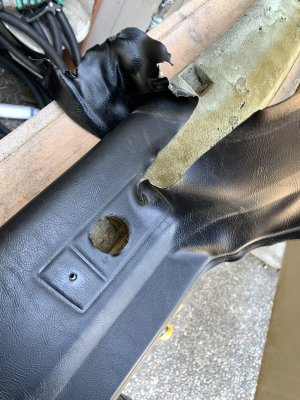
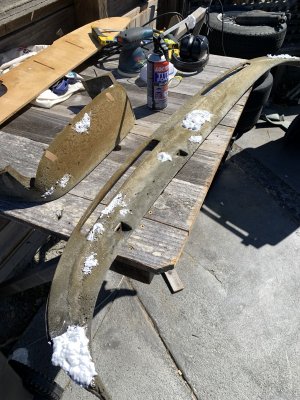


Last edited:
The suspense is killing’ me! So, then….how did you recover the pieces??!Dashboard recover part I
My dashboard was a bit of a dilemma because it was overall in very good condition. But it had three things I didn’t like: two small cracks which 98% of people would never notice but also the infamous fasten seatbelt sign which left big holes in the center.
Having the windshield out is both a blessing and a curse. It gives you access to all kinds of things which means you feel obligated to take advantage of this unique opportunity to repair some things that would be much more difficult to deal with with windshield in place. So I decided to take the plunge.
First step was to remove the old vinyl. As it turns out it’s not really vinyl but some sort of plastic that was formed around the foam. Using a heat gun and some scrapers it was not too difficult of a job. Once I had the foam laid bare, I filled the holes from the fasten seatbelt sign as well as several other areas where the original foam had not completely filled the space. I tested several different options and finally chose Loctite Tite Foam for having the closest cell structure and density to the original. It is also exterior rated and uv resistant. Then shaped it with a random orbital sander.
View attachment 143478 View attachment 143477 View attachment 143479 View attachment 143480 View attachment 143482
After a bit of research I found some marine grade exterior four-way stretch vinyl with a texture very similar to the original. I plan on testing it in the next couple of weeksThe suspense is killing’ me! So, then….how did you recover the pieces??!
tygaboy
Well-Known Member
Nice job, Bo! Thanks for taking time to do your always-detailed documentation - always appreciated. I have an interior refresh on the to-do list so a "Fasten Seat Belt" delete is in my future, too. With your newly acquired expertise, cold beverages on me, if you're looking for a side hustle! But instead of a random orbital sander, can we use a very specific model? 
This sounds very interesting. I've considered recovering the E3 dash, which looks a little easier than an E9, but if I wait long enough my urge will probably pass.After a bit of research I found some marine grade exterior four-way stretch vinyl with a texture very similar to the original. I plan on testing it in the next couple of weeks
I too am waiting to hear how it goes.marine grade exterior four-way stretch vinyl
I have an old GTV dash that I would like to recover in a similar way. Like the E9, the original cover is a heat mounded/formed plastic that can be removed from the foam core.
Are you going to recoat the old foam core to give the new vinyl a stable surface to bond to?
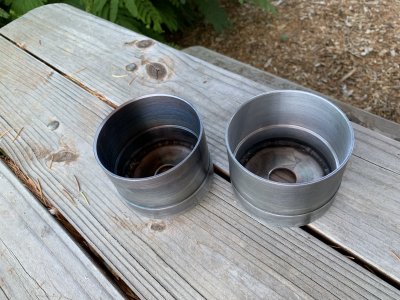
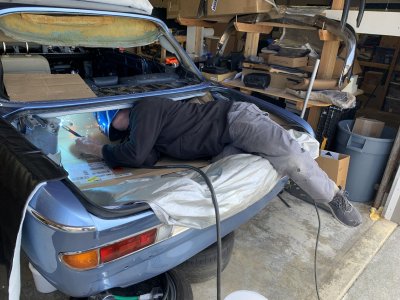
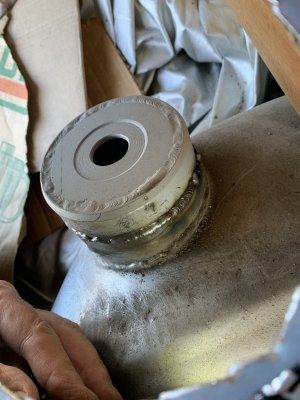
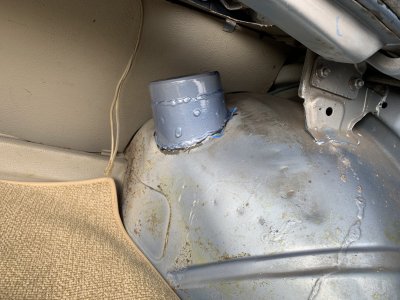
I got the rebuilt shock towers caps from my friend Jeremy Sycip. He did an awesome job as always. Then Chris “Have-welder-will-travel” Baker came by and welded them in place. I did the best I could to dress up those welds afterwards, but unfortunately I only had circular grinder which is very difficult to use in such a tight space, so that part is definitely not up to @tygaboy usual standards. Apologies, Chris!
After that I gave them a lick of paint up top (the rest of the trunk will be painted later), lathered POR15 and seam sealer down under and those shock towers are now much stronger than they ever were.
Huge thank you to Chris Baker for his amazing work!
After that I gave them a lick of paint up top (the rest of the trunk will be painted later), lathered POR15 and seam sealer down under and those shock towers are now much stronger than they ever were.
Huge thank you to Chris Baker for his amazing work!


Last edited:
