Bringing a '74 back up to her intended glory.

Bmachine

Well-Known Member
Site Donor $
Site Donor $$
Messages
3,525
Reaction score
1,779
Location
Northern California coast
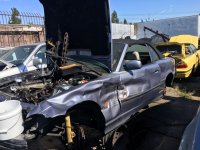
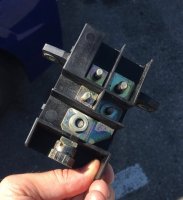
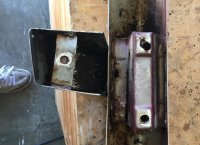
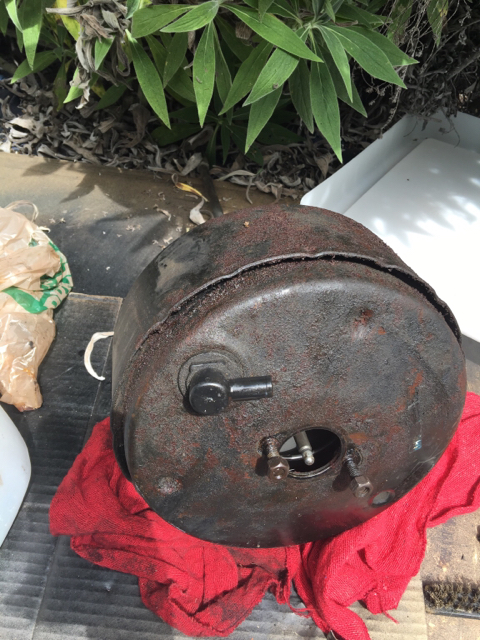
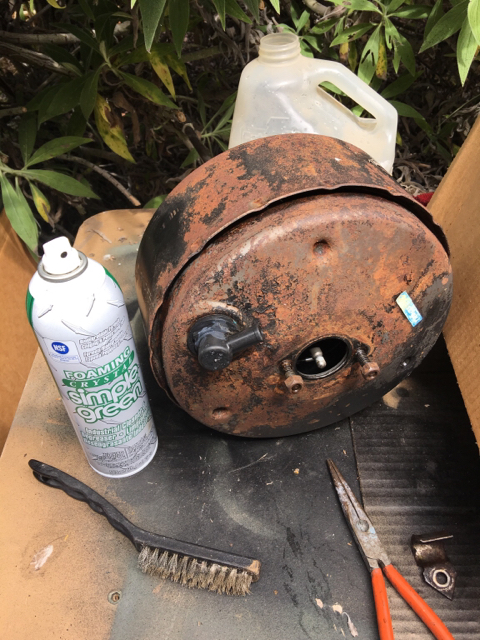
June 18. Visit to the local junk yard. I am looking for a power distribution block from an e36.

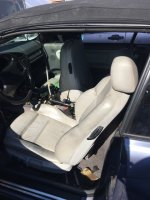
While there I am also looking at slightly more modern seats. I really need some good lower back support and old seats just did not offer much in that area. I am looking at the e36 ones. Definitely more modern but not as aggressive as Recaros. I am not sure if they are going to fit so I have to go back and take measurements first.
 

Attachments

  • IMG_0224.jpg
    IMG_0224.jpg
    106.3 KB · Views: 334
  • IMG_0222.jpg
    IMG_0222.jpg
    81.9 KB · Views: 316
  • IMG_0225.jpg
    IMG_0225.jpg
    84.4 KB · Views: 366
Last edited:

Bmachine

Well-Known Member
Site Donor $
Site Donor $$
Messages
3,525
Reaction score
1,779
Location
Northern California coast
June 26. I discovered that it is extremely difficult to disassemble the headlight buckets from their bracket. They were obvioulsy designed ONLY to pressed IN and never to be taken OUT. After trying various brute force options I fnally came up with a little gizmo which made it possible without destroying the whole thing.

http://www.e9coupe.com/forum/threads/separating-the-headlights-buckets.22503/

Once separated, I can finally repaint them!

15. Refinish the headlight assemblies.
 

Attachments

  • IMG_0258.jpg
    IMG_0258.jpg
    111.2 KB · Views: 281
  • IMG_0259.jpg
    IMG_0259.jpg
    105.8 KB · Views: 282
Last edited:

Bmachine

Well-Known Member
Site Donor $
Site Donor $$
Messages
3,525
Reaction score
1,779
Location
Northern California coast
July 2. Restoring yet another set of rear bumpers. How the heck do you remove the under riders??? The bolt/screw is impossible to reach under the main bumper bracket.
 

Attachments

  • IMG_0271.jpg
    IMG_0271.jpg
    109.3 KB · Views: 294
  • IMG_0272.jpg
    IMG_0272.jpg
    136.2 KB · Views: 287
  • IMG_0276 (1).jpg
    IMG_0276 (1).jpg
    91.7 KB · Views: 288

Bmachine

Well-Known Member
Site Donor $
Site Donor $$
Messages
3,525
Reaction score
1,779
Location
Northern California coast
July 22. Brake work time. I have a few hours available today so I decide to get the calipers out so they can be rebuilt. While I'm there I also remove the old rubber brake lines and replace them with a set of steel braided ones I got from La Jolla.

While I am down there, I notice with horror that the ball joint boots are completely trashed. Great. Now I need to buy new lower control arms as well...

The front calipers were definitely ready for rebuild. The seals were all perished.

And... darn, my front disks are right at the lower limit! While I'm there....

Good grief... Where are we? Must be Plan K.

16. remove and rebuild all calipers.
17. Replace rubber brake lines with steel braided ones
18. R n R Lower control arms
19. R n R front brake disks
 

Attachments

  • IMG_0332.jpg
    IMG_0332.jpg
    104.5 KB · Views: 298
  • IMG_0344.jpg
    IMG_0344.jpg
    76.7 KB · Views: 284
  • IMG_0346.jpg
    IMG_0346.jpg
    83.7 KB · Views: 283
Last edited:

Peter Coomaraswamy

Well-Known Member
Site Donor $$
Messages
3,787
Reaction score
896
Location
Austin, TX
That is a great thread start, going through it I kept thinking how much work actually goes into tearing one of these down, and then there is the pleasure of putting it back together. The thing I like the most about working on the e9 is that no matter what part of the car you are working on you can always switch to another part that needs attention while you wait for the inevitable late or wrong part to be delivered. Cant wait to see the pictures when you start the underside :)

Thanks for posting
 

Bmachine

Well-Known Member
Site Donor $
Site Donor $$
Messages
3,525
Reaction score
1,779
Location
Northern California coast
Thank you Peter and Steve.

My daughter is home from college for the summer so there are far less opportunities to work on the car during the weekend as I want to take advantage of the time we have with her. But every now and then, when she goes out to catch Pokemon with her friends (also in college...!!!) I get a few hours to do some small thing. Today, I took her with me under the pretense of checking if there were any in Huntington and went to pay a visit to the great Chris Macha. I asked him what he suggested to clean those very rough steel brake lines. He mentioned brass wool and sand paper. I did not have brass wool so I used a collection of sand papers, sanding sticks, wire brushes and brake cleaner. It's amazing the hits that the ones in the front wheel well take from millions of little rocks and stones hitting them over 45 years of service.

Before, during and after:
 

Attachments

  • IMG_0381.jpg
    IMG_0381.jpg
    125.5 KB · Views: 282
  • IMG_0382.jpg
    IMG_0382.jpg
    127.4 KB · Views: 282
  • IMG_0383.jpg
    IMG_0383.jpg
    127.8 KB · Views: 272

Bmachine

Well-Known Member
Site Donor $
Site Donor $$
Messages
3,525
Reaction score
1,779
Location
Northern California coast
Good idea, Steve. Chris had mentioned the same thing.

PS: Never ceases to amaze me how much time we end up taking to do some of the simplest things... like cleaning your brake lines!!!
 

Peter Coomaraswamy

Well-Known Member
Site Donor $$
Messages
3,787
Reaction score
896
Location
Austin, TX
One of the things that is truly stunning about the e9 and many other vintage BMW's is how a 40 year old piece of rubber will come back to life after a good cleaning. Thus you spend more time on redoing old parts than actual money buying new ones- Of course there are plenty of things to spend money on. Enjoy your kids when they're around, my daughter is still young enough to think I'm actually "OK" to hang around with.... I think :)
 

Bmachine

Well-Known Member
Site Donor $
Site Donor $$
Messages
3,525
Reaction score
1,779
Location
Northern California coast
Time to refresh the brake booster. Lots of fluid had apparently spilled on it at some point causing serious cosmetic issues.

406c1f7e7f60e5d73b7654711bb5d642.jpg


56c93c8dabc4150ccd250784a6ee624a.jpg


e3c1fb1bb1bd4c610bba9f4f2bb78233.jpg


7fc24cc91e84b588ac1cb2d934b12c75.jpg


351d11d58593e9341c9f4add4f3af0e0.jpg


00622e0b9be039c612d461612fad1e90.jpg
 

Attachments

  • IMG_0447.JPG
    IMG_0447.JPG
    421.1 KB · Views: 224
Last edited:

Markos

Well-Known Member
Site Donor
Messages
13,369
Reaction score
7,502
Location
Seattle, WA
Great job on the booster! You appear to be a rattle can artisan! I didn't know they made foaming simple green in a can. I must have it!
 

Peter Coomaraswamy

Well-Known Member
Site Donor $$
Messages
3,787
Reaction score
896
Location
Austin, TX
Bo, since you are going into such detail (I love it!), regarding the paint, from what I can tell the modern rattle cans can be really good and Eastwood sells some pretty good stuff as well, the satin clear-coat that Steve mentions above is available in High-temp and I find that a little better than the regular clear coat. Also, even though the factory did not prime allot of the stamped steel pieces I find it worthwhile so prime them, they look smoother and hold up better. Hey, as long as you're in there :)
 

Bmachine

Well-Known Member
Site Donor $
Site Donor $$
Messages
3,525
Reaction score
1,779
Location
Northern California coast
Hectic summer with family vacation, the whole Monterey thing and some work to do in the house.

But little by little some things get done. First removing, bead blasting and refinishing the headlight buckets.

877ff9f2128940d98c259decc635cd6d.jpg


c3685e9442119c882f6304815a5c3133.jpg


a09e2510803fb6a04baeabe2cfd45e7e.jpg


8ba4c0bd37a0abf122b5d96256bbe4ab.jpg


66127431b0071bca0b5a5707e92ee63f.jpg
 

Bmachine

Well-Known Member
Site Donor $
Site Donor $$
Messages
3,525
Reaction score
1,779
Location
Northern California coast
Then I finally got a home blasting system that can be rolled out when needed and back in a corner of the garage when the weekend is over.

c0fba767c9a1006f0cf31976d672218c.jpg


First items I tested it on are the PS fluid reservoir and the heater fan grille. Before and after:

57e453cc65ada38e2453625cd219c8c4.jpg


a50385d0ae7078d7f5cfeed750063dfd.jpg


ab1dc05ff4bf4132d29d2ea9a9e7e04b.jpg
 
Last edited:
Top