Bringing a '74 back up to her intended glory.

Bmachine

Well-Known Member
Site Donor $
Site Donor $$
Messages
3,525
Reaction score
1,778
Location
Northern California coast
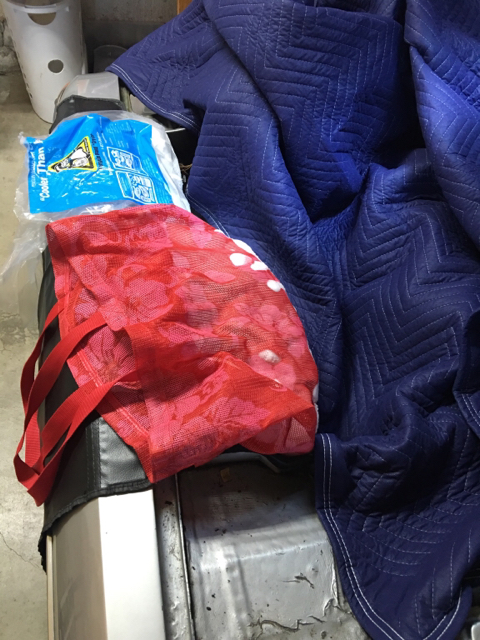
Today I decided to start removing the sound insulation on the top of the fender. Following the thread on the subject I decided to use the dry ice method.

More added task:

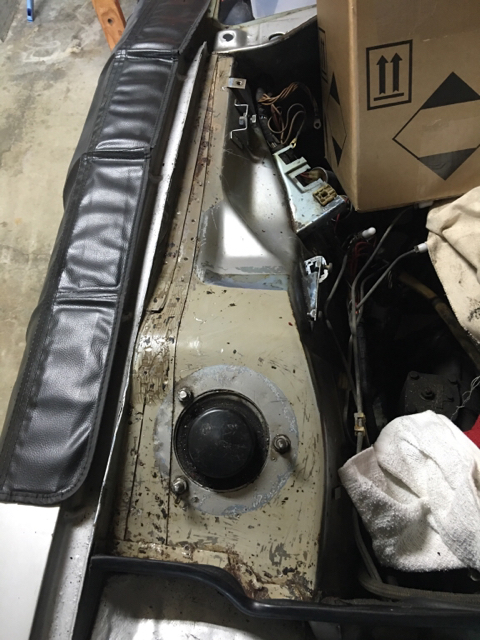
20. Remove and replace (?) sound deadening on fenders

d59c2bfe2d8d43800107d1fa342416ba.jpg


It took some work but most of it came off. There is a little bit of surface rust but compared to what I have seen on others I can't really complain.

b67b7ee3f40776c26df20d3b44721f9e.jpg


4f48b31a10c058a0d3b3d367891d233d.jpg
 
Last edited:

Bmachine

Well-Known Member
Site Donor $
Site Donor $$
Messages
3,525
Reaction score
1,778
Location
Northern California coast
Not much playtime this weekend with the Vintage taking most of Saturday.
But I started installing the battery under the rear seat. Pics when it gets more interesting
I also started removing the auto tranny shifter console. I have one question about that. The early selector just required you to unscrew the shift knob to allow the selector to slide out the bottom. But the later style with the reverse lock does not offer any obvious way to take it apart. I only saw one tiny hole half way down the shaft where a tiny screw could possibly be but it is very difficult to see what needs to happen in there. The blue manual was no help. Any suggestions?

Before and after.

In the middle: Later style cars have a female receptacle for each window switch instead of individual wires that need to be connected.
 

Attachments

  • IMG_1223.jpg
    IMG_1223.jpg
    106.9 KB · Views: 277
  • IMG_1224.jpg
    IMG_1224.jpg
    89.3 KB · Views: 265
  • IMG_1228.jpg
    IMG_1228.jpg
    127.2 KB · Views: 274

eriknetherlands

Moderator
Site Donor
Messages
2,696
Reaction score
1,927
Location
Netherlands, Eindhoven area
Bo, not sure if this may help, but in my may '73 CS the auto shifter unscrews. here's a picture. It shows the thread where mine seperates.
It was quite stuck the first time i took it off. Now it turns lot easier as I took it off regularly as a "burglar protection" while parking in our local city center. Good luck driving it without.... :)
 

Attachments

  • 20150411_223222.jpg
    20150411_223222.jpg
    1.7 MB · Views: 262

Bmachine

Well-Known Member
Site Donor $
Site Donor $$
Messages
3,525
Reaction score
1,778
Location
Northern California coast
Bo, not sure if this may help, but in my may '73 CS the auto shifter unscrews. here's a picture. It shows the thread where mine seperates.
It was quite stuck the first time i took it off. Now it turns lot easier as I took it off regularly as a "burglar protection" while parking in our local city center. Good luck driving it without.... :)

Ha, it sure does help!!! Thank you Erik.

I had tried to turn the handle but it did not want to budge easily so I stopped, fearing it was the wrong way to do it. But after your post I went at it again and, with the help of a wooden block as a handle, it did loosen up and unscrew properly. Thank you!

PS: Brilliant idea to use that as cheap but effective theft deterrent!
 

eriknetherlands

Moderator
Site Donor
Messages
2,696
Reaction score
1,927
Location
Netherlands, Eindhoven area
Yep, and it helps that it fits in your inside pocket, where the bus wheel or battery won't. Well not in my jacket with me still in it...

The thing that wonders me is how they ever engineered this thing; did you notice that it has a solid end stop when installing it back on?
When you screw the handle/selector knob back on it takes 15 turns or so, and then all of a sudden it locks at a perfect orientation, 90 degree to the driving direction. Unlike a screw that can always be convinced to turn some more with some force. How did BMW do that? Add to that the fact that not only the thick outside chromed tube is threaded (the one in my pic in the previous post), but also the internal 5mm steel rod sticking out from under the handle/selector has a thread as well that operates the reverse lock from the push button.

Or is it just me overthinking things, which seems to be a hobby.....
 
Last edited:

Bmachine

Well-Known Member
Site Donor $
Site Donor $$
Messages
3,525
Reaction score
1,778
Location
Northern California coast
Yes! I definitely noticed that. German over engineering at its best!

But pretty damn cool all the same.

BTW, are you keeping your automatic tranny?
 

aearch

Well-Known Member
Site Donor $
Messages
4,106
Reaction score
588
Location
pleasant hill , ca
ive found the whole darn car is like that
ever try to put a larger sheet metal screw in.
impossible because of the quality of the steel
 

Bmachine

Well-Known Member
Site Donor $
Site Donor $$
Messages
3,525
Reaction score
1,778
Location
Northern California coast
After several weeks absence due to a family emergency, I was able to get back to the car for a little bit this weekend.

Time to work on the front axle:

New brake discs, new lower control arms, longer wheel studs on the hub.

I was lucky enough to have my friend Gavin come over and provide tremendous help. I was also fortunate to be able to get down to Mike (OCCoupe)'s shop in order to use his hydraulic press to remove and install the longer wheel studs.

Plan M:

21. Replace front wheel studs with longer ones.
 
Last edited:

Bmachine

Well-Known Member
Site Donor $
Site Donor $$
Messages
3,525
Reaction score
1,778
Location
Northern California coast
Upon disassembly I noticed that the PO had installed the long bolt for the sway bar with the threads at the bottom. I always wonder why people do that as it almost guarantees that they will get bent sooner or later as the car hits a rock and anything down below. Sure enough, mine was bent so it couldn't slide out of the long sleeve. Had no other choice but to cut the thing.

3a6da54e76b47cdaab85b9f632918681.jpg


f199f7a7127d0090fce1ed62069b15c5.jpg
 

Bmachine

Well-Known Member
Site Donor $
Site Donor $$
Messages
3,525
Reaction score
1,778
Location
Northern California coast
While we are at it, might as well take the brake dust shields off and refinish them. I had originally planned to just clean them and give them a lick of paint but soon realized that it was better to glass blast them first.

20f709a9feb29c08945564c32b166fde.jpg


852cc729ae84fa64a7a5012641606479.jpg
 
Last edited:

Bmachine

Well-Known Member
Site Donor $
Site Donor $$
Messages
3,525
Reaction score
1,778
Location
Northern California coast
After trying with 3 different tools to press the old ball joint out, we finally decided the only way to get proper access to the top of the joint bolt was to separate the steering arm from the strut. Without that, there are parts of the strut that extend right above the top of the ball joint and that keep you from placing the removal tool on top of the ball joint bolt.

ac8b898e5ca1ea0fb7dc4b169ba0f176.jpg
 
Last edited:

Bmachine

Well-Known Member
Site Donor $
Site Donor $$
Messages
3,525
Reaction score
1,778
Location
Northern California coast
There was a discussion about the possible variation in sizes between lower control arms on the pre and post '74 cars. I ordered the Ocap replacements from RM European and they seem to match the ones on my car perfectly.

d7e85814e7a191140db4ed3b1f4ce734.jpg


17d44bdc4519c122c1f12152a8bd62d8.jpg


d43e9f0bcf16b6bfd03ea121577f1b7a.jpg


3986ab1dc29d5eeac5c0844811f1af54.jpg
 
Last edited:

Bmachine

Well-Known Member
Site Donor $
Site Donor $$
Messages
3,525
Reaction score
1,778
Location
Northern California coast
Next was time to clean the hubs. Ideally this should have been done BEFORE installing the longer studs but, as often happens, sometimes the perfect scheduling is thrown out of whack because of external factors.The reason for the longer studs is that my wheels are 8" and I need to use a 5mm spacer to get them to clear the strut. So there the studs were about 8mm shy of covering the full wheel nuts.

248fee9e79a4ebe5f47340bcc607f2ac.jpg
 

Bmachine

Well-Known Member
Site Donor $
Site Donor $$
Messages
3,525
Reaction score
1,778
Location
Northern California coast
After doing a test fit, the new ones seemed to stick out way too much now. Mike had indeed expressed concerns the the wheel cover would not fit anymore. Much to our surprise, they fit perfectly!

f2c05943c5e80ae044404167764bf595.jpg


ae753ce477d6b0513dab849a20ba3499.jpg
 

aearch

Well-Known Member
Site Donor $
Messages
4,106
Reaction score
588
Location
pleasant hill , ca
would you be able to help w/ my electrical
im redoing mine from scratch and the wiring is a bit complicated
specifically the headlight and fog light wiring
the low beam relay has a green wire that i think goes to the old smog stuff and should be a ground for the low beam relay
the wiring says its brown
but not the case.
 

HB Chris

Well-Known Member
Site Donor $$
Messages
19,418
Reaction score
8,757
Location
Huntington Beach, CA
Well, ground is always brown, low beam yellow, high beam white (these could have tracer colors too). Green is part of chokes and smog relays too.
 

Bmachine

Well-Known Member
Site Donor $
Site Donor $$
Messages
3,525
Reaction score
1,778
Location
Northern California coast
would you be able to help w/ my electrical
im redoing mine from scratch and the wiring is a bit complicated
specifically the headlight and fog light wiring
the low beam relay has a green wire that i think goes to the old smog stuff and should be a ground for the low beam relay
the wiring says its brown
but not the case.

Not sure about that. Would be a good idea to put that in a separate thread since it's a separate subject.
 
Top