I was thinking that with all the welding the earlier owner did it kinda negates the "L" in CSL....
You are using an out of date browser. It may not display this or other websites correctly.
You should upgrade or use an alternative browser.
You should upgrade or use an alternative browser.
CSL Restoration
- Thread starter Marc-M
- Start date
-
- Tags
- restoration list
Marc-M
Well-Known Member
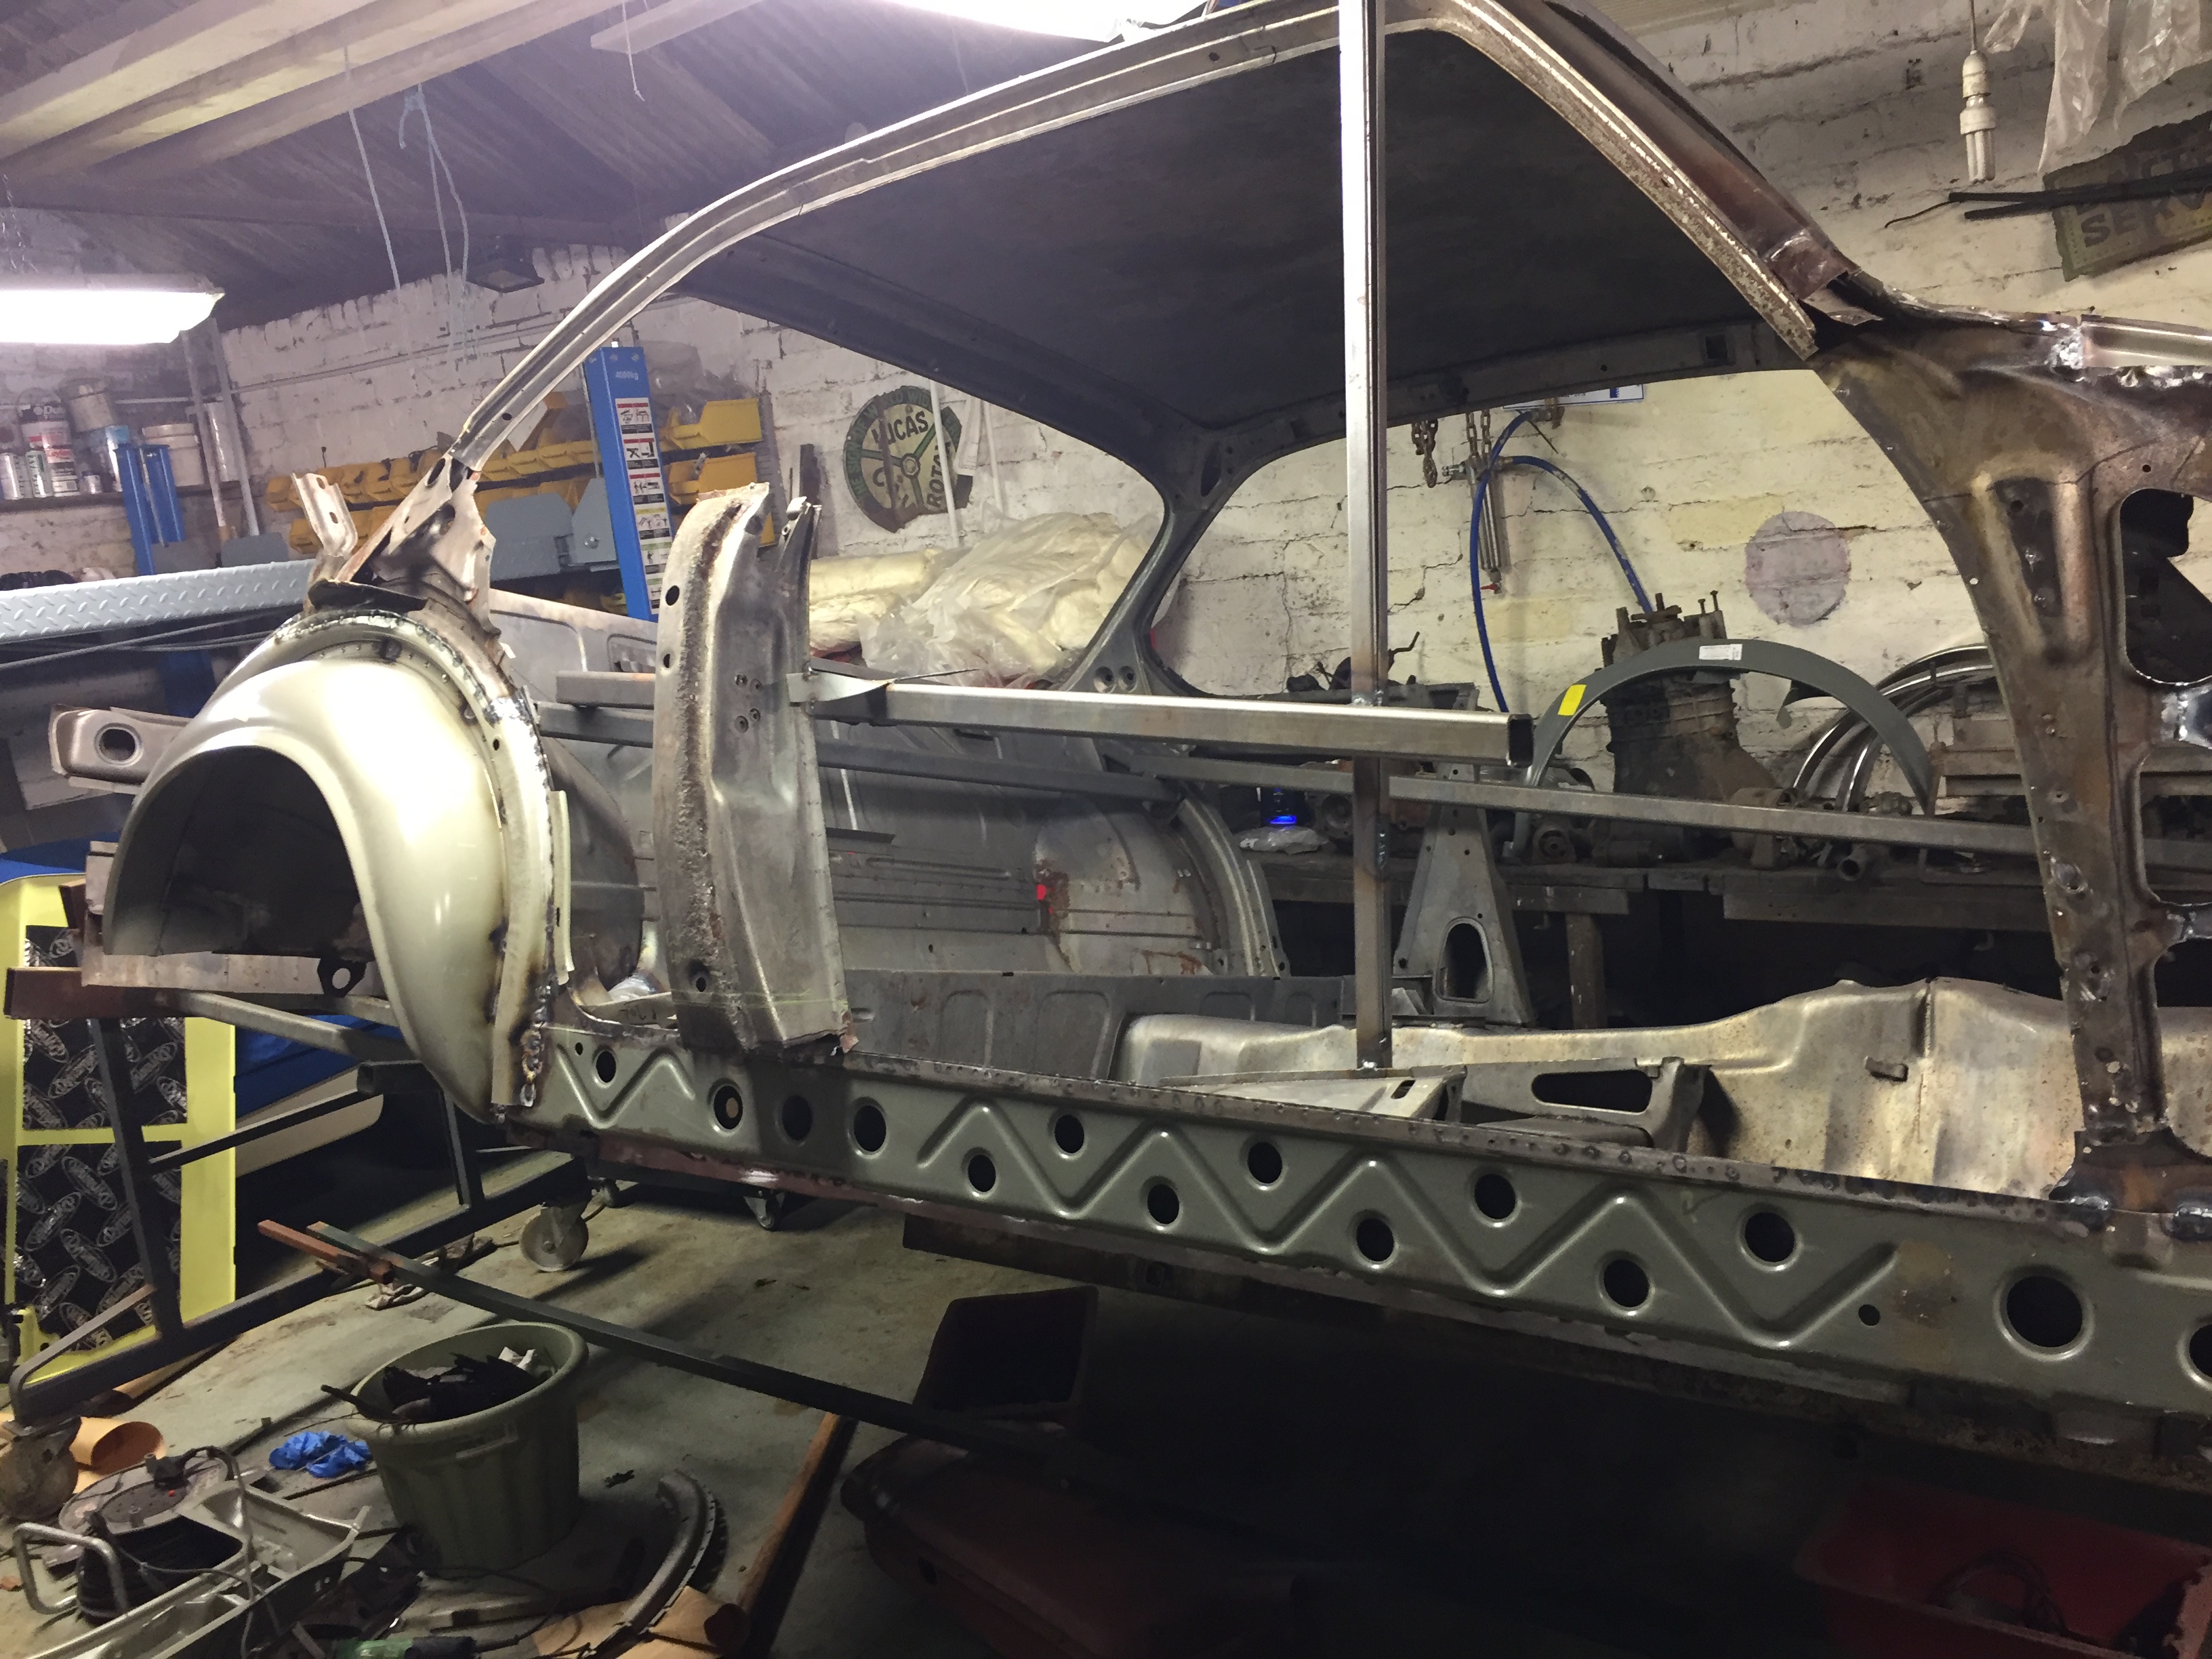
A few sections new made and put in to the wheel arch, but I have to peel back so many layers of steel work to get to the rotten bits and then reinstate.
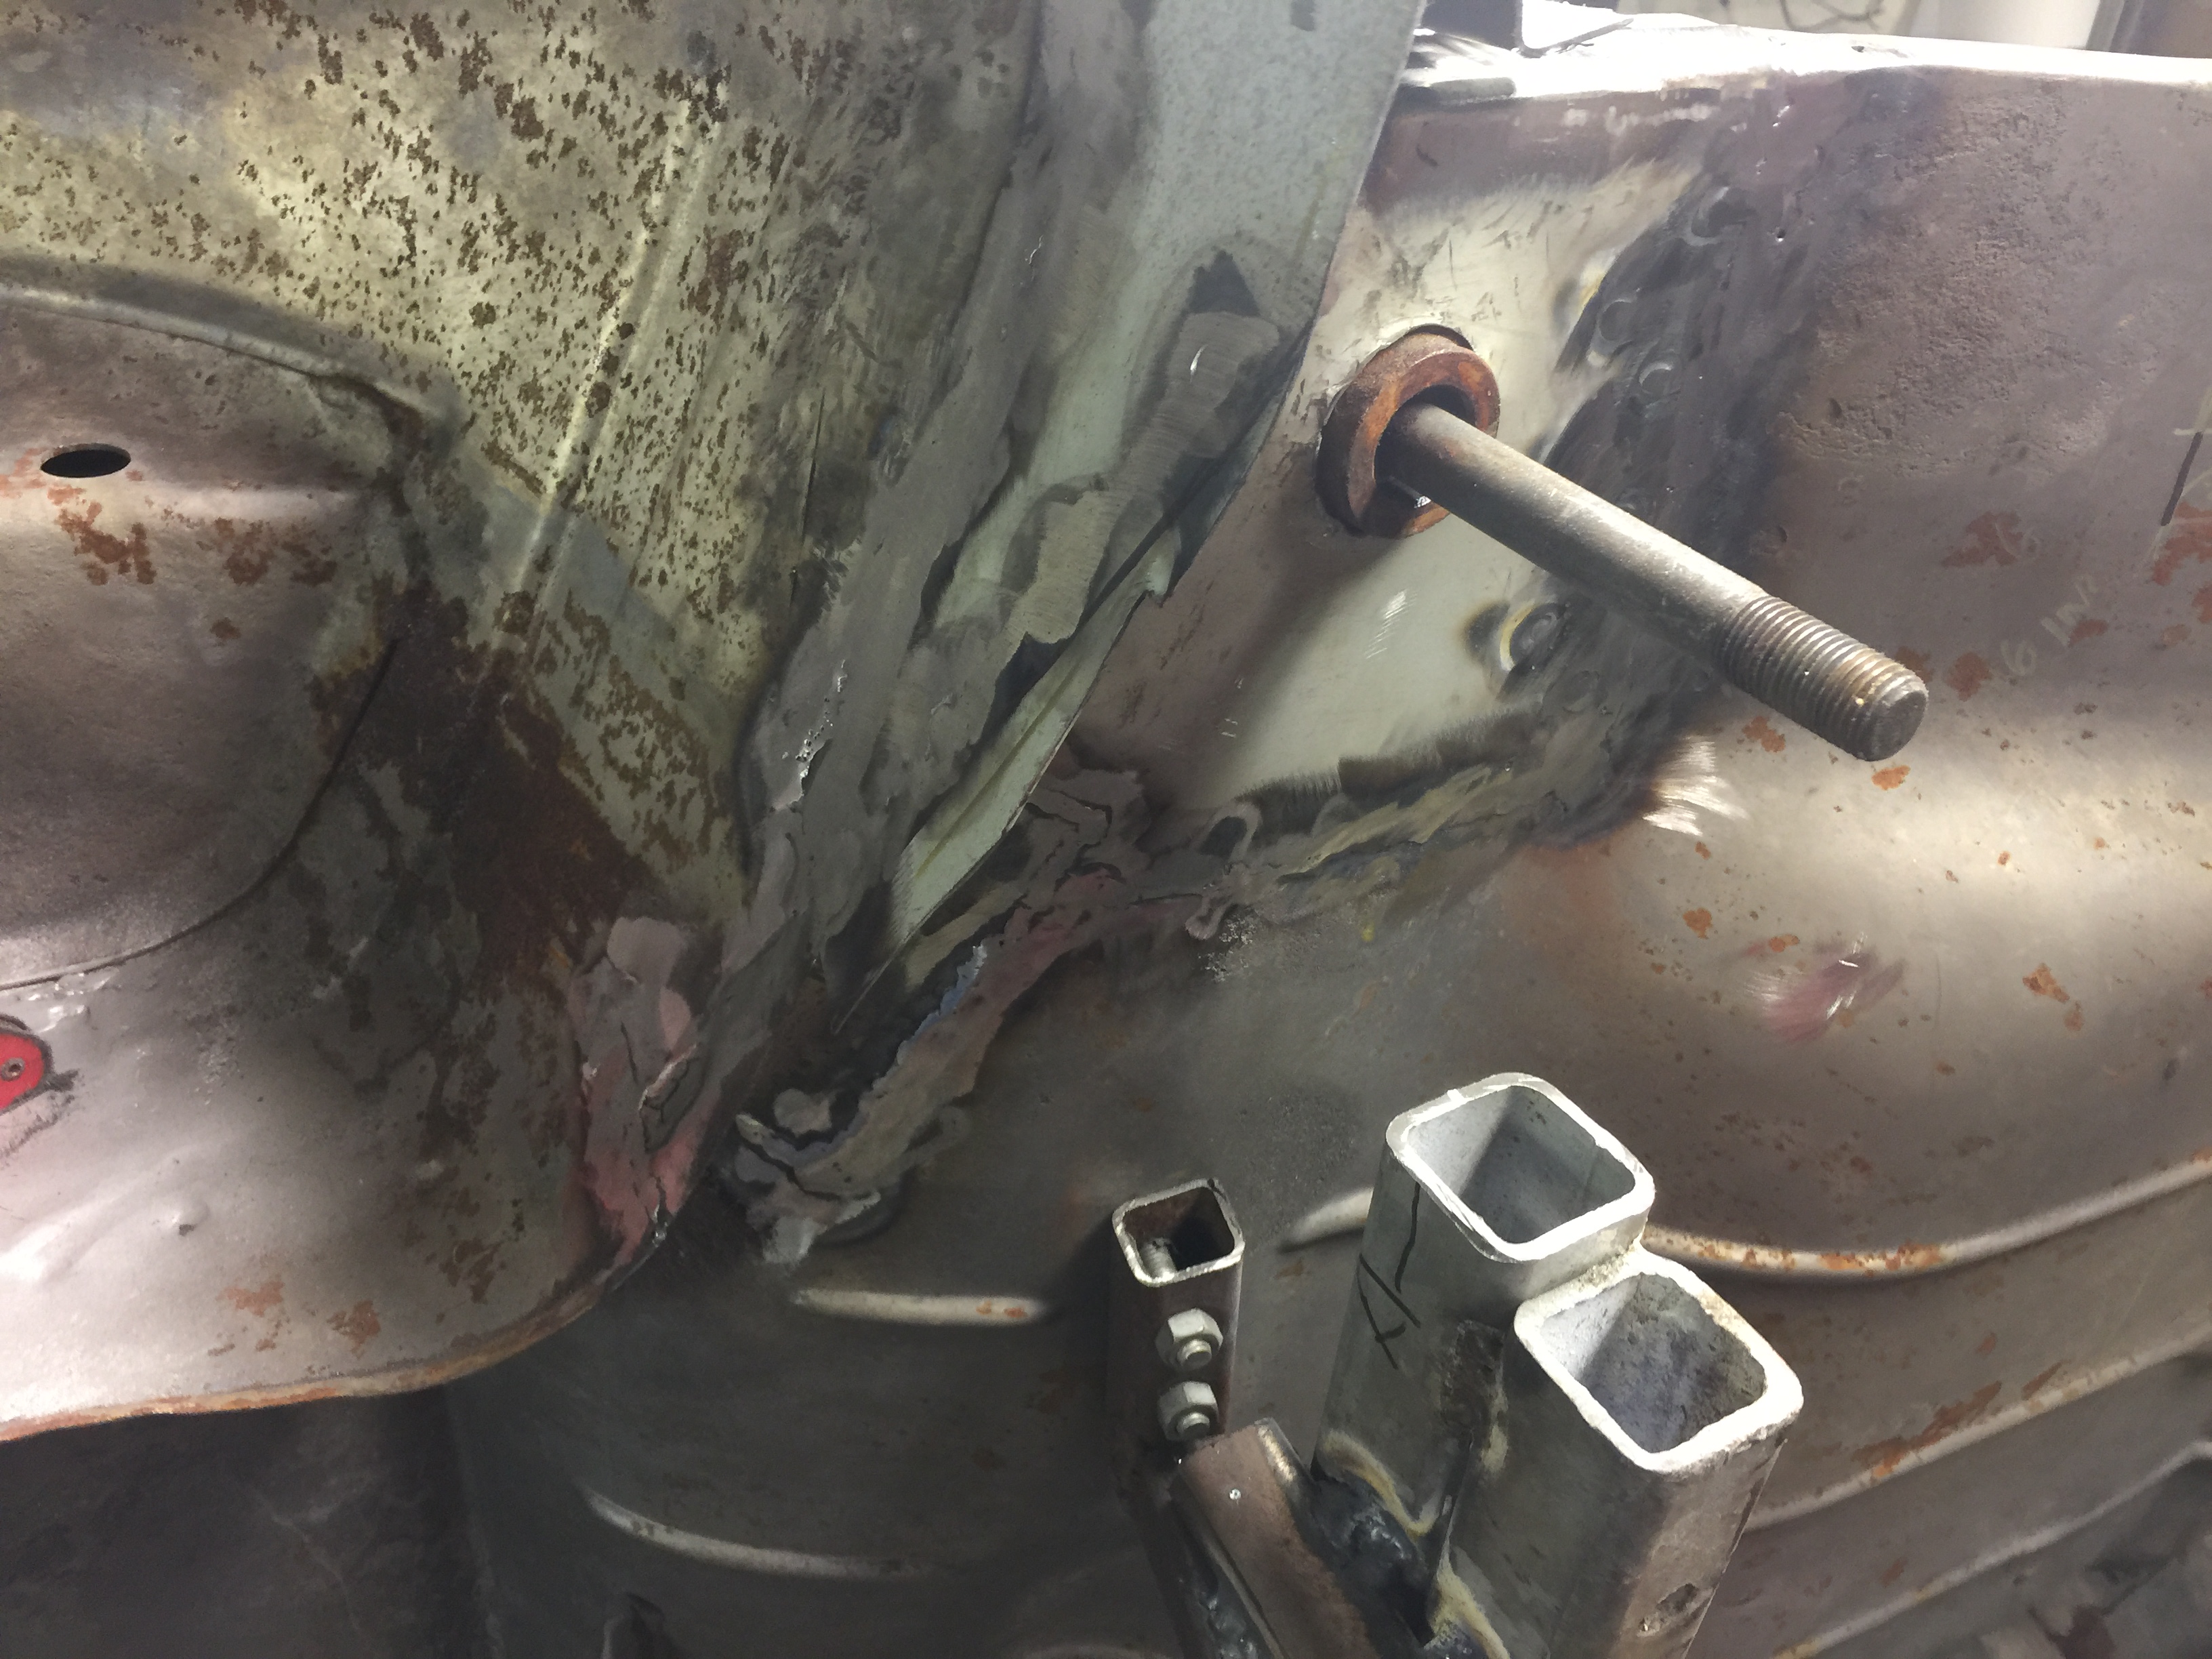
I have started on the rear subframe mounting point as this ties into the rear wheel arch that still need a section setting in.
As I have used that to secure the car to my roll over gig and need to get full access to it I need to attach the car it to somewhere else otherwise I may lose the alignment if it moves.
I have added 2 more mounting points to take the strain – one is bolted through the rear floor pan (so I only have to weld up 2 holes) and the other I have welded to main floor pan that I will be taking out.
The old rusty box steel that comes in handy for jobs I kept outside- I think after this its time is up..
This temp fix had held the car frim.
Marc-M
Well-Known Member
I’m now getting fairly well on with the inner sill section and I now think I have a solution to how the bottom of the inner wheel arch should be… still need to make that.
As I have nothing to work from my only option is from scanning the web on other restos.
it’s hard to find the right photo, at the right angle and to have a close up showing things in detail.
After a few trial fits and drilling holes in the new sill, its finally welded in place.
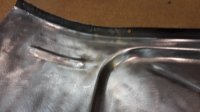
I had made a mistake with the repair section that is located at the rear mounting point, in that I did not give it a corner (just rounded it) and when I offer up the inner sill it became quite apparent that the car would fill up with water as the hole was quite big!
Make a small section and knitted it in…
spot the corner missing!
All the bits welded in
As you can see I was still working out how to finish the inner wheel arch section - a few more bits to make and weld there! - but all bits fitting like a glove
As I have nothing to work from my only option is from scanning the web on other restos.
it’s hard to find the right photo, at the right angle and to have a close up showing things in detail.
After a few trial fits and drilling holes in the new sill, its finally welded in place.
I had made a mistake with the repair section that is located at the rear mounting point, in that I did not give it a corner (just rounded it) and when I offer up the inner sill it became quite apparent that the car would fill up with water as the hole was quite big!
Make a small section and knitted it in…
spot the corner missing!
All the bits welded in
As you can see I was still working out how to finish the inner wheel arch section - a few more bits to make and weld there! - but all bits fitting like a glove
Marc-M
Well-Known Member
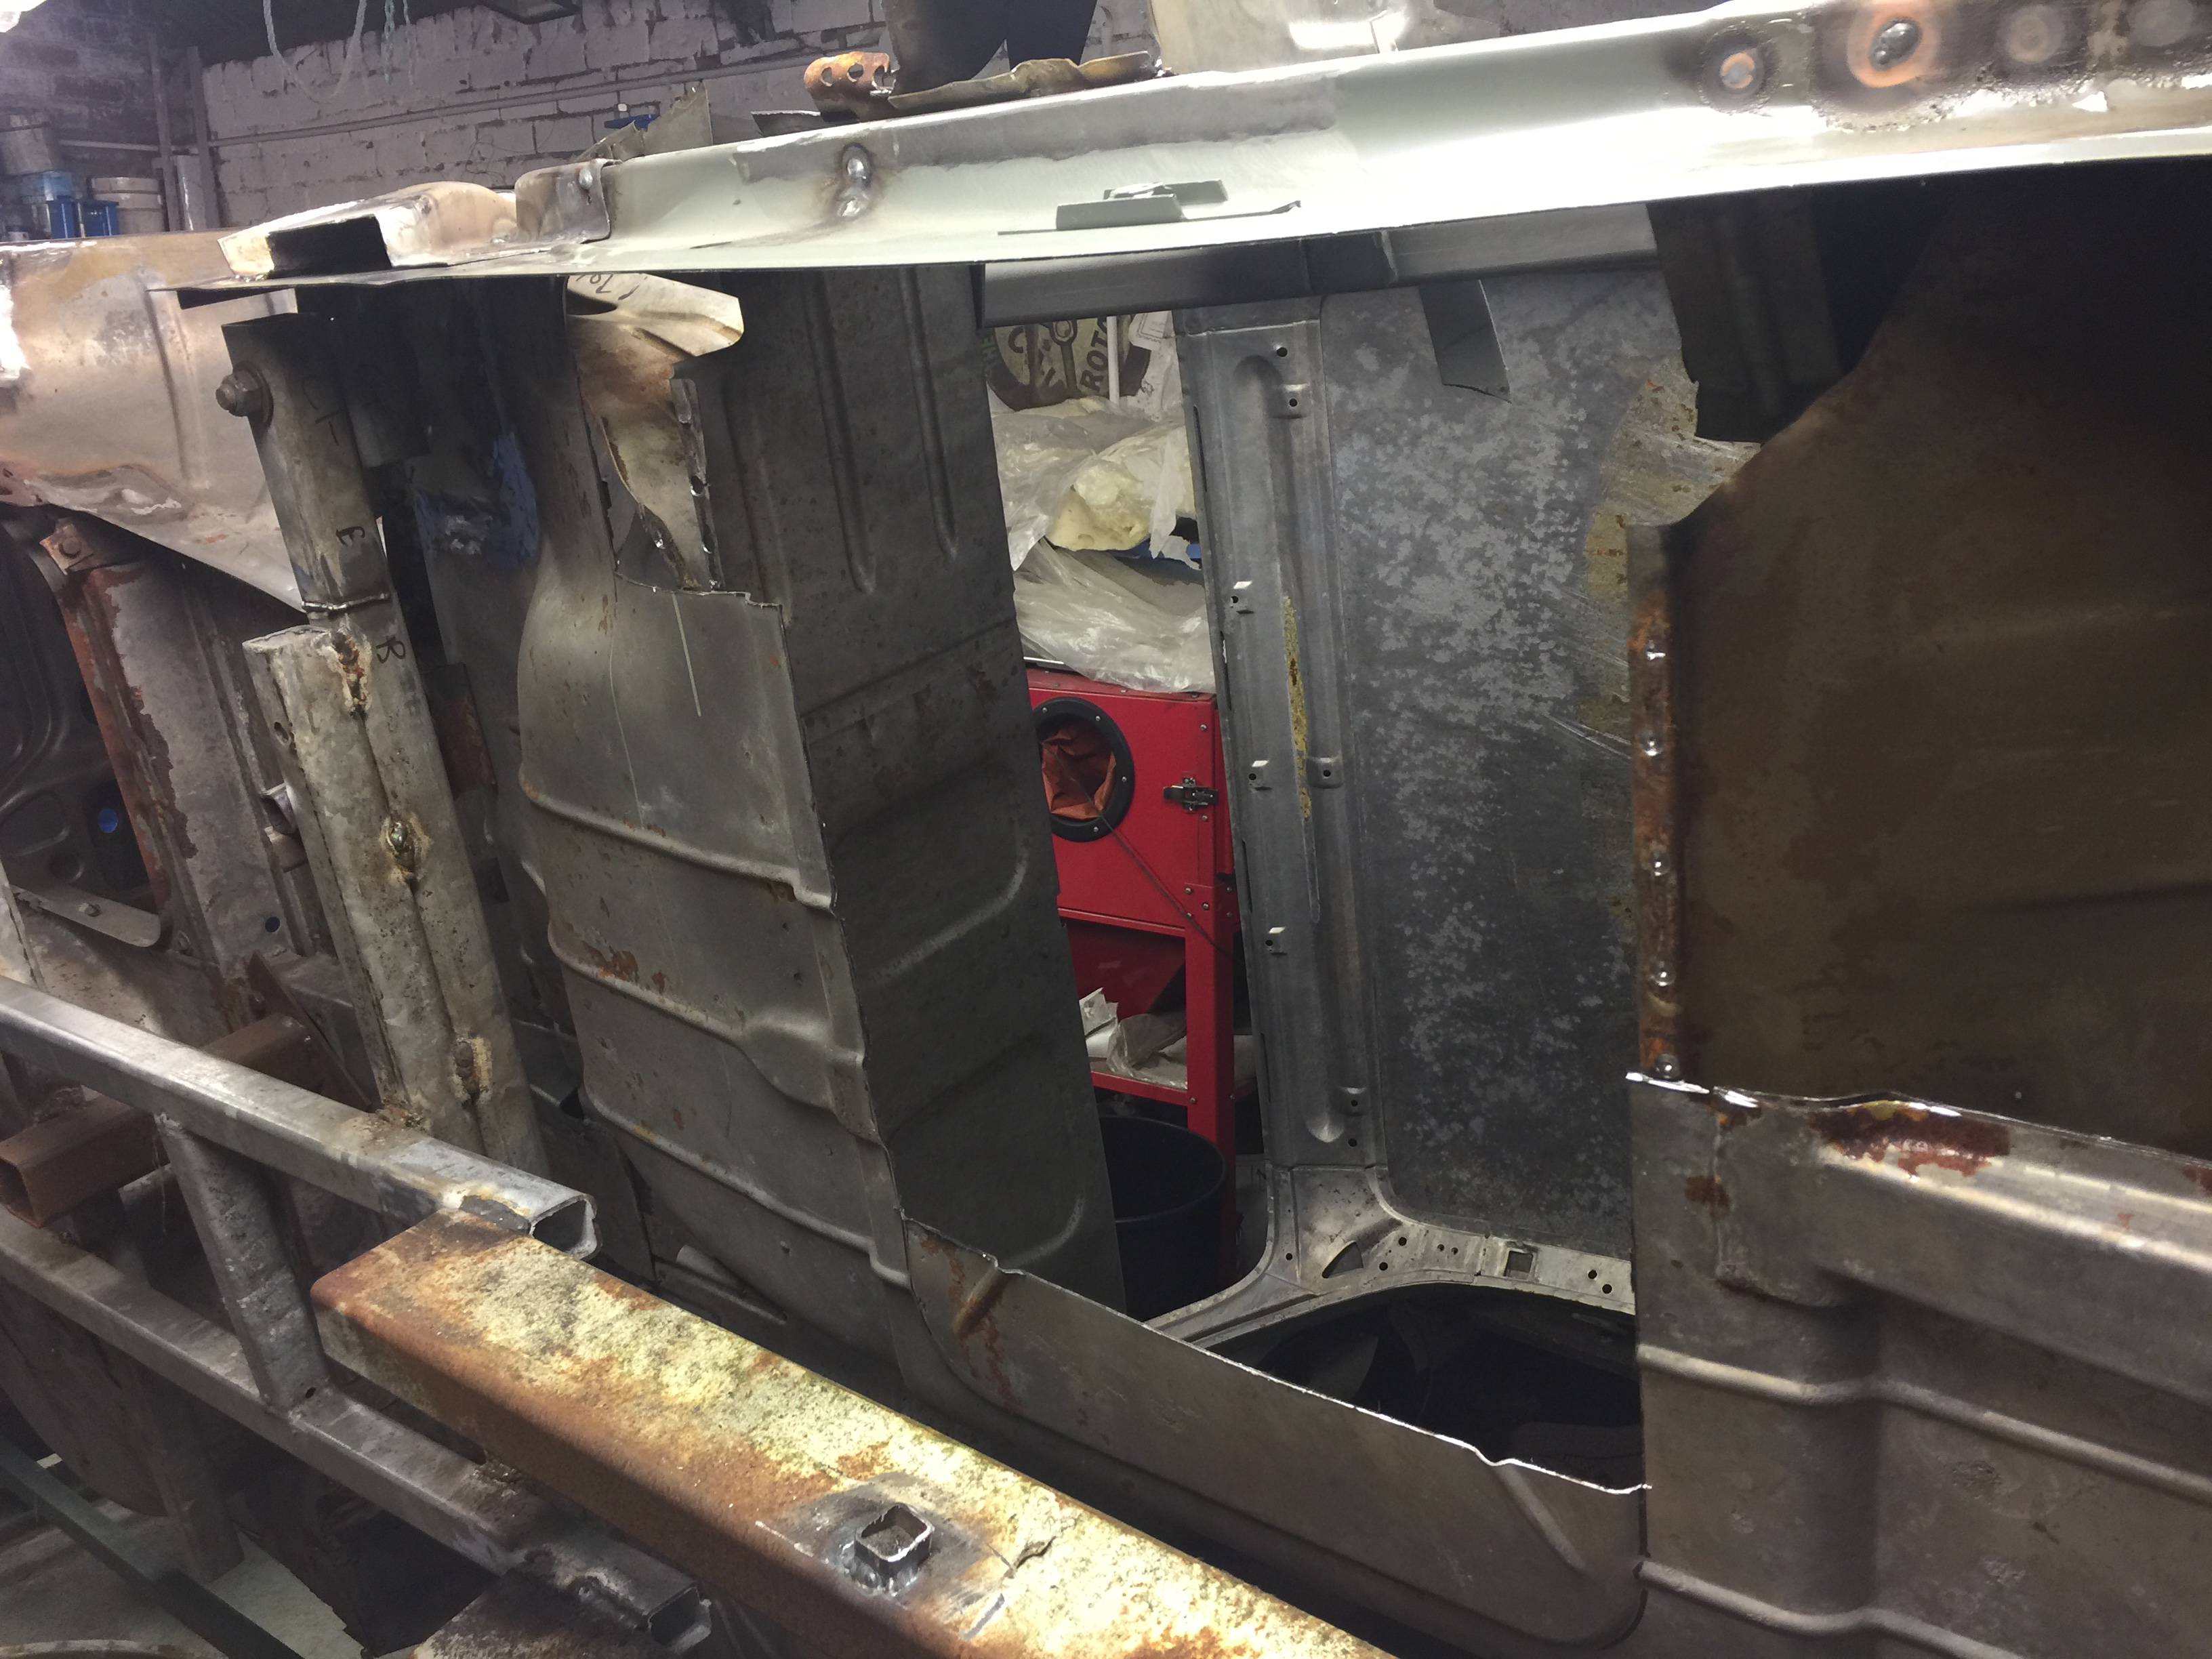
The car is now getting some of its structure back, it is time to put in the new floors, these need to go in before the intermediate sill sections
I am trying to keep as much of the original car as I can, with the new floor pans being really good reproductions, I have just cut out the rotten sections, I like odd shapes!
The floor pans only difference is the plug holes (looks like plug – but is solid)
My dilemma was, should I cut out the old plug holes from the old floors and set them into the new floor pan?
Well as you can see I decided not to do it, reason being the front floor plans were totally rotted away years ago, and the fronts would not match the back and I don’t have the plugs…
But now I’m doing this post, maybe I should make a template of the rear ones and use that for the fronts?? – more work – will it make any difference?? Apart from someone telling me “you have not got original floors” … you can see I’m in mental turmoil over it….
The rear floor took a good few hours to get a nice and snug fit and by tonight it should be welded in.
Much work to the front floor pan to fit and get the beads matching up with the rear.
Marc-M
Well-Known Member
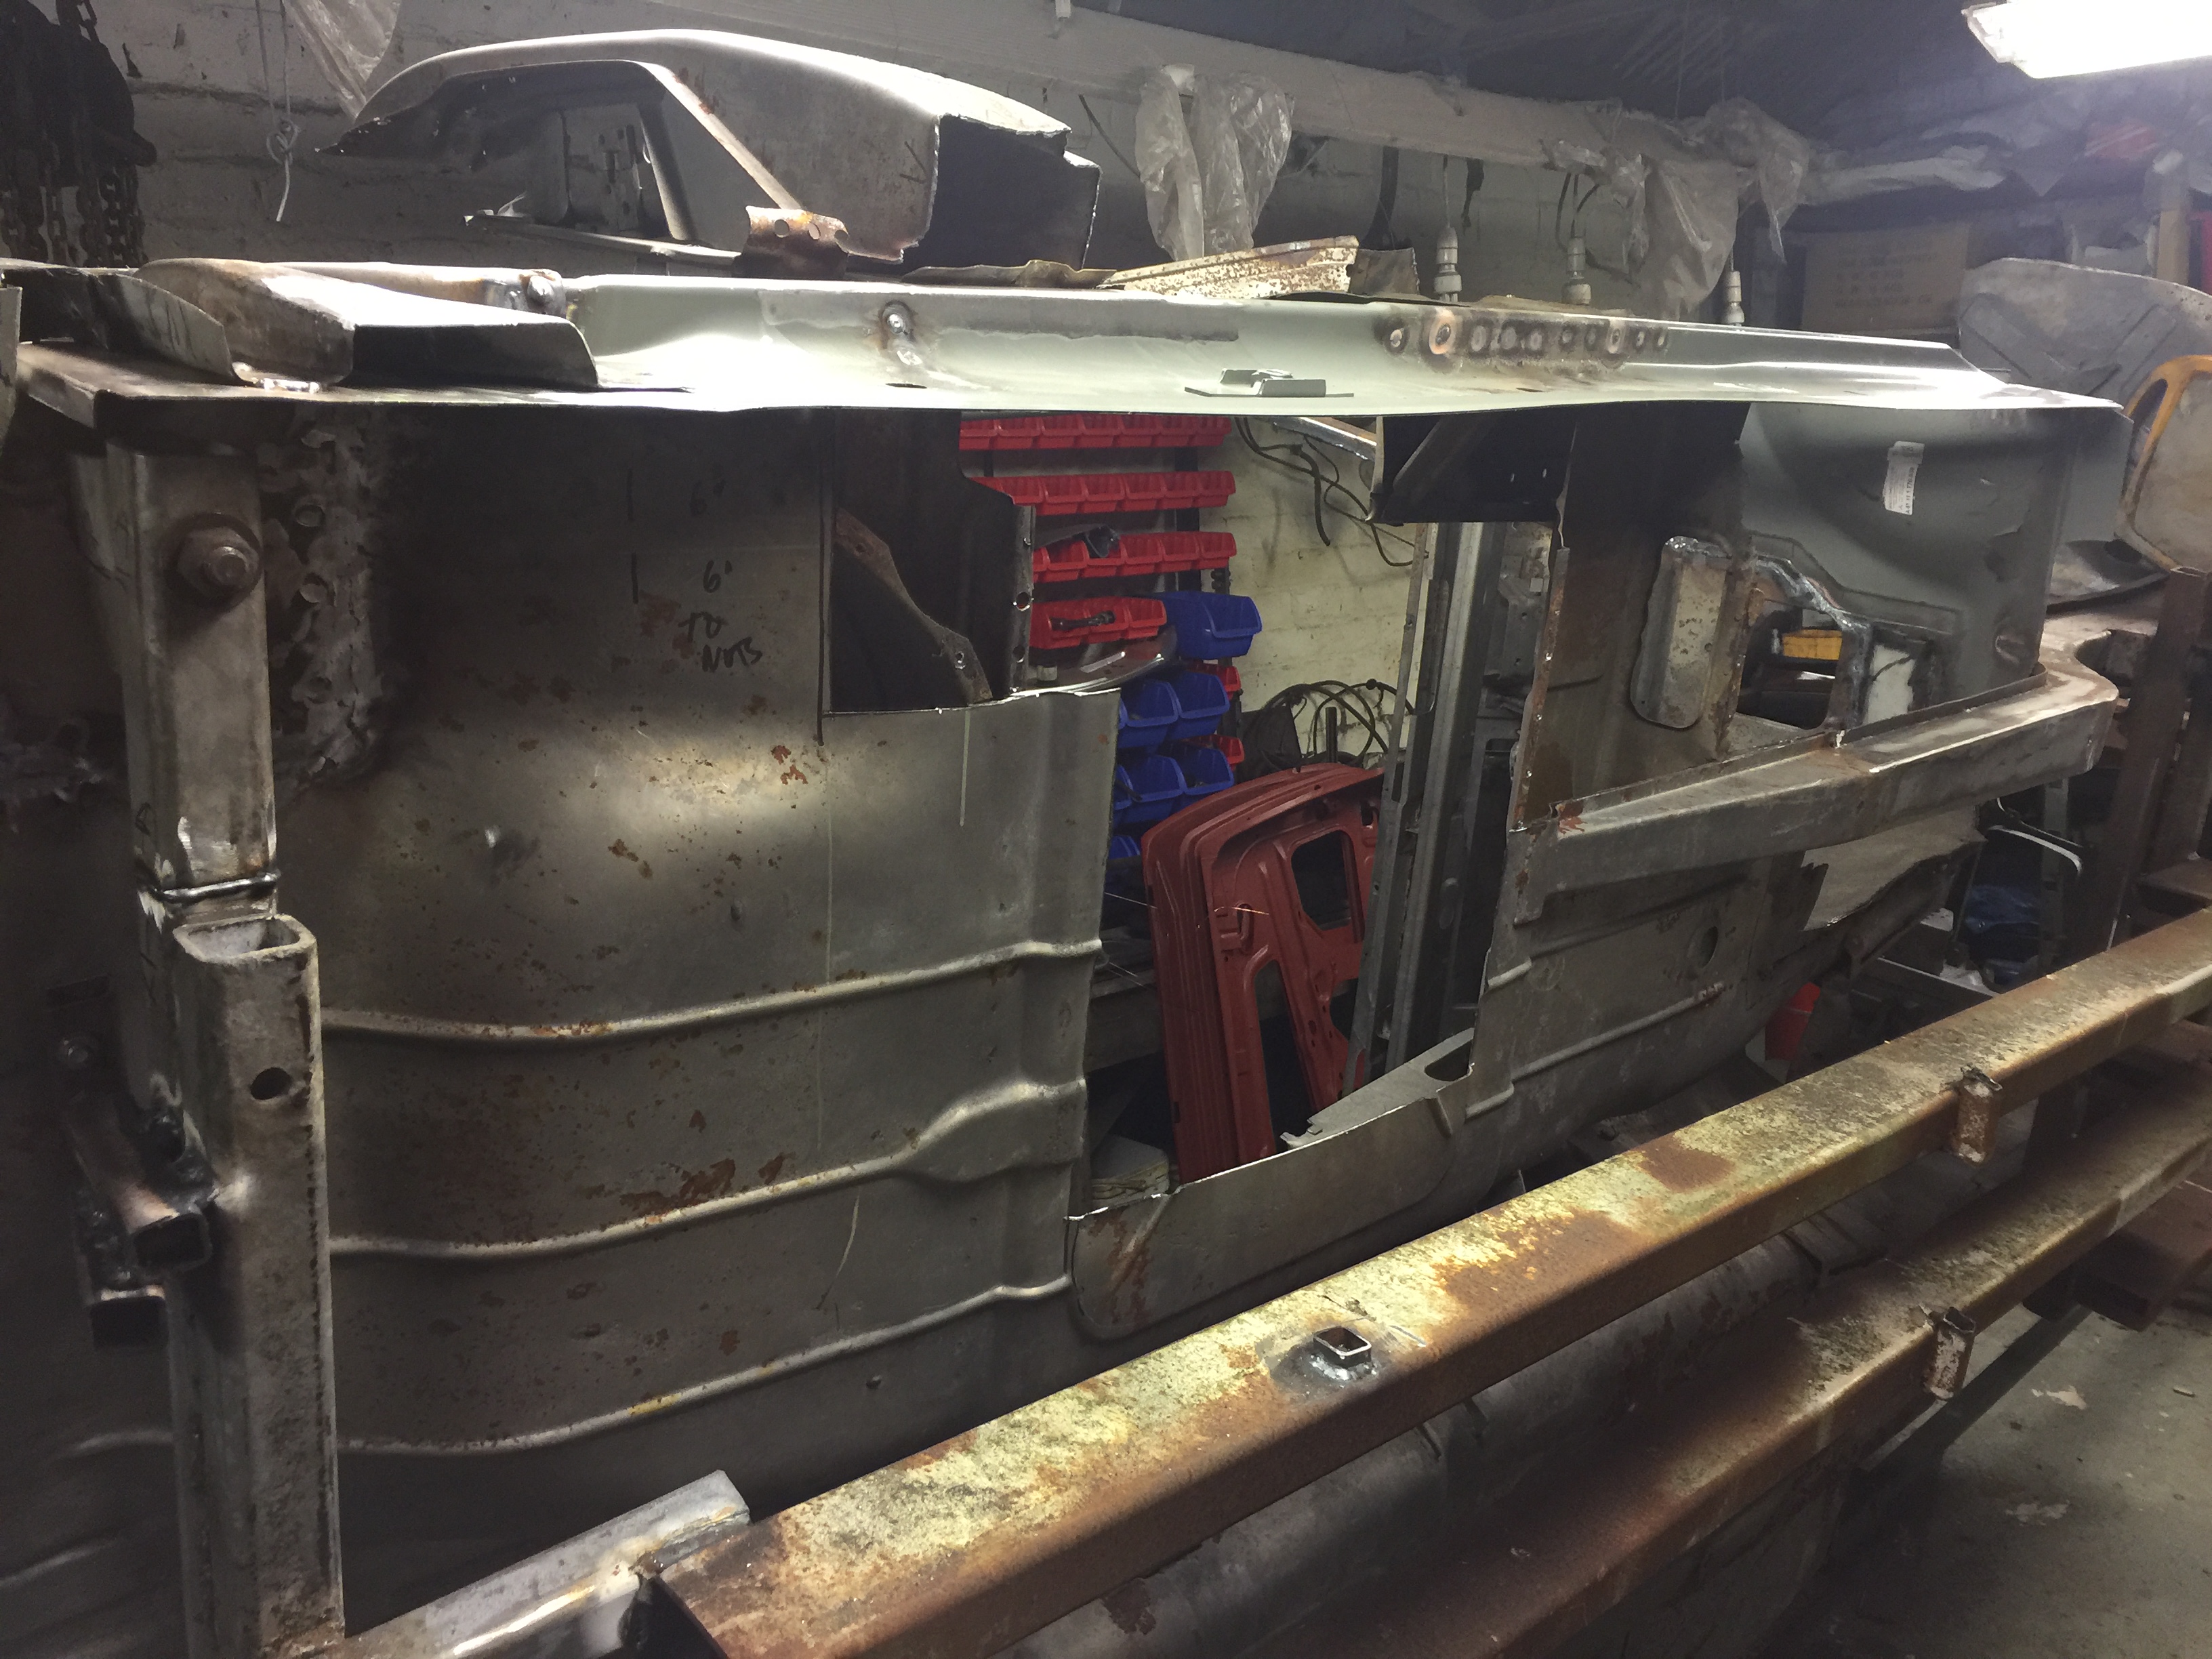
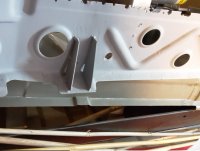
Due to many panels not available, last night made the inner A post structure.
I was fortunate, in that there was a little bit of the original structure to fit to.
But having nothing to copy, I had to examine a few photos on the web and make a copy as near as I could.
My first attempt was ok, but was just a few mm out, so a second was made with the adjustments and the panel looks and fits right… and the new A post fits well over the top, it may not be factory, but it’s as near as I could make.
Still a bit more fitting, but should be in this week – things are starting to come together now after weeks of bits..


Now only the floor to fit! - plus 1000 other bits!
I was fortunate, in that there was a little bit of the original structure to fit to.
But having nothing to copy, I had to examine a few photos on the web and make a copy as near as I could.
My first attempt was ok, but was just a few mm out, so a second was made with the adjustments and the panel looks and fits right… and the new A post fits well over the top, it may not be factory, but it’s as near as I could make.
Still a bit more fitting, but should be in this week – things are starting to come together now after weeks of bits..
Now only the floor to fit! - plus 1000 other bits!
Marc-M
Well-Known Member
Welded in the inner a post support section- quite happy with the results –
Trial fitted all the A post and sill sections and all look to go in with little or no adjustment.
With that in mind my next step is to re skin the doors ready to hang on the A post that will be temporary fixed with screws to ensure that my panel gaps (I will have to screw on as well, the inner and outer sill sections) are within the tolerance, and if I need to adjust is an easy fix before I weld them.
The new door skins– cleaned down – scotch brighted and I have applied an aerospace anodize finish, - I will be priming next with a areo aluminium primer. – but I need to fix in the door handle supports – I need to find the correct glue for that.
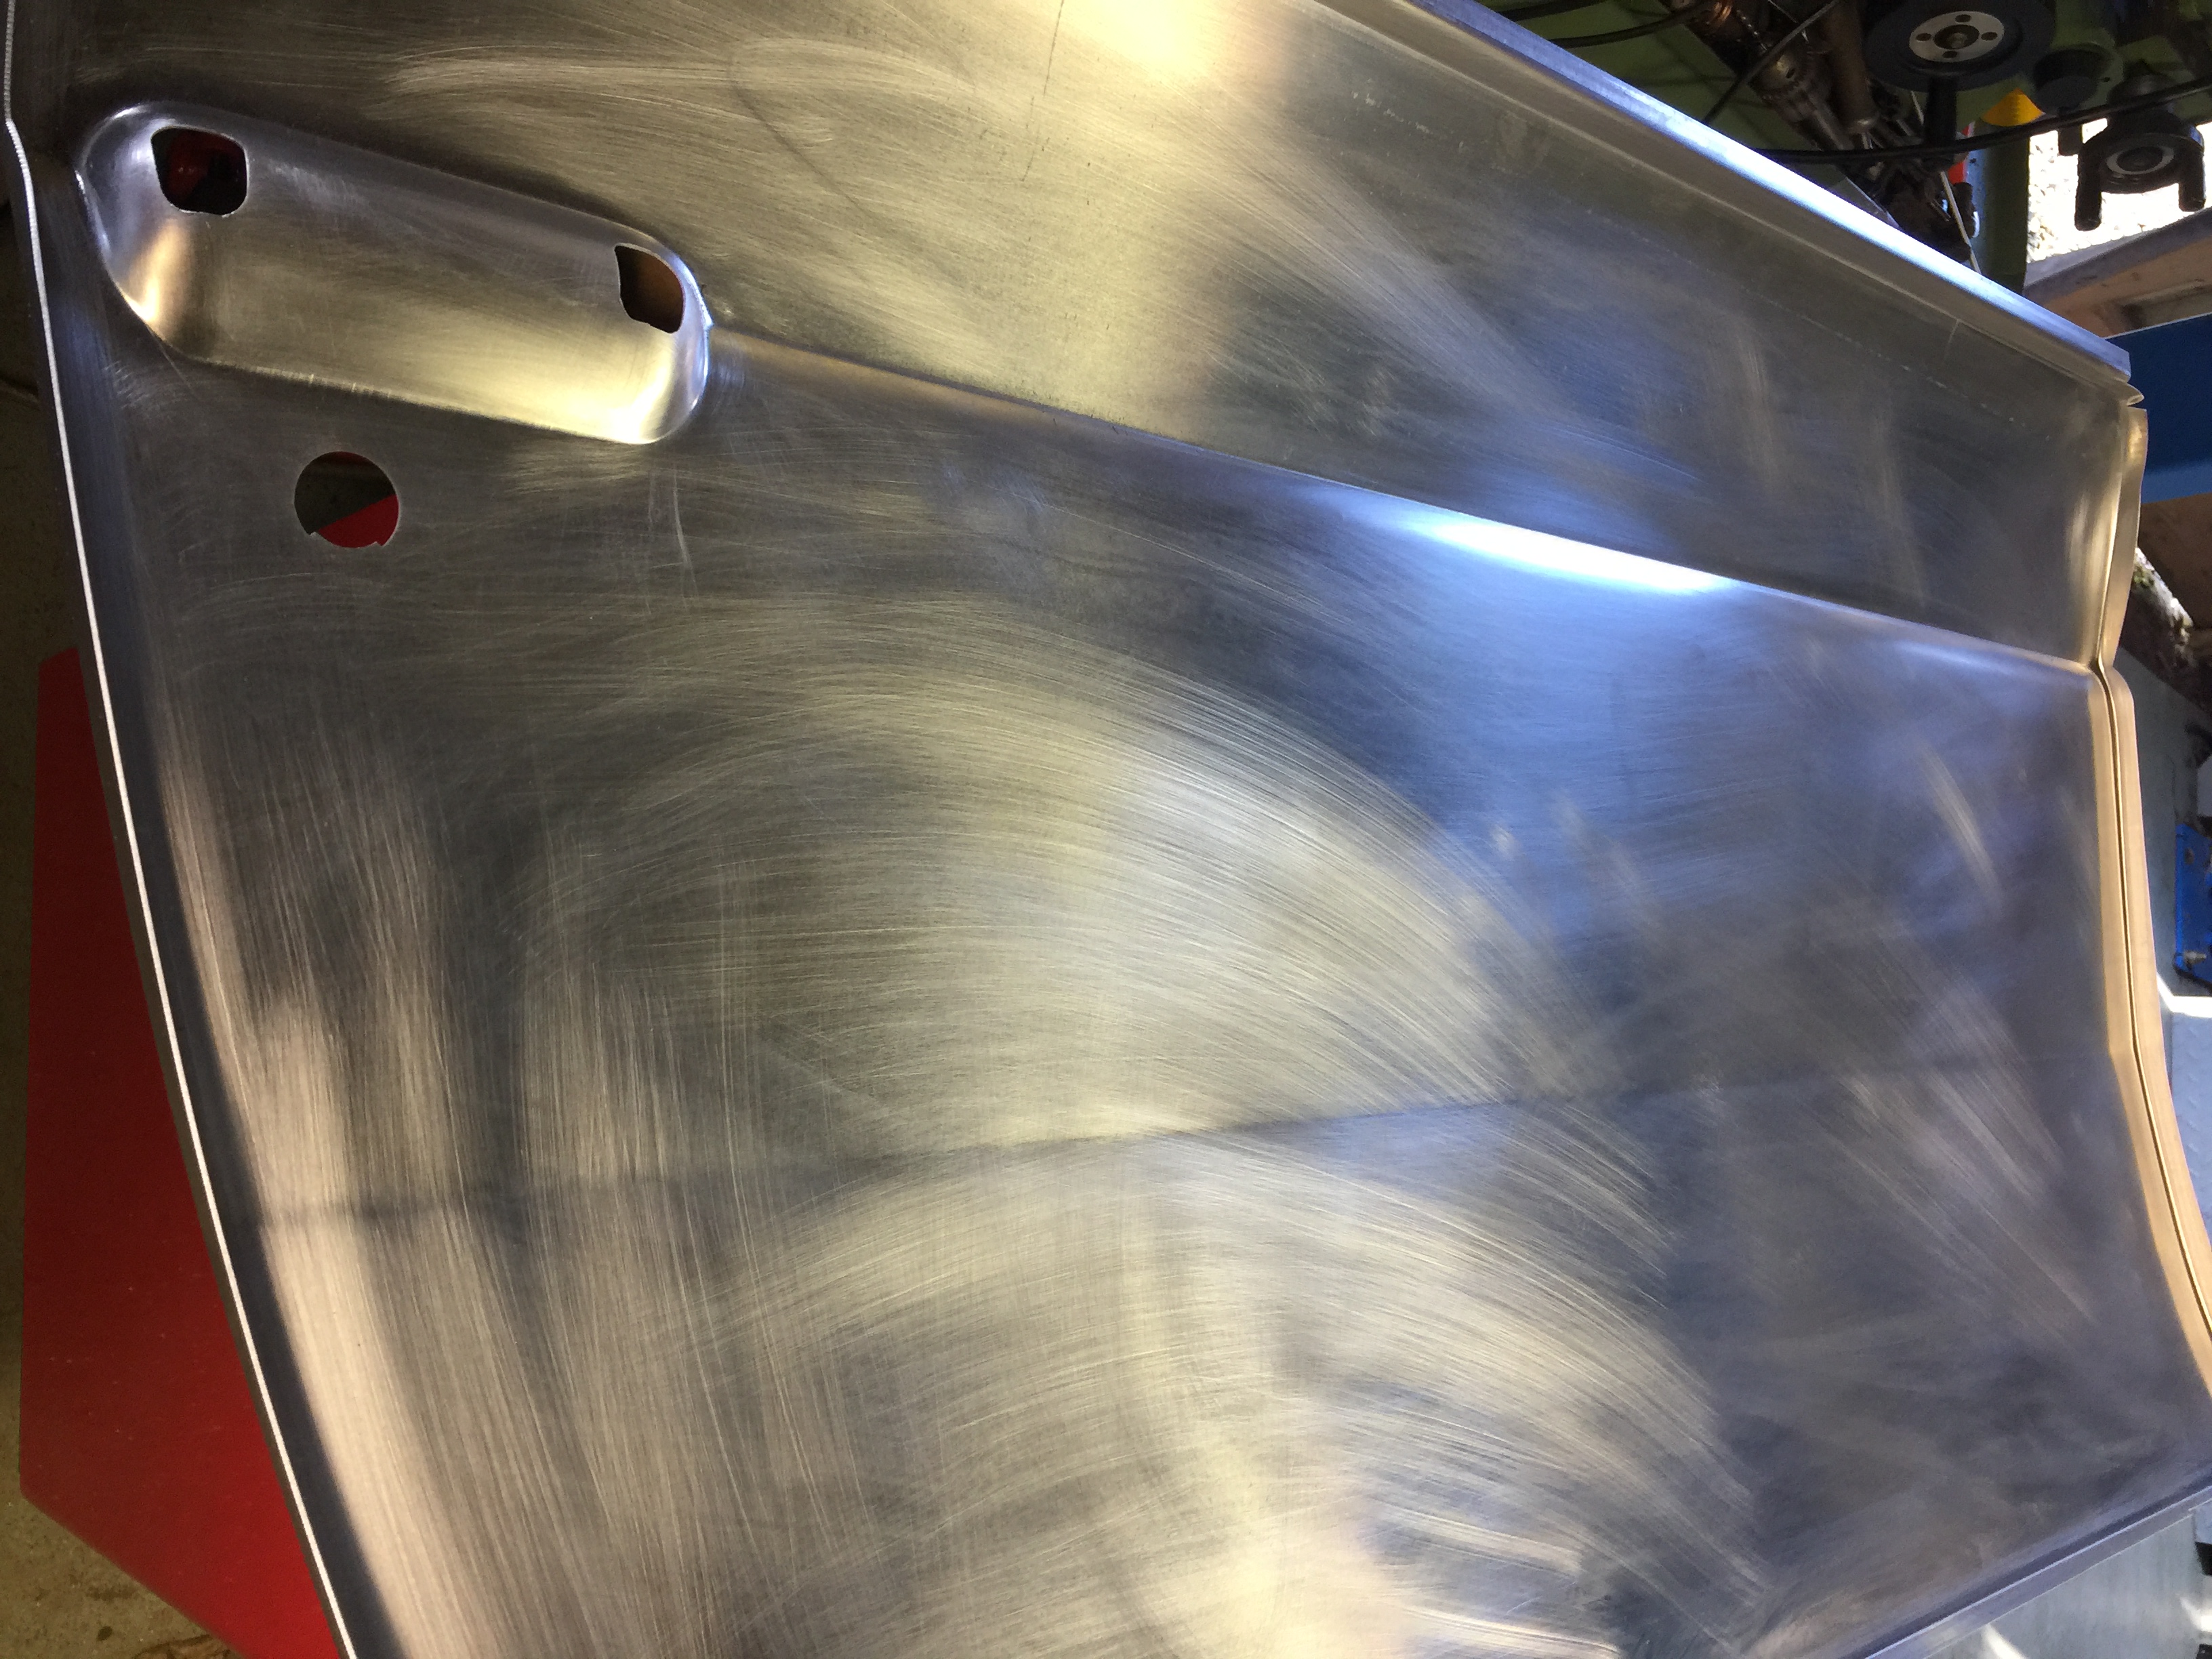
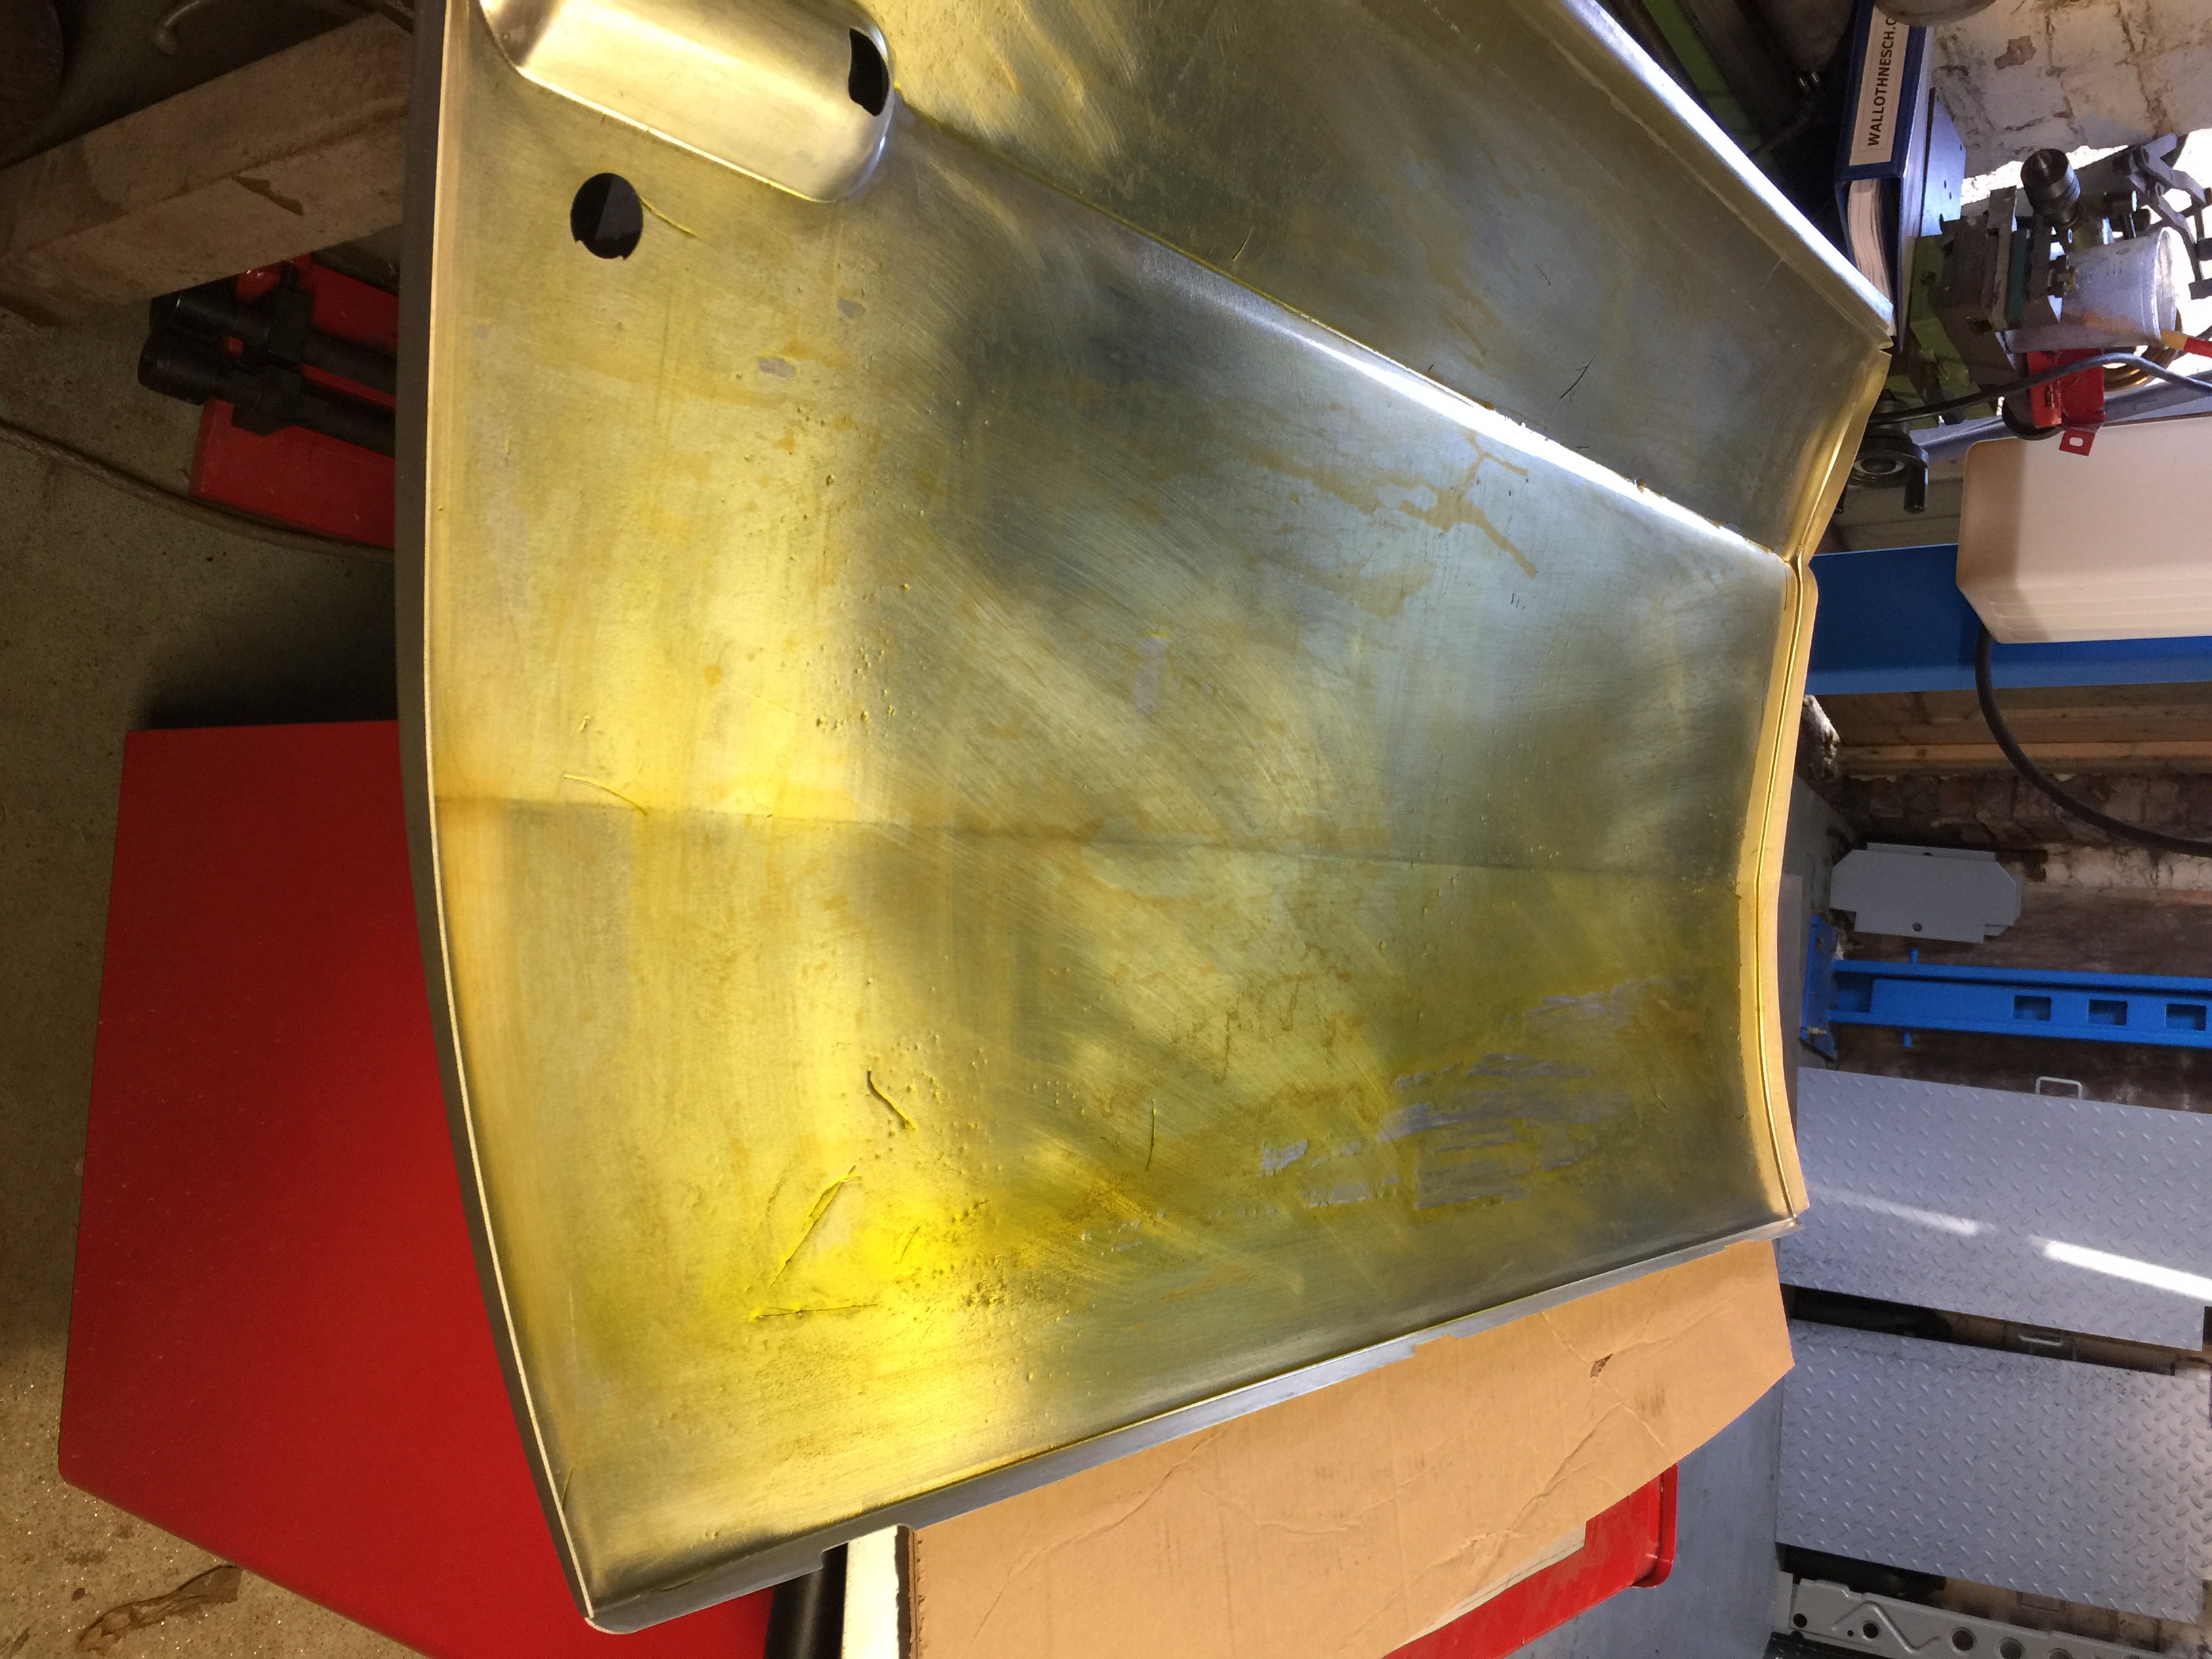
You have to leave this stuff on for 10 mins and then wash it off - its better than nothing I guess..
Trial fitted all the A post and sill sections and all look to go in with little or no adjustment.
With that in mind my next step is to re skin the doors ready to hang on the A post that will be temporary fixed with screws to ensure that my panel gaps (I will have to screw on as well, the inner and outer sill sections) are within the tolerance, and if I need to adjust is an easy fix before I weld them.
The new door skins– cleaned down – scotch brighted and I have applied an aerospace anodize finish, - I will be priming next with a areo aluminium primer. – but I need to fix in the door handle supports – I need to find the correct glue for that.
You have to leave this stuff on for 10 mins and then wash it off - its better than nothing I guess..
Hey Marc - that looks like Alodine to me - you might want to get hold of some aviation primer (zinc chromate) https://www.lasaero.com/site/products/article?id=E029UJIJ9
Marc-M
Well-Known Member
It does - but it’s not - is a 2-part thing, nasty chemicals- got it from a mate who sprays fast jets that are made not too far from here - he gave me some 2-pack primer as well
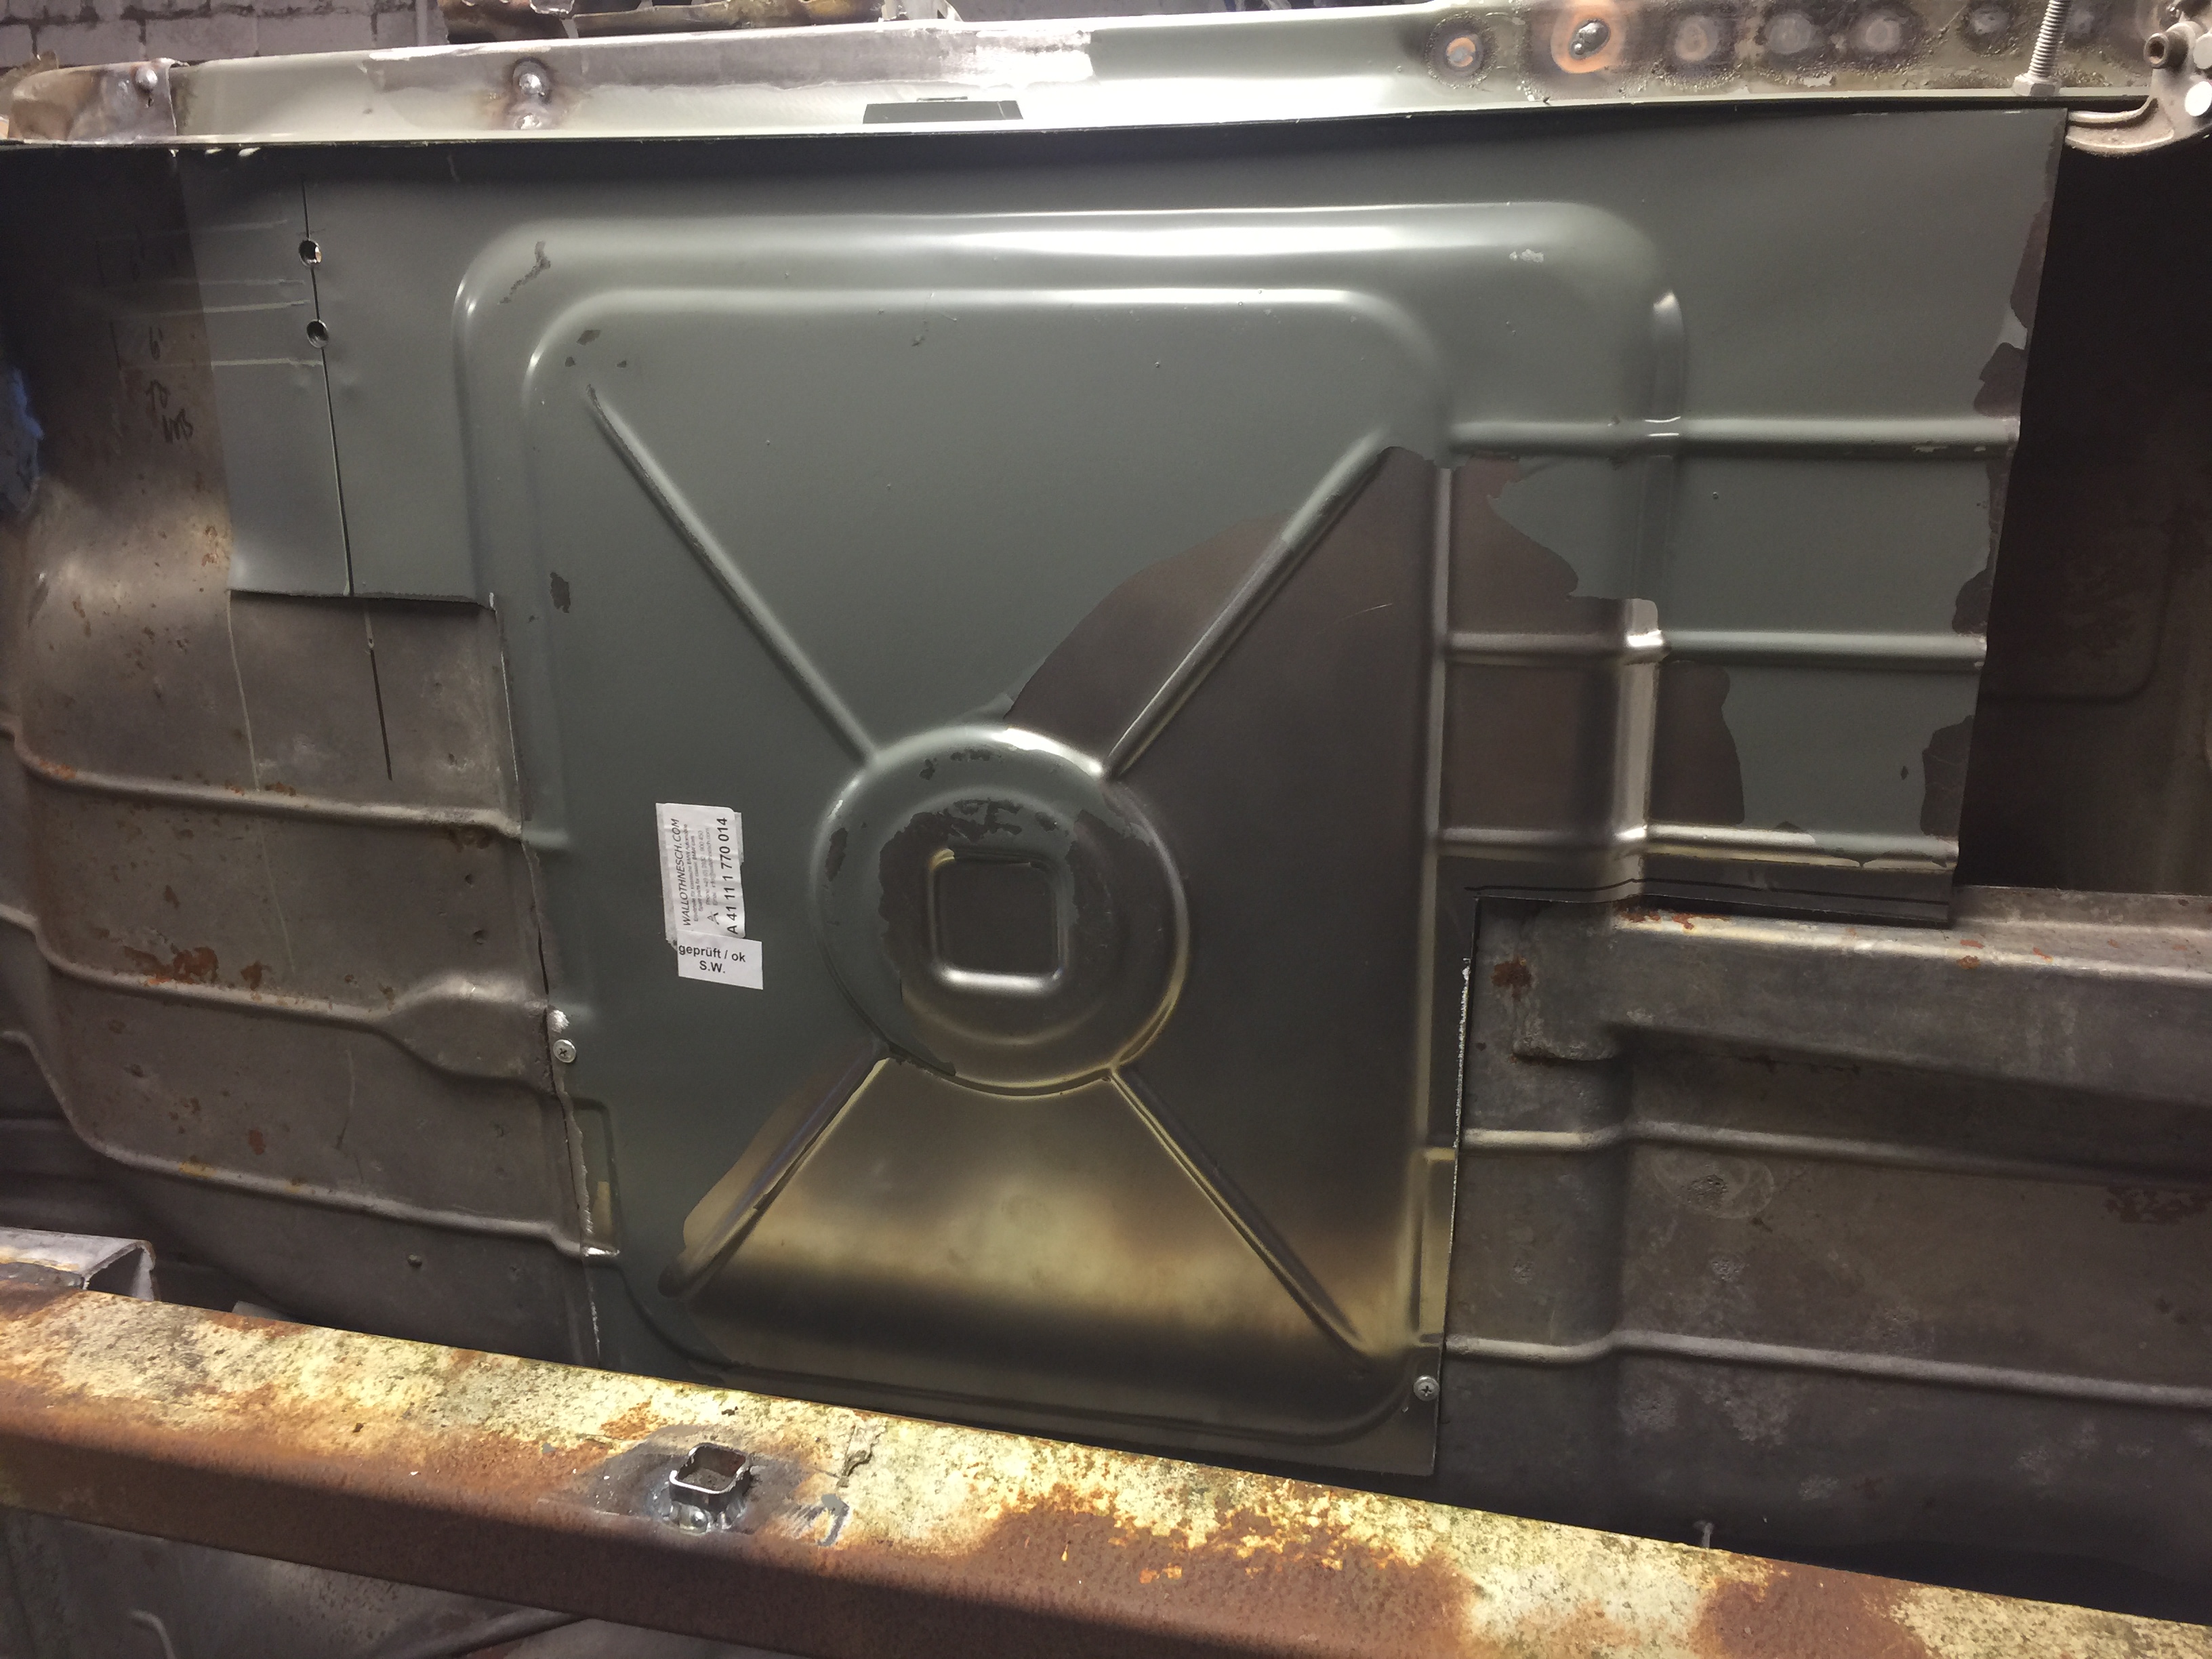
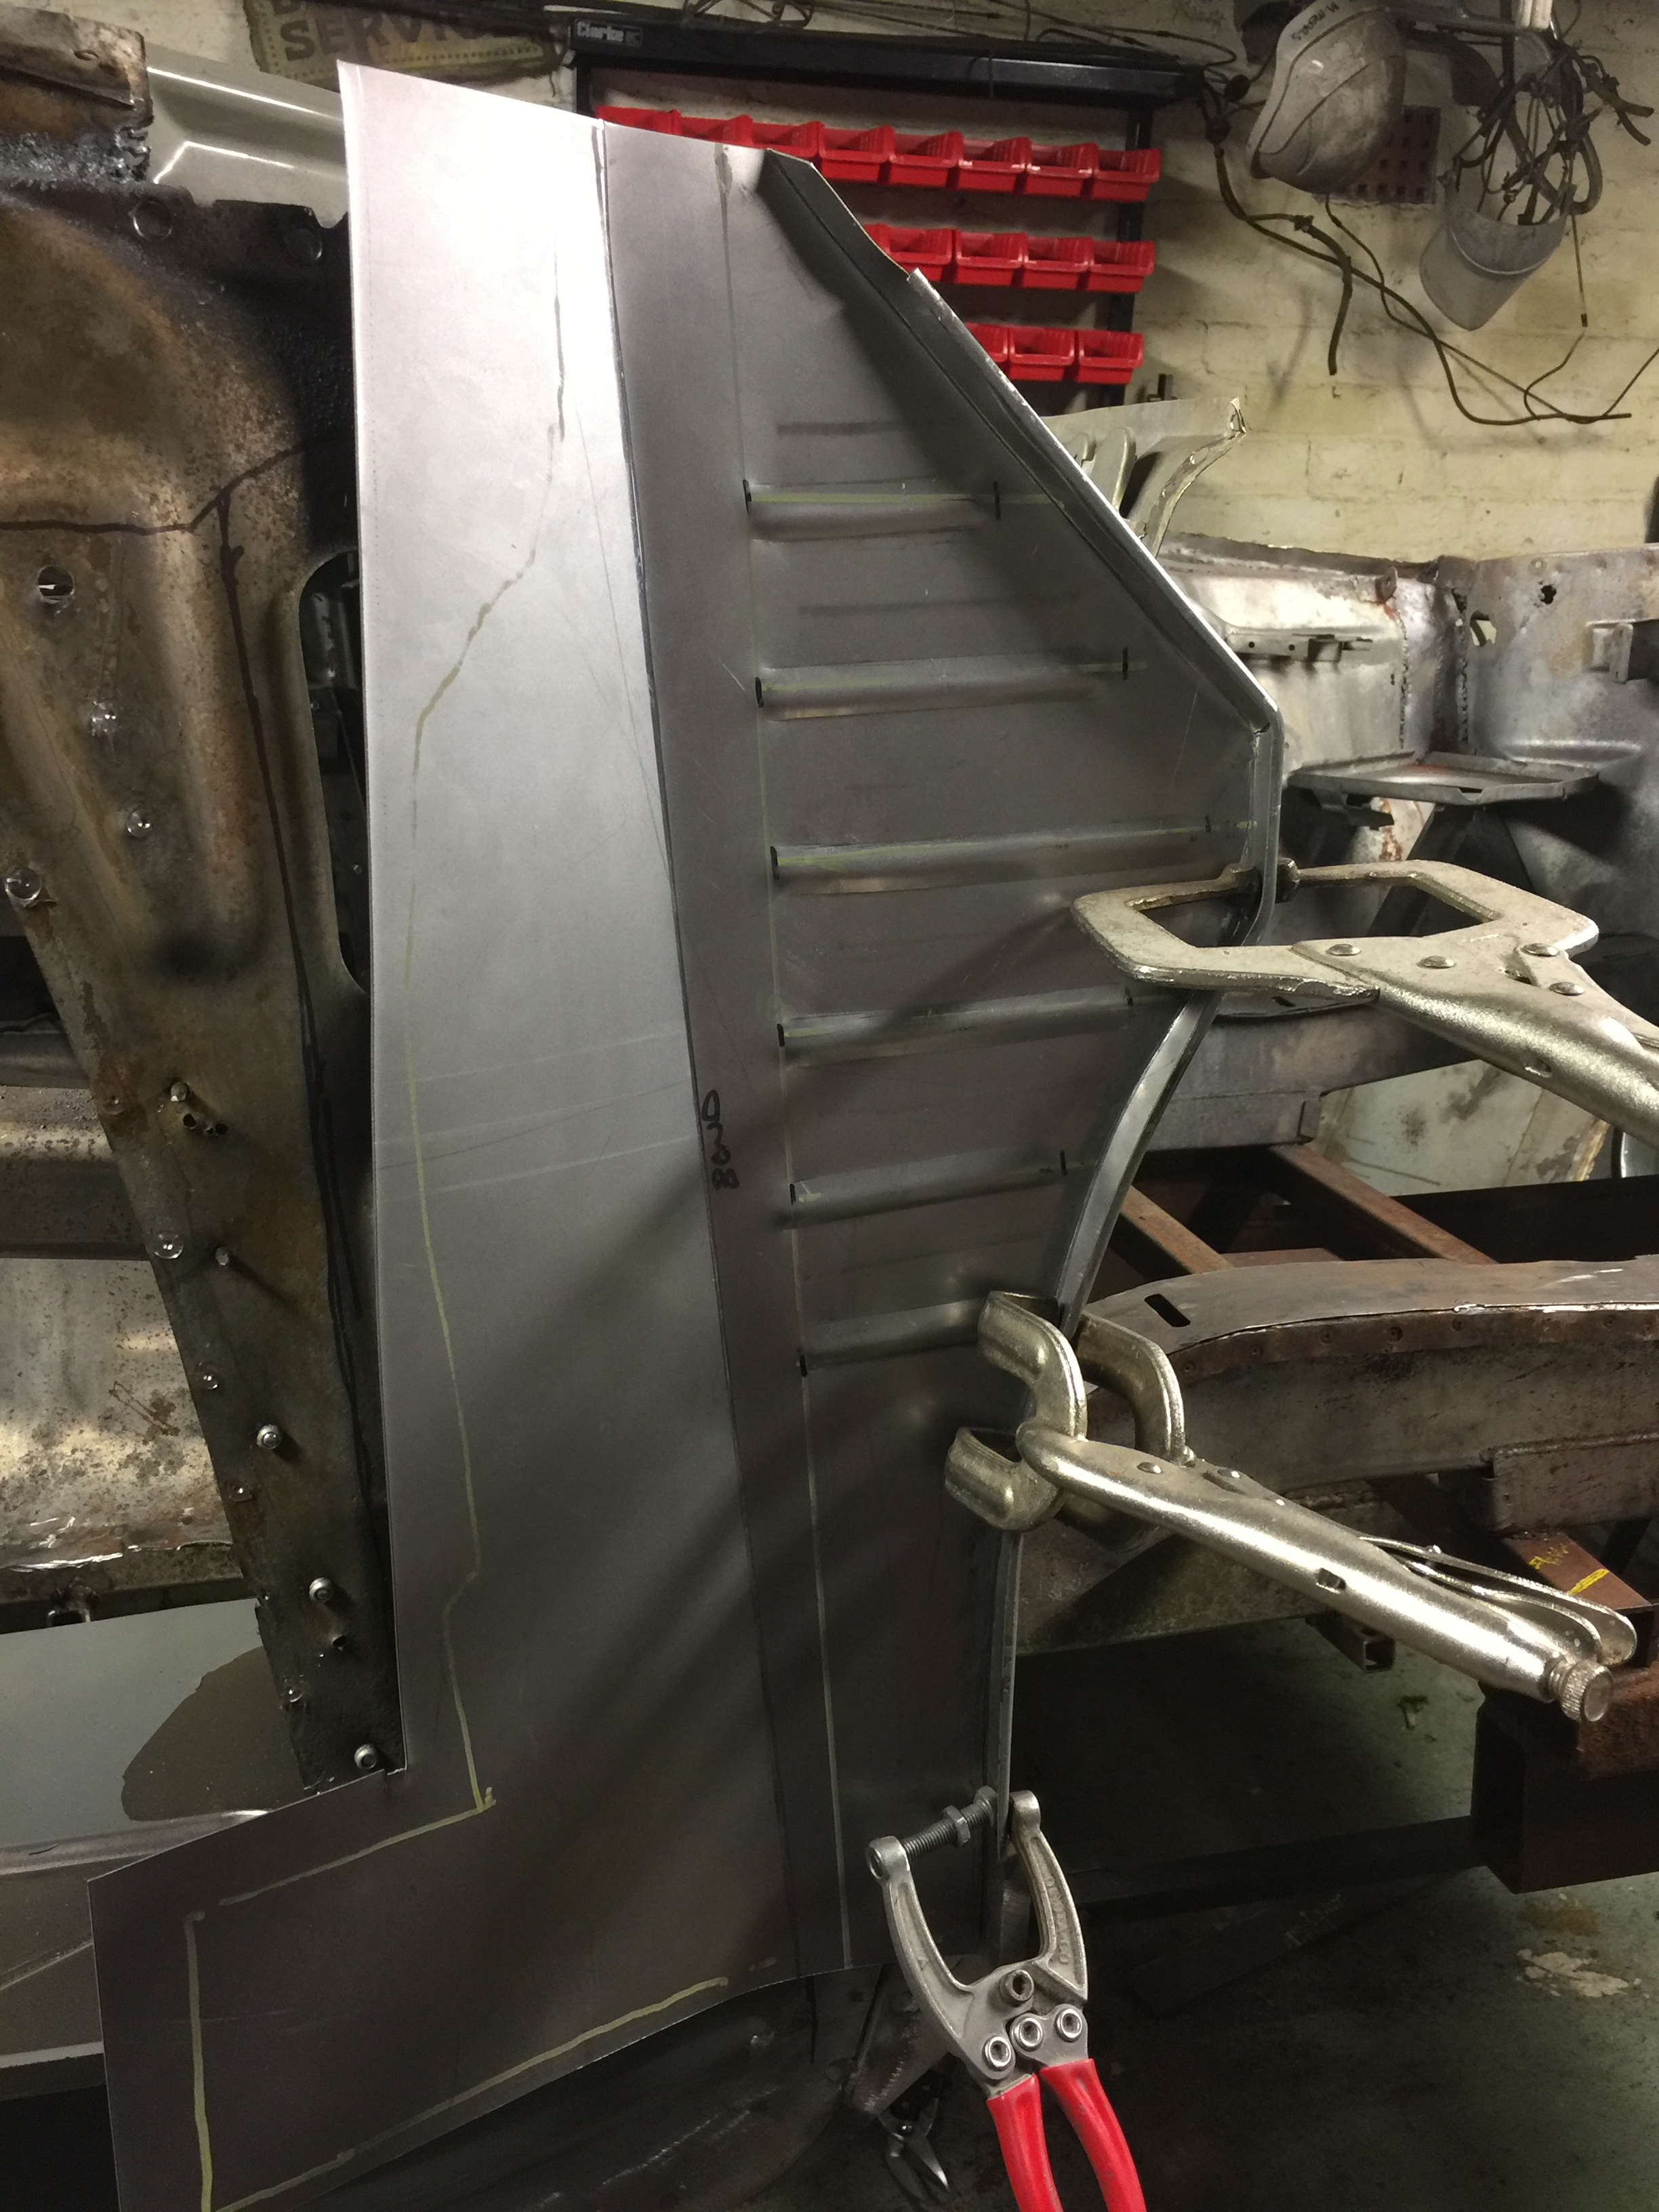
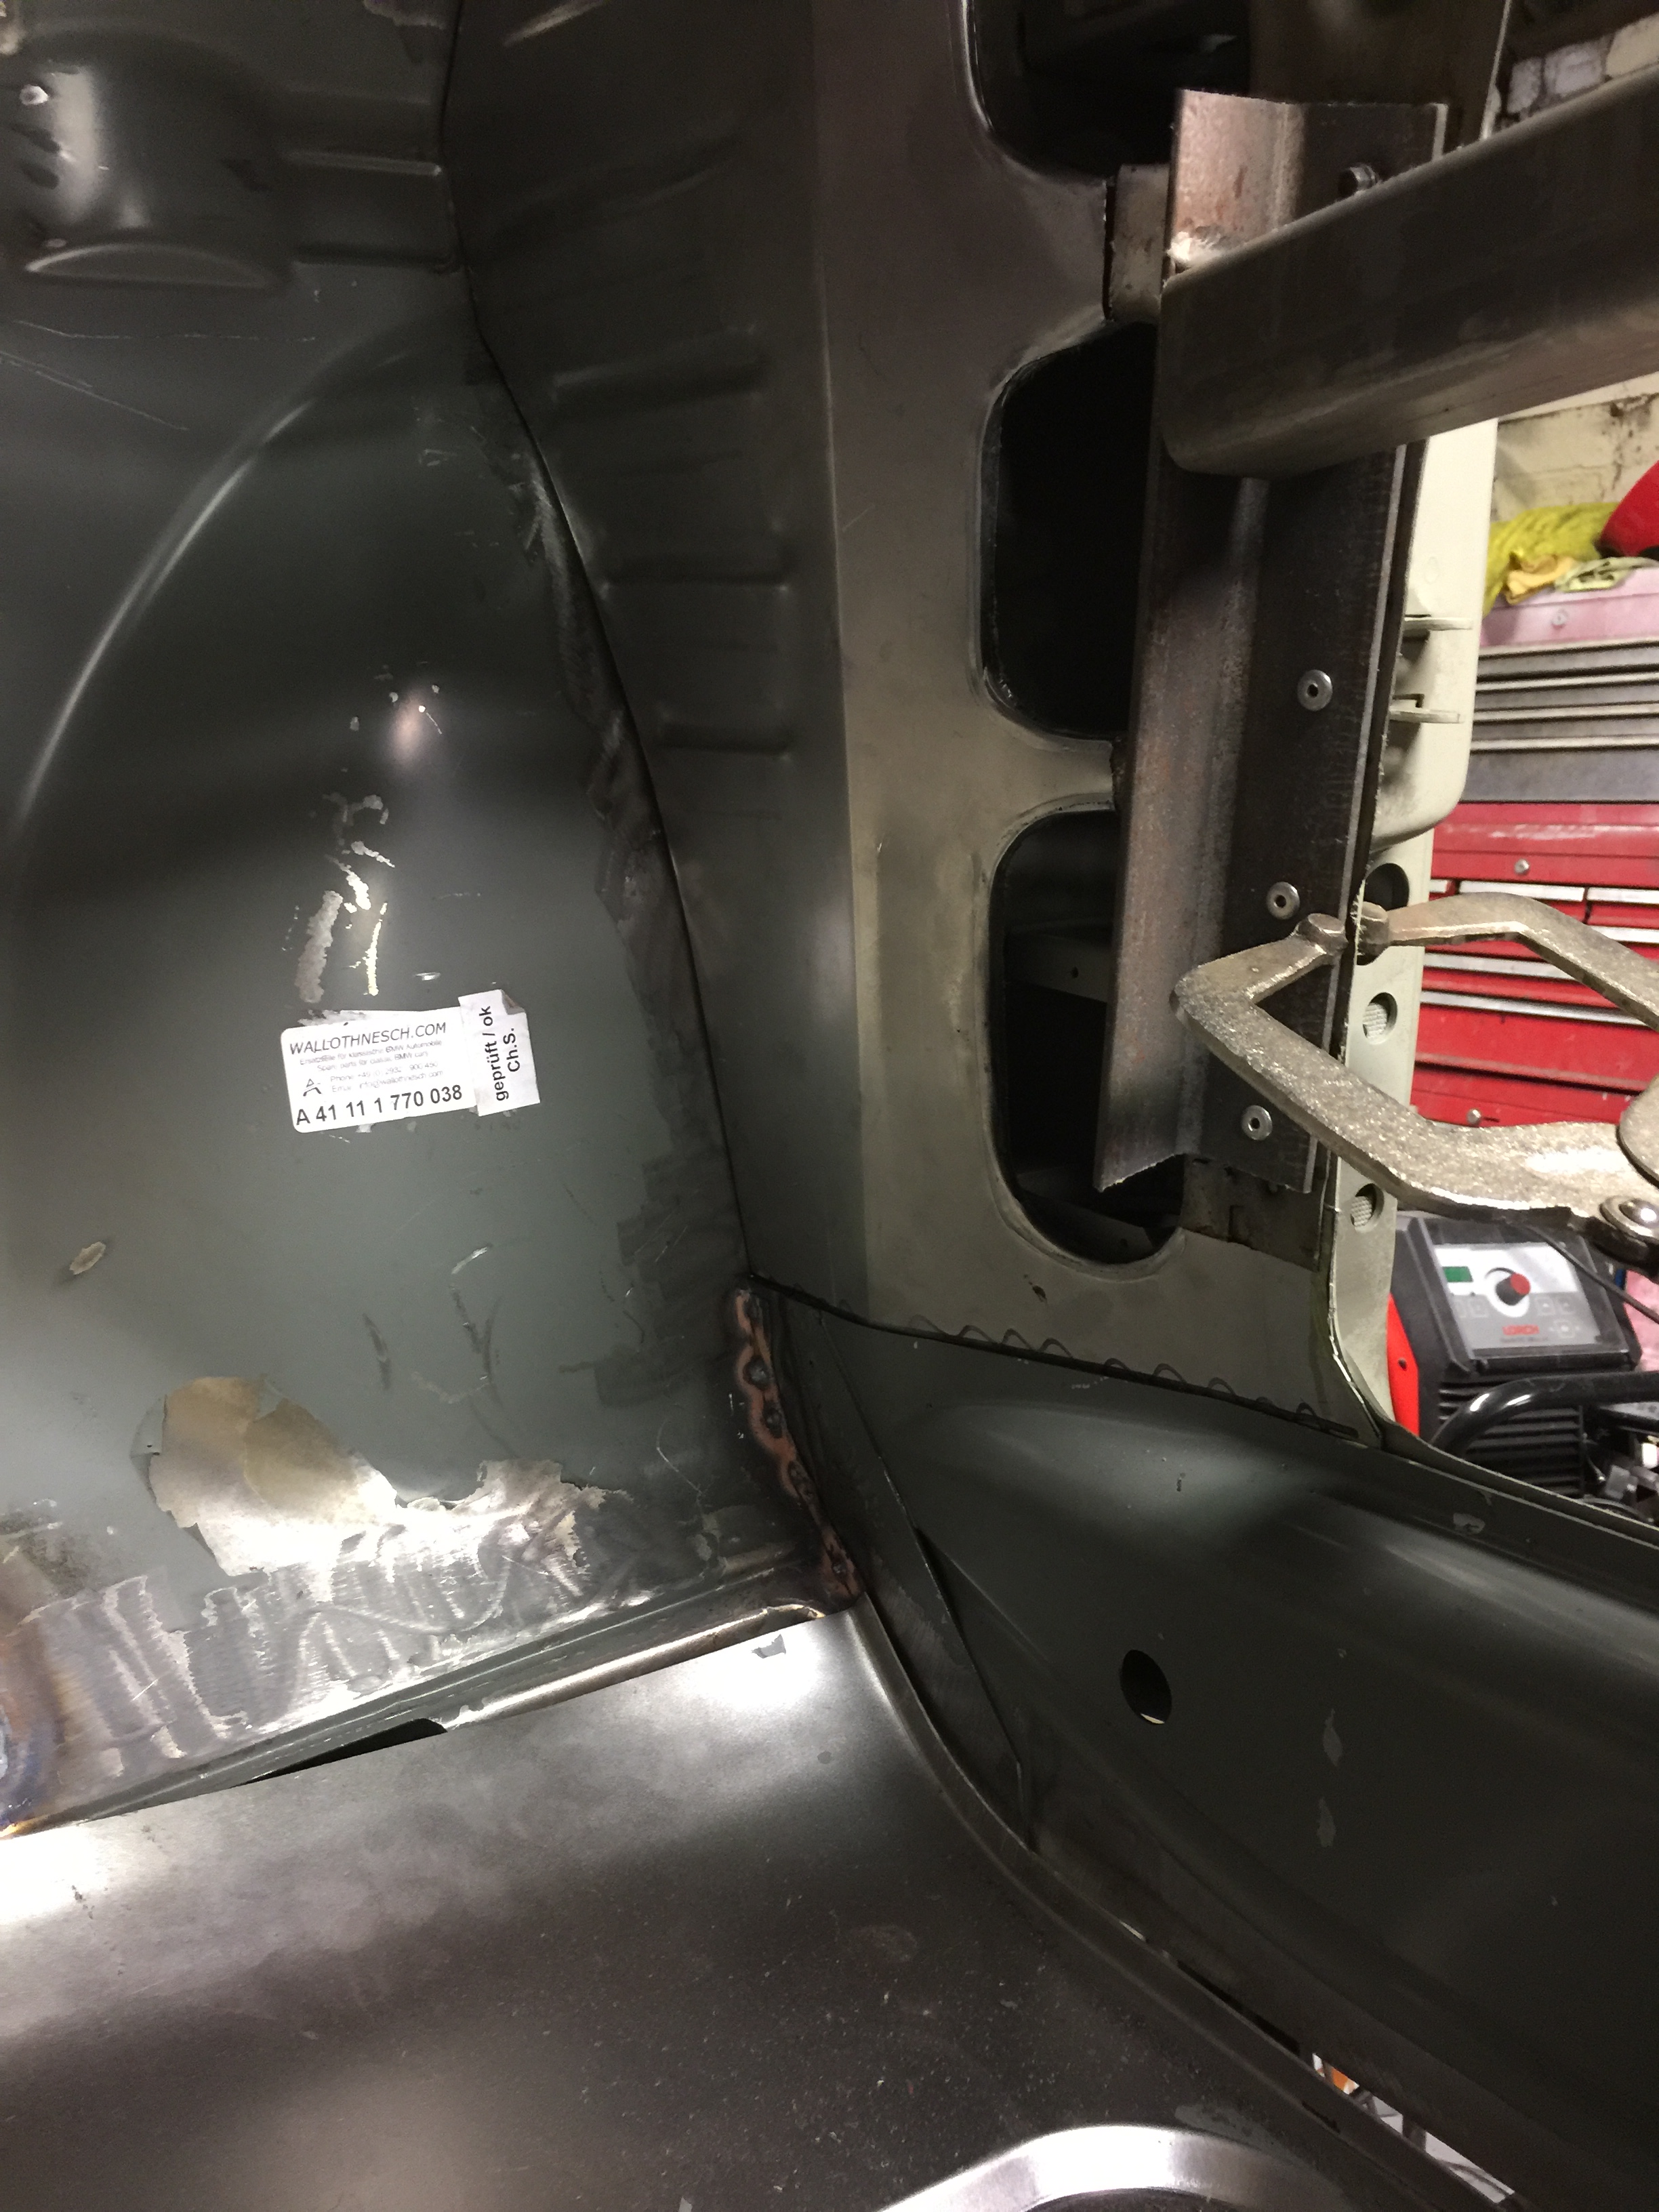
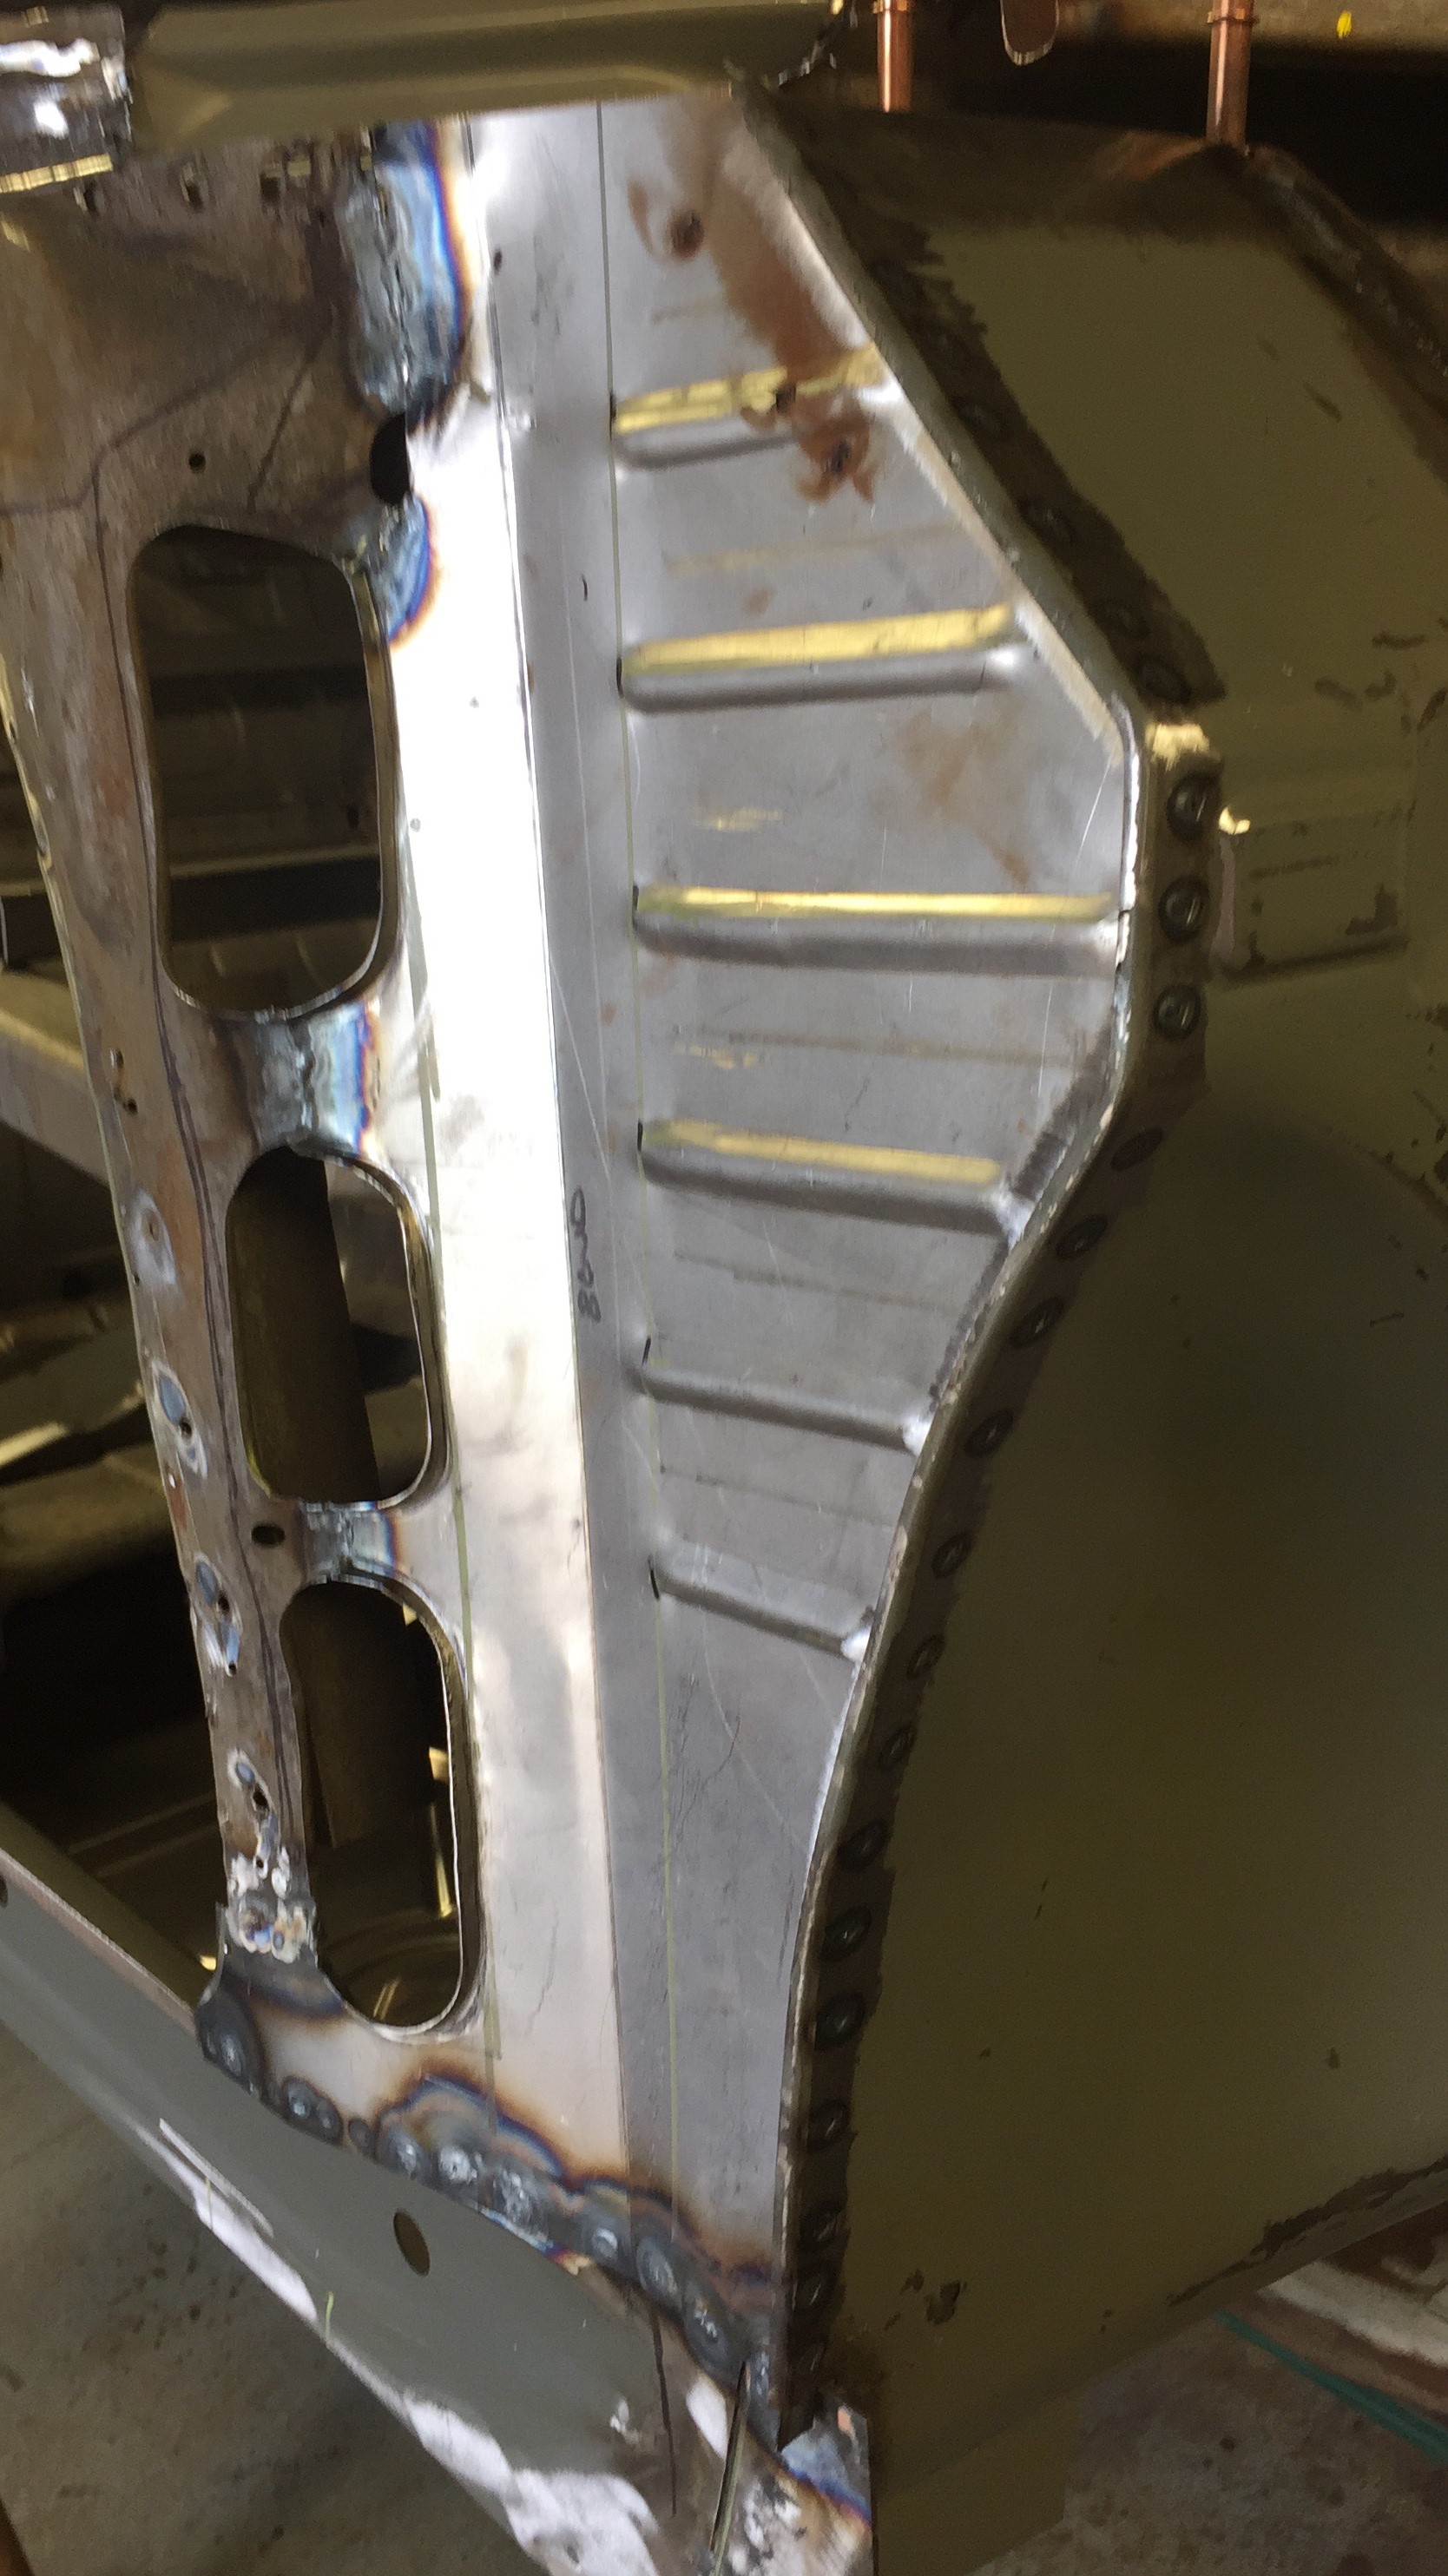
Marc, i still owed you these pictures.
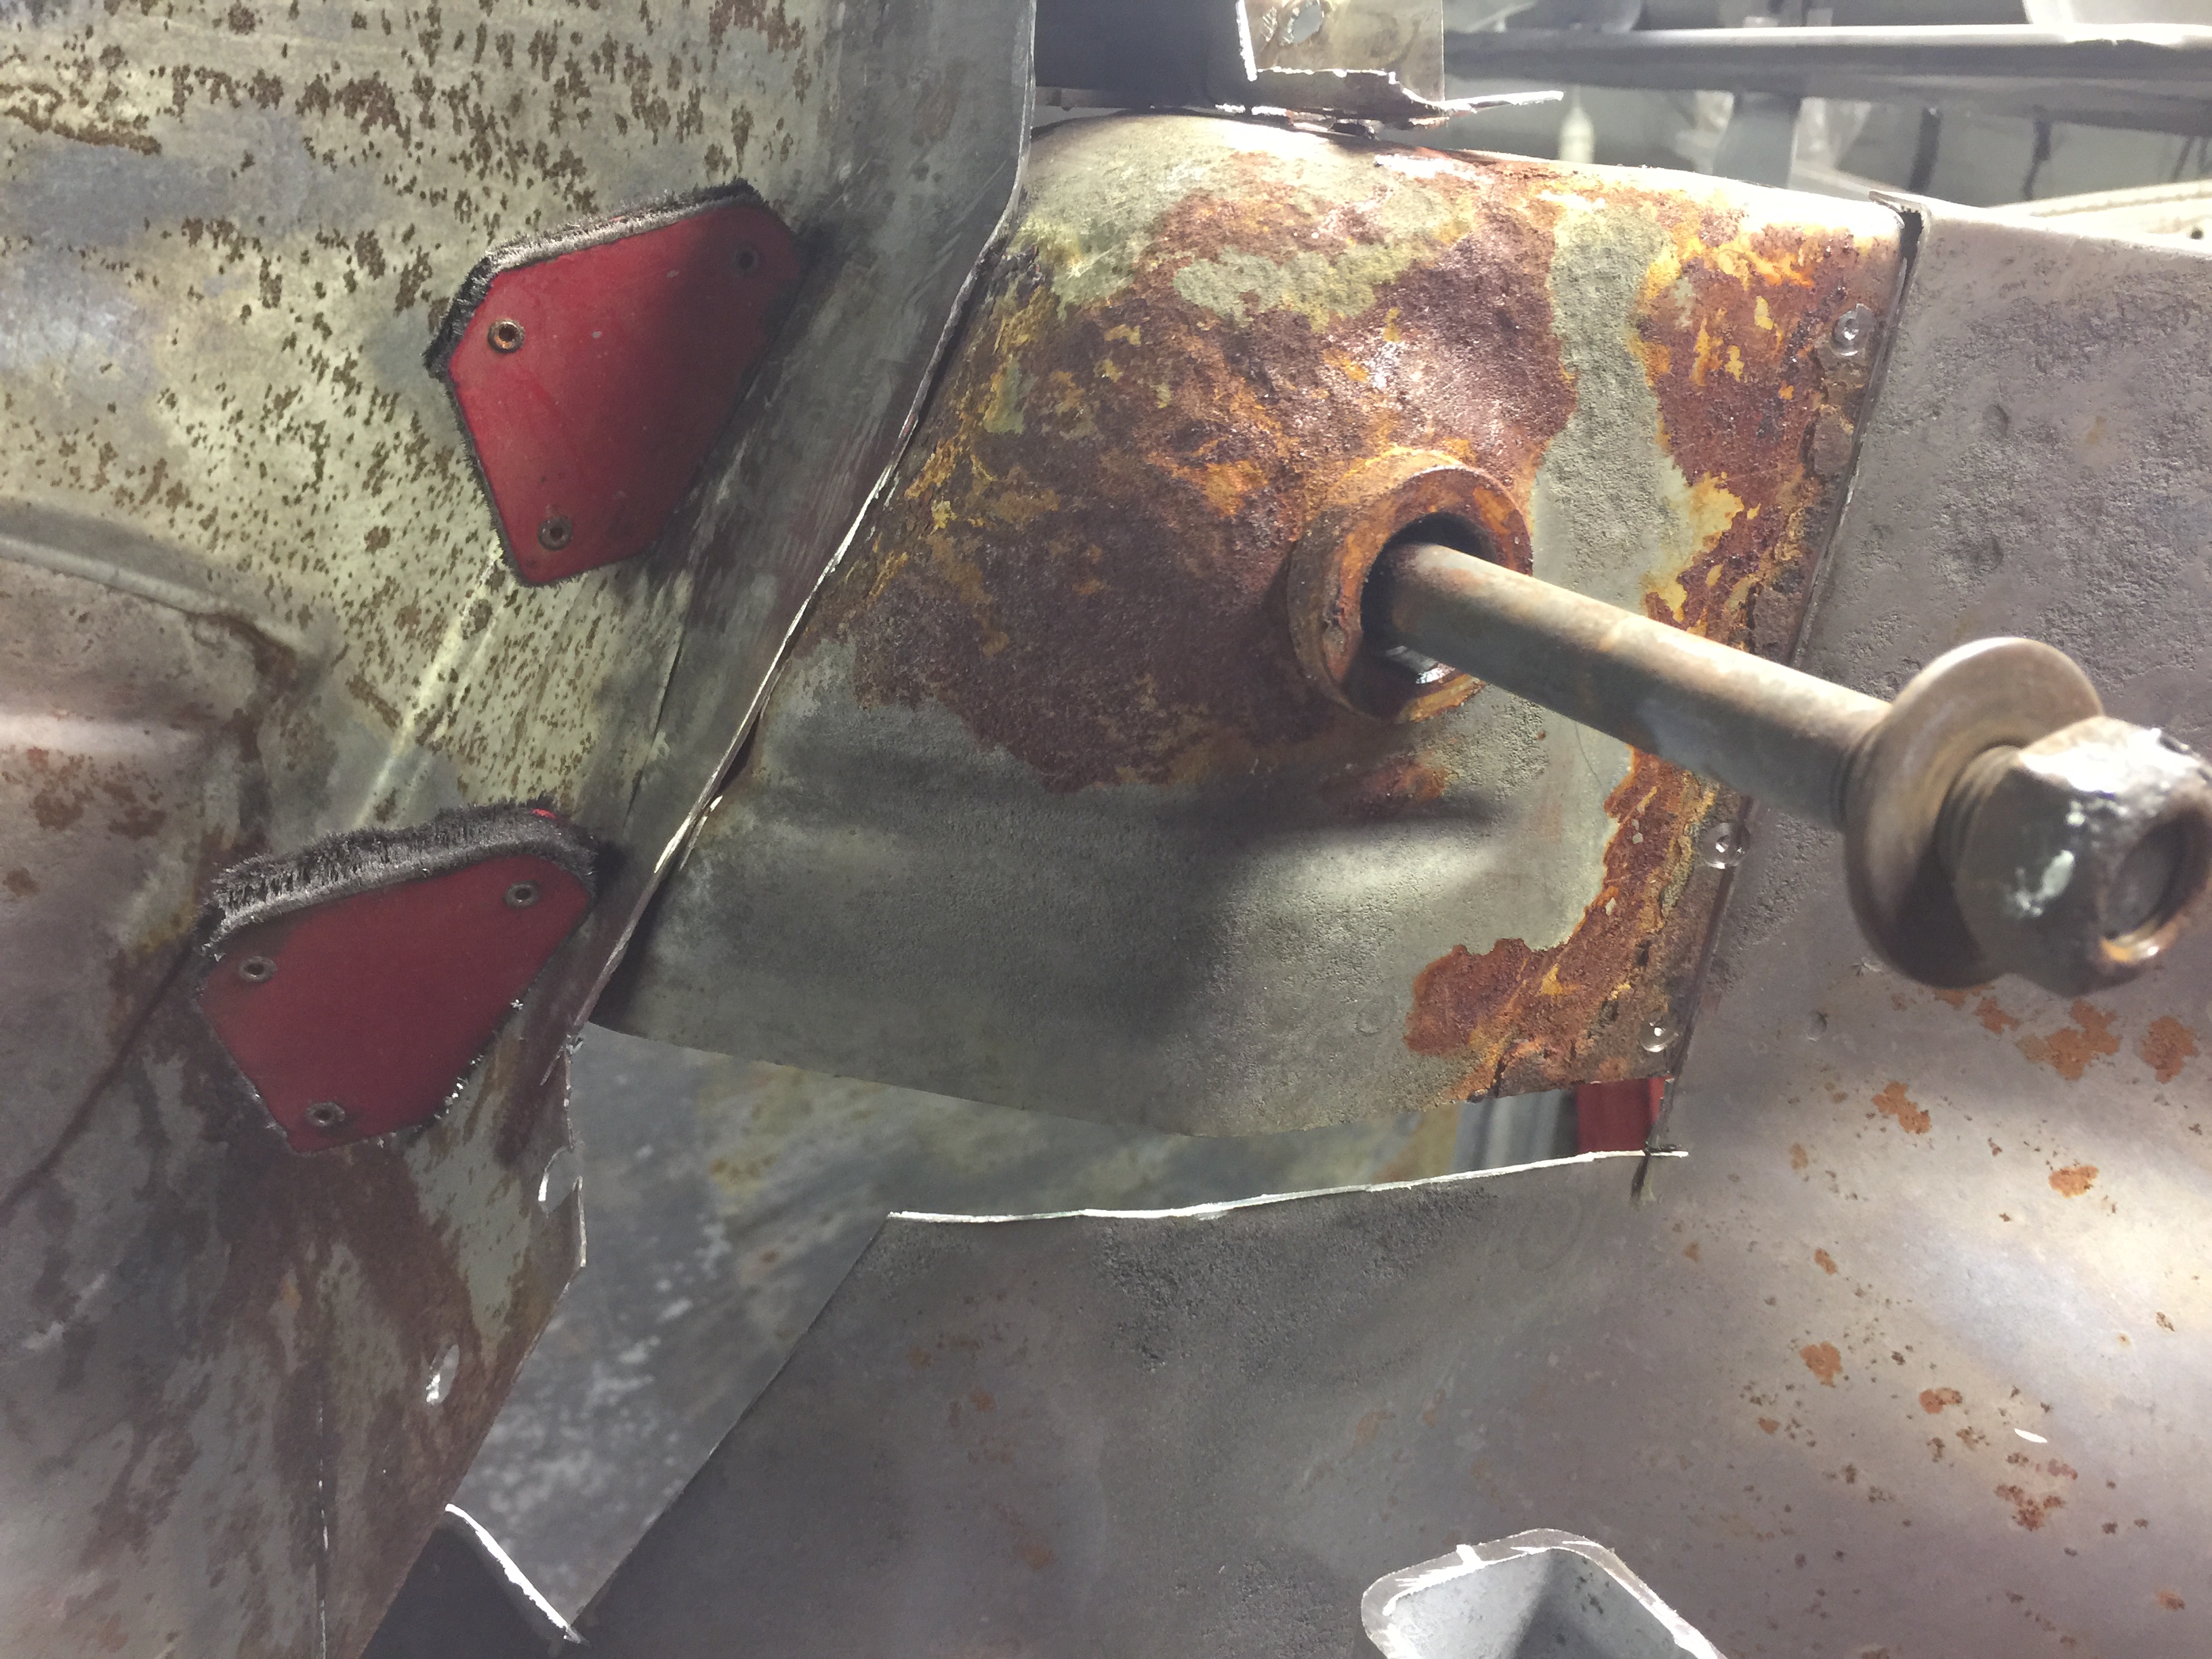
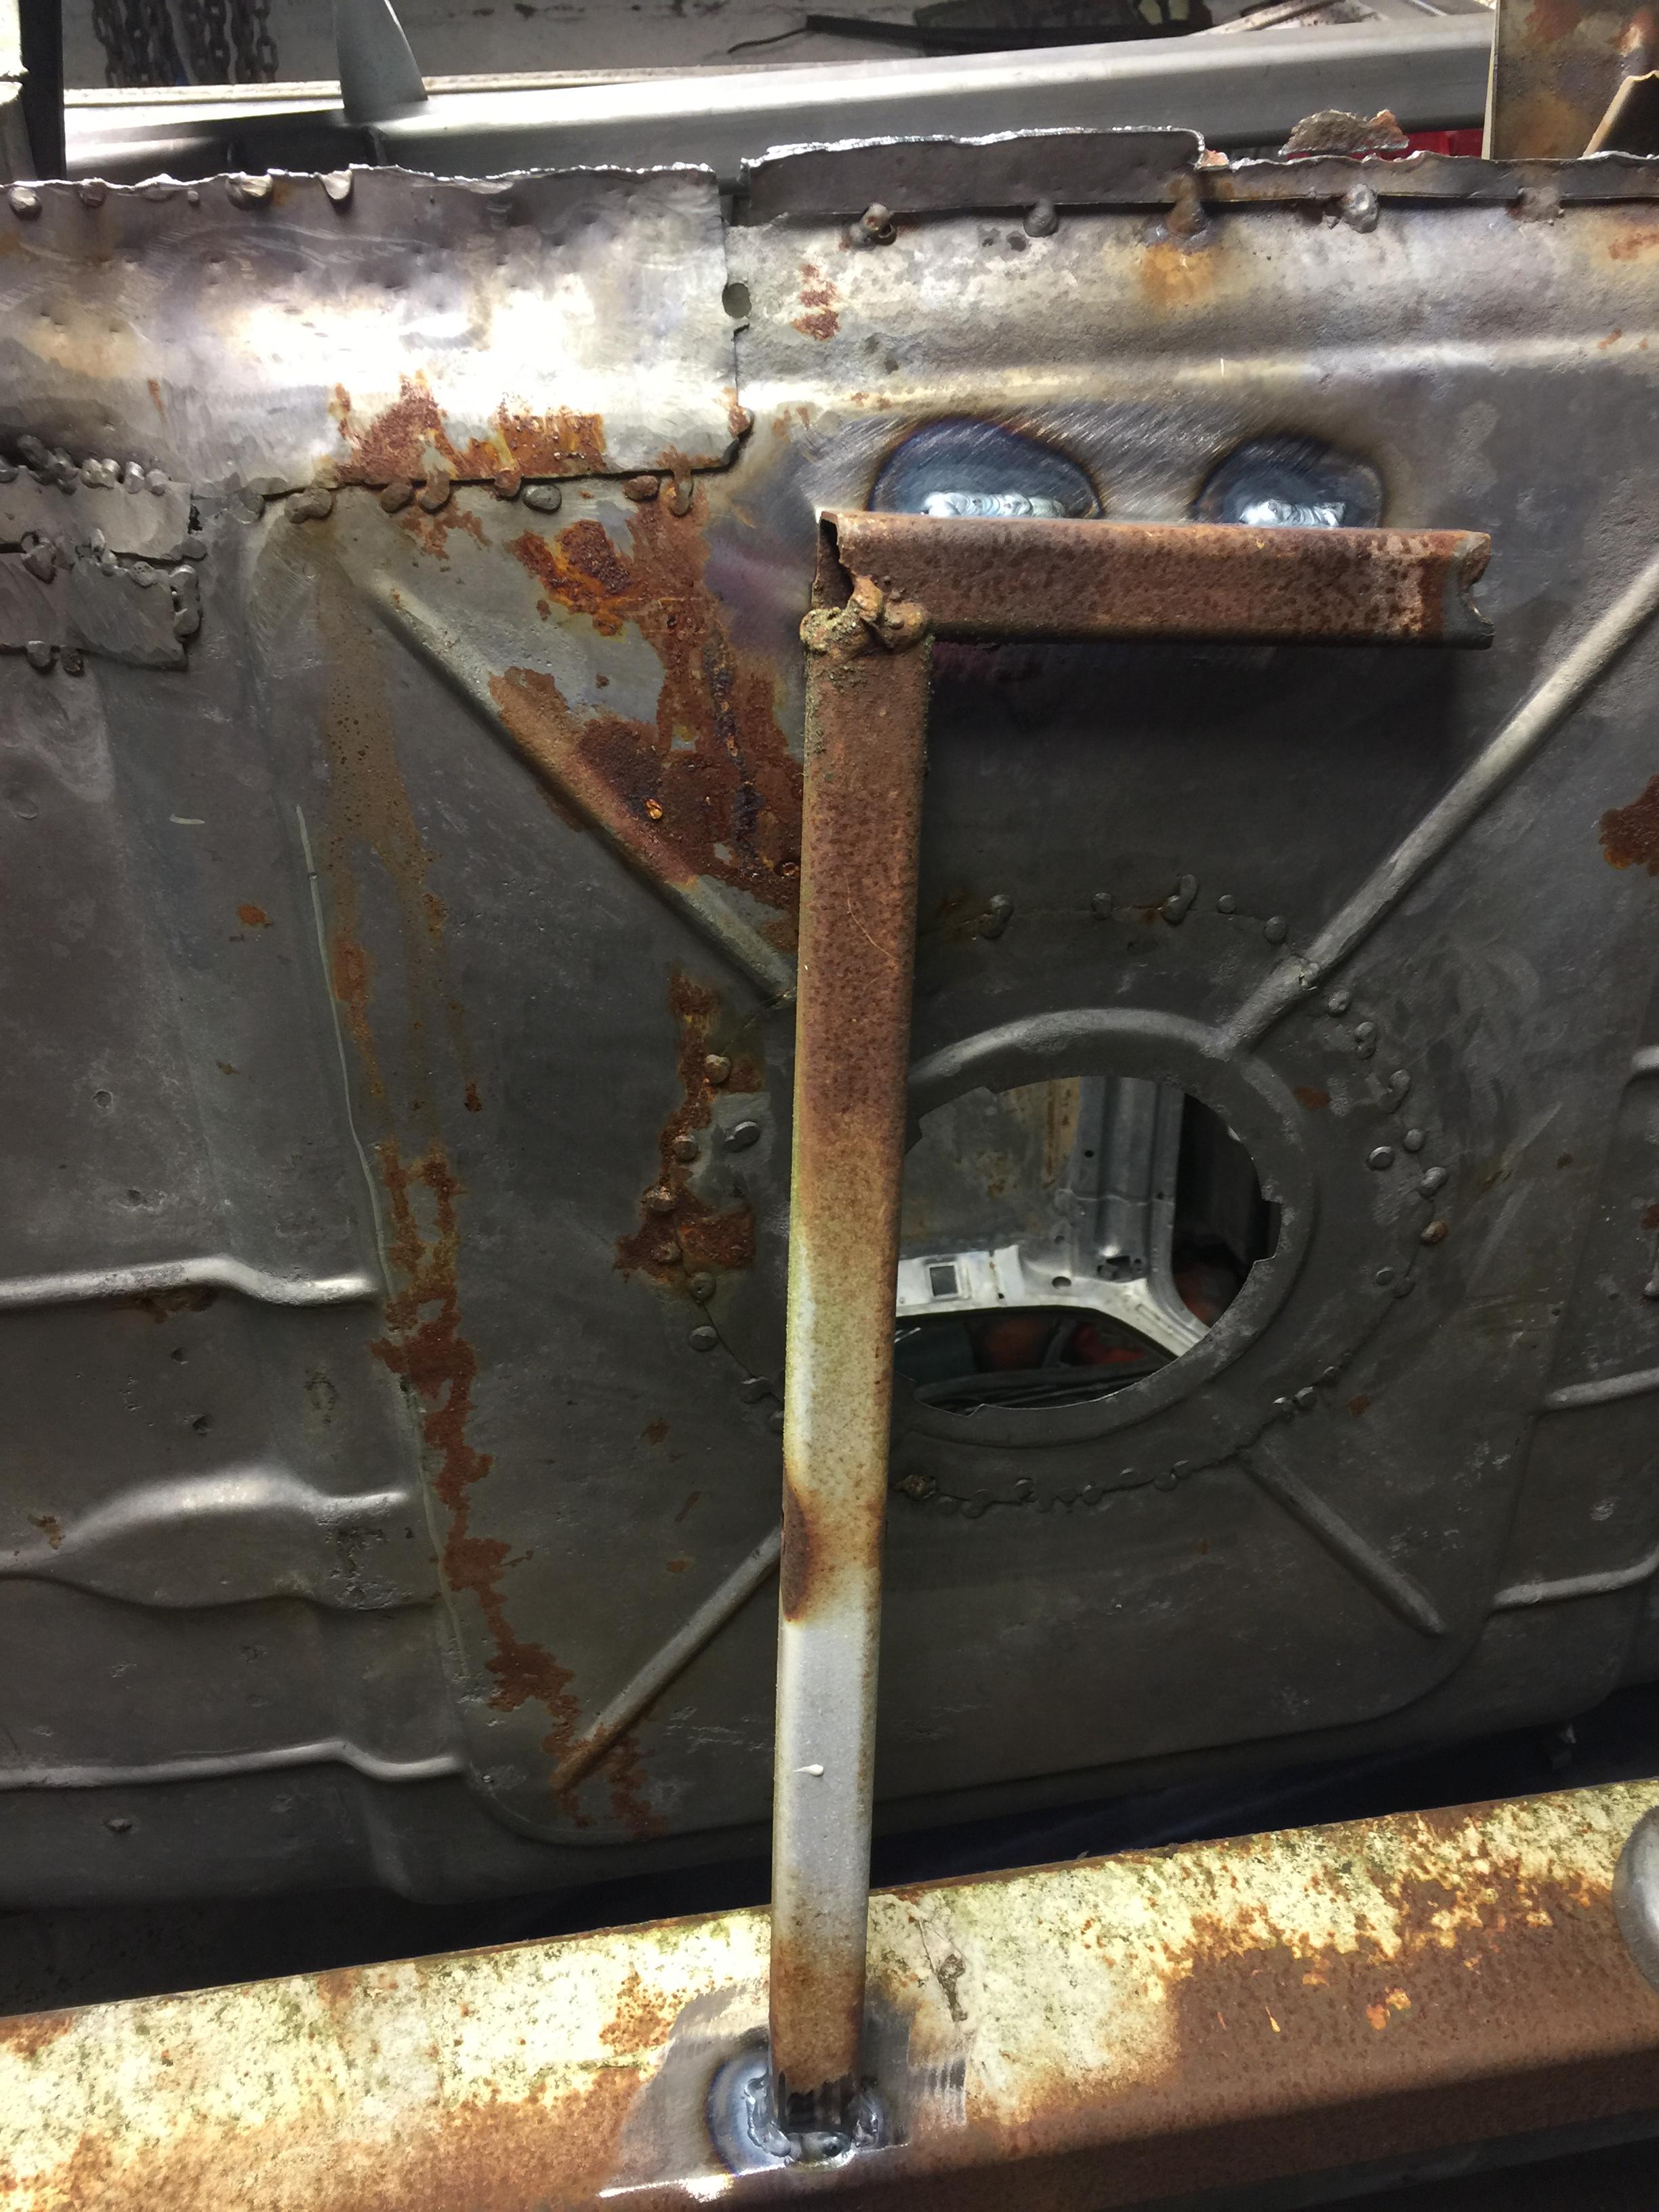
I had my sill out yesterday and took this pic... it is related to post #112 the reinforcement of the inner sill.
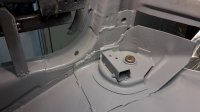
and another picture showing a ridge that is originally in the right passenger floor. As I noticed you have a bead roller, you might still be able to put it in?
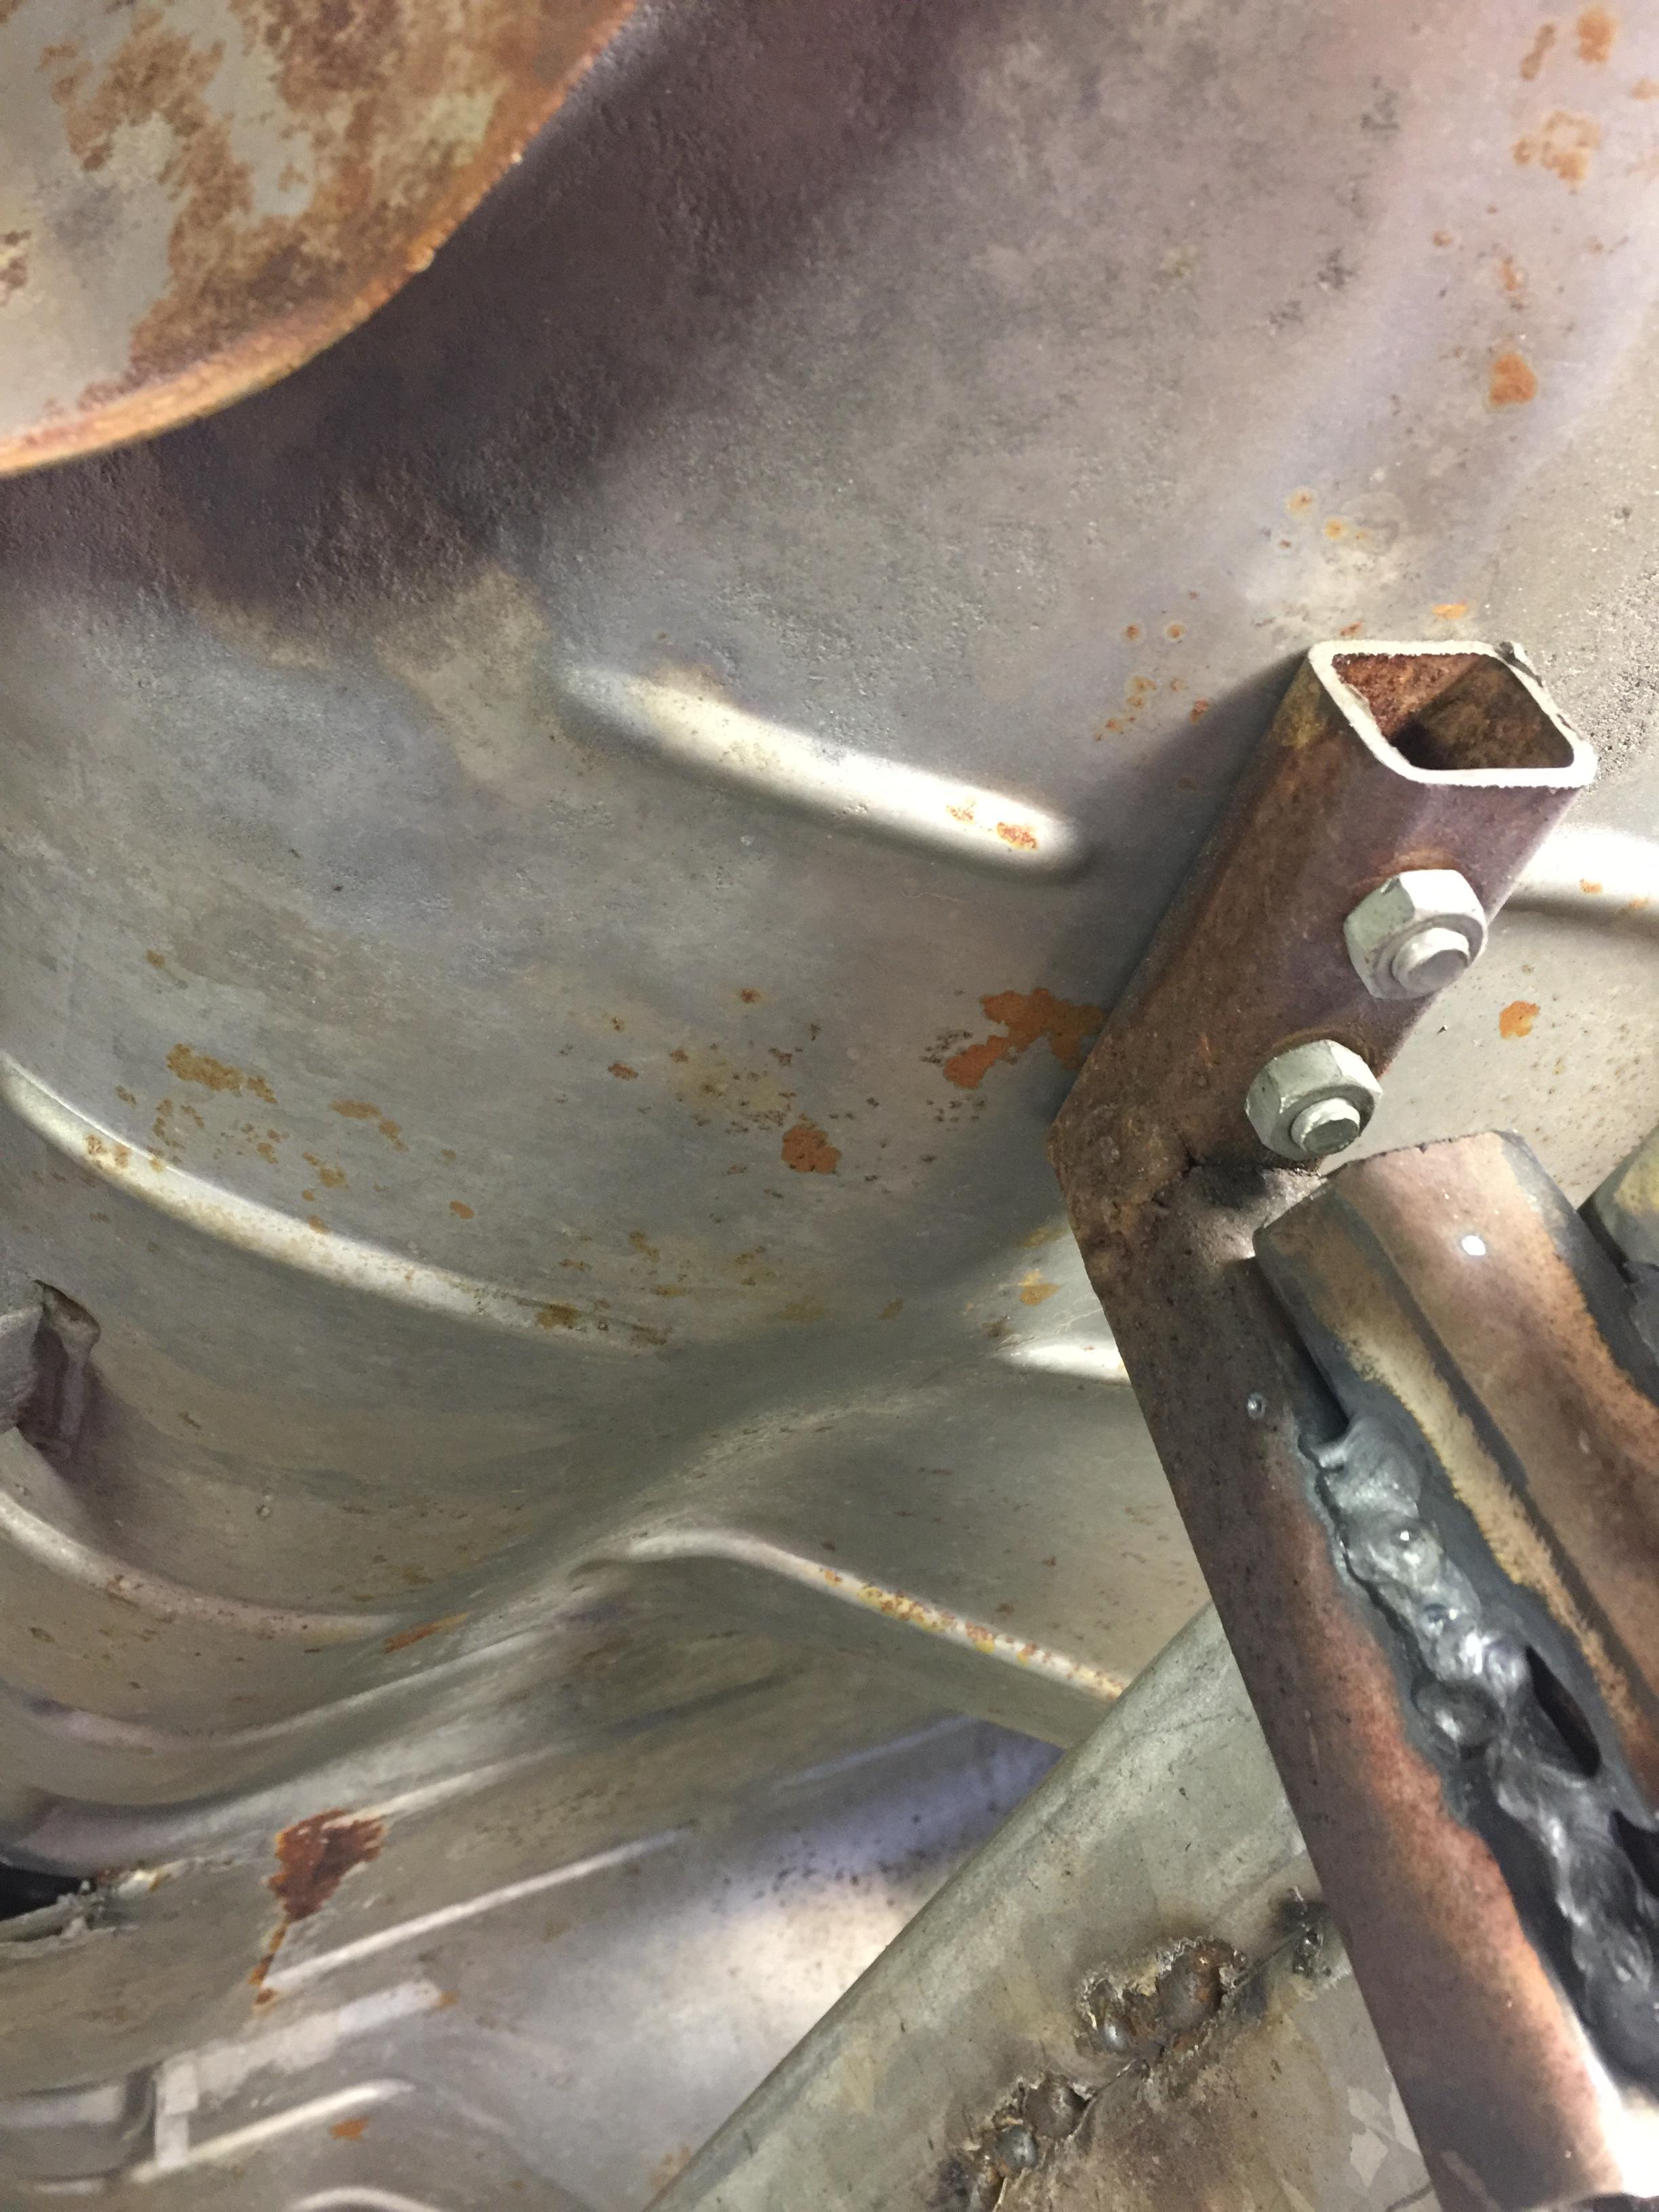
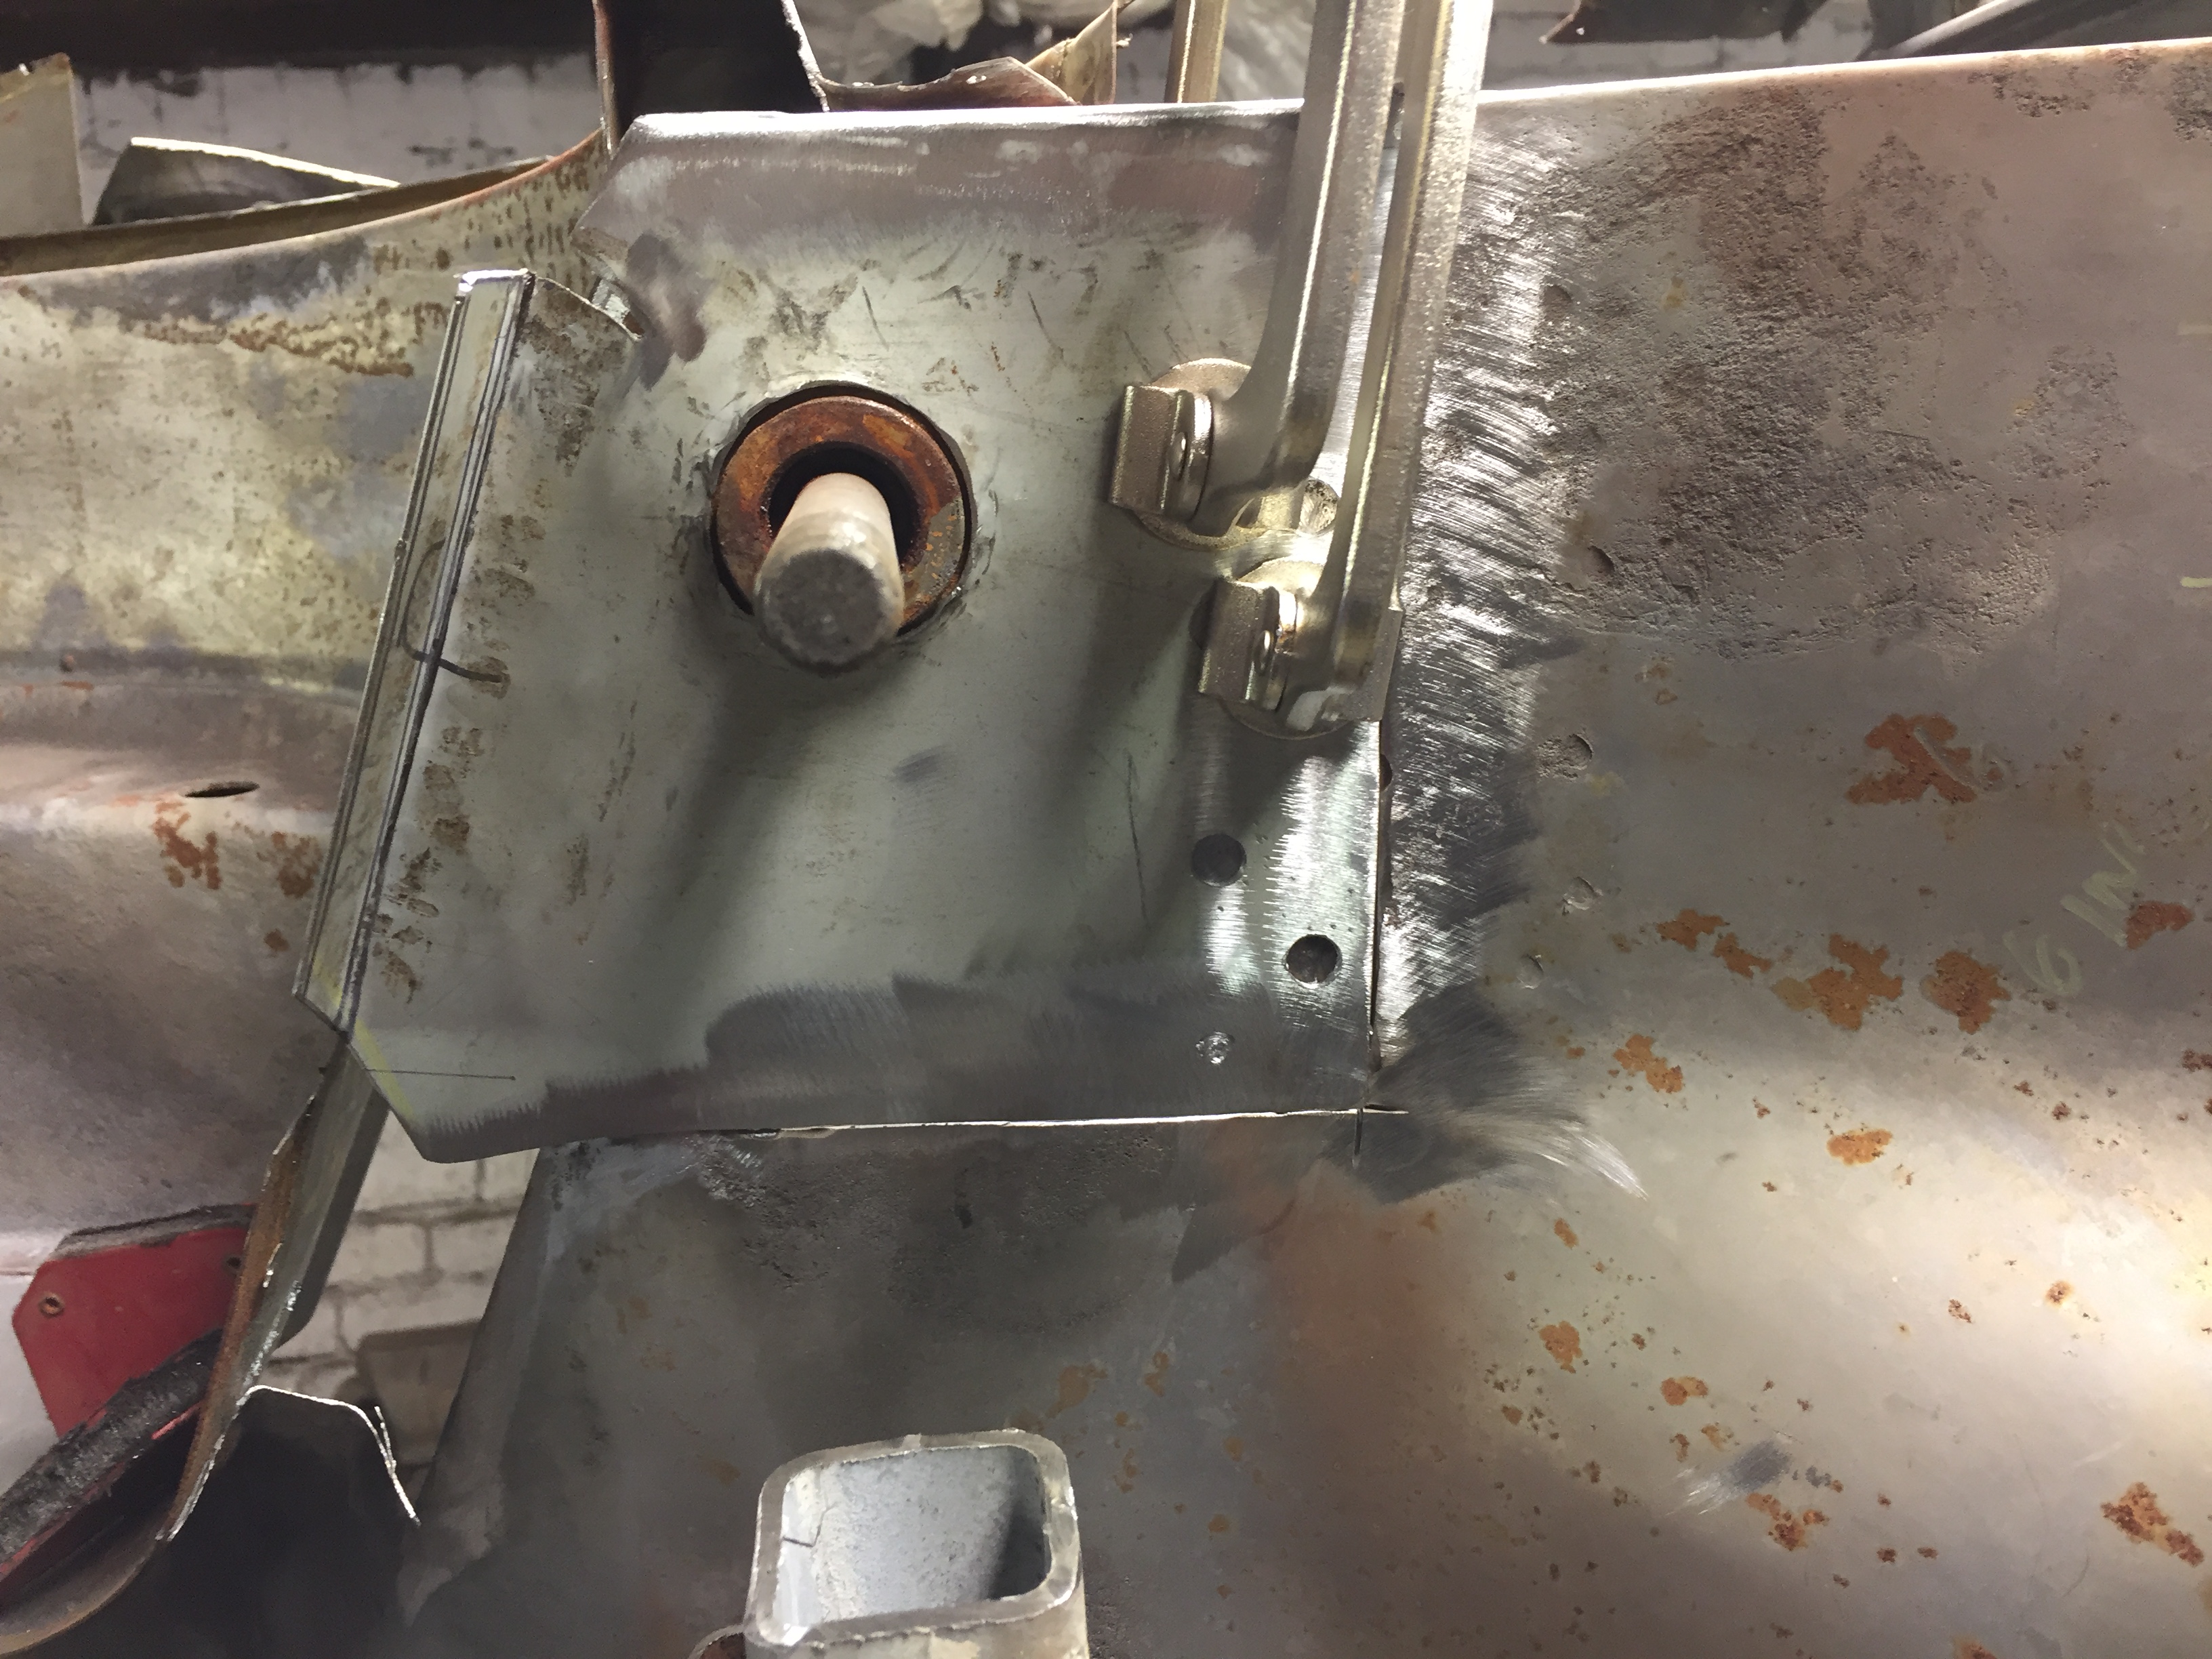
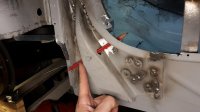
another suggstion is the third & forth picture. As the rear of the sills are rust prone, it would a good thing to have acces for cavity wax injection. the Original sills had an opening on the inner /underside for this near the rear, but as it is such a layered constrruction, you can't get into all the layers. I made some holes in the triangle piece that allows cavity wax to be injected from under the rear seat. See pic with red pencil.
Erik
I had my sill out yesterday and took this pic... it is related to post #112 the reinforcement of the inner sill.
and another picture showing a ridge that is originally in the right passenger floor. As I noticed you have a bead roller, you might still be able to put it in?
another suggstion is the third & forth picture. As the rear of the sills are rust prone, it would a good thing to have acces for cavity wax injection. the Original sills had an opening on the inner /underside for this near the rear, but as it is such a layered constrruction, you can't get into all the layers. I made some holes in the triangle piece that allows cavity wax to be injected from under the rear seat. See pic with red pencil.
Erik
Attachments
Marc-M
Well-Known Member
Dear ErikMarc, i still owed you these pictures.
I had my sill out yesterday and took this pic... it is related to post #112 the reinforcement of the inner sill.
and another picture showing a ridge that is originally in the right passenger floor. As I noticed you have a bead roller, you might still be able to put it in?
another suggstion is the third & forth picture. As the rear of the sills are rust prone, it would a good thing to have acces for cavity wax injection. the Original sills had an opening on the inner /underside for this near the rear, but as it is such a layered constrruction, you can't get into all the layers. I made some holes in the triangle piece that allows cavity wax to be injected from under the rear seat. See pic with red pencil.
Erik
Thanks for that - I will be making the mods you have done - it is well worth it - floor not in yet so will pop in the bead.... yep I have a bead roller - and I must say its one of the most used machines I have - I wish it was an electric one - but I have my wife working the winder on the bigger bits....
Thanks
Marc
If you want I can also send you the pressing tools i made for the depressions in the floor towards the frame rails ......
Marc-M
Well-Known Member
Hi Erik
Thanks for the offer - but you are a long way away... I will pay for the post there and back.....
Marc
Thanks for the offer - but you are a long way away... I will pay for the post there and back.....
Marc
Marc-M
Well-Known Member
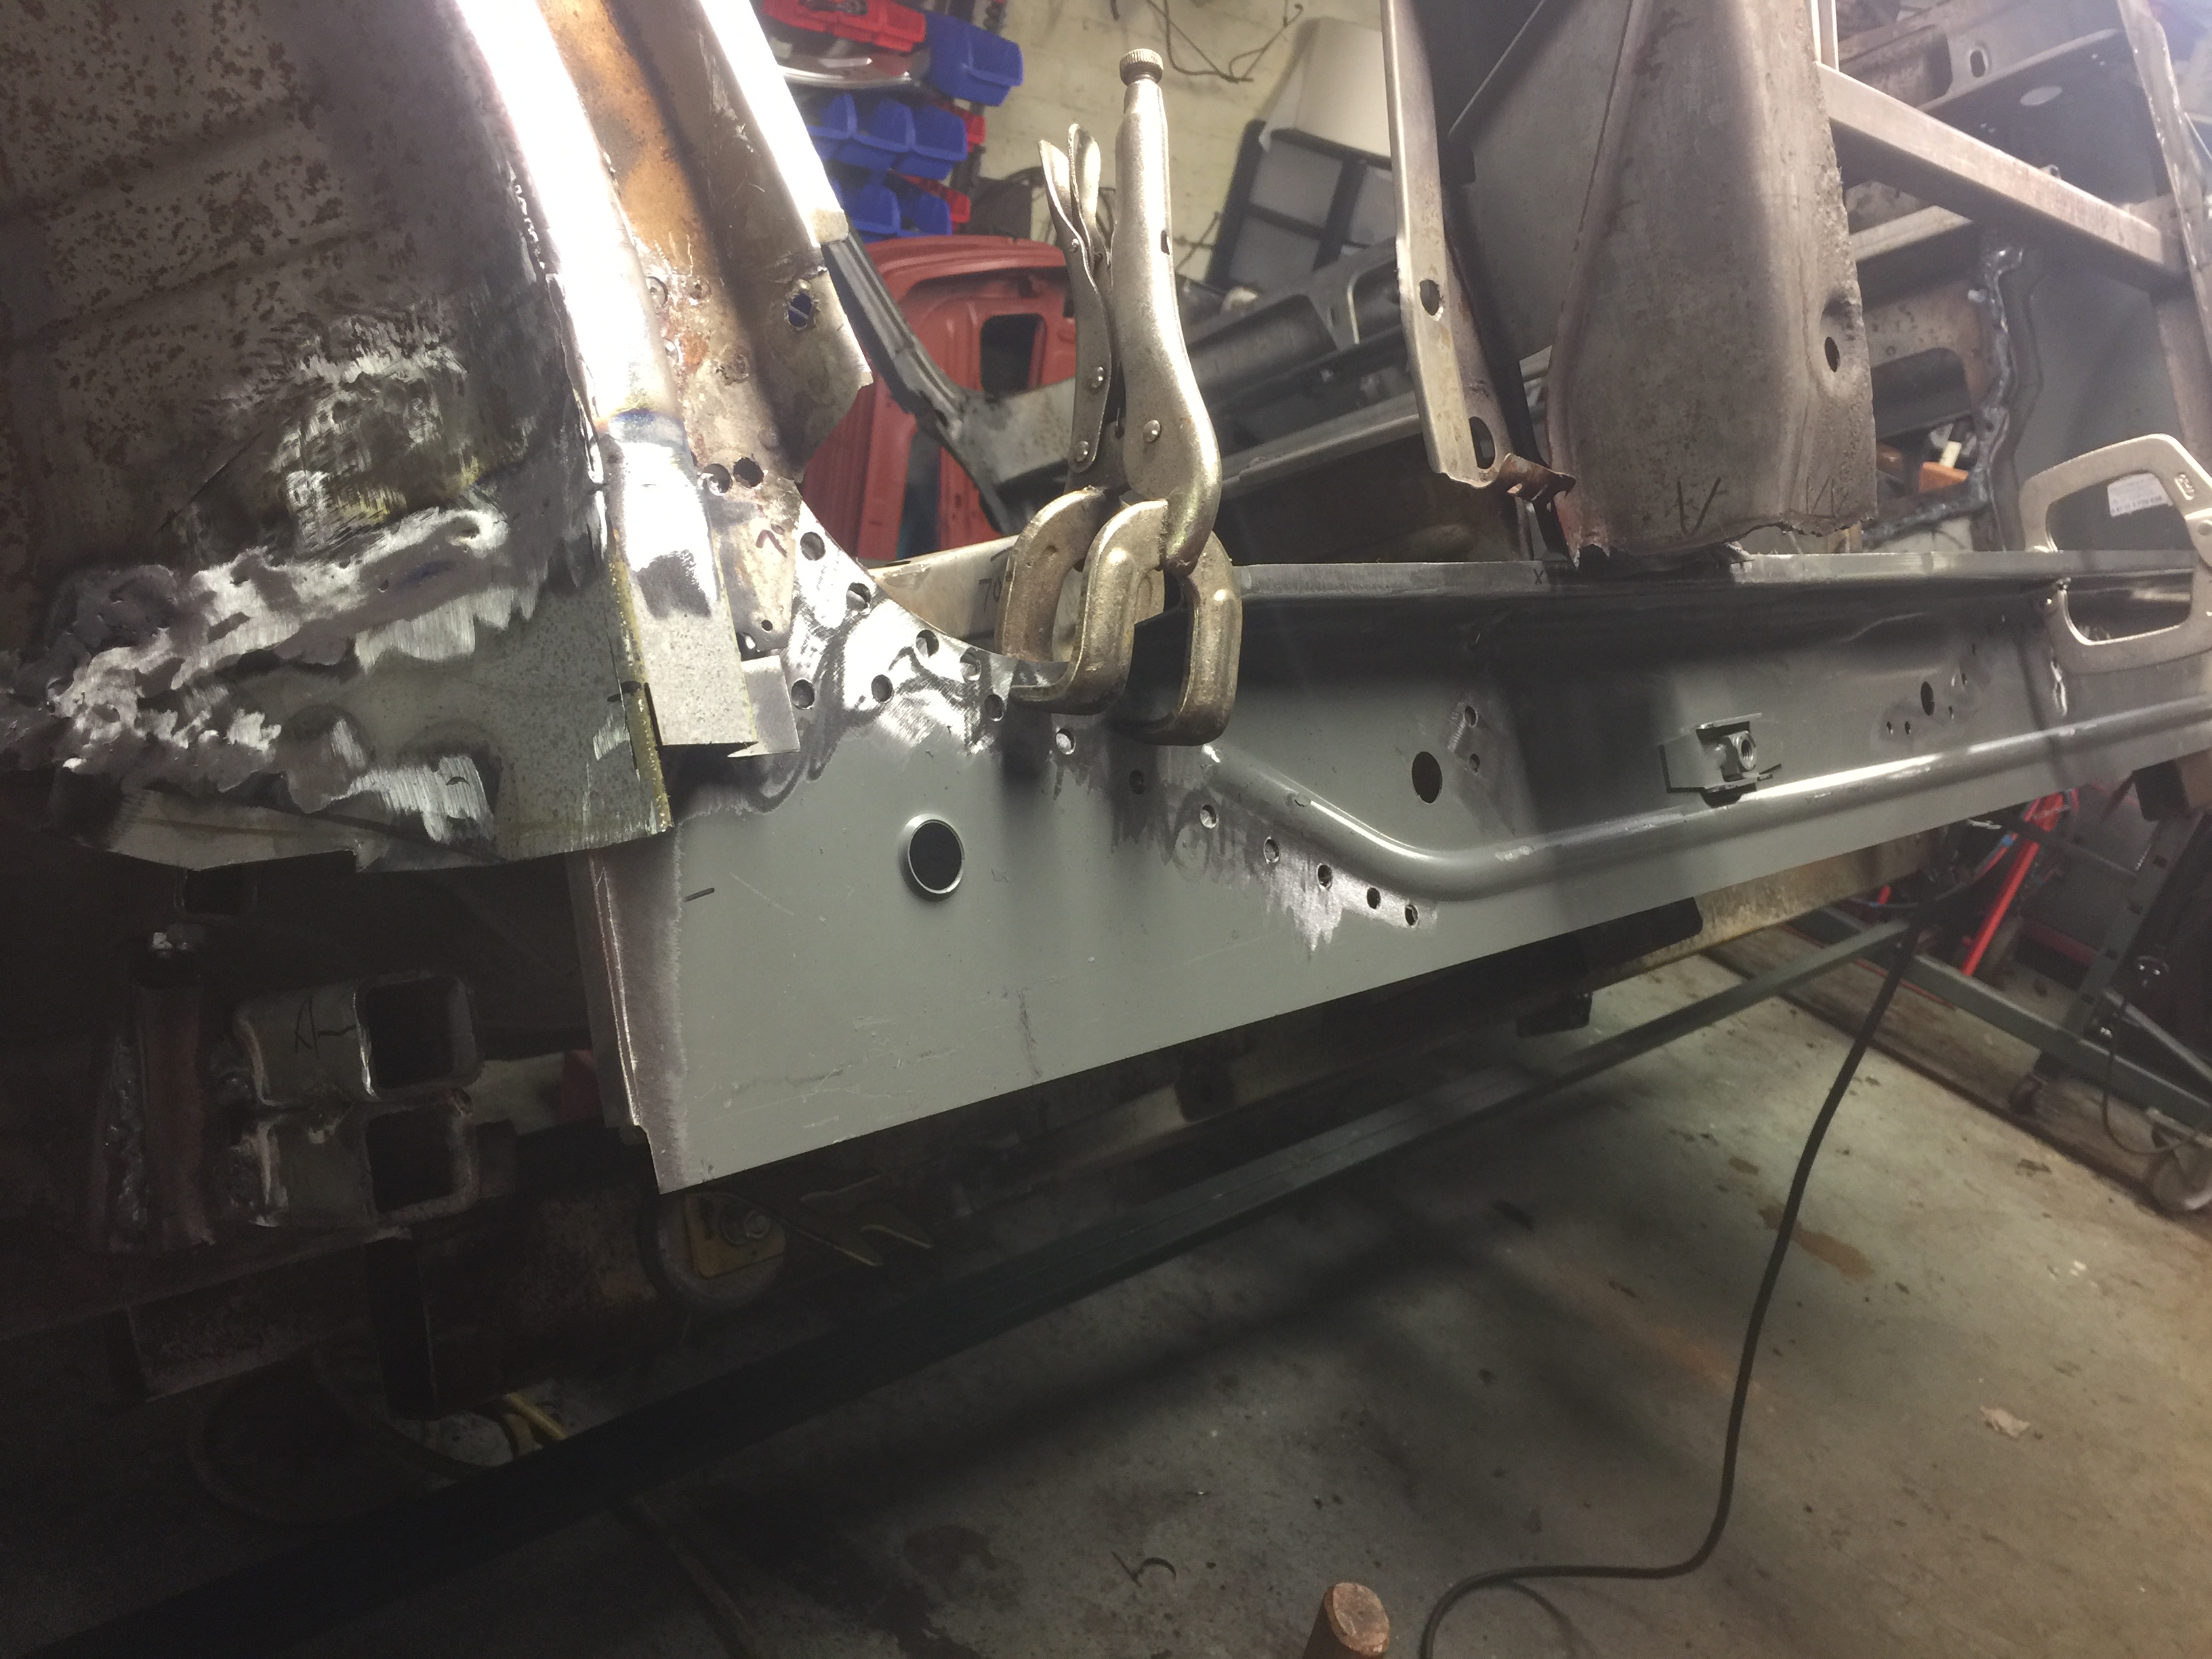
Usually it one step forward and two steps back, however last night a few things came together and I managed to get the intermediate sill section spot welded in after trail fitting the other panels.
Could not resist clamping on the outer sill on as well to give me a bit of satisfaction that this side should be nearly done within a week or so time.
Most of the middle sill is spot welded but where I could not get access I plug welded and put a few tacks in for good measure.
I now have a good hour or so to dress off the welds to make it look good.
'69 2800cs
Well-Known Member
Marc-thanks very much for posting these....I have to update my rocker replacement thread...I'm just about to weld in my intermediate.
Marc-M
Well-Known Member
The pictures tell it all – things are starting to speed up as big bits are now going on.
The rear outer wheel arch is ½ plug welded and ½ spot welded.
A bit more welding to the wheel arch and then it’s on to the B post! – so actually as I write this thinking about the process – it’s actually going quite slow!
And then I have about hours of grinding and dressing the welds! – so really slow… and I’ve only done one side so far! – but once it’s done, it done….
YOU ARE SURELY GOING TO HAVE 200K IN LABOR ON THIS UNIT
AMAZING
was there any sheet metal on this that was good
looks like it was all replaced
AMAZING
was there any sheet metal on this that was good
looks like it was all replaced
Marc-M
Well-Known Member
YOU ARE SURELY GOING TO HAVE 200K IN LABOR ON THIS UNIT
AMAZING
was there any sheet metal on this that was good
looks like it was all replaced
Would that be Pound sterling £ or Dollars $?
Yep loads of good steel - its just has lots of holes in it....
Forrest Gump said " "Life is like a box of chocolate"
I say " This car is like an rotten onion - you have to peel of so many layers to get to the good stuff"
Forrest Gump also said "Stupid is as stupid does."
I think I must be Stupid!
Wladek
Well-Known Member
Please note one more Stupid - I also feel so.Would that be Pound sterling £ or Dollars $?
Yep loads of good steel - its just has lots of holes in it....
Forrest Gump said " "Life is like a box of chocolate"
I say " This car is like an rotten onion - you have to peel of so many layers to get to the good stuff"
Forrest Gump also said "Stupid is as stupid does."
I think I must be Stupid!
Amazing project Marc, thank you for so much useful information about e9 bodywork!
Marc, a question and a request for advice: I see that you are welding the new panels straight in, keeping the paint as it came with.
Are you going to acid dip it once its done ( i know you have these facilities in the uk), or is it good enough for you, with a liberal coat of wax of some sort?
I ask because i feel im taking it to theoretical:
The panels i have are from W&N and that coating is quite marginal. Scratches easily and even some rust spots on it.
So i take a lot of effort to clean them, etch them and put a thick coat of epoxy on them. After welding i drown it in epoxy again and seal with a clearcoat. No area is left as bare metal and all welds are cleaned from both sides. (Chemical dipping is beyond my scope and budget.)
Am i taking it too far?
Verstuurd vanaf mijn SM-G800F met Tapatalk
Wladek
Well-Known Member
Yes, i also think that this primer used on W&N body parts is not to durable, i don't think it last too long, because on my body parts also have some splashes (not mounted).Marc, a question and a request for advice: I see that you are welding the new panels straight in, keeping the paint as it came with.
Are you going to acid dip it once its done ( i know you have these facilities in the uk), or is it good enough for you, with a liberal coat of wax of some sort?
I ask because i feel im taking it to theoretical:
The panels i have are from W&N and that coating is quite marginal. Scratches easily and even some rust spots on it.
So i take a lot of effort to clean them, etch them and put a thick coat of epoxy on them. After welding i drown it in epoxy again and seal with a clearcoat. No area is left as bare metal and all welds are cleaned from both sides. (Chemical dipping is beyond my scope and budget.)
Am i taking it too far?
Verstuurd vanaf mijn SM-G800F met Tapatalk
Want to ask Marc - maybe you already finished alloy door skins?