I see you perfectly color matched the car to the orange cap on the diagnostic port! Now that is an eye for detail....
You are using an out of date browser. It may not display this or other websites correctly.
You should upgrade or use an alternative browser.
You should upgrade or use an alternative browser.
CSL Restoration
- Thread starter Marc-M
- Start date
-
- Tags
- restoration list
Marc-M
Well-Known Member
The looms are now in position and the fuse box is in and wired up - had to get the hair dryer on the wires to give them a blow dry to style them into position!
My arms were aching due the position of the fuse box – I had a few minutes spare before bed so put a bit of bling on the car…
Had the outer sections re chromed but they still show pitting if you look close - i guess the question is do i get new ones - or keep the old ones ?

My arms were aching due the position of the fuse box – I had a few minutes spare before bed so put a bit of bling on the car…
Had the outer sections re chromed but they still show pitting if you look close - i guess the question is do i get new ones - or keep the old ones ?
I would install any trim pieces as late as possible in the assembly process as your paint is still soft.
I can fully see why you want to put the bling on; it sure looks nice!
- I'm suprised a little by the chroming quality (Mind you; I never have had anything chromed before), as I was under the impression (from watching youtube...) that in the chroming process they cover the holes with copper before sanding it all flat. Does it possibly have to do with the strange material (Zamac / pot metal/die cast metal type ) that is used on the outer rings? I noticed that i have 2 versions of these; one is heavy as if steel or brass, the other is light as if aluminum.
- interesting to learn that you can shape the wires by using a hair drier! I totally recognize the struggle where you want to wiring loom to follow a certain route, but it has a mind of it's own. Thanks for the tip.
- I see in the picture a wire going through the speaker hole; seeing the connector I think it is rear window defroster? I so, Isn't that wire is supposed to run along the C pillar upwards, starting at the bottom of the C-pillar and exit from under the Vinyl just next to the connector on the windscreen?
regards, Erik.
Marc-M
Well-Known Member
Hi ErikI can fully see why you want to put the bling on; it sure looks nice!
- I'm suprised a little by the chroming quality (Mind you; I never have had anything chromed before), as I was under the impression (from watching youtube...) that in the chroming process they cover the holes with copper before sanding it all flat. Does it possibly have to do with the strange material (Zamac / pot metal/die cast metal type ) that is used on the outer rings? I noticed that i have 2 versions of these; one is heavy as if steel or brass, the other is light as if aluminum.
- interesting to learn that you can shape the wires by using a hair drier! I totally recognize the struggle where you want to wiring loom to follow a certain route, but it has a mind of it's own. Thanks for the tip.
- I see in the picture a wire going through the speaker hole; seeing the connector I think it is rear window defroster? I so, Isn't that wire is supposed to run along the C pillar upwards, starting at the bottom of the C-pillar and exit from under the Vinyl just next to the connector on the windscreen?
regards, Erik.
I just pulled the wire through the speaker hole so i would not forget it - the ones i have are pot metal and they corrode - the chroming is good but the pits are chromed over and i guess they will get bad over time....
Marc-M
Well-Known Member
On to the fuel lines – I purchased the steel one from W&N ( comes in 5m) but there is insufficient to do both the runs!
Try finding steel fuel lines that are 6mm internal and 8 mm outside diameter – anyhow I managed to find a company who were local and they sell hydraulic galvanised steel pipe and got an extra 3m.
I would say that you will need 4m for the return and 3m for the feed.
Bending and shaping these things is not easy but after 2 nights I have managed, I used a standard brake pipe bending machine.
My old fuel pipes had rotted out and was replaced by rubber hose – so finding the exact factory route of the fuel lines has been hard (I have probably got it wrong) as I could not find any pictures on the net of original routing – the main issue was the return fuel line routing over the top of the diff.
Fuel Pump – I got the one from W@N – its not the same as the old one – the out flow on the old one comes out at 90o from the body – the new one is straight out of the back and means the routing of pipe to the expansion tank is longer and takes a different route – also the pump is a smaller dia so needs a 2mm rubber wrapping round it to get it to hold in the header tank mounting.
Next brake pipes!
Marc-M
Well-Known Member
Brake pipes are all now in - Still need to dress/straighten up the pipes so they look factory, but they are now in the general position – but getting the pipes to keep in position on the bulkhead is a pain.


Ford Blue??
That’s original
Marc-M
Well-Known Member
Last night i managed to get the engine and rear sub frame all in position ready for Tonight’s final (I hope) reunification of major parts….
The stands have now been lowered to the bottom so the car is not so high up - its a tight fit!
Will lift engine up into the hole it up via a engine lift, and with a few of my mates with a roaming trolley jack leveling it up - well thats the plan anyhow...


The stands have now been lowered to the bottom so the car is not so high up - its a tight fit!
Will lift engine up into the hole it up via a engine lift, and with a few of my mates with a roaming trolley jack leveling it up - well thats the plan anyhow...
Such an awesome color!
It fits these cars so well.
A bit boring that my own car came in Fjord and that I'm a sucker for originality....
Just out of curiosoty, how heavy is an empty shell? Would it be an option to " simply" carry the shell with 6 guys and drape it over the engine?
It fits these cars so well.
A bit boring that my own car came in Fjord and that I'm a sucker for originality....
Just out of curiosoty, how heavy is an empty shell? Would it be an option to " simply" carry the shell with 6 guys and drape it over the engine?
Even if the weight were manageable, I think the risk of bending a fender lip or something would be high. Ask me how I know...Such an awesome color!
It fits these cars so well.
A bit boring that my own car came in Fjord and that I'm a sucker for originality....
Just out of curiosoty, how heavy is an empty shell? Would it be an option to " simply" carry the shell with 6 guys and drape it over the engine?
The shell is heavy....
And how are you planning on getting it off those high jackstands? Lots of boards and a jack?Such an awesome color!
It fits these cars so well.
A bit boring that my own car came in Fjord and that I'm a sucker for originality....
Just out of curiosoty, how heavy is an empty shell? Would it be an option to " simply" carry the shell with 6 guys and drape it over the engine?
Marc-M
Well-Known Member
Yes, you could lift it with 4 guys - but the problem is where to hold the body - I would guess it would bend/ distort the wings if you lifted it up from there.And how are you planning on getting it off those high jackstands? Lots of boards and a jack?
So, we just lacked it up to 3-foot clearance (engine and my home-made wheeled dolly height)
The car was put on high stand to get the engine under the body work - once in place we lowered it down over the engine to the last extension on the stands.
For the back axle we just simply jacked it up in place – locating the rear bushes first.
However, you do need a few good men to hold and steer the axle and especially the gas struts and springs in place while its being jacked up.
Once the axle is bolted in – jack up each wheel and located the gas struts and bolt the tops in…. Done
Engine was just as easy apart from it’s a tight fit.
Used an engine hoist and lifted the whole lot up into the hole – also I had a mate whom was under the gearbox with a trolly jack and he levelled it off as I pulled the engine up with the engine hoist-.
Again, a had a couple of my mates guiding the struts up so they did not touch the paint work.
Got the subframe in place and bolted the thing up as well as the gear box – then like the rear axle jacked up the wheels and located the struts in place and bolted in.
The new strut tops have very long studs so I will have to cut them down.
We took a sweep on how long it would take and we did it all in 2 ½ hours …
It all looks great – but my garage now needs a few hours to clean it up and sort out…
Obviously, they are just bolted it and much is now needed to put everything in place and a good clean as the engine and rear axle have been standing for a good 6 months.
But all the big stuff is now done, so a mile stone for the car.
And lastly are my old mates who were so much help - i gave them all a lollypop as reward!
I never would have guessed you could get it done that quickly. I'd say that deserves at least two lollypops! Looking fabulous too.We took a sweep on how long it would take and we did it all in 2 ½ hours …
Obviously not your first rodeo... Looks great.
Question: looks like a new ecu harness. Where did you have it made?
Question: looks like a new ecu harness. Where did you have it made?
Marc-M
Well-Known Member
Autosparks - they take your old one and make the new one with your old bitsObviously not your first rodeo... Looks great.
Question: looks like a new ecu harness. Where did you have it made?
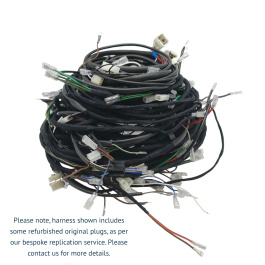
BMW 3.0L CSL Coupe Left Hand Drive Wiring Harness Set - Manual with Electric Windows
BMW 3.0L CSL Coupe Left Hand Drive Wiring Harness Set | Classic British Quality Vehicle Wiring Harnesses from Autosparks
 www.autosparks.co.uk
Thanks, yes, they are not taking orders at the moment from my understanding. Not that it really matters at this point but I did want to confirm that...Autosparks - they take your old one and make the new one with your old bits
they may just do the engine loomBMW 3.0L CSL Coupe Left Hand Drive Wiring Harness Set - Manual with Electric Windows
BMW 3.0L CSL Coupe Left Hand Drive Wiring Harness Set | Classic British Quality Vehicle Wiring Harnesses from Autosparks