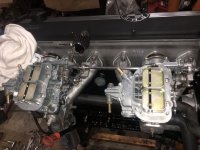
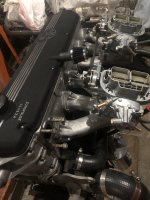
I didn't realize you were going through the motor too. Was there something wrong with it or is this a different one? I also like your rear roundel work. I just took mine off yesterday and it's pretty gone. No color, but bent and probably not usable. Any suggestions?
You are using an out of date browser. It may not display this or other websites correctly.
You should upgrade or use an alternative browser.
You should upgrade or use an alternative browser.
Progress
- Thread starter Mot27cars
- Start date
Found two cracked rockers so decided to take it apart.I didn't realize you were going through the motor too. Was there something wrong with it or is this a different one? I also like your rear roundel work. I just took mine off yesterday and it's pretty gone. No color, but bent and probably not usable. Any suggestions?
The trunk rounded has a bow or arc to it. Is that what yours is doing? How is the metal condition?
It looks like it was pried off at one point and the mounting pins deformed the roundel surface. Big indentations. But hey, I'm cheap, I'll try fixing it first. 
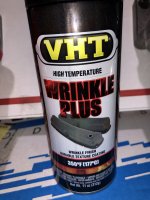
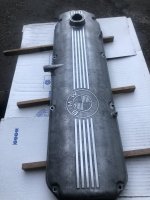
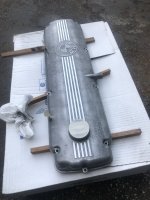
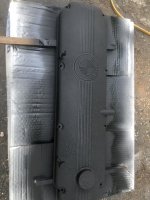
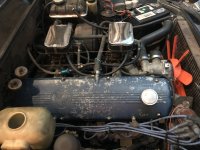
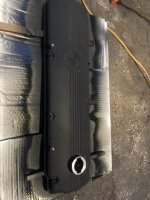
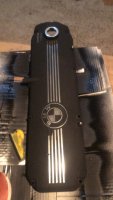
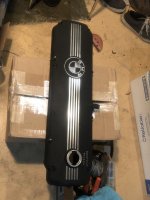
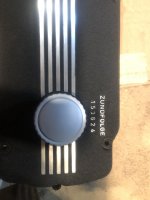
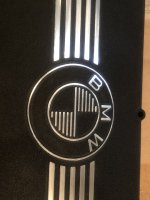
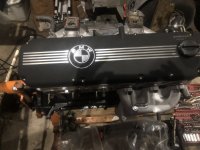
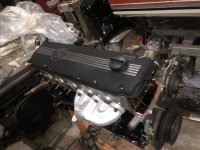
To improve the appearance of this valve cover I’ve cleqned and scrubbed. Then used a red scrub pad. Then wet sanding the raised lettering and line sections. Not tried wrinkle finish before. After it cures I will remove the paint from the lettering and lines. See how this turns out.
Second to last picture is what I started with. Lol
If I don’t like it I know how to remove it.
Second to last picture is what I started with. Lol
If I don’t like it I know how to remove it.
Attachments
-
 5BE0BBEA-4164-4451-91F1-4498B7CB20C7.jpeg296.8 KB · Views: 346
 -
 34CAA8FC-42DE-486E-965D-285CC284E354.jpeg278.4 KB · Views: 359
 -
 7DD17AF8-C7A7-4B41-87BE-8274335721EB.jpeg288.1 KB · Views: 340
 -
 6BD28E90-C67F-45D9-8D8D-4C05986EABC3.jpeg267.5 KB · Views: 350
 -
 06C02BA1-D670-42A7-831F-EC20D183D620.jpeg335.3 KB · Views: 378
 -
 A0F249F2-19E7-4C28-8701-D7D45C04E31D.jpeg331.4 KB · Views: 367
Last edited:
Here’s the update on the valve cover.
So far so good......
We’ll see.....
So far so good......
We’ll see.....
Attachments
-
 DBC7A246-C705-4560-9728-10570825051A.jpeg181.9 KB · Views: 352
 -
 89426D14-B566-4EAA-90F2-3EEE3FC3206C.jpeg251.4 KB · Views: 333
 -
 D58DA4FB-55EA-4120-8A6F-BF18059D2ABE.jpeg132.1 KB · Views: 349
 -
 E4382832-0C1E-423D-90F4-72FAD5310CDC.jpeg214.5 KB · Views: 354
 -
 3D1C84E6-D371-48CE-A275-84796A1F292C.jpeg277.6 KB · Views: 372
 -
 4B958050-2E93-48F0-9F64-71E8A32287C8.jpeg231.4 KB · Views: 345
 -
 C53A98F4-598D-419B-BAB3-72B003E2CDB6.jpeg267.7 KB · Views: 343
 -
 ABC0A5EF-9A1E-4666-B988-4ACBA65B12DE.jpeg289.5 KB · Views: 353
Last edited:
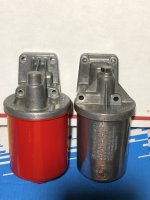
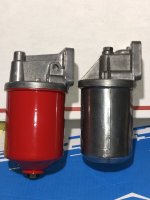
Less messy with top bolt
Top=lesser of two evils IMO.
BTW beautiful job on the cover. Wrinkle paint is difficult in that the thickness has to be uniform to get uniform wrinkle. What paint did you use and I hope it was high temp.
BTW beautiful job on the cover. Wrinkle paint is difficult in that the thickness has to be uniform to get uniform wrinkle. What paint did you use and I hope it was high temp.
Last edited:
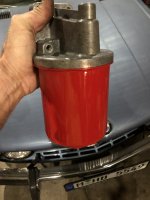
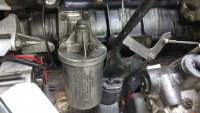
Maybe I'm doing it wrong (it's happened before  ) but I like the bottom bolt. With that unit, I can put a drain pan under the filter housing, loosen the bolt, and drain the housing. Snaking the housing out of the engine compartment is now easy since I don't have to worry about spilling oil over everything.
Am I just clumsy, or is there an easy way to get a top bolted filter housing out without spilling oil?
Am I just clumsy, or is there an easy way to get a top bolted filter housing out without spilling oil?
Y
Yes high temp. I’ll check the manufacturer.Top=lesser of two evils IMO.
BTW beautiful job on the cover. Wrinkle paint is difficult in that the thickness has to be uniform to get uniform wrinkle. What paint did you use and I hope it was high temp.
After loosening the top bolt I place large zip lock bag under it and pull it up. Much easier to do as mentioned as there is bit more room. I think the e3 is a bit roomier too.Maybe I'm doing it wrong (it's happened before) but I like the bottom bolt. With that unit, I can put a drain pan under the filter housing, loosen the bolt, and drain the housing. Snaking the housing out of the engine compartment is now easy since I don't have to worry about spilling oil over everything.
Am I just clumsy, or is there an easy way to get a top bolted filter housing out without spilling oil?
After loosening the top bolt I place large zip lock bag under it and pull it up. Much easier to do as mentioned as there is bit more room. I think the e3 is a bit roomier too.
I like the plastic bag trick!
I have got a top bolt one "in inventory" and will switch next oil change and give it a try.
What years/models did the top bolt come on originally?
What years/models did the top bolt come on originally?
Mine came from an 83 533i m30b32I have got a top bolt one "in inventory" and will switch next oil change and give it a try.
What years/models did the top bolt come on originally?
This. Will let you know how it holds up.Top=lesser of two evils IMO.
BTW beautiful job on the cover. Wrinkle paint is difficult in that the thickness has to be uniform to get uniform wrinkle. What paint did you use and I hope it was high temp.
Attachments
I have got a top bolt one "in inventory" and will switch next oil change and give it a try.
What years/models did the top bolt come on originally?
e12 has the top bolt filter
Dick when you go to switch to top bolt style make sure you have the canister bolt already in the top mount before you bolt it to the block.... ask me how I know .... lolI have got a top bolt one "in inventory" and will switch next oil change and give it a try.
What years/models did the top bolt come on originally?

