Swedish 1973 3.0 CS restoration

ellac

Active Member
Messages
55
Reaction score
165
Location
Sweden
Hi

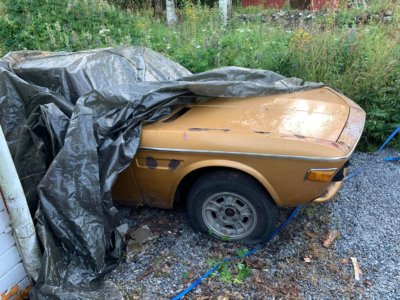
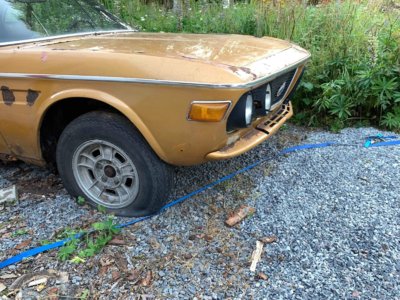
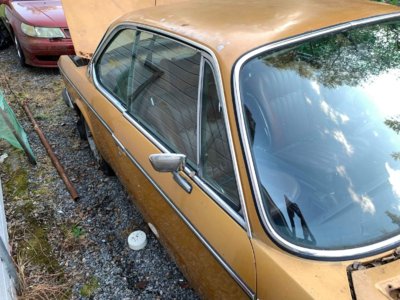
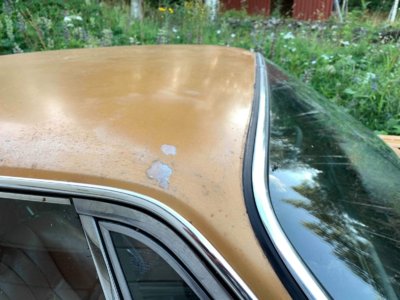
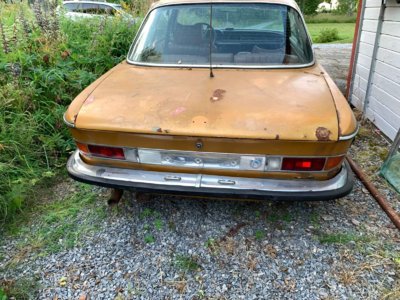
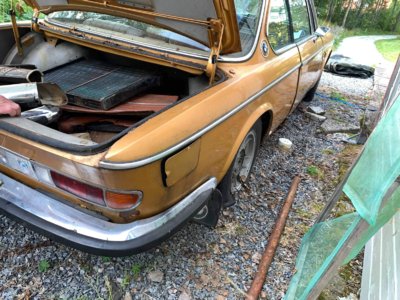
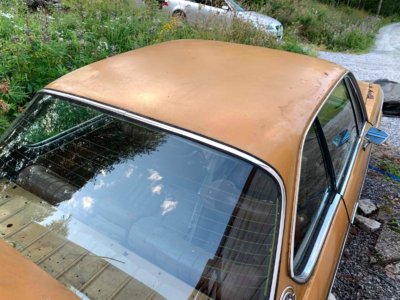
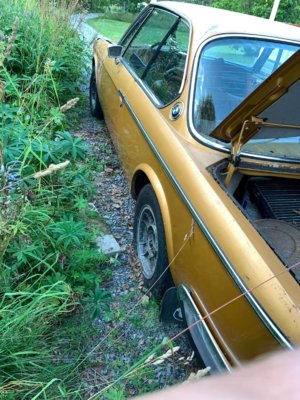
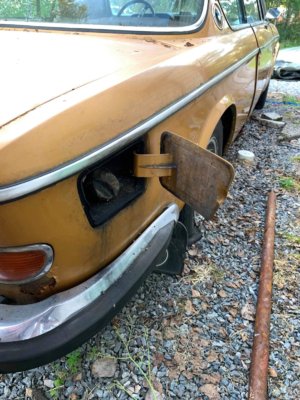
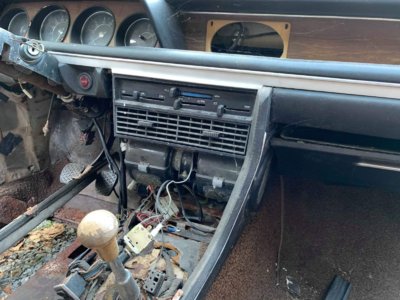
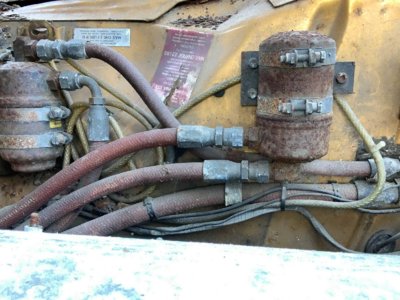
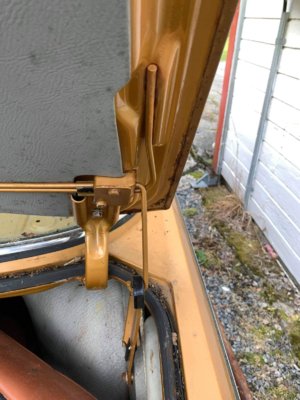
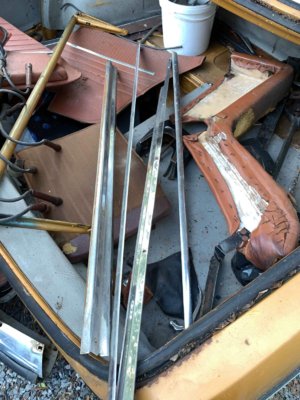
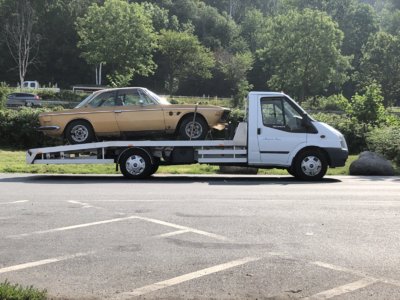
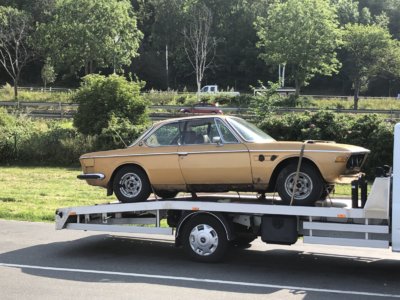
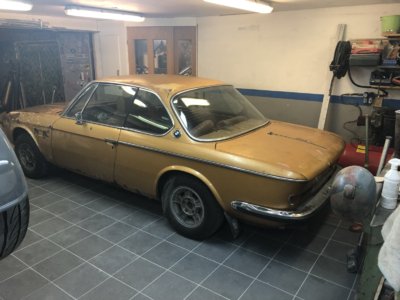
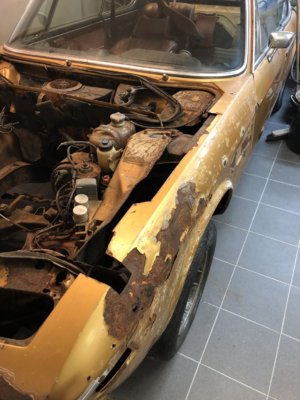
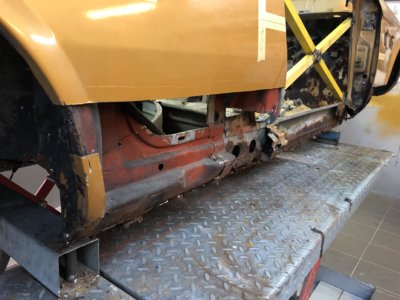
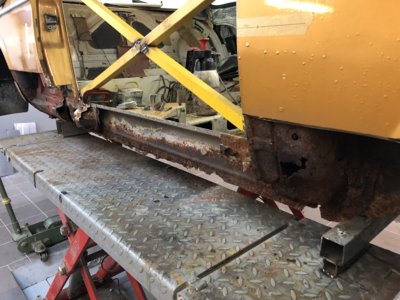
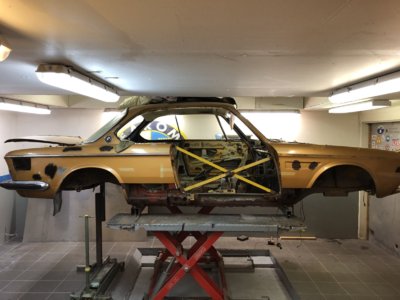
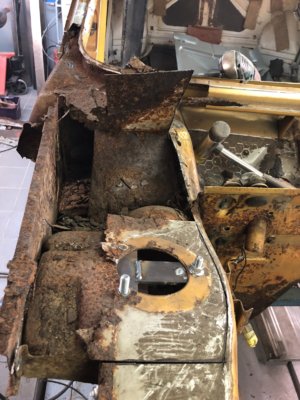
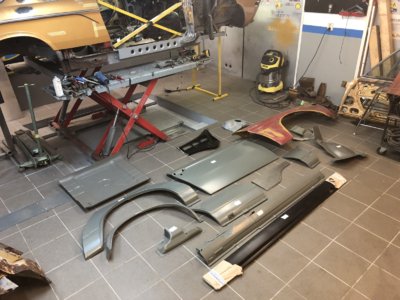
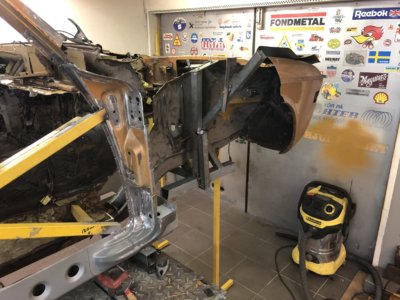
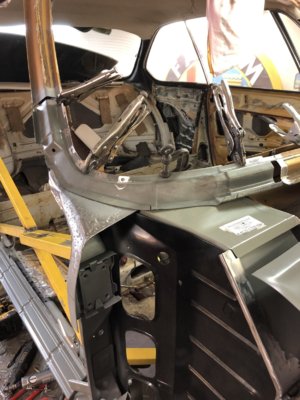
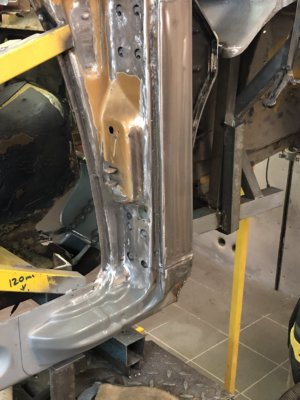
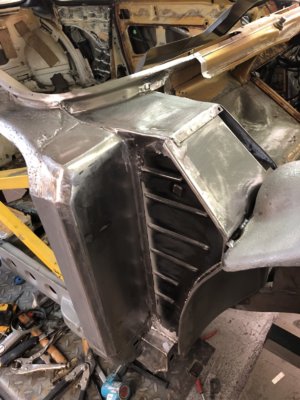
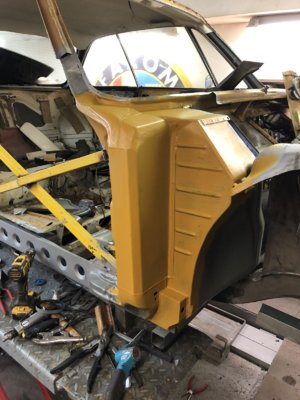
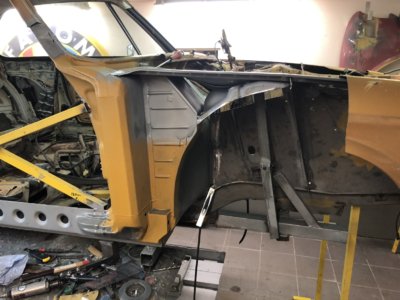
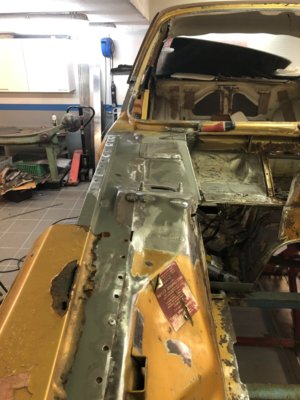
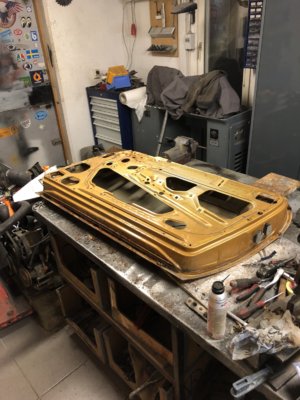
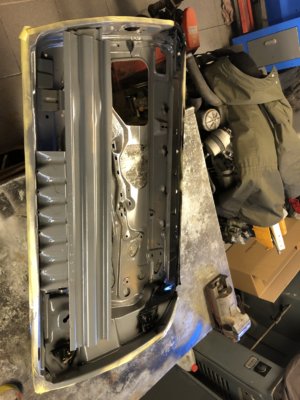
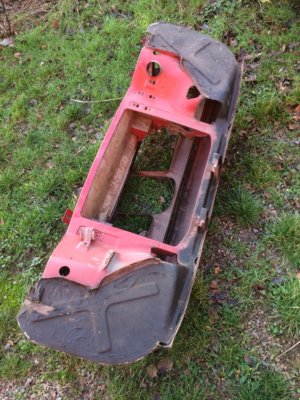
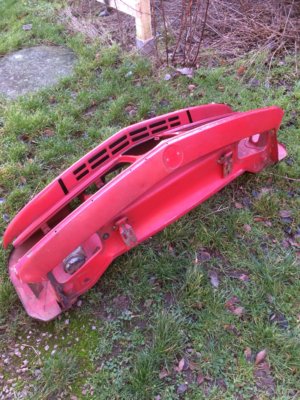
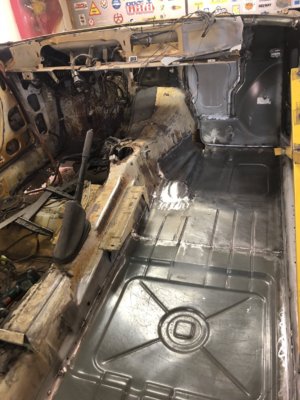
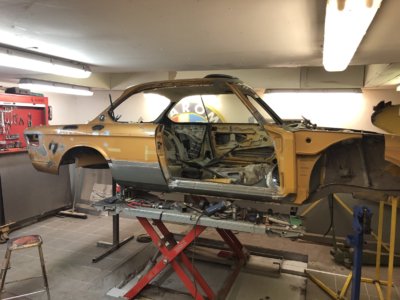
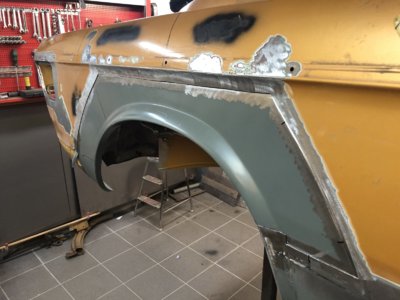
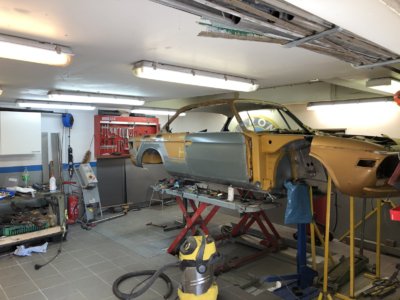
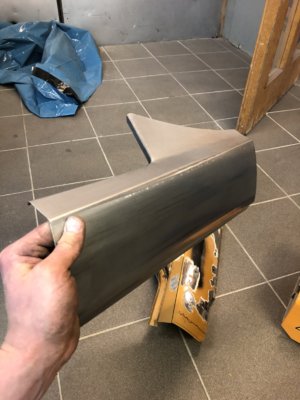
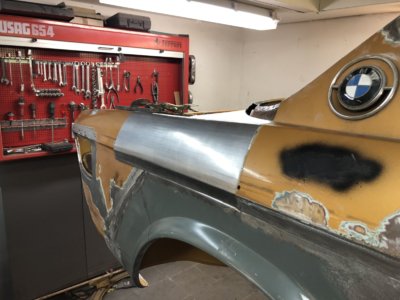
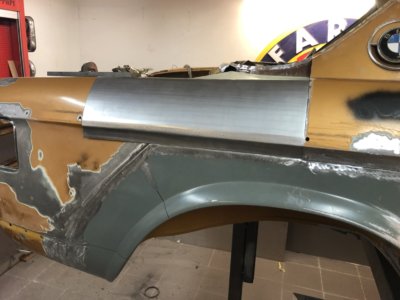
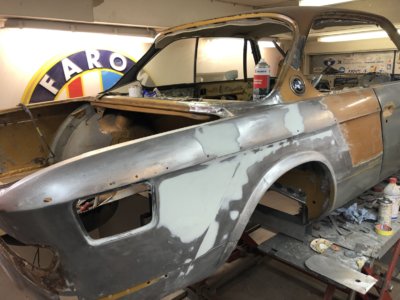
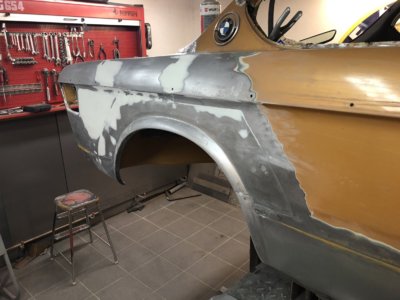
First post to the forum but I have been reading for a few years . This thread is a restoration of my 1973 3.0 CS , a US-spec car that never sold to the US , instead delivererd as new to BMW Italy S.p.a on the 14th of August 1973 .

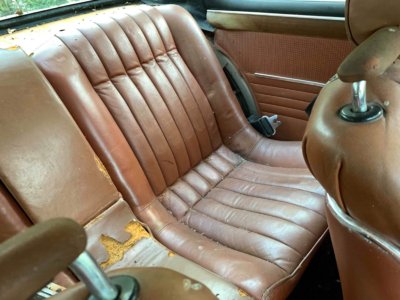
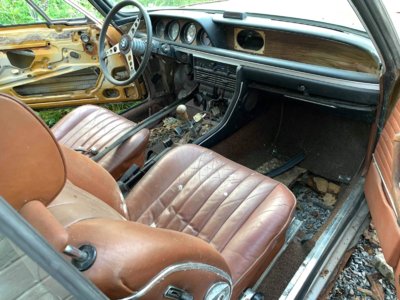
Originally Ceylon with brown leather and AC which I think is a really nice option. Wheater the color will remain Ceylon is still undecided..

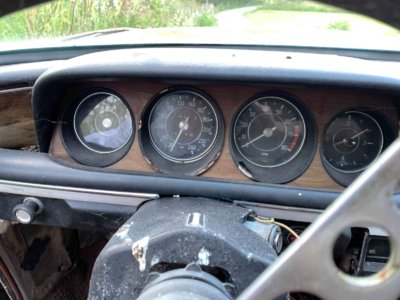
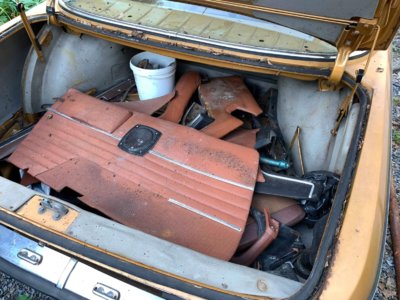
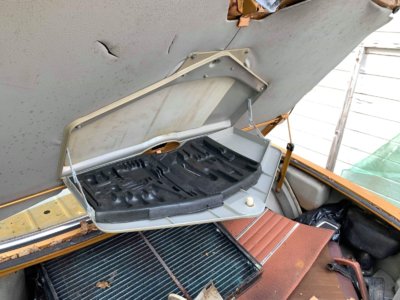
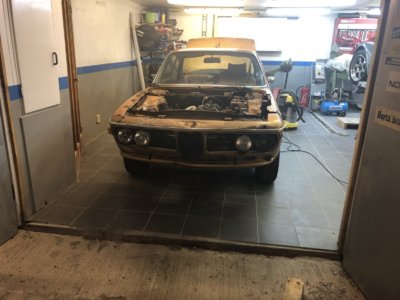
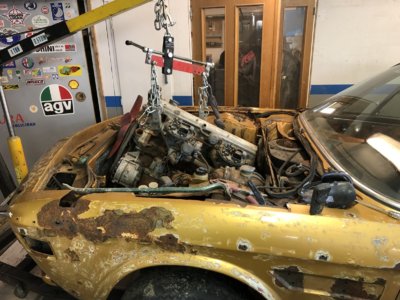
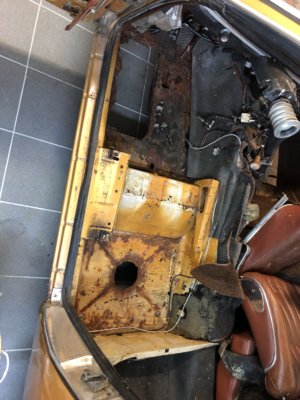
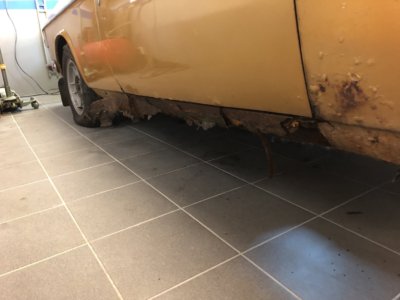
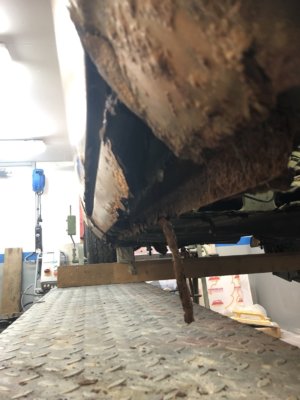
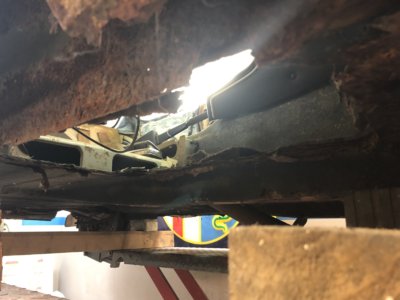
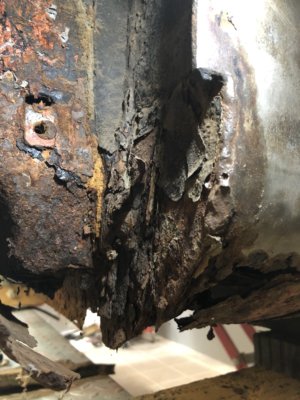
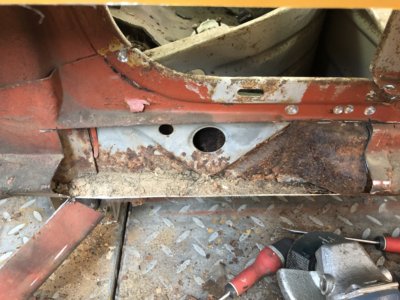
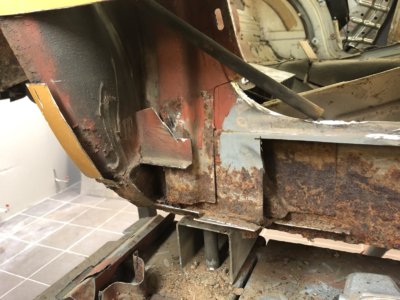
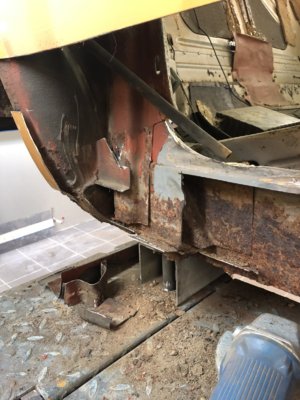
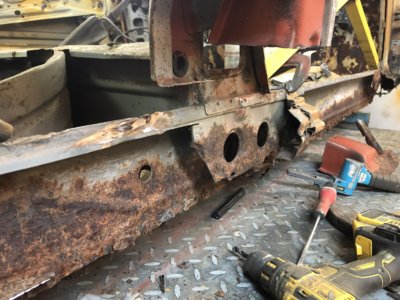
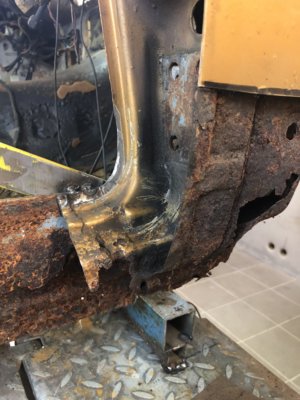
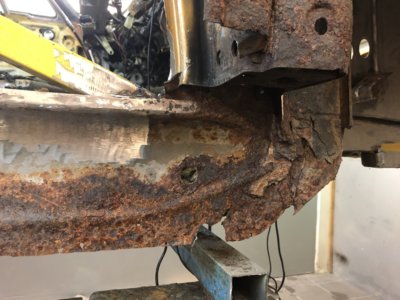
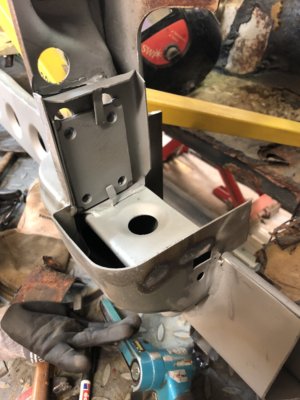
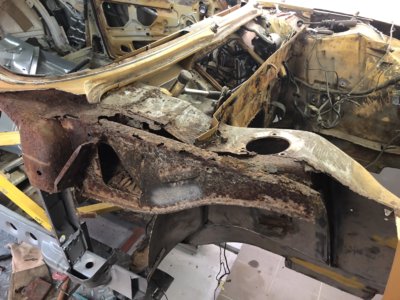
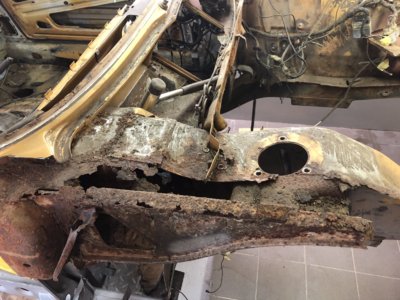
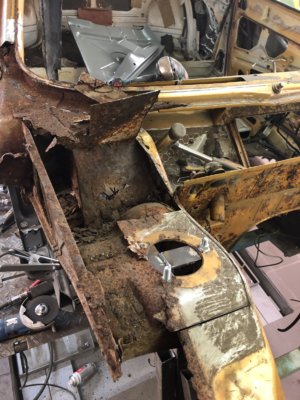
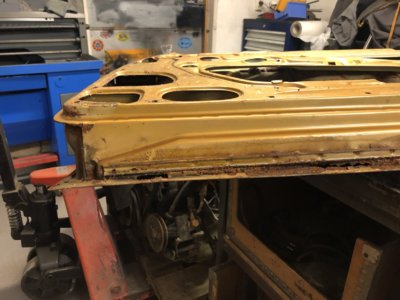
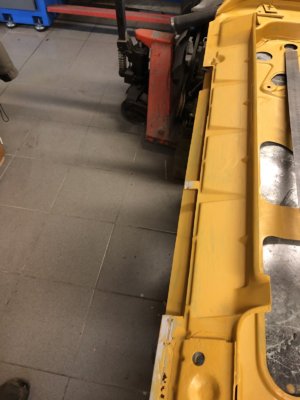
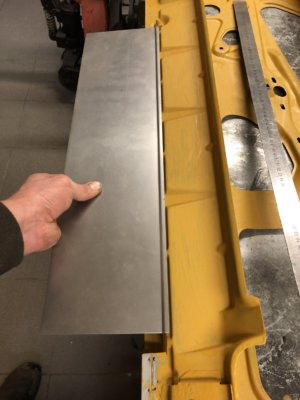
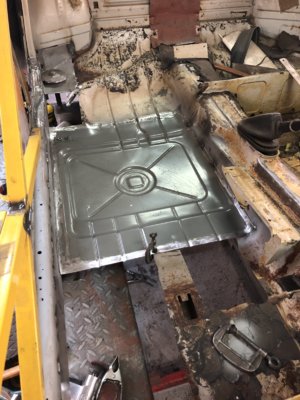
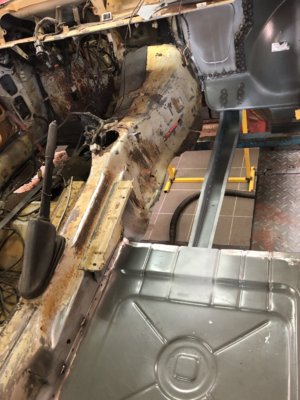
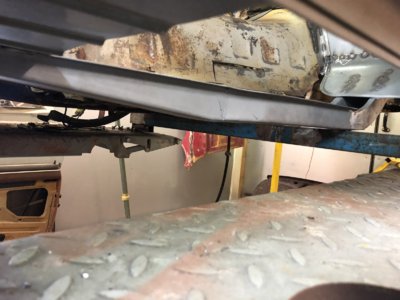
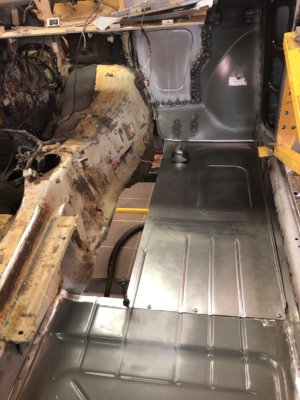
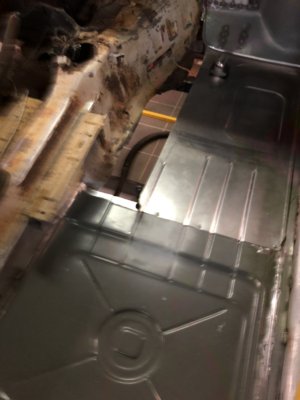
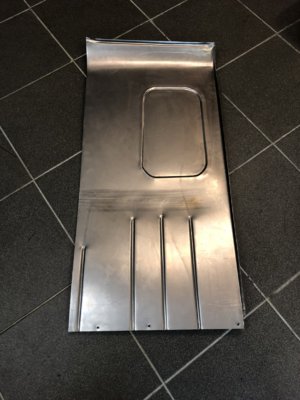
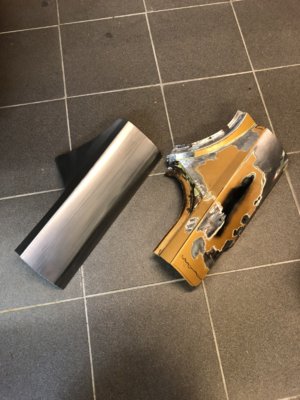
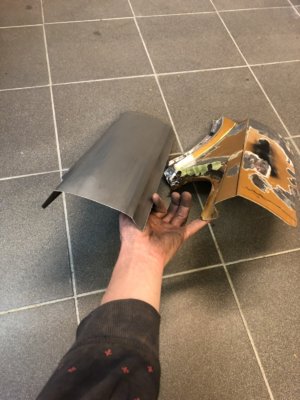
I started the restoration in November 2019 , the car had then been of the road for at least 25 years and spent a number of years outside on a lawn.

First pictures before collecting .
 

Attachments

  • IMG_0606.JPG
    IMG_0606.JPG
    591.8 KB · Views: 553
  • IMG_0617.JPG
    IMG_0617.JPG
    636.5 KB · Views: 544
  • IMG_0618.JPG
    IMG_0618.JPG
    444.7 KB · Views: 468
  • IMG_0619.JPG
    IMG_0619.JPG
    322.5 KB · Views: 435
  • IMG_0620.JPG
    IMG_0620.JPG
    584.4 KB · Views: 462
  • IMG_0622.JPG
    IMG_0622.JPG
    544.4 KB · Views: 456
  • IMG_0623.JPG
    IMG_0623.JPG
    436.7 KB · Views: 443
  • IMG_0624.JPG
    IMG_0624.JPG
    561.2 KB · Views: 460
  • IMG_0625.JPG
    IMG_0625.JPG
    437.6 KB · Views: 454
  • IMG_0630.JPG
    IMG_0630.JPG
    315 KB · Views: 450
  • IMG_0631.JPG
    IMG_0631.JPG
    297.6 KB · Views: 504
  • IMG_0632.JPG
    IMG_0632.JPG
    386.9 KB · Views: 497
  • IMG_0633.JPG
    IMG_0633.JPG
    383.7 KB · Views: 514
  • IMG_0634.JPG
    IMG_0634.JPG
    368.5 KB · Views: 457
  • IMG_0635.JPG
    IMG_0635.JPG
    284 KB · Views: 453
  • IMG_0636.JPG
    IMG_0636.JPG
    215.6 KB · Views: 451
  • IMG_0637.JPG
    IMG_0637.JPG
    385.9 KB · Views: 456
  • IMG_0638.JPG
    IMG_0638.JPG
    425.3 KB · Views: 464
  • IMG_0640.JPG
    IMG_0640.JPG
    378.1 KB · Views: 453
After getting it home , finishing some other project and making some room in the garage it was time for some inspection.
 

Attachments

  • IMG_0651.JPG
    IMG_0651.JPG
    498.5 KB · Views: 480
  • IMG_0652.JPG
    IMG_0652.JPG
    471.9 KB · Views: 461
  • IMG_0925.JPG
    IMG_0925.JPG
    251.1 KB · Views: 442
  • IMG_0927.JPG
    IMG_0927.JPG
    245.3 KB · Views: 454
  • IMG_0930.JPG
    IMG_0930.JPG
    367.5 KB · Views: 474
  • IMG_0933.JPG
    IMG_0933.JPG
    427.2 KB · Views: 494
  • IMG_0957.JPG
    IMG_0957.JPG
    404.2 KB · Views: 514
  • IMG_0960.JPG
    IMG_0960.JPG
    318.2 KB · Views: 507
  • IMG_0962.JPG
    IMG_0962.JPG
    185 KB · Views: 497
  • IMG_1004.JPG
    IMG_1004.JPG
    222.9 KB · Views: 476
  • IMG_1006.JPG
    IMG_1006.JPG
    196.8 KB · Views: 478
  • IMG_1007.JPG
    IMG_1007.JPG
    252.9 KB · Views: 517
  • IMG_1142.JPG
    IMG_1142.JPG
    359.9 KB · Views: 504
After dismantling of interior , engine , gearbox , front and rear axle etc I locked my lift in top position and leveled with shims to have it perfectly straight . With some heavy steeltubing I thereafter welded a simple jig to the car to prevent it from moving / flexing.
I made inner and middle sills from 2 mm steel and pressed some flared holes .
 

Attachments

  • IMG_1339.JPG
    IMG_1339.JPG
    288.3 KB · Views: 503
  • IMG_1340.JPG
    IMG_1340.JPG
    312.8 KB · Views: 505
  • IMG_1341.JPG
    IMG_1341.JPG
    251.1 KB · Views: 492
  • IMG_1344.JPG
    IMG_1344.JPG
    378.7 KB · Views: 537
  • IMG_1345.JPG
    IMG_1345.JPG
    333.7 KB · Views: 476
  • IMG_1347.JPG
    IMG_1347.JPG
    359.9 KB · Views: 476
  • IMG_1349.JPG
    IMG_1349.JPG
    370.6 KB · Views: 474
  • IMG_1354.JPG
    IMG_1354.JPG
    334.9 KB · Views: 469
  • IMG_1357.JPG
    IMG_1357.JPG
    335.3 KB · Views: 465
  • IMG_1380.JPG
    IMG_1380.JPG
    318.7 KB · Views: 479
  • IMG_1382.JPG
    IMG_1382.JPG
    333.1 KB · Views: 491
  • IMG_1383.JPG
    IMG_1383.JPG
    349.8 KB · Views: 473
  • IMG_1385.JPG
    IMG_1385.JPG
    343.6 KB · Views: 466
  • IMG_1402.JPG
    IMG_1402.JPG
    281.3 KB · Views: 477
  • IMG_1416.JPG
    IMG_1416.JPG
    308.3 KB · Views: 463
  • IMG_1417.JPG
    IMG_1417.JPG
    255.9 KB · Views: 486
  • IMG_1426.JPG
    IMG_1426.JPG
    377.7 KB · Views: 485
  • IMG_1427.JPG
    IMG_1427.JPG
    393 KB · Views: 469
  • IMG_1428.JPG
    IMG_1428.JPG
    403.5 KB · Views: 469
  • IMG_1429.JPG
    IMG_1429.JPG
    377.4 KB · Views: 472
The "A"-post and struttower was not very nice.. I made a simple jig to make sure the struttower went back in the same place as intened.

Since my budget is quite moderate I try to make as many panels that I can by myself but I chucky order from wallot was requiered anyway.
 

Attachments

  • IMG_1432.JPG
    IMG_1432.JPG
    254.8 KB · Views: 471
  • IMG_1466.JPG
    IMG_1466.JPG
    310.2 KB · Views: 479
  • IMG_1467.JPG
    IMG_1467.JPG
    285.5 KB · Views: 462
  • IMG_1473.JPG
    IMG_1473.JPG
    314.2 KB · Views: 475
  • IMG_1474.JPG
    IMG_1474.JPG
    293.3 KB · Views: 477
  • IMG_1480.JPG
    IMG_1480.JPG
    252.6 KB · Views: 484
  • IMG_1486.JPG
    IMG_1486.JPG
    329.4 KB · Views: 464
  • IMG_1489.JPG
    IMG_1489.JPG
    325.6 KB · Views: 457
  • IMG_1499.JPG
    IMG_1499.JPG
    299.7 KB · Views: 444
  • IMG_1512.JPG
    IMG_1512.JPG
    283.1 KB · Views: 469
  • IMG_1527.JPG
    IMG_1527.JPG
    342.6 KB · Views: 477
  • IMG_1528.JPG
    IMG_1528.JPG
    303.4 KB · Views: 458
  • IMG_1549.JPG
    IMG_1549.JPG
    266.4 KB · Views: 451
  • IMG_1550.JPG
    IMG_1550.JPG
    283.6 KB · Views: 447
  • IMG_1552.JPG
    IMG_1552.JPG
    222.6 KB · Views: 463
  • IMG_1599.JPG
    IMG_1599.JPG
    344.7 KB · Views: 470
  • IMG_1667.JPG
    IMG_1667.JPG
    308.1 KB · Views: 451
  • IMG_1668.JPG
    IMG_1668.JPG
    356.7 KB · Views: 460
  • IMG_1669.JPG
    IMG_1669.JPG
    283.2 KB · Views: 472
Amazing work, you are a brave soul! Since it is US spec I would love to know the VIN and build date if you would share.

Chris
 
Looking great! Thanks for sharing and keep the updates coming, you'll have quite a following here.

As Chris said, you're a brave man!
 
Thanks for the comments , its allot of work ..!

@CHRIS , I will add the car to the registry later in the process.
 
Rustrepairs continue , doing some repairs on the door , changing the bottom and a new skin. The fuel lid surrunding was rust damaged so I had to fabricate a new lip / edge around the hole.
 

Attachments

  • IMG_1810.JPG
    IMG_1810.JPG
    335.7 KB · Views: 447
  • IMG_1811.JPG
    IMG_1811.JPG
    278.2 KB · Views: 440
  • IMG_1823.JPG
    IMG_1823.JPG
    262.9 KB · Views: 446
  • IMG_1887.JPG
    IMG_1887.JPG
    235 KB · Views: 429
  • IMG_1888.JPG
    IMG_1888.JPG
    221.4 KB · Views: 429
  • IMG_1889.JPG
    IMG_1889.JPG
    249.9 KB · Views: 434
  • IMG_1892.JPG
    IMG_1892.JPG
    248.4 KB · Views: 429
  • IMG_1895.JPG
    IMG_1895.JPG
    213 KB · Views: 439
  • IMG_1928.JPG
    IMG_1928.JPG
    352.8 KB · Views: 440
  • IMG_1944.JPG
    IMG_1944.JPG
    238.3 KB · Views: 434
  • IMG_1945.JPG
    IMG_1945.JPG
    219 KB · Views: 440
  • IMG_1970.JPG
    IMG_1970.JPG
    181 KB · Views: 437
  • IMG_1971.JPG
    IMG_1971.JPG
    213.3 KB · Views: 419
  • IMG_1981.JPG
    IMG_1981.JPG
    192.8 KB · Views: 425
  • IMG_1982.JPG
    IMG_1982.JPG
    236 KB · Views: 403
  • IMG_1984.JPG
    IMG_1984.JPG
    330.3 KB · Views: 425
Had the suspension components blasted and powdercoated. Was lucky and finding a used frontend in good condition. Started welding and fabricating new floors . Made a new frame-railsextension and started testfitting some panels.
 

Attachments

  • IMG_1514.JPG
    IMG_1514.JPG
    361.9 KB · Views: 428
  • IMG_1515.JPG
    IMG_1515.JPG
    397.2 KB · Views: 451
  • IMG_1517.JPG
    IMG_1517.JPG
    470.5 KB · Views: 454
  • IMG_1647.JPG
    IMG_1647.JPG
    585.3 KB · Views: 440
  • IMG_1648.JPG
    IMG_1648.JPG
    469.9 KB · Views: 449
  • IMG_1649.JPG
    IMG_1649.JPG
    611.7 KB · Views: 444
  • IMG_1676.JPG
    IMG_1676.JPG
    365.7 KB · Views: 414
  • IMG_1687.JPG
    IMG_1687.JPG
    340.3 KB · Views: 420
  • IMG_1688.JPG
    IMG_1688.JPG
    242.9 KB · Views: 419
  • IMG_1689.JPG
    IMG_1689.JPG
    317.2 KB · Views: 407
  • IMG_1690.JPG
    IMG_1690.JPG
    190.9 KB · Views: 409
  • IMG_1695.JPG
    IMG_1695.JPG
    352.9 KB · Views: 412
  • IMG_1730.JPG
    IMG_1730.JPG
    354.8 KB · Views: 413
  • IMG_1747.JPG
    IMG_1747.JPG
    272.2 KB · Views: 426
Started rustrepair in the boot , doing the inner and outer rear wheelhouse . Fabricating a patchpanel for the rear fender and doing repairs on the c-pillar.
 

Attachments

  • IMG_1858.JPG
    IMG_1858.JPG
    348.1 KB · Views: 419
  • IMG_1870.JPG
    IMG_1870.JPG
    346.2 KB · Views: 430
  • IMG_2018.JPG
    IMG_2018.JPG
    271.4 KB · Views: 434
  • IMG_2019.JPG
    IMG_2019.JPG
    249.4 KB · Views: 423
  • IMG_2053.JPG
    IMG_2053.JPG
    235 KB · Views: 402
  • IMG_2067.JPG
    IMG_2067.JPG
    242 KB · Views: 416
  • IMG_2078.JPG
    IMG_2078.JPG
    286.4 KB · Views: 403
  • IMG_2081.JPG
    IMG_2081.JPG
    245.4 KB · Views: 422
  • IMG_2119.JPG
    IMG_2119.JPG
    231.1 KB · Views: 428
  • IMG_2123.JPG
    IMG_2123.JPG
    288.3 KB · Views: 410
  • IMG_2139.JPG
    IMG_2139.JPG
    433 KB · Views: 430
  • IMG_2140.JPG
    IMG_2140.JPG
    390.9 KB · Views: 407
  • IMG_2141.JPG
    IMG_2141.JPG
    280.2 KB · Views: 409
  • IMG_2143.JPG
    IMG_2143.JPG
    250.3 KB · Views: 429
  • IMG_2144.JPG
    IMG_2144.JPG
    210.9 KB · Views: 428
  • IMG_2243.JPG
    IMG_2243.JPG
    257.7 KB · Views: 417
  • IMG_2244.JPG
    IMG_2244.JPG
    280.6 KB · Views: 407
  • IMG_2246.JPG
    IMG_2246.JPG
    253.1 KB · Views: 412
  • IMG_2247.JPG
    IMG_2247.JPG
    317.5 KB · Views: 409
  • IMG_2248.JPG
    IMG_2248.JPG
    286.7 KB · Views: 417
I love watching pros at work...


Thanks , but I am no pro, I spend my days behind a desk , this is only hobby. I have done a few cars before, for thoose interested :

Alpina B3 : https://www.m5board.com/threads/alpina-b3-3-0-e36-94-restoration.141429/

Alfa Gtam "replica" : https://rejsa.nu/forum/viewtopic.php?t=83873

Range Rover Classic : https://rejsa.nu/forum/viewtopic.php?t=97740&postdays=0&postorder=asc&start=0

Morgan / Lotus : https://rejsa.nu/forum/viewtopic.ph...tart=168&sid=409e59990dfe230a770e208cb7227c3e
 

Attachments

  • ALPINA.JPG
    ALPINA.JPG
    260.9 KB · Views: 427
  • gtam.jpg
    gtam.jpg
    85.5 KB · Views: 429
  • motus.jpeg
    motus.jpeg
    197 KB · Views: 417
  • range.jpg
    range.jpg
    115.7 KB · Views: 451
The "A"-post and struttower was not very nice.. I made a simple jig to make sure the struttower went back in the same place as intened.

Since my budget is quite moderate I try to make as many panels that I can by myself but I chucky order from wallot was requiered anyway.
Simply amazing. Not many would have attempted such a restoration. Congrats on your work to date.
 
Congratulations the results you have achieved are brilliant. You are a very brave and talented man !!! :)
Good luck with the rest of her !
 
Hi again
I am just wondering of all of the cars you listed above was the e9 the one with the most rust ?
Or was it the Alfa ???
Just wondering as I have always heard how rusty Italian cars can be ....
And I have always heard how well German cars are built ...
But now that I have cut up most of my e9 and welded most of it back together I NOW know... man an e9 does like to rust !!!
just wondering :)
 
@ellac you possibly haven’t noticed the piece of jewelry in your car, the Csl leather wrapped Petri steering wheel with the 4 ring Csl hub.
Take good care of it, it’s a rare and valuable part. A cover you’ll find fairly easily.

Keshav
Yup, in the state that you found the car, the wheel may have been 50% of the value of the total car.
 
Back
Top